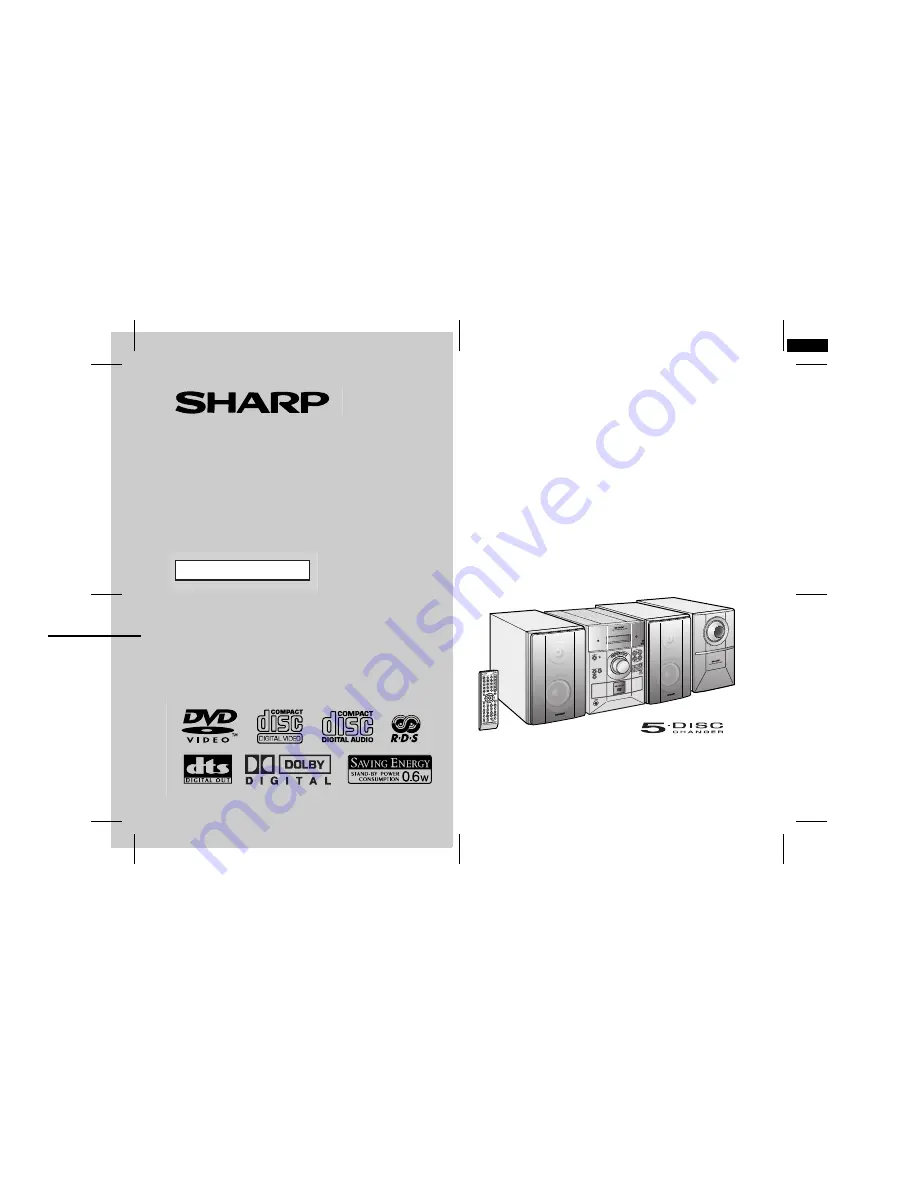
Sharp XL-DV50H Скачать руководство пользователя страница 1

03/8/20

XL-DV50H(A)_FRONT.fm

TINSEA027SJZZ

Thank you for purchasing this SHARP product. 
To obtain the best performance from this product, please read this
manual carefully. It will guide you in operating your SHARP product.

DVD MICRO SYSTEM

XL-DV50H DVD Micro System consisting of XL-DV50H (main unit), CP-
DV50HF (front speakers) and CP-DV50HSW (subwoofer).

XL-DV50H(A) TINSEA027SJZZ

1

MODEL

OPERATION MANUAL

XL-DV50H

Содержание XL-DV50H

Страница 1: ...best performance from this product please read this manual carefully It will guide you in operating your SHARP product DVD MICRO SYSTEM XL DV50H DVD Micro System consisting of XL DV50H main unit CP DV50HF front speakers and CP DV50HSW subwoofer XL DV50H A TINSEA027SJZZ 1 MODEL OPERATION MANUAL XL DV50H ...

Страница 2: ...t before any service operation and when not in use for a long period To prevent fire or shock hazard do not expose this appliance to dripping or splashing No objects filled with liquids such as vases shall be placed on the apparatus CAUTION This product is classified as a CLASS 1 LASER product Use of controls adjustments or performance of procedures other than those specified herein may result in ...

Страница 3: ...ess of whether or not such activities are for profit of disc contents are prohibited by law This system is equipped with copy protection technology that causes substantial degradation of images when the contents of a disc are copied to a videotape Apparatus Claims of U S Patent Nos 4 631 603 4 577 216 4 819 098 and 4 907 093 licensed for limited viewing uses only This product incorporates copyrigh...

Страница 4: ...To play a video CD with P B C playback control 33 Page Audio CD Operation Playing an audio CD To play in random order random play 34 To start playback from the desired point direct play 34 To play in the desired order programmed playback 35 MP3 and JPEG Disc Operation Playing an MP3 and JPEG disc 36 37 Radio Listening to the radio 38 39 Using the Radio Data System RDS 40 43 Advanced Features Chang...

Страница 5: ... CD R CD RW re corded in MP3 for mat 4 JPEG format 5 1 Discs including DVD R DVD RW DVD R DVD RW may not be played back due to properties and scratches on the disc dirty optical pickup lens etc 2 Only the audio on the CDV can be played 3 The CD R CD RW may not be played back properly depending on the recording equipment or the disc 4 If the sampling frequency is 44 1 or 48 1 kHz and the fixed bit ...

Страница 6: ...e 4 3 size TV You can enjoy wide images on a wide screen TV and 4 3 images with the side edges cut on the 4 3 size TV Type of subtitles recorded Recorded subtitle languages Example Language can be selected with the SUB TITLE SURROUND button 1 English 2 French Number of camera angles Number of angles recorded on the DVD Angles can be selected with the ANGLE button Number of audio tracks and audio r...

Страница 7: ...jected whilst rotating and cause injury Title chapter and track DVDs are divided into titles and chapters If the disc has more than one movie on it each movie is a separate title Chapters are subdivisions of titles Video CD and audio CD are composed of tracks Tracks are equiv alent to songs on a CD Note Title chapter or track numbers may not be recorded on some discs MP3 JPEG discs consist of fold...

Страница 8: ... that specified on this unit Using this product with a higher voltage other than that which is specified is dangerous and may result in a fire or other type of acci dent causing damage SHARP will not be held responsible for any damage resulting from use of this unit with a voltage other than that which is specified Volume control The sound level at a given volume setting depends on speaker effi ci...

Страница 9: ...on 23 39 15 Memory Set Button 19 16 Disc Compartment Open Close Button 20 17 Disc Number Select Buttons 21 18 Volume Control 18 Display Reference page 1 Disc Number Indicators 21 2 Play Indicator 21 3 Pause Indicator 21 4 Repeat Play Indicators 26 5 Disc Type Indicators 21 6 Extra Bass Indicator 18 7 Traffic Programme Indicator 40 8 RDS Indicator 42 9 Traffic Announcement Indicator 40 10 Sound Mod...

Страница 10: ...Output Socket 15 4 Cooling Fan 16 5 FM 75 Ohms Aerial Socket 13 6 AM Loop Aerial Socket 13 7 Video Auxiliary Audio Signal Input Sockets 53 8 Video Output Socket 14 9 S video Output Socket 15 10 Optical Digital Audio Output Socket 53 Front speaker 1 Tweeter 2 Woofer 3 Bass Reflex Duct 4 Speaker Wire Subwoofer 1 Sub Duct Pipe 2 Subwoofer 3 Speaker Wire 1 3 6 7 4 8 5 9 10 3 3 4 2 1 2 1 2 ...

Страница 11: ...9 44 16 Subtitle or Surround Mode Select Button 18 29 17 Shift Button 18 18 Extra Bass or Digital Picture Select Button 18 31 19 DVD CD Button 20 20 Equaliser Mode Select or Digital Gamma Button 18 31 21 Tuner Band Button 38 22 Menu or On Screen Display Select Button 29 32 23 Disc Number Select Buttons 21 24 Direct Button 25 25 Chapter Track Skip Up or Fast Forward Tuner Preset Up Time Up Button 1...

Страница 12: ...speaker left Front speaker right Subwoofer Wall socket AC 230 240 V 50 Hz Speaker connection see page 13 FM aerial Make sure to unplug the AC power lead before any connections Aerial connection see page 13 TV connection see pages 14 15 Connecting the AC power lead see page 16 AM loop aerial TV ...

Страница 13: ...ial to the AM LOOP socket Position the AM loop aerial for optimum reception Place the AM loop aerial on a shelf etc or attach it to a stand or a wall with screws not supplied Assembling Attaching to the wall Wall Screws not supplied External FM aerial The supplied speakers are exclusively for XL DV50H Do not connect them to other equipment and do not connect other speakers to XL DV50H It may cause...

Страница 14: ...still present Move the speakers further away from the TV If any kind of magnet or an electromagnet is placed too close to the TV and the system irregular colours may appear on the TV screen TV connection Three types of sockets VIDEO OUT S VIDEO OUT and SCART OUT are available for connection of a TV and this unit Connect according to your TV Connecting to a TV with a video input socket You can enjo...

Страница 15: ... supplied to enjoy images Set the video output mode to S Video default setting For the procedure refer to Changing the initial setting of DVD on pages 44 46 TV To S video input socket Video signal S video cable commercially available Set the video output mode to SCART For the procedure refer to Changing the initial setting of DVD on pages 44 46 Notes Change the TV input in accordance with the conn...

Страница 16: ...he power on Cooling fan A cooling fan is built into this unit for better heat radiation Do not cover the opening in this section with any obstacles to avoid dam age to the unit Wall socket AC 230 240 V 50 Hz The first time the unit is plugged in the unit will enter the demonstration mode You will see words scroll To cancel the demonstration mode When the unit is in the power stand by mode demonstr...

Страница 17: ...or similar Periodically clean the transmitter on the remote control and the sensor on the unit with a soft cloth Exposing the sensor on the unit to strong light may interfere with operation Change the lighting or the direction of the unit if this occurs Keep the remote control away from moisture heat shock and vibrations Test of the remote control Check the remote control after checking all the co...

Страница 18: ...the volume will decrease Remote control operation Press the VOLUME or button to increase or decrease the volume Press the SHIFT button on the re mote control and adjust the volume 30 MAXIMUM 29 0 30 MAXIMUM 29 0 When the power is first turned on the unit will enter the extra bass mode which emphasises the bass frequencies and X BASS will ap pear To cancel the extra bass mode press the X BASS DEMO ...

Страница 19: ...utton 2 Within 30 seconds press the PRESET or button to select 24 hour or 12 hour display and then press the MEM ORY SET button 0 00 The 24 hour display will appear 0 00 23 59 AM 12 00 The 12 hour display will appear AM 12 00 PM 11 59 3 Within 30 seconds press the PRESET or button to adjust the hour and then press the MEMORY SET button Press the PRESET or button once to advance the time by 1 hour ...

Страница 20: ... button to turn the power on 2 Press the DVD CD button 3 Press the OPEN CLOSE button to open the disc compartment All trays open in tiers 4 Place the disc on the disc tray 1 label side up Be sure to place 8 cm 3 discs in the middle of the disc trays 5 To place discs in the trays 2 5 1 Slide in the tray with a disc to ward the unit 2 Place a disc in an empty tray 12 cm 5 8 cm 3 ...

Страница 21: ... press the play button When playing a DTS on this unit sound is not heard from the speakers To listen to the sound select another audio output in the To change the audio language audio output on page 28 When the menu appears on the TV screen On DVD select an item by using the cursor or button and press the ENTER button On video CD select an item by using the direct number buttons To interrupt play...

Страница 22: ...error message will appear on the TV display and the disc will not play Notes When the unit is turned on no operation is possible for 10 sec onds as the unit is performing the initial setting Stop positions may be recorded on some discs When you play such a disc playback stops there During an operation may appear indicating that the opera tion is disabled by the disc To resume playback after stoppi...

Страница 23: ... during the DVD playback pictures may not be forwarded or reversed in the search speed specified in this manual depending on the disc or the scene being played Whilst a disc is playing press the or button Press the button to skip to the next chapter track Press the button to skip to the beginning of the current chapter track Press the button again to skip to the be ginning of the previous chapter ...

Страница 24: ...n the current title and not in another title 1 Whilst in the stop or playback mode press the DIRECT but ton 2 Within 10 seconds select the title or chapter by pressing the cursor or button and enter the title or chapter number by using the direct number buttons Title number Chapter number If the title or chapter number is 2 digits or more press 10 and enter the number Example To select chapter 1 p...

Страница 25: ...press the DIRECT button 2 Within 10 seconds select the time by pressing the cursor or button and specify the time by using the direct number buttons Time To specify 1 hour 23 minutes and 40 seconds enter 012340 If you enter the wrong number start over from step 1 3 Within 10 seconds press the ENTER button 1 Whilst a disc is playing press the STILL PAUSE button Each press of the STILL PAUSE button ...

Страница 26: ...n Repeat off CHAP TITLE Disappear Repeats the chapter currently playing Repeats the title currently playing The normal playback File Rep Folder Rep Disc Rep Rep off 1 Disappear Repeats the file currently playing Only for MP3 Repeats the folder directory currently playing Repeats the disc currently playing The normal playback Track Repeat on Disc Repeat on Repeat off 1 Disappear Repeats the track c...

Страница 27: ...ts repeatedly A B repeat You can play the desired portion repeatedly by specifying it during playback Notes A B repeat play is disabled on some discs Some scenes in DVD may not allow A B repeat play A B repeat play for DVD is possible only within a title A B repeat play for video CD and audio CD are possible only within a track 2 Select Repeat off by pressing the REPEAT button repeat edly to retur...

Страница 28: ...e to listen to the sound through the speakers Only the 2 1 channel sound can be reproduced even if you select other audio languages Dolby Digital 5 1 channel or Dolby Digital 2 chan nel etc Alternatively connect to a DTS digital surround amplifier etc to produce the sound from the speakers see page 53 1 Whilst a disc is playing press the SHIFT button and then press the ZOOM AUDIO but ton Audio lan...

Страница 29: ...uage on your DVD if it has a disc menu Notes The procedure shown here provides only general steps The actual procedure for using the title menu depends on the disc you are using See the disc jacket for details If the disc you are using does not have a title menu nothing appears on the screen 1 Whilst the disc is playing press the SUB TITLE SURROUND but ton 2 Within 3 seconds press the SUB TITLE SU...

Страница 30: ...oomed Subtitles cannot be zoomed The position of the current part is indicated in the lower left of the screen 1 Whilst a disc is playing press the ZOOM AUDIO button Each press of the ZOOM AUDIO button cycles through the zoom settings as follows 2 To shift the view and display the desired part of a zoomed image press the cursor or button repeatedly Zoom x 1 5 Zoom x 1 5 Zoom x 2 Zoom x 3 Zoom off ...

Страница 31: ...ing the SHIFT button and then press the DIGITAL GAMMA button Level Setting Level Setting OFF Normal image ON Brighter ON Slightly brighter ON A lot brighter OFF G ON G 1 During playback press the SHIFT button and then press the DIGITAL PICTURE button to select ON ON and OFF will be switched by each press of these but tons 2 Within 10 seconds press the cursor or button to set the level 3 To restore...

Страница 32: ...otal number of titles Current title number Disc number Disc type Chapter playing time Remaining playing time of the current title Remaining playing time of the current chapter Angle information Repeat mode information Audio language information Subtitle information 1 1 8 2 10 00 38 58 1 8 2 10 1 01 09 50 1 8 2 10 1 00 07 43 1 8 2 10 1 00 02 38 DEF 1 9 DEF 1 3 1 3 1 2 3 4 5 DVD VCD 2 0 CDDA 8 10 19...

Страница 33: ...ntrol To scroll the menu screen menu screen with more than 1 page Press the or button To stop playback Press the button To play without activating the playback control function You can play a video CD with P B C without activating the playback control function In this case the menu screen will not appear and the disc will play in the same way as a video CD without P B C Note Some video CDs with P ...

Страница 34: ...y To select and play the desired track Notes Direct play feature is disabled on some discs When operating video CD with the P B C function set the P B C to off see page 33 To play by specifying time time search You can play tracks from the desired time point during playback Note Time search feature is disabled on some discs Whilst in the stop mode press the RANDOM button TV screen Unit display Ran...

Страница 35: ...ack2 Track3 Track4 Track5 Track6 1 Disc 2 PROGRAM LIST DISC No No INDEX Disc 1 Disc 2 Disc 3 Disc 4 Disc 5 1 Disc 2 Track2 2 Disc 3 Track12 3 Disc 4 Track8 4 PROGRAM LIST DISC No 6 Press the cursor button to finish programming 7 Use the cursor or button to select a track to start with and press the play button Playback starts from the select ed track and ends after the last track in the programme ...

Страница 36: ...aution If you convert MP3 data to audio CD data when recording on a CD R RW play it as an audio CD The MP3 operation cannot be performed Note Up to 20 characters can be displayed for a folder name and a track name Underlines asterisks and spaces may not be displayed Load a disc containing MP3 and JPEG tracks A menu screen appears and playback starts automatically Example of playback sequence Playb...

Страница 37: ...ch the zoom setting as follows 3 To shift the view and display the desired part of a zoomed image press the cursor or button repeatedly Zoom on Zoom 150 Pct Zoom 025 Pct Zoom 050 Pct Zoom 100 Pct Zoom 150 Pct Zoom 200 Pct Press the button Press the button Press the button Press the button After pressing the STILL PAUSE button press the cursor or button The image rotates as shown below button 90º r...

Страница 38: ...n stereo To receive an FM stereo transmission Press the TUNER BAND button to display the ST indicator will appear when an FM broadcast is in stereo If the FM reception is weak press the TUNER BAND button to extinguish the ST indicator The reception changes to monau ral and the sound becomes clearer 1 Press the ON STAND BY button to turn the power on 2 Press the TUNER BAND button repeatedly to sele...

Страница 39: ...the stations in memory in order starting with preset channel 1 4 Within 30 seconds press the MEMORY SET button to store that station in memory If the MEMORY and preset number indicators go out before the station is memorised repeat the operation from step 2 5 Repeat steps 1 4 to set other stations or to change a pre set station When a new station is stored in memory the station previously memorise...

Страница 40: ...ll appear on the display when the received broadcast carries traffic information and TA Traffic Announcement will appear whilst a traffic information is on air You can control the RDS by using the remote control only Information provided by RDS Each time the DISPLAY button is pressed the display will switch as follows When you are tuning in to a station other than an RDS station or to an RDS stati...

Страница 41: ...ic styles Jazz Folk or Country Music in this category is often but not always vocal and usually of short duration LIGHT M Classical music for general rather than specialist appreciation Examples of music in this category are instrumental music and vocal or choral works CLASSICS Performances of major orchestral works sympho nies chamber music etc and including Grand Op era OTHER M Musical styles no...

Страница 42: ...l culture of a particular nation usually played on acoustic instru ments The narrative or story may be based on his torical events or people DOCUMENT Programme concerned with factual matters pre sented in an investigative style TEST Broadcast when testing emergency broadcast equipment or receivers ALARM Emergency announcement made under exception al circumstances to give warning of events causing ...

Страница 43: ...s The same station name can be stored in different channels In a certain area or during certain time periods the station names may temporarily be different Notes for RDS operation If any of the following events occur it does not mean that the unit is faulty PS NO PS and a station name appear alternately and the unit does not operate properly If a particular station is not broadcasting properly or ...

Страница 44: ...tton To return to the previous dis play press the cursor but ton Or press the SHIFT button and then press the RETURN button Submenu 4 Press the cursor or button to change the setting and press the ENTER button To return to the previous display press the cursor button Or press the SHIFT button and then press the RETURN but ton To change other settings begin from step 2 5 Press the SET UP button The...

Страница 45: ...ream LPCM Select a type of signal sent from the digital audio output socket P 53 LPCM output 48 kHz 96 kHz PCM sound signals recorded in 96 kHz are converted to 48 kHz Analog output Surround 2 1Ch Select a type of signal sent to the speaker Surround 2 channel video CD audio CD or 5 1 channel DVD sound are converted to 2 1 channel sound virtual speaker surround sound 2 1Ch 2 channel video CD audio ...

Страница 46: ...his mode for the multi system TV Video output SCART S Video The video output mode should be set according to the con nected TV type P 14 15 SCART Select this when the unit is connected to a TV with a SCART cable S Video Select this when the unit is connected to a TV with an S video or video cable Picture mode Auto Film Video Smart Select a mode to optimise DVD or video CD images on a TV Auto Image...

Страница 47: ...Press the button After 5 minutes or more of inactiv ity a screen saver appears To turn off the screen saver on the screen press any button on the main unit or remote control Off Cancel the screen saver setting System Setup Rating Level 1 G 2 3 PG 4 PG 13 5 6 PG R 7 NC 17 8 Adult No Limit Sets a restriction level for DVD viewing P 49 Please enter a 4 digit password Default setting 6629 Password Pas...

Страница 48: ...guage English French Close Fermer English French Thank you Merci English French Merci Thank you English French CAST STAFF ACTEURS PERSONNEL Indicator Setting 4 3 LB When playing a wide image 16 9 disc black bands are inserted at the top and bot tom and you can enjoy full wide images 16 9 on a 4 3 size TV A 4 3 disc is played in 4 3 4 3 PS When playing a wide image 16 9 disc the left and right side...

Страница 49: ...ng level control is cancelled 1 After pressing the button press the SET UP button 2 Press the cursor or button to select System Setup and press the ENTER button 3 Press the cursor or button to select Password and press the ENTER button 4 Enter a 4 digit old password with the direct number but tons on the remote control Default setting 6629 5 Enter a 4 digit new password with the direct number but ...

Страница 50: ...the clock is set to the cor rect time Refer to page 19 2 Load the discs to be played 1 Press the ON STAND BY button to turn the power on 2 Press the DVD CD or TUNER BAND button to select the desired function When you select the TUNER BAND tune into the desired sta tion 3 Adjust the volume using the VOLUME buttons Do not turn the volume up too high 4 Press the TIMER SLEEP button repeatedly until is...

Страница 51: ...BY button to turn the power on 7 When the preset time is reached playback will start The volume will increase gradually until it reaches the volume you were listening to before your system entered the timer stand by mode 8 The unit will enter the power stand by mode one hour after the timer playback starts Note When performing timer playback using an other unit connected to the VIDEO AUX sockets s...

Страница 52: ...ound source 2 Press the TIMER SLEEP button repeatedly until SLEEP is displayed and then within 8 seconds press the MEMORY SET button To change the sleep time Whilst the sleep time is displayed press the PRESET or button Maximum 3 hours Minimum 5 minutes 3 Within 30 seconds press the MEMORY SET button 4 The unit will enter the power stand by mode automatically after the preset time has elapsed The ...

Страница 53: ...put socket To the line output sockets Optical digital cable commercially available 1 Use a connection lead to connect the VCR DVD etc to the VIDEO AUX AUDIO IN sockets When using video equipment connect the audio output to this unit and the video output to a television 2 Press the ON STAND BY button to turn the power on 3 Press the VIDEO AUX button 4 Play the connected equipment Note To prevent no...

Страница 54: ... correct Are the batteries dead Is the distance or angle incorrect Does the remote control sensor receive strong light Symptom Possible cause No images are dis played Is TV turned on Is the input of TV switched Even though a disc is loaded No Disc is displayed Is the disc loaded upside down Is the disc very dirty Does the disc satisfy the standards Is the unit located near excessive vibrations Pla...

Страница 55: ...es the unit clear all the memory by resetting it Clearing all the memory reset 1 Press the ON STAND BY button to enter the power stand by mode 2 Whilst pressing down the DVD CD button and the 2 button press the ON STAND BY button until CLEAR appears Caution When you reset all data is deleted and the settings return to the default DVD initial settings are retained Before transporting the unit Remov...

Страница 56: ...cs can cause noise or mistracking If a disc is dirty or does not play properly clean it with a soft dry cloth wiping straight out from the centre along the radius Specifications As part of our policy of continuous improvement SHARP reserves the right to make design and specification changes for product improvement without prior notice The performance specification fig ures indicated are nominal va...

Страница 57: ...ontal resolution 500 lines S N ratio 75 dB Audio signal Frequency characteris tics Linear PCM DVD 30 Hz to 20 kHz sampling rate 48 kHz 30 Hz to 20 kHz sampling rate 96 kHz CD 30 Hz to 20 kHz S N ratio CD 95 dB 1 kHz Dynamic range Linear PCM DVD 92 dB CD 92 dB Total har monic distor tion ratio 0 14 Frequency range FM 87 5 108 MHz AM 522 1 620 kHz Type 2 way type speaker system magnetic shield 4 cm ...

Страница 58: ...04 3 8 XL DV50H A _MEMO fm TINSEA027SJZZ MEMO ...

Страница 59: ...epair This warranty does not extend to accessories defects or injuries caused by or resulting from causes not attributable to faulty parts or the manufacture of the product including but not limited to defect or injury caused by or resulting from misuse abuse neglect accidental damage improper voltage liquid spillage vermin infestation software or any alterations made to the product which are not ...

Страница 60: ... APPROVED SERVICE CENTRE VISIT OUR WEBSITE AT www sharp net au OR CALL SHARP LOCAL CALL 1 300 135 022 SHARP CORPORATION OF AUSTRALIA PTY LIMITED A B N 40 003 039 405 1 Huntingwood Drive Blacktown NSW 2148 FOR PRODUCTS PURCHASED IN NEW ZEALAND CONTACT YOUR SELLING DEALER RETAILER OR CALL SHARP CUSTOMER SERVICES TELEPHONE 09 573 0111 FACSIMILE 09 573 0113 WEB www sharpnz co nz SHARP CORPORATION OF N...

Отзывы: