background image

E-25

SD-PX15H_SEEG_E.fm

04/2/9

ENGLISH

TINSZA052AWZZ

SD-PX15H

D

V

D Oper

ation

- U

s

e

ful

 o

p

e

ra

ti

on

 -

Useful operation (continued)

"

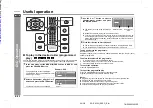
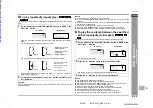
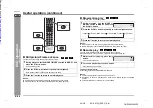
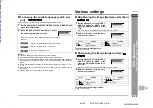
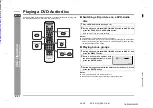
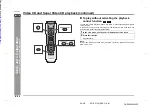
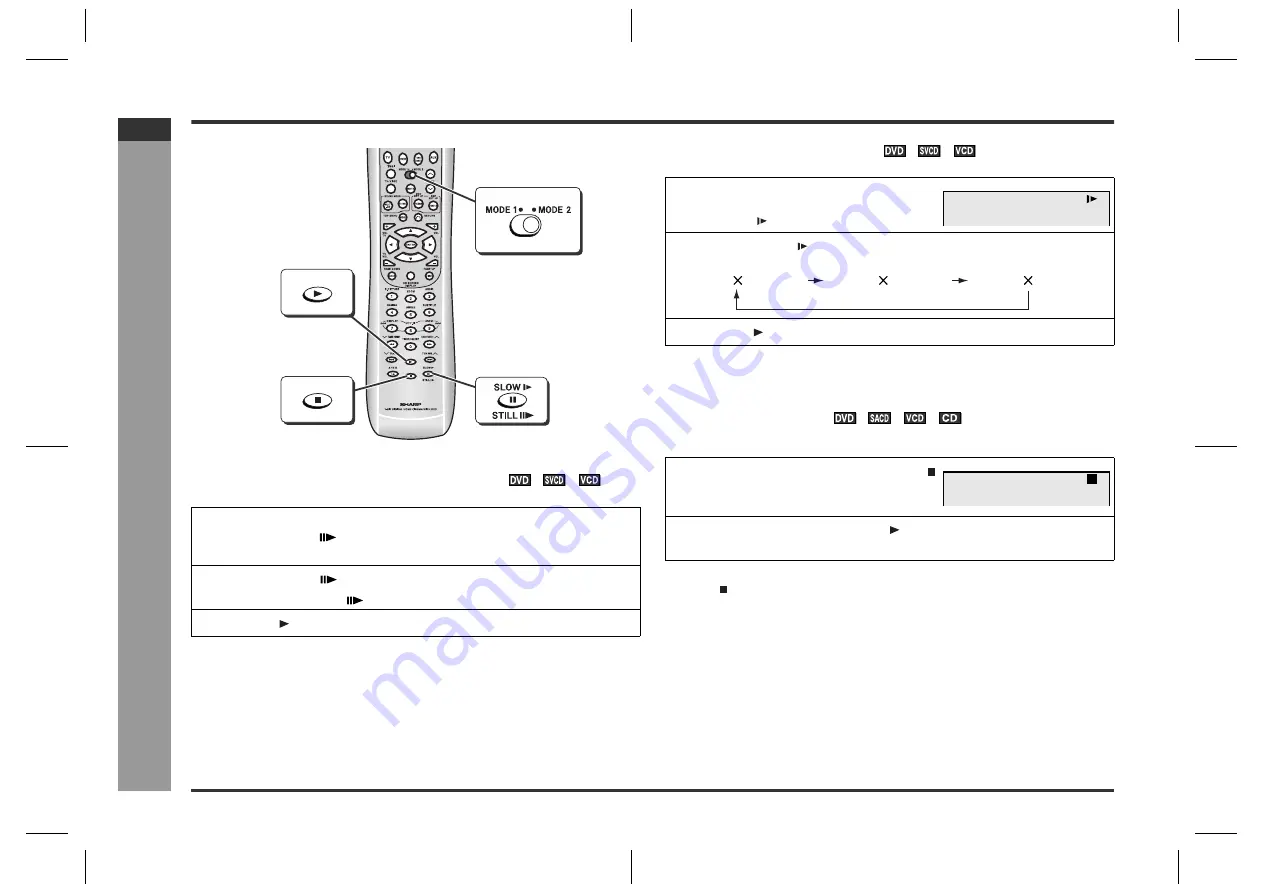
Still picture/Frame advance    


You can freeze the image and advance frame by frame.

Notes:

!

Still picture and frame advance features are disabled on some discs.

!

Frame advance is not available on DVD-Audio discs (audio part only).

"

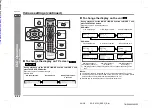
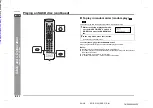
Slow-motion play    


You can slow down the playback speed.

Notes:

!

On some discs, the slow-motion playback functions are disabled.

!

Slow-motion play is not available on DVD-Audio discs (audio part only).

"

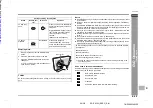
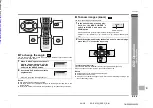
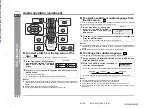
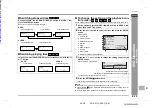
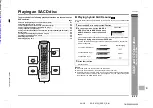
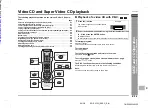
Resume play   


You can resume playback from the point where it was stopped.
When playing VCD, cancel the P.B.C. (playback control) (see page 35).

To cancel resume play:

Press the   button whilst "RESUME" is displayed.

Notes:

!

The resume play feature is disabled on some discs.

!

Depending on the disc, playback may resume from slightly before the stopped
position.

!

For SVCD/MP3 discs, resume play is not available.

1

During playback, set the MODE 1/MODE 2 switch to MODE 1 and
press the STILL 

 button.

A still picture appears.

2

Press the STILL 

 button during still picture playback.

Each press of the STILL 

 button advances the frame.

3

Press the   button to return to normal playback.

1

During playback, set the MODE 1/
MODE 2 switch to MODE 2 and press
the SLOW   button.

2

Press the SLOW   button repeatedly to select a playback speed.

3

Press the   button to return to normal playback.

1

Whilst the disc is playing, press the 
button.

The unit stores the point.

2

To resume playback, press the   button.

Play resumes from the point.

1

C

0 0

1

3

/

1

5

/

0

:

:

0 1

2 3

D D

V

1

1 (about     1/2 times)

2 (about     1/8 times)

3 (about     1/16 times)

1

C

0 0

1

3

/

1

5

/

0

:

:

0 1

2 3

D

RESUME

D

V

Downloaded from: 

http://www.usersmanualguide.com/

Содержание SD-PX15H

Страница 1: ...NLEITUNG MODE D EMPLOI MANUAL DE MANEJO BRUKSANVISNING MANUALE DI ISTRUZIONI GEBRUIKSAANWIJZING MANUAL DE OPERAÇÃO OPERATION MANUAL Siehe Seiten i bis vi und D 1 bis D 68 DEUTSCH Se reporter aux pages i à vi et F 1 à F 68 FRANÇAIS Consulte las páginas i a vi y S 1 a S 68 ESPAÑOL Hänvisa till sidorna i till vi och V 1 till V 68 SVENSKA Leggere le pagine i a vi e I 1 a I 68 ITALIANO Raadpleeg de bla...

Страница 2: ...nning i apparaten Med ON STAND BY knappen i läge STAND BY kan apparaten startas med fjärrkontrollen Varning Apparaten innehåller inga delar som kan åtgärdas av kunden Höljet får endast öppnas av kvalificerad personal Apparaten innehåller farliga spänningar Stickkontakten ska därför dras ut från nätuttaget före reparationsarbeten och bör dras ut om apparaten inte ska användas på mycket länge 0305 D...

Страница 3: ...ltagens perigosas Remova sempre o cabo de alimentação da tomada antes de efetuar qualquer conserto ou quando deixar o aparelho muito tempo fora de uso When the ON STAND BY button is set at STAND BY position mains volt age is still present inside the unit When the ON STAND BY button is set at STAND BY position the unit may be brought into operation by the remote control Warning This unit contains n...

Страница 4: ...wing Stel het toestel niet bloot aan druipend of spattend water om brand en elektrische schokken te voorkomen Met vloeistoffen gevulde voorwerpen zoals vazen mogen niet op het toestel geplaatst worden Cuidado Para evitar incêndio ou choque elétrico não exponha este aparelho a gotejamento ou salpicamento de água Não coloque objetos com água como por exemplo um vaso de flores em cima do aparelho War...

Страница 5: ...No intente desmontar la caja ya que el haz de láser usado en este reproductor de discos compactos es perjudicial para los ojos Para el servicio de reparación consulte a una persona cualificada OBSERVERA Användning av reglage eller justeringar eller handhavande på annat sätt än som anges kan leda till farlig bestrålning Försök inte ta isär höljet eftersom CD spelarens laserstråle är skadlig för ögo...

Страница 6: ... 6 mW Propriedades do diodo de laser Material AlGaAs AlGaInP Comprimento de onda 785 nm 650 nm Duração da emissão contínua Saída de laser máx 0 6 mW Laser Diode Properties Material AIGaAs AIGaInP Wavelength 785 nm 650 nm Emission Duration continuous Laser Output max 0 6 mW 0306 ADVERSEL SYNLIG OG USYNLIG LASERSTRÅLING VED ÅBNING SE IKKE IND I STRÅLEN HELLER IKKE MED OPTISKE INSTRUMENTER VARO AVATT...

Страница 7: ...2 en andere wereldwijde patenten verstrekt en aangevraagd DTS en DTS Digital Surround zijn geregistreerde handelsmerken van Digital Theater Systems lnc Copyright 1996 2000 Digital Theater Systems lnc Alle rechten voorbehouden Produzido sob licença da Digital Theater Systems Inc Patente nos Estados Unidos Nº 5 451 942 5 956 674 5 974 380 5 978 762 e outras patentes ao redor do mundo emitidas e pend...

Страница 8: ...ts are prohibited by law This system is equipped with copy protection technology that causes substantial degradation of images when the contents of a disc are copied to a videotape Apparatus Claims of U S Patent Nos 4 631 603 4 577 216 4 819 098 and 4 907 093 licensed for limited viewing uses only This product incorporates copyright protection technology that is protected by method claims of certa...

Страница 9: ... subtitle language 27 To change the audio language audio output 28 Page Various settings Brightening the image Gamma correction 28 Sharpening the image Super picture 28 To change the display on TV screen 29 To change the display on the unit 29 Switching elapsed time 30 Switching playing time 30 To change the setting on the playback control screen 30 Playing a DVD Audio disc 31 SACD and CD Operatio...

Страница 10: ...his surface Keep your discs away from direct sunlight heat and excessive moisture Always hold the DVD SACD CDs by the edges Fingerprints dirt or water on the DVD SACD CDs can cause noise or mistracking If a DVD SACD CD is dirty or does not play properly clean it with a soft dry cloth wiping straight out from the centre along the radius Please ensure that the equipment is positioned in a well venti...

Страница 11: ...Indicator 57 12 Once Timer Indicator 57 13 Sleep Indicator 58 14 Title Indicator 29 15 Group Indicator 29 16 Chapter Indicator 29 17 Track Indicator 29 18 Total Indicator 30 19 Angle Indicator 26 20 RDS Indicator 41 21 Radio Text Indicator 39 22 Traffic Programme Indicator 39 23 Traffic Announcement Indicator 42 24 Dynamic PTY Indicator 39 25 Audio Signal Speaker Indicators 44 26 Repeat One Track ...

Страница 12: ...1 Headphone Socket 61 2 Coaxial Digital Audio Input Socket 61 3 Optical Digital Audio Output Socket 63 4 Optical Digital Audio TV Input Socket 61 5 Audio TV Input Sockets 61 6 Audio VCR Input Sockets 61 7 Audio VCR Output Sockets 61 8 Subwoofer Pre Output Socket 61 9 AC Power Lead 16 10 FM 75 Ohm Aerial Socket 14 11 Aerial Earth Terminal 14 12 AM Aerial Terminal 14 13 Speaker Terminals 13 14 SCART...

Страница 13: ... Direct Number Buttons 22 15 Fast Reverse or Preset Down Button 21 38 16 Chapter track Skip Down or Tuning Down Button 21 37 17 Repeat Play Button 24 18 Disc Play Button 19 19 Tuner Band Button 37 20 On Stand by Button 16 21 Mute Button 18 22 Auxiliary Button 62 23 TV Channel Up Button 59 24 TV Channel Down Button 59 25 Programme Button 23 26 Random Play Button 33 27 Return Button 22 28 Volume Up ...

Страница 14: ... Timer Sleep Button 17 56 8 A B Repeat Button 24 9 DVD Setup Button 30 47 10 Amplifier Setup Button 51 11 Return Button 22 12 On Screen Display Button 29 13 DVD Page Up Button 31 14 DVD Audio Language or CD Audio Output Select Button 28 15 DVD Subtitle Button 27 16 DVD Angle Button 26 17 RDS ASPM Auto Station Programme Memory Button 41 18 RDS Programme Type Traffic Information Search Button 42 19 ...

Страница 15: ... CORPORATION MADE IN MALAYSIA SPEAKER SYSTEM IMPEDANCE MAXIMUM POWER 4 OHMS 70 W MODEL NO CP PX15HS SHARP CORPORATION MADE IN MALAYSIA SPEAKER SYSTEM IMPEDANCE MAXIMUM POWER 4 OHMS 70 W The bottom of the speaker 1 The bottom of the speaker MODEL NO CP PX15HC SHARP CORPORATION MADE IN MALAYSIA SPEAKER SYSTEM IMPEDANCE MAXIMUM POWER 4 OHMS 70 W 2 3 1 DVD DVD Video Disc DVD Audio Disc DVD R DVD RW Re...

Страница 16: ... three types of SACD single layer dual layer and hybrid Hybrid disc contains both SACD and CD structures Some SACD discs contain multi channel audio recordings Track SACD video CD and audio CD are composed of tracks Tracks are equivalent to songs on a CD MP3 format on CD R CD RW An MP3 file is an audio data compressed in the MPEG 1 audio layer 3 format MP3 files have the extension mp3 Files with t...

Страница 17: ...s of nations and areas Egypt Arab Republic of Egypt Faeroe Islands Faeroe Islands Finland Republic of Finland France French Republic Germany Federal Republic of Germany Gibraltar Gibraltar Greece Hellenic Republic Greenland Greenland Hungary Republic of Hungary Iceland Republic of Iceland Iran Islamic Republic of Iran Iraq Republic of Iraq Ireland Ireland Isle of Man Isle of Man Israel State of Is...

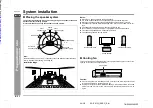
Страница 18: ...ex ducts Front and centre speakers are magnetically shielded The speakers grilles are not removable Cooling fan Caution The unit will get warm whilst being used Do not touch the warm areas of the unit for prolonged periods to avoid damage to you A safety circuit protects the amplifier from damage When it is activated the sound switch is turned off In this case set the unit to the stand by mode and...

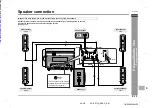
Страница 19: ... on the main unit and speakers and speaker wires are distinguished by colours Connect the speaker and the unit by matching the colours see page 13 You can connect a commercially available subwoofer with a built in amplifier see page 61 Front speaker left Centre speaker Subwoofer Surround speaker left Surround speaker right Front speaker right Blue Purple White Green Grey Red Red Black Downloaded f...

Страница 20: ...ple To connect the left surround speaker If screws are difficult to turn by hand use a coin or flathead screwdriver 2 Connect the wires to the speakers Label blue Turn it over and route the cable through a hole Unscrew the cover to remove Red Red Black Black Speaker terminal blue Tube blue Tube blue Connect the other end to the main unit Attach the speaker terminal cover 3 4 Label blue Caution The...

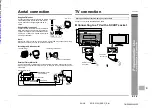
Страница 21: ...plied FM aerial Connect the FM aerial wire to the FM 75 OHMS socket and position the FM aerial wire in the di rection where the strongest signal can be re ceived Supplied AM loop aerial Connect the AM loop aerial wire to the AM and GND terminals Position the AM loop aerial for optimum reception Place the AM loop aerial on a shelf etc or attach it to a stand or a wall with screws not supplied Assem...

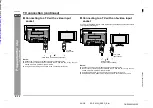
Страница 22: ...ideo input socket If your TV is equipped with an S video input socket purchase an appropriate cable to enjoy higher quality images Notes Change the TV input in accordance with the connected socket Do not connect other equipment between the TV and this unit If they are con nected via a VCR pictures may be distorted Using the audio cable you can listen to the TV sound with this unit Use a SCART cabl...

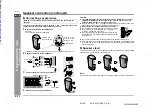
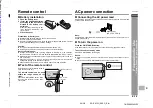
Страница 23: ...rations Test of the remote control AC power connection Connecting the AC power lead After checking all the connections have been made correctly plug the AC power lead of this unit into the AC socket Note Unplug the AC power lead from the wall socket if the unit will not be in use for a pro longed period of time To turn the power on Press the ON STAND BY button If the power does not turn on check i...

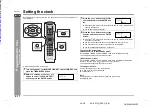
Страница 24: ... In step 2 the time will be displayed Follow steps 3 4 Note Unplugging the unit or power failure will clear the clock setting Readjust the clock 1 Turn on the power set the MODE 1 MODE 2 switch to MODE 2 and press the TIMER SLEEP button 2 Within 10 seconds press the or button to select CLOCK ADJUST and then press the ENTER button 3 Press the or button to adjust the hour and then press the ENTER bu...

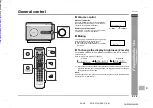
Страница 25: ...en the VOLUME control is turned clockwise the volume will increase When it is turned anti clockwise the volume will decrease Remote control operation Press the VOL button to increase the volume and the VOL button for decreasing The volume is muted temporarily when pressing the MUTE button on the remote control Press again to restore the volume The mute status is cancelled when you adjust the volum...

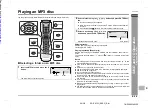
Страница 26: ...he button to set the input to DVD You can also use the button on the main unit 2 Press the OPEN CLOSE button to open the sliding door The sliding door closes after approx 2 min utes of inactivity 3 Insert a disc To avoid damage insert the disc carefully 4 Press the OPEN CLOSE button to close the sliding door Some discs play automatically 5 If you cannot start playback in step 4 press the button Wh...

Страница 27: ...To stop play back When you press once RESUME appears Press again to enter the stop mode Whilst RESUME appears press the button Playback resumes from the point where it was stopped Resume play See page 25 To pause playback Not available Press during playback In the pause mode press the button Playback resumes from the point where it was paused 1 Stop playback and press the OPEN CLOSE button 2 Press...

Страница 28: ... 2 times Sound is not heard on SACD discs Depending on the disc or scene the search speed may differ from that in this man ual During VCD fast forward sound is heard only at the search speed 1 about x 2 times Whilst a disc is playing press the or button Press the button to skip to the next chapter track Press the button to skip to the beginning of the current chapter track Press the button again t...

Страница 29: ... 2 switch to MODE 1 2 Selecting a title of DVD TV screen Press the DIRECT button Selecting a chapter of DVD Press the DIRECT button twice Selecting a track on SACD SVCD VCD CD discs Unit display Press the DIRECT button 3 Within 10 seconds enter a number with the direct number buttons 0 9 and press the ENTER button To correct the number enter again To cancel press the RETURN button Instead of the d...

Страница 30: ...MODE 1 and press the PROGRAM button Example DVD The programming screen is displayed To programme tracks on SACD SVCD VCD CD discs go to step 3 2 Select a title number with the or button and press the ENTER button The chapter selection screen appears Cursor DVD VIDEO PROGRAM TITLE T 1 T 2 DVD VIDEO PROGRAM TITLE T 1 T 2 3 Use the or button to select a chapter track number and press the ENTER button...

Страница 31: ...programmed play A B repeat play is not available When you press the button the current A B repeat play is cancelled For SVCD MP3 discs A B repeat play is not available An end point B is created when playback of the title track ends When playing VCD cancel the P B C playback control see page 35 1 During playback set the MODE 1 MODE 2 switch to MODE 1 and press the button TV screen Unit display Each...

Страница 32: ...resume play feature is disabled on some discs Depending on the disc playback may resume from slightly before the stopped position For SVCD MP3 discs resume play is not available 1 During playback set the MODE 1 MODE 2 switch to MODE 1 and press the STILL button A still picture appears 2 Press the STILL button during still picture playback Each press of the STILL button advances the frame 3 Press t...

Страница 33: ...zoom function you cannot shift the view Notes An image may become distorted when zoomed Subtitles cannot be zoomed When the zoom indicator changes from white to red whilst shifting the image you cannot shift it any further 1 When ANGLE appears on the unit display during playback set the MODE 1 MODE 2 switch to MODE 2 and press the ANGLE button 2 Use the ANGLE button to select an angle number Each ...

Страница 34: ...Notes The subtitle language on some DVDs may not be changed If no subtitles are recorded on the disc XX is displayed It may take a little time to switch the subtitle language to the selected one When you set the unit to the stand by mode or replace the disc settings return to the default 1 In the stop mode or during playback set the MODE 1 MODE 2 switch to MODE 2 and press the TOP MENU button Exam...

Страница 35: ...iginal image quality In step 1 select OFF 1 During playback set the MODE 1 MODE 2 switch to MODE 2 and press the AUDIO button 2 Press the AUDIO button repeatedly to select the audio language audio output Each time you press audio language audio output changes Example 1 Original English Dolby Digital 5 1 Surround 2 Original English DTS 5 1 Surround 3 Japanese Dolby Digital 2 ch 1 1 D h c 1 5 1 D h ...

Страница 36: ...nd press the ON SCREEN button Each time you press the display changes Example DVD Always displayed Not displayed Displayed for approx 3 seconds C 0 1 8 3 2 5 0 2 3 4 0 D D V C 0 1 8 3 2 5 0 2 3 4 0 D D V During playback set the MODE 1 MODE 2 switch to MODE 1 and press the DISPLAY button Each time you press the display changes DVD Video Title elapsed time Title Chapter number Chapter elapsed time D...

Страница 37: ...number with the or button SACD VCD CD Track number Track playing time Track playing time After approx 2 seconds 1 During playback set the MODE 1 MODE 2 switch to MODE 2 and press the DVD SET UP button 2 Press the or button to select the item and press the ENTER button Example DVD 1 Title number 2 Chapter number 3 Elapsed playing time 4 Subtitle 5 Angle 6 Audio language 7 Gamma 8 Super picture 9 BI...

Страница 38: ...scs audio part only you cannot change the two modes Playing bonus groups Notes For a 4 digit password see the disc jacket etc On some discs a password is not required to play bonus groups 1 Play a DVD Audio disc see page 19 2 During playback set the MODE 1 MODE 2 switch to MODE 2 and press the PAGE UP or PAGE DOWN button Each time you press the image switches 1 During playback set the MODE 1 MODE ...

Страница 39: ...CD layer and a CD layer you can select sound to play Notes For sound types see the manual for the hybrid disc When you remove the disc the audio output returns to MULTI On SACD CD layer only CD discs you can enjoy various sounds by changing the multi channel mode or stereo mode see pages 45 46 You cannot change the two modes for the SACD SACD layer 1 Insert an SACD disc and press the button 2 In t...

Страница 40: ...rrent random play is cancelled Notes Random play is not allowed during programmed playback In random play the unit will select and play tracks automatically You cannot select the order of the tracks For MP3 discs random play is not available In random play press the button to switch to repeat play 1 Whilst in the stop or playback mode set the MODE 1 MODE 2 switch to MODE 1 and press the RANDOM but...

Страница 41: ... display on TV screen 29 Switching elapsed time 30 Switching playing time 30 To change the setting on the playback control screen 30 Playback of a video CD with P B C To interrupt playback Press the button To resume playback from the same point press the button To stop playback Press the button To stop the current operation and return to the menu Press the RETURN button To scroll the menu screen m...

Страница 42: ...video CD super video CD with P B C without activating the playback control function In this case the menu screen will not appear and the disc will play in the same way as a video CD super video CD without P B C Note Some video CDs super video CDs with P B C cannot be played back when the P B C mode is off 1 In the stop mode use the or button to select a track 2 Press the button Playback starts Dow...

Страница 43: ...io tracks in the CD format the unit recognises the disc as a CD and plays only those tracks It may take some time to read a disc depending on the number of files or folder tree structure Up to 8 characters are displayed for folder or track names Some characters and symbols may not appear properly MP3 discs with data recorded at high speed may not play or noise may occur dur ing playback The MP3 fu...

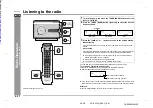
Страница 44: ...press the TUNER BAND button to set the input to FM AM 2 Press the TUNER BAND button repeatedly to select the desired frequency band 3 Press the TUNING or button to tune in to the desired station Manual tuning Press the TUNING button as many times as required to tune in to the desired station Auto tuning When the TUNING button is pressed for 0 5 seconds or more scanning will start automatically and...

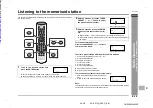
Страница 45: ...d station and press the ENTER button For FM stations stereo and mono modes are memorised Store the stations in memory in order starting with preset channel 1 2 Within 5 seconds press the TUNER PRESET or button to select the preset channel number Preset channel number 3 Within 5 seconds press the ENTER button to store that station in mem ory Repeat steps 1 3 to set other stations or to change a pre...

Страница 46: ...switch as follows When you are tuning in to a station other than an RDS station or to an RDS station which sends weak signal the display will change in the following order Notes for RDS operation If any of the following events occur it does not mean that the unit is faulty PS NO PS and a station name appear alternately and the unit does not oper ate properly If a particular station is not broadcas...

Страница 47: ...ythm Blues and Reggae are examples Weather Weather reports and forecasts and meteorological information Finance Stock Market reports commerce trading etc Children For programmes targeted at a young audience primarily for entertain ment and interest rather than where the objective is to educate Social Programmes about people and things that influence them individually or in groups Includes sociolog...

Страница 48: ...m ory It may be impossible to store station names in memory using the ASPM function if there is lots of noise or if the signal is too weak In this case perform as follows Notes The same station name can be stored in different channels In a certain area or during certain time periods the station names may temporarily be different 1 Press the TUNER BAND button to select the FM band 2 Set the MODE 1 ...

Страница 49: ...pecify station names and select stations manually You can select a station by specifying the name BBC R1 BBC R2 etc from the sta tions stored in memory Before starting this operation you must store one or more station names in memory 1 Press the TUNER BAND button to select the FM band 2 Set the MODE 1 MODE 2 switch to MODE 2 and press the PTY TI button PTY TI and SELECT will appear alternately for...

Страница 50: ...Dolby Digital the DIGITAL indicator lights up see page 28 DTS Digital Theater Systems Disc with this trademark One of the digital audio systems for theatrical use As the sound quality is empha sised you can enjoy the realistic sound effect in the home theatre system When you set the audio output to DTS for a disc recorded in DTS the indicator lights up see page 28 Dolby Pro Logic Stereo recorded d...

Страница 51: ...ls L R LFE are received the audio signal indicators L R and LFE light up The illustration on the right indicates that 2 chan nel stereo sound L and R is reproduced When Dolby Pro Logic is activated 2 channel stereo sound is converted to 5 1 chan nel surround sound and all the speaker indica tors light up 2 1 3 4 6 5 8 10 11 9 7 Audio signal indicator Speaker indicator 12 13 L R LFE Incoming audio ...

Страница 52: ...e are retained by input DVD TV AUX and VCR Listening to sounds in the multi channel mode 5 1 ch etc DVD Dolby Digital or DTS Whilst the disc is playing press the MULTI CH button Example DTS format A maximum of 5 1 ch surround sound is reproduced to provide three dimensional effect When you press once the last used setting appears To change it press the button repeatedly within 3 seconds STANDARD Y...

Страница 53: ...ro Logic converts 2 channel stereo sound of CDs etc to 5 1 chan nel When you press once the last used setting appears To change it press the button repeatedly within 3 seconds STANDARD You can enjoy the original sound as it is MOVIE The bass level is increased for powerful sound effect MUSIC You can enjoy lively sound by producing the articulate sound NIGHT Soft but powerful sound is achieved even...

Страница 54: ...s per form step 3 2 Press the or button to select a parameter and press the ENTER button Select a language see page 48 OSD LANGUAGE SETUP SVENSKA NEDERLANDS ENTER ENTER ENGLISH ESPAÑOL FRANÇAIS ITALIANO SELECT RETURN OSD LANGUAGE SETUP SVENSKA NEDERLANDS ENTER ENTER ENGLISH ESPAÑOL FRANÇAIS ITALIANO SELECT RETURN 3 Press the or button to select a setting item and press the ENTER button For setting...

Страница 55: ...country code according to a parental control level of discs P 49 AUDIO DIGITAL BITSTREAM D PCM Select the audio output according to the external equipment connected to the optical digital audio out put socket P 63 DISC LANGUAGE AUDIO ENGLISH SPANISH OTHER Select a language to play If the selected language is not available the disc plays in a default lan guage P 50 SUB TITLE ENGLISH SPANISH OTHER O...

Страница 56: ...layed in 4 3 When playing a wide image 16 9 disc black bands are inserted at the top and bottom and you can enjoy full wide im ages 16 9 on a 4 3 size TV A 4 3 disc is played in 4 3 A wide image 16 9 is displayed when playing a wide image 16 9 disc When playing a 4 3 image disc the image size depends on the setting of the connected TV If you play back a wide image 16 9 disc with the unit connected...

Страница 57: ...screens are displayed in a specified language English French Merci Thank you English French Merci Thank you ACTEURS PERSONNEL CAST STAFF English French 1 On the initial setting screen select DISC LANGUAGE see steps 1 3 on page 47 and select MENU and press the ENTER button 2 Press the or button to select H for the first letter 3 Press the or button to move the cursor to the MENU 2 4 Press the or bu...

Страница 58: ...rs centre speaker and surround speak ers or turn on or off the centre speaker and surround speakers 1 In Speaker delay setting set the right surround speaker SR to 3 3 m 2 In Speaker level setting slightly increase the level of the right surround speaker as it is a little farther than others see page 53 3 In Test tone check the sound from each speaker see page 53 FL FR SL Default setting 2 m SR SW...

Страница 59: ...alid whilst playing DVD Audio or SACD discs valid for the CD layer of SACD discs 4 Within 10 seconds press the or button to select their sizes To set sizes of other speakers repeat the operation from step 3 5 Press the RETURN button twice The setting is complete Speaker type Speaker size Front speaker Left Right F SMALL Small diameter F LARGE Large diameter Centre speaker C SMALL Small diameter C ...

Страница 60: ...e or button to select SP LEVEL and press the ENTER but ton 3 Within 10 seconds press the or button to select the desired speaker The indicator of the selected speaker flashes 4 Within 10 seconds press the or button to adjust the level You can adjust the level at 1 dB intervals To adjust the levels of other speakers repeat the op eration from step 3 5 Press the RETURN button twice The setting is co...

Страница 61: ...setting cannot be selected 2 Press the or button to select the menu and press the ENTER button 3 Press the or button to change the setting and press the ENTER button Repeat the operation as instructed The number of repetition depends on the setting item To change other settings begin from step 2 SUB WOOFER speaker size cannot be selected 4 Press the RETURN button twice The setting is complete SPEA...

Страница 62: ...after timer setting the clock stops and the timer setting will be cancelled Set the clock and timer again You cannot use the timer to operate other equipment Timer playback does not start if the unit is turned on at the start time Setting the timer You can use the once timer and daily timer together For example use the timer as a wake up call daily timer and listen to the ra dio later on the day 1...

Страница 63: ...et the time to finish as in steps 4 and 5 above 7 Switch the input with the or button and then press the ENTER button Available playback sources DVD CD TUNER TV AUX and VCR If you select TV AUX or VCR connect the unit to the corresponding equip ment and set the timer When you select TUNER select a station by pressing the or button and then press the ENTER button If a station has not been programme...

Страница 64: ...matically Lights up flashes or 1 Set the MODE 1 MODE 2 switch to MODE 2 and press the TIMER SLEEP button 2 Within 10 seconds press the or button to select TIMER ONCE or TIMER DAILY and press the ENTER button 3 Within 10 seconds press the or button to select ONCE CALL or DAILY CALL and press the ENTER button The unit returns to the timer stand by mode after displaying the settings in order 1 Set th...

Страница 65: ... 1 minute 1 minute intervals 4 Press the ENTER button The unit will enter the power stand by mode auto matically after the preset time has elapsed The volume will be turned down 1 minute before the sleep operation finishes and then you cannot change the volume 1 Whilst SLEEP appears set the MODE 1 MODE 2 switch to MODE 2 and press the TIMER SLEEP button 2 Within 10 seconds press the or button to s...

Страница 66: ...ding on TVs Even if numbers can be set some buttons may not work 1 Press the TV I button to turn on the TV 2 Press the TV CH or button to set the channel Operation Button Volume control Switching the input 1 Whilst holding down the TV button enter the manufacturer setting number 4 digits 2 Release the TV button The setting is registered and the TV can be operated with the remote control of this un...

Страница 67: ...2 1030 NEC 1007 1009 1015 1026 NIKKO 1009 1019 1030 NTC 1019 OPTIMUS 1021 OPTONICA 1025 1044 ORION 1031 1032 1037 OSAKA 1034 TV manufacturer Setting number TV manufacturer Setting number OTTO 1039 PANASONIC 1013 1024 PENNEY 1003 1007 1008 1009 1011 1012 1013 1015 1016 1022 1030 1050 PHILCO 1007 1009 1014 1020 1037 PHILIPS 1014 PILOT 1007 1009 1011 PIONEER 1010 1028 PORTLAND 1007 1011 1019 PRISM 10...

Страница 68: ...ptical digital audio output socket DIGITAL OUT To audio output sockets TV L R Optical digital socket cap When using the optical digital socket remove the cap first After using the socket replace the cap AUDIO OUT VCR TV To audio input sockets Audio cable commercially available Audio cable commercially available Audio cable commercially available Audio cable commercially available To audio output s...

Страница 69: ...avoid further level decrease Plug in each cable fully to prevent noise interference Refer to the manual for the connected equipment You can also use the FUNCTION button to set the input to VCR Audio connection to a digital tuner You can listen to sound from the digital tuner etc from the speakers by connecting the unit using an audio digital cable To listen to the digital tuner Turn the power on a...

Страница 70: ... the disc The digital audio output socket does not send signals coming from SACD or MP3 discs In DVD Audio playback the digital audio output socket does not send some signals Also the sampling rate of digital audio signals may reduce or no signals may be sent Plug in each cable fully to prevent noise interference Maintenance Cleaning the cabinet Cleaning the laser pickup lens Notes Close the slidi...

Страница 71: ...the power on again FAN LOCK The cooling fan on the back of the main unit does not run due to foreign objects caught in it Set this unit to the stand by mode and remove the foreign objects around the fan NO DISC The disc is not loaded The disc is loaded upside down NO PLAY The disc s region number is neither 2 nor ALL No Signal The digital audio input socket is not connected prop erly Unspecified s...

Страница 72: ...Spanish KS Kashmiri ET Estonian KU Kurdish EU Basque KY Kirghiz FA Persian LA Latin FI Finnish LN Lingala FJ Fiji LO Laotian FO Faroese LT Lithuanian FR French LV Latvian Lettish Code Language name Code Language name MG Malagasy SN Shona MI Maori SO Somali MK Macedonian SQ Albanian ML Malayalam SR Serbian MN Mongolian SS Siswati MO Moldavian ST Sesotho MR Marathi SU Sundanese MS Malay SV Swedish M...

Страница 73: ...clock P 17 The display on the unit is dark Is the display in the dimmer mode P 18 The display does not appear Is the sliding door open P 19 The power is not turned on Is the unit unplugged P 16 No images are displayed Is TV turned on P 59 Is the input of TV switched P 59 Symptom Possible cause Reference page Even though a disc is loaded NO PLAY is displayed Is the disc loaded upside down Is the di...

Страница 74: ...ove the aerial away from the AC power lead or the unit if located near P 14 The preset channel cannot be recalled Did you remove the plug from the AC socket or did a power failure oc cur P 38 Set the channel again Symptom Possible cause Reference page The remote control does not operate properly Is the battery polarity respected P 16 Are the batteries dead Is the distance or angle incorrect P 16 A...

Страница 75: ... signal Frequency character istics Linear PCM DVD 4 Hz to 22 kHz sampling rate 48 kHz 4 Hz to 44 kHz sampling rate 96 kHz CD 4 Hz to 20 kHz S N ratio CD 96 dB 1 kHz Dynamic range Linear PCM DVD 95 dB CD 94 dB Total harmonic distor tion ratio 0 006 maximum Frequency range FM 87 5 108 MHz AM 522 1 620 kHz Type Bass Reflex 2 way system Magnetic shield 8 cm Woofer 5 cm Tweeter Impedance 4 ohms Dimensi...

Страница 76: ...TINSZA052AWZZ 04B R AO 1 SD PX15H_seeg TINSZA052AWZZ SHARP CORPORATION 0401_B5 Downloaded from http www usersmanualguide com ...

Страница 77: ...SD PX15H 1 BIT DIGITAL HOME CINEMA WITH DVD U P DOWN SD PX15H_seeg TINSZA052AWZZ Downloaded from http www usersmanualguide com ...

Страница 78: ... tv dvd and othes Manual users user manuals user guide manual owners manual instruction manual manual owner manual owner s manual guide manual operation operating manual user s manual operating instructions manual operators manual operator manual product documentation manual user maintenance brochure user reference pdf manual Downloaded from http www usersmanualguide com ...

Отзывы: