66
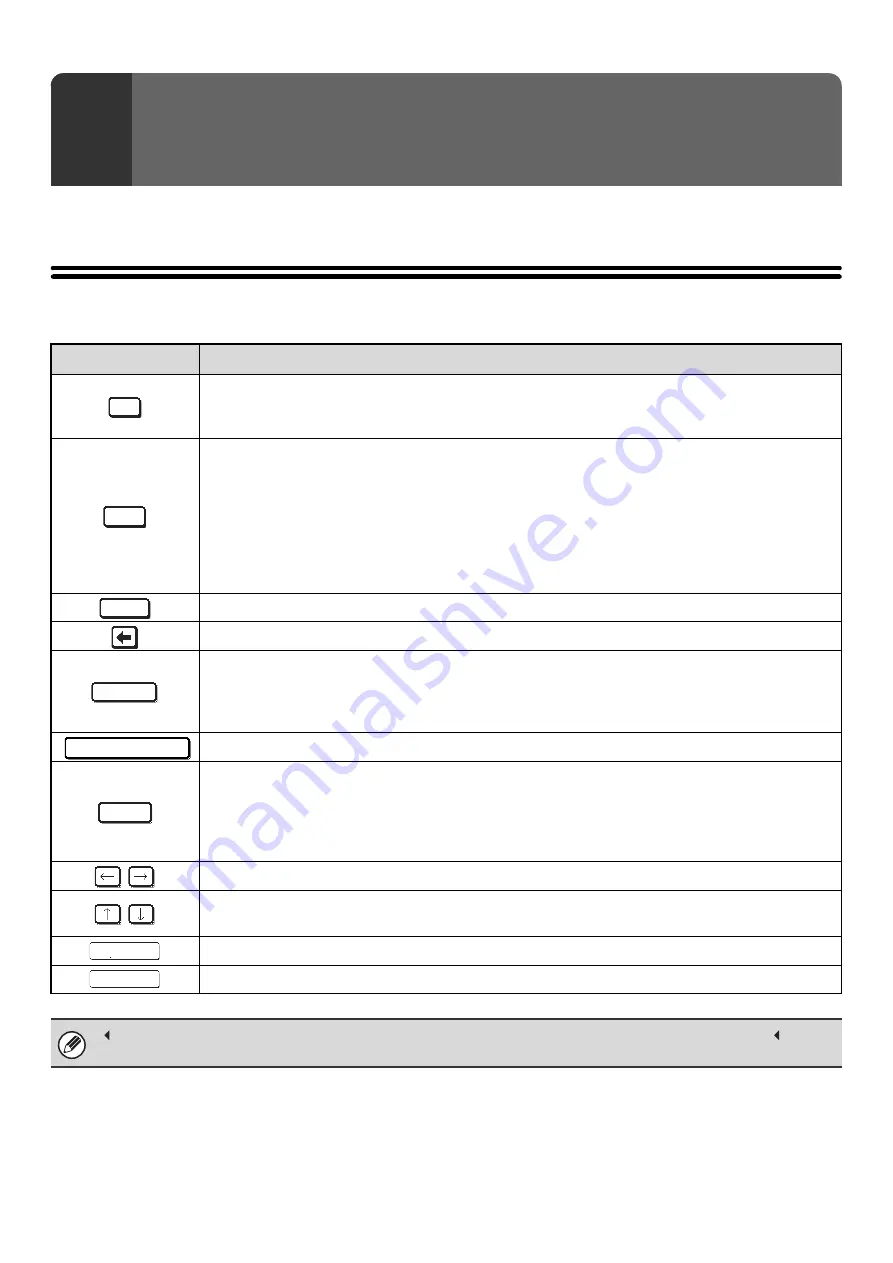
This chapter explains the text entry screen.
FUNCTIONS OF THE MAIN KEYS
6
ENTERING TEXT
Key
Description
This changes the text entry screen from the lower case screen to the upper case screen. The upper
case screen will continue to appear until the [Caps] key is touched again so that it is no longer
highlighted. The [Caps] key is convenient when you wish to enter all capital letters.
This key temporarily changes the keys in the text entry screen to upper case when lower case letters
appear, or to lower case when upper case letters appear.
Touch a letter key after touching the [Shift] key to enter that letter. After the letter is entered, the [Shift]
key will no longer be highlighted and the original text entry screen will appear.
The [Shift] key is convenient when you only need to enter one upper case letter or one lower case letter,
or when you need to enter one of the symbols assigned to the numeric keys.
To cancel selection of the [Shift] key, touch the [Shift] key again. The [Shift] key will no longer be
highlighted.
Touch this key to enter a line break when entering the body text of an e-mail message.
Touch this key to delete the characters to the left of the cursor one character at a time.
Touch this key to change the entry mode.
When this key is touched, the [Characters] key, [Symbols] key, and [Other Language] key appear. Touch
one of the keys to select a different entry mode.
☞
"
Touch this key to enter a space between letters.
This temporarily changes the entry screen to the accented letter and symbol entry screen. Touch a letter
key after touching the [AltGr] key to enter that letter. After the letter is entered, the [AltGr] key will no
longer be highlighted and the original text entry screen will appear.
To cancel selection of the [AltGr] key, touch the [AltGr] key again. The [AltGr] key will no longer be
highlighted.
These keys move the cursor left and right.
These keys move the cursor to the line above or below the current line during entry of the body text of an
e-mail message.
Touch this key to return to the previous setting screen without entering text.
Touch this key to enter the text that currently appears and return to the previous setting screen.
" " in the text entry screen indicates how many characters can be entered. A number of characters greater than " " cannot
be entered.
Caps
Shift
Enter
Mode
Space
Alt
G
r
Cancel
OK
Содержание MX 3501N - Color Laser - Copier
Страница 1: ...User s Guide MX 3500N MX 3501N MX 4500N MX 4501N MX 2300N MX 2700N MODEL ...
Страница 2: ...System Settings Guide MX 3500N MX 3501N MX 4500N MX 4501N MX 2300N MX 2700N MODEL ...
Страница 127: ...MX4500 US SYS Z2 System Settings Guide MX 3500N MX 3501N MX 4500N MX 4501N MX 2300N MX 2700N MODEL ...
Страница 173: ... mx4500_us_ins book 44 ページ 2005年10月31日 月曜日 午前11時57分 ...
Страница 174: ... mx4500_us_ins book 45 ページ 2005年10月31日 月曜日 午前11時57分 ...
Страница 176: ...Document Filing Guide MX 3500N MX 3501N MX 4500N MX 4501N MX 2300N MX 2700N MODEL ...
Страница 222: ...MX4500 US FIL Z1 Document Filing Guide MX 3500N MX 3501N MX 4500N MX 4501N MX 2300N MX 2700N MODEL ...
Страница 223: ...Scanner Guide MX 3500N MX 3501N MX 4500N MX 4501N MX 2300N MX 2700N MODEL ...
Страница 354: ...MX4500 US SCN Z2 Scanner Guide MX 3500N MX 3501N MX 4500N MX 4501N MX 2300N MX 2700N MODEL ...
Страница 355: ...Printer Guide MX 3500N MX 3501N MX 4500N MX 4501N MX 2300N MX 2700N MODEL ...
Страница 370: ...15 2 Select 2 sided printing 1 Select 2 Sided Book or 2 Sided Tablet 2 Click the OK button 3 Start printing 2 1 ...
Страница 415: ...MX4500 US PRT Z2 Printer Guide MX 3500N MX 3501N MX 4500N MX 4501N MX 2300N MX 2700N MODEL ...
Страница 416: ...Facsimile Guide MX FXX1 MODEL ...
Страница 605: ...MX FXX1 MODEL MX4500 US FAX Z2 Facsimile Guide ...
Страница 606: ...Copier Guide MX 3500N MX 3501N MX 4500N MX 4501N MX 2300N MX 2700N MODEL ...
Страница 775: ...MX4500 US CPY Z1 Copier Guide MX 3500N MX 3501N MX 4500N MX 4501N MX 2300N MX 2700N MODEL ...
Страница 843: ...MX4500 US USR Z1 User s Guide MX 3500N MX 3501N MX 4500N MX 4501N MX 2300N MX 2700N MODEL ...


