62
SENDING A FAX IN INTERNET FAX MODE
5
BASIC PROCEDURE FOR
TRANSMISSION IN INTERNET FAX MODE
When a default address is configured in "Default Address Setting" in the system settings (administrator), the mode cannot be
changed, the destination cannot be changed, and destinations cannot be added. To switch to Internet fax mode, touch the
[Cancel] key in the touch panel and follow the steps below.
1
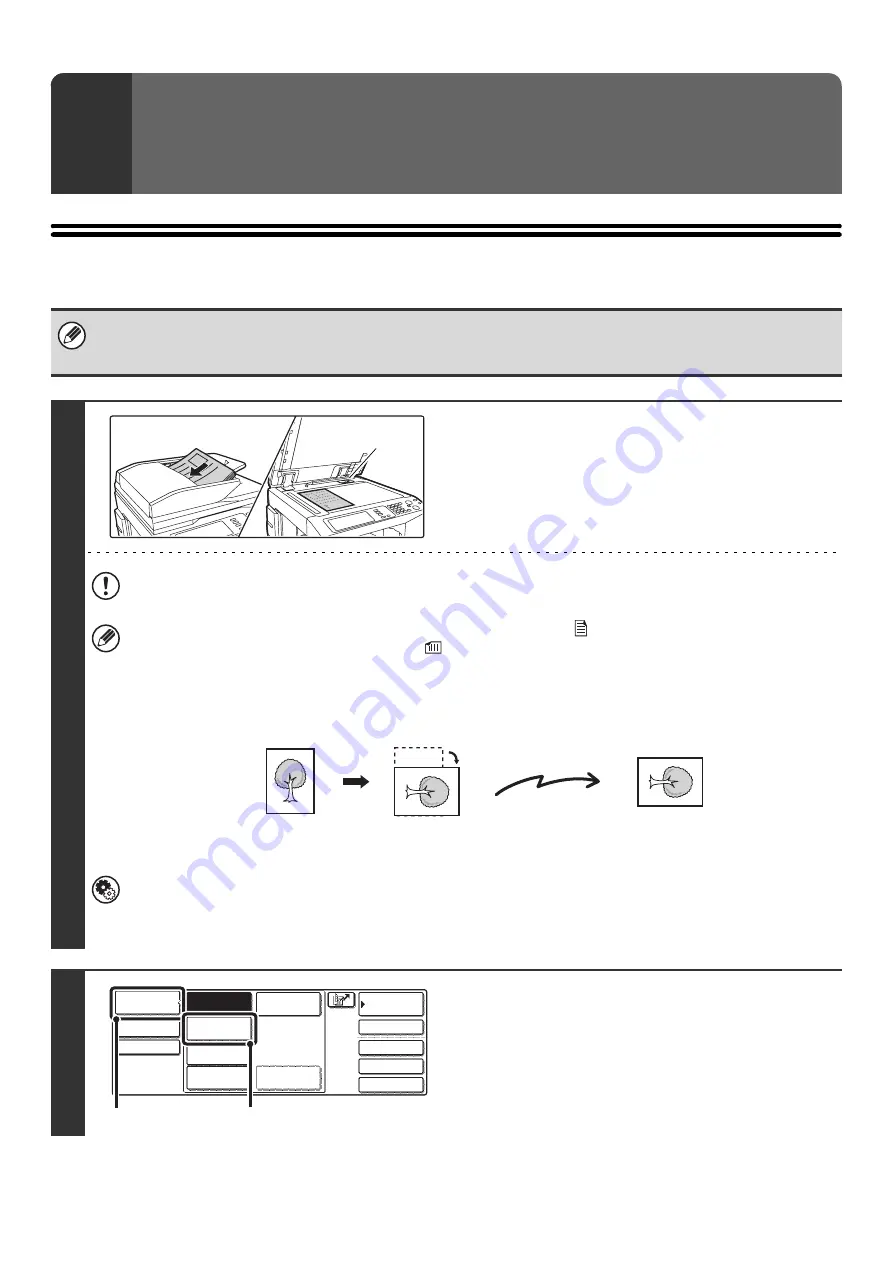
Place the original.
Place the original face up in the document feeder tray, or face
down on the document glass.
Do not place any objects under the original size detector. Closing the automatic document feeder with an object
underneath may damage the original size detector plate and prevent correct detection of the document size.
• Place 5-1/2" x 8-1/2" (A5) size originals in portrait (vertical) orientation (
).
If placed in landscape (horizontal) orientation (
), an incorrect size will be detected. For an 5-1/2" x 8-1/2"R (A5R)
size original, enter the original size manually.
•
Image rotation
8-1/2" x 11" and 5-1/2" x 8-1/2"R (A4, B5R, and A5R) originals are rotated 90 degrees and transmitted in
8-1/2" x 11"R or 5-1/2" x 8-1/2" (A4R, B5, or A5) orientation. (8-1/2" x 11"R and 5-1/2" x 8-1/2" (A4R, B5, and A5)
originals cannot be rotated for transmission.)
• Originals cannot be scanned in succession from both the automatic document feeder and the document glass and
sent in a single transmission.
System Settings (Administrator): Rotation Sending Setting
This is used to select whether or not a scanned original image is rotated before transmission.
The default setting is: rotate 8-1/2" x 11" (A4) to 8-1/2" x 11"R (A4R), and 5-1/2" x 8-1/2"R (B5R or A5R) to
5-1/2" x 8-1/2" (B5 or A5).
2
Change to Internet fax mode.
(1) Touch the [Mode Switch] key.
(2) Touch the [Internet Fax] key.
1
1
Original size
detector
Transmission
Quick File
File
Special Modes
Address Entry
Address Book
Fax
Data Entry
PC Scan
USB Mem. Scan
Internet Fax
Scan
Mode Switch
Image
Settings
Send Settings
(1)
(2)
Содержание MX 3501N - Color Laser - Copier
Страница 1: ...User s Guide MX 3500N MX 3501N MX 4500N MX 4501N MX 2300N MX 2700N MODEL ...
Страница 2: ...System Settings Guide MX 3500N MX 3501N MX 4500N MX 4501N MX 2300N MX 2700N MODEL ...
Страница 127: ...MX4500 US SYS Z2 System Settings Guide MX 3500N MX 3501N MX 4500N MX 4501N MX 2300N MX 2700N MODEL ...
Страница 173: ... mx4500_us_ins book 44 ページ 2005年10月31日 月曜日 午前11時57分 ...
Страница 174: ... mx4500_us_ins book 45 ページ 2005年10月31日 月曜日 午前11時57分 ...
Страница 176: ...Document Filing Guide MX 3500N MX 3501N MX 4500N MX 4501N MX 2300N MX 2700N MODEL ...
Страница 222: ...MX4500 US FIL Z1 Document Filing Guide MX 3500N MX 3501N MX 4500N MX 4501N MX 2300N MX 2700N MODEL ...
Страница 223: ...Scanner Guide MX 3500N MX 3501N MX 4500N MX 4501N MX 2300N MX 2700N MODEL ...
Страница 354: ...MX4500 US SCN Z2 Scanner Guide MX 3500N MX 3501N MX 4500N MX 4501N MX 2300N MX 2700N MODEL ...
Страница 355: ...Printer Guide MX 3500N MX 3501N MX 4500N MX 4501N MX 2300N MX 2700N MODEL ...
Страница 370: ...15 2 Select 2 sided printing 1 Select 2 Sided Book or 2 Sided Tablet 2 Click the OK button 3 Start printing 2 1 ...
Страница 415: ...MX4500 US PRT Z2 Printer Guide MX 3500N MX 3501N MX 4500N MX 4501N MX 2300N MX 2700N MODEL ...
Страница 416: ...Facsimile Guide MX FXX1 MODEL ...
Страница 605: ...MX FXX1 MODEL MX4500 US FAX Z2 Facsimile Guide ...
Страница 606: ...Copier Guide MX 3500N MX 3501N MX 4500N MX 4501N MX 2300N MX 2700N MODEL ...
Страница 775: ...MX4500 US CPY Z1 Copier Guide MX 3500N MX 3501N MX 4500N MX 4501N MX 2300N MX 2700N MODEL ...
Страница 843: ...MX4500 US USR Z1 User s Guide MX 3500N MX 3501N MX 4500N MX 4501N MX 2300N MX 2700N MODEL ...


