


159
Changing the Name of a Custom Index
You can change the name of a custom index used for individual and group keys.
For the procedure for entering text, see "6. ENTERING TEXT" in the User's Guide.
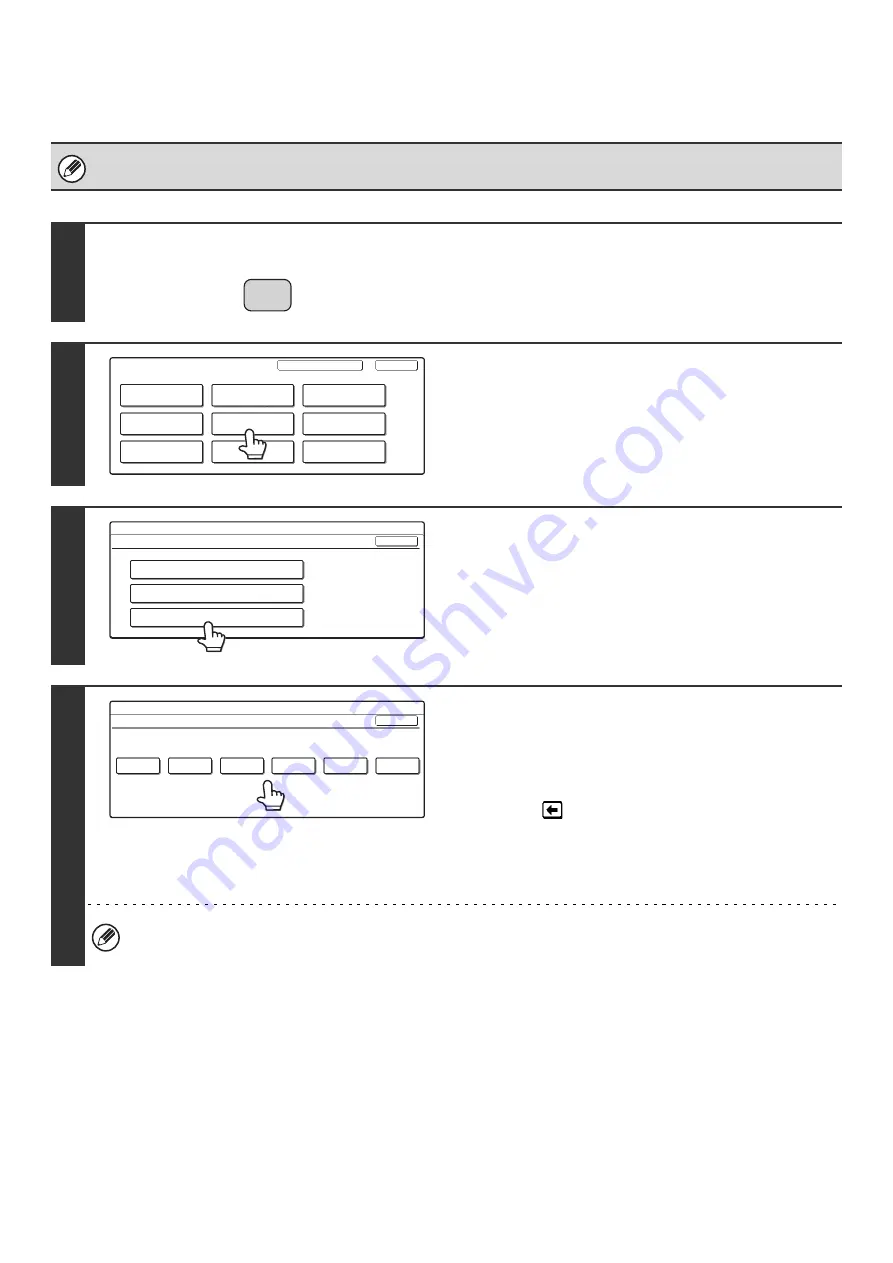
1
Press the [SYSTEM SETTINGS] key.
2
Touch the [Address Control] key.
3
Touch the [Custom Index] key.
4
Change the index name.
(1) Touch the key of the desired index.
(2) Change the index name on the text entry
screen that will appear.
Use the
key to clear the pre-entered name one
character at a time, and then enter the desired name
(maximum of 6 characters).
For the procedure for entering text, see "6. ENTERING
TEXT" in the User's Guide.
• The factory default names for the custom indexes are "User 1" to "User 6".
• To change another custom index, repeat this procedure.
SYSTEM
SETTINGS
System Settings
Admin Password
Default Settings
Total Count
Address Control
Exit
List Print
(User)
Fax Data
Receive/Forward
USB-Device Check
Paper Tray
Settings
Printer Condition
Settings
Document Filing
Control
System Settings
Address Control
OK
F-Code Memory Box
Custom Index
Direct Address / Program
System Settings
Custom Index
Select the key to be custom named.
OK
User 2
User 1
User 3
User 4
User 5
User 6
Содержание MX-2300N Guide
Страница 1: ...User s Guide MX 2300N MX 2700N MODEL ...
Страница 67: ...System Settings Guide MX 2300N MX 2700N MODEL ...
Страница 192: ...Copier Guide MX 2300N MX 2700N MODEL ...
Страница 361: ...Printer Guide MX 2300N MX 2700N MODEL ...
Страница 376: ...15 2 Select 2 sided printing 1 Select 2 Sided Book or 2 Sided Tablet 2 Click the OK button 3 Start printing 2 1 ...
Страница 421: ...Scanner Guide MX 2300N MX 2700N MODEL ...
Страница 552: ...Facsimile Guide MX FXX1 MODEL ...
Страница 741: ...Document Filing Guide MX 2300N MX 2700N MODEL ...