


5-91
ERASING PERIPHERAL SHADOWS ON THE IMAGE (Erase)
The erase function is used to erase shadows on images produced when scanning thick originals or books. (This function
does not detect shadows and will eliminate everything appearing in the erase area - including shadows, text and images.)
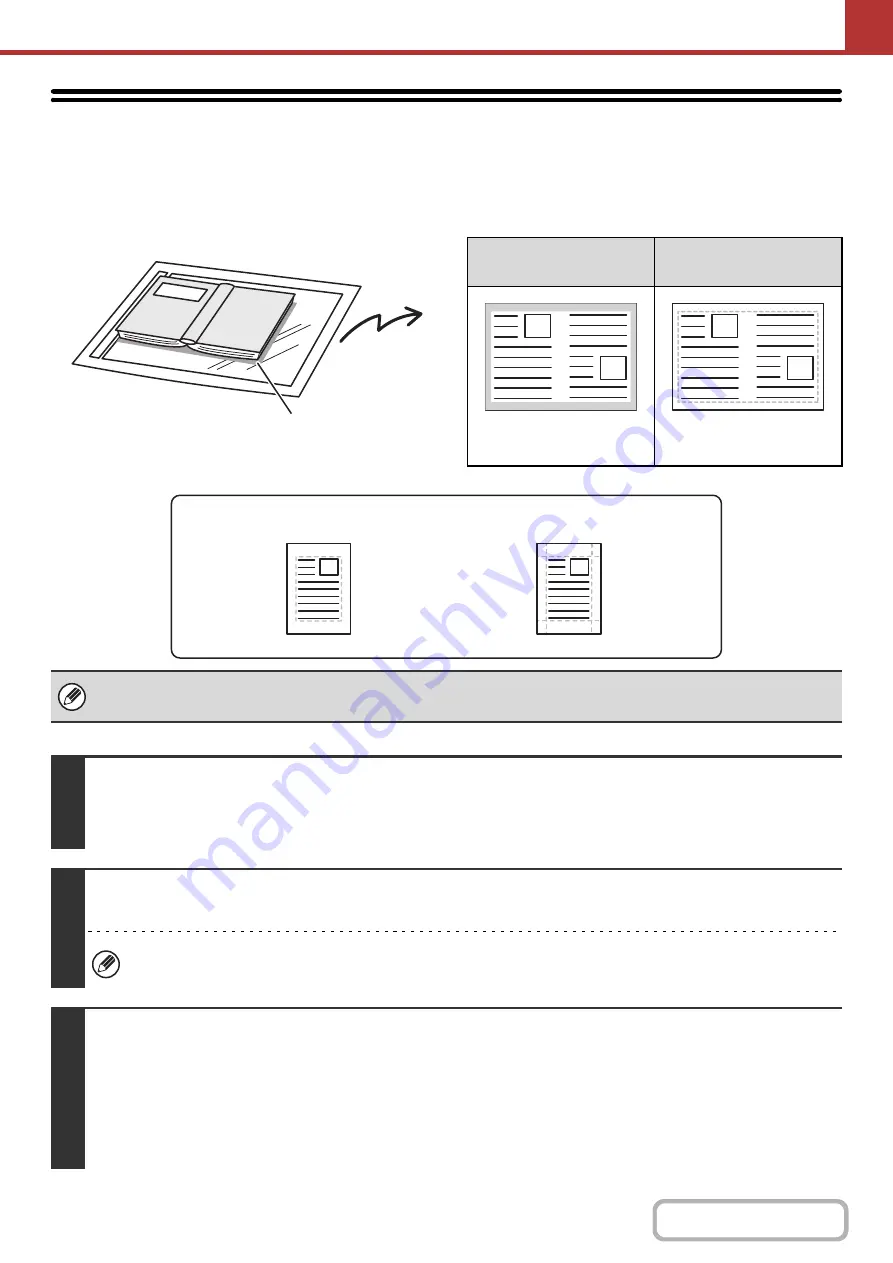
Scanning a thick book
Erase modes
Keys in the display can be selected with the arrow keys and the [OK] key.
Shadows appear here
Not using the erase
function
Using the erase
function
Shadows appear in the
image.
No shadows appear.
• Shadows at the edges of the original can also be erased when the automatic document feeder is used.
• When using USB memory mode, connect the USB memory device to the machine before performing the procedure below.
1
Place the original.
Place the original face up in the document feeder tray, or face down on the document glass.
When the original is a different size than the size setting, set the original size.
☞
SPECIFYING THE ORIGINAL SCAN SIZE AND SEND SIZE
2
Specify the destination.
☞
(page 5-22)
When scanning to USB memory, there is no need to specify the destination. Go to step 3.
3
Select the special modes.
(1) Select the [Mode Switch] key.
(2) Select the mode that you wish to use.
(3) Select the [Special Modes] key.
(4) Select the [Erase] key.
☞
(page 5-77)
Edge Erase
Side Erase
Содержание DX-C310 Operation
Страница 5: ...Make a copy on this type of paper Envelopes and other special media Transparency film ...
Страница 7: ...Assemble output into a pamphlet Create a pamphlet Staple output Create a blank margin for punching ...
Страница 10: ...Conserve Print on both sides of the paper Print multiple pages on one side of the paper ...
Страница 33: ...Search for a file abc Search for a file using a keyword ...
Страница 34: ...Organize my files Delete a file Periodically delete files ...
Страница 226: ...3 18 PRINTER Contents 4 Click the Print button Printing begins ...