


SerVision
Embedded Video Gateway System Guide
Configuring Sensor and Activator Settings
135
Figure 151: Opening the Remote Route Selection utility in SVControlCenter
To upload routes and areas from a GPX file to a Video Gateway:
1. On the right side of the utility, click
Load GPX file
. A Windows
File Selector
dialog box opens.
2. Navigate to the GPX file and select
Open
. The routes and areas it contains are loaded into the utility.
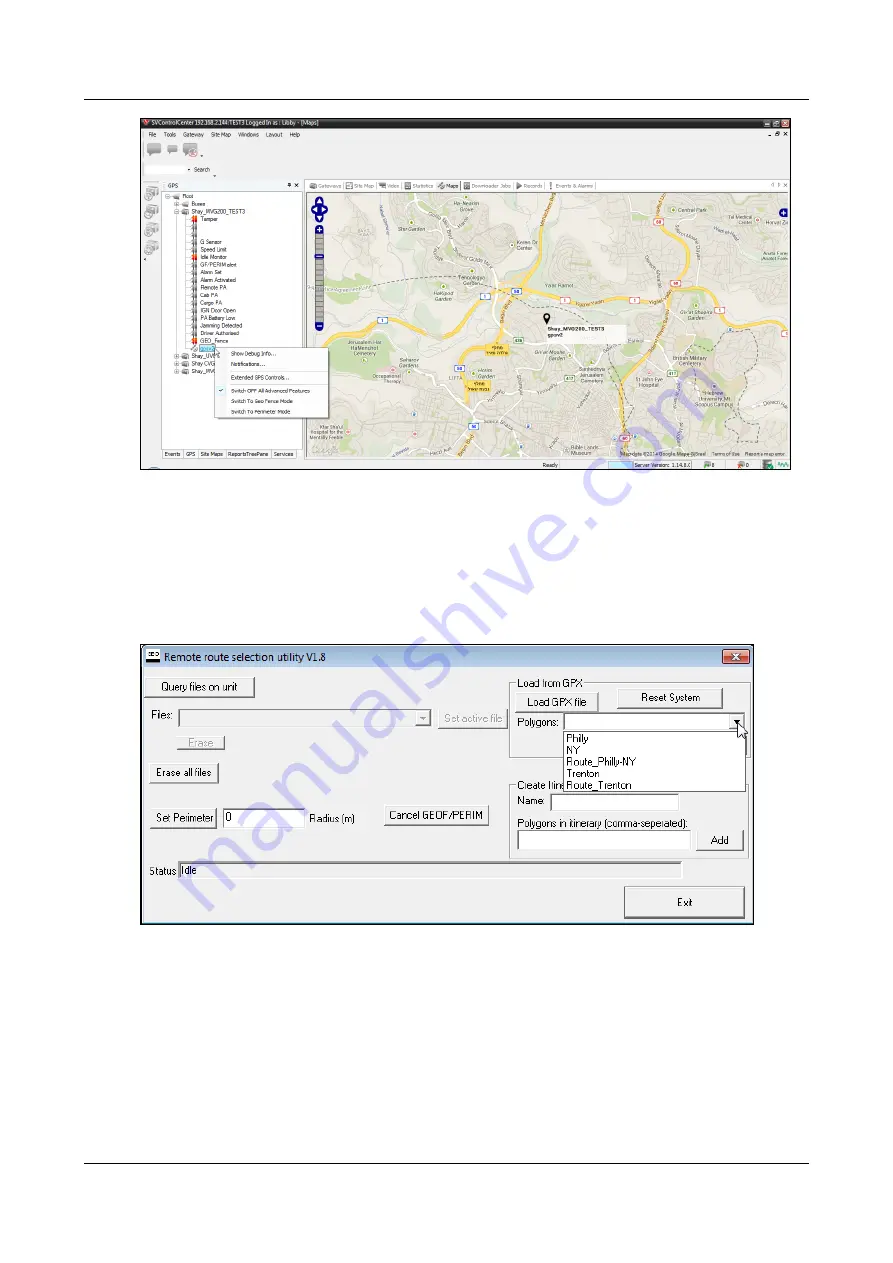
3. Click the
Polygons
field. The routes and areas defined in the GPX file are listed.
Figure 152: Areas and routes defined in the loaded GPX file
4. Select a polygon you want to upload to the Video Gateway.
5. If the polygon you selected is an area, click
Add as Fence
. If it is a route, click
Add as Route
. The polygon is
uploaded, and, after a moment, a confirmation message appears.