background image

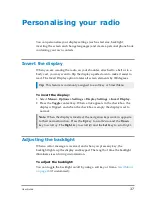
3. Enter characters you wish to filter against (see

Text entry

on page 77

).

The list of matching names is dynamically filtered as characters are
entered. Only matching talkgroups or folders remain in the list.

4. To cancel the filter operation select the

Stop search

option.

Inserting a talkgroup into a folder

If a folder is editable you can use the

Insert

option to insert a talkgroup into

it.

Deleting a talkgroup from a folder

If a folder is editable you can use the

Delete

option to remove a talkgroup

from it. The talkgroup can still be selected from the All folder if customised,
or by entering the talkgroup number directly in the Talkgroup Selection box.

Create a ‘favourite’ talkgroup folder

To quickly access frequently used talkgroups, you can add them to the

Favourites

folder.

1. Select

Menu > Groups > Folders > Favourites

.

2. Press

Options

, then select

Open

.

3. Navigate to the

New Group

option then press

Options

.

4. Press

Insert

.

5. Select the talkgroup you want to add (from any folder).

6. Press

Select

to insert the talkgroup into the Favourites folder.

Tip:

If the

New Group

option is not available, you do not have 'edit'

permissions on the Favourites folder. The Favourites folder must be set to
'Edit' at customisation.

Quick Groups

You can quickly change to a different talkgroup by pressing a customised

Quick Group

soft key specified for that talkgroup.

To select the Quick Group talkgroup

Press the customised

Quick Group

soft key. Alternatively, view the Quick

Group using the menu then press

Select

.

User Guide

49

Содержание SC21 Series

Страница 1: ...SC21 Series hand portable radio ...

Страница 2: ...d personnel and it is intended for the purpose of the agreement under which the information is submitted Any party using or relying upon this information assumes full responsibility for such use and in no event shall Sepura plc be liable to anyone for especial collateral incidental or consequential damages in connection with or arising out of the use of this information The information or statemen...

Страница 3: ...he battery 9 Using Sepura approved batteries 9 Controls indicators 11 Navi knob 11 Navigation Keys 12 Soft keys 12 Context keys 13 Status icons 14 LED indicators 18 Emergency button 19 Getting Started 20 Fitting a Smartcard 20 Antenna 20 Power on 21 Power off 22 Locking and unlocking the keypad 23 Home screen 24 Shortcut Bar 25 Notifications 26 Menu 27 SmartMenus 28 User Guide iii ...

Страница 4: ... Personalising your radio 37 Invert the display 37 Adjusting the backlight 37 Day Night mode 38 Adjusting text and icon size 39 Setting the display language 39 Menu style 40 Time and Date 41 Talkgroups and folders 43 Special folders 44 Typical folder arrangement 46 Talkgroup Selection Mode 47 Folder Selection Mode 52 Contacts 61 Searching and filtering contacts 62 View contact details 63 Creating ...

Страница 5: ... PTT during TMO group calls 75 Text entry 77 Cursor movement 77 Character sets 78 Messages 79 Message Inbox 79 Opening messages 81 View message details 81 Reply to a message 82 Saved messages 82 Picture messages 87 Paging alerts 87 Networks 89 Authentication 89 Change Network 90 Transmit Inhibit 91 Adjusting the DMO power transmission level 91 Fallback Mode 92 Operating Modes 94 DMO Mode 95 User G...

Страница 6: ...ctor 113 User profiles 114 Man Down 115 Lone Worker 118 WAP 119 Using WAP 119 Browser menu 120 Navigation menu 121 Settings 121 History menu 123 Using bookmarks 124 Call handling 125 GPS 128 GPS position 128 GPS direction 129 GPS reporting options 130 Bluetooth 131 Bluetooth on off 131 Audio devices 132 Data devices 134 Modify connected devices 137 Security 138 vi SC21 Series 07 2017 ...

Страница 7: ...yption 139 Zeroising 141 Asset management 142 Labelling 142 RFID tag 143 Customising your radio 144 Revert radio settings to customisation settings 145 Accessories 147 Accessory profiles 148 Belt Clip 149 Shirt Pocket clip 150 Klick fast stud 151 Fit an accessory 153 GLOSSARY 155 User Guide vii ...

Страница 8: ...viii SC21 Series 07 2017 ...

Страница 9: ...times and that local laws governing the use of Radio Frequency RF devices are observed Sepura products are designed for use by mobile workforces often working alone and are intended for use in occupational and controlled conditions It is recommended that you obtain training on how to operate this product Your personal safety could be at risk if you do not understand how to operate this product cor...

Страница 10: ...your organisation or the manufacturer of your medical device before using RF wireless devices Some electronic devices are sensitive to RF energy Always obey signs restricting the use of RF wireless devices Operational conditions Do not exceed the operational conditions for your radio and battery Prolonged exposure to extreme temperatures over 55 C or 131 F for example behind glass in direct sunlig...

Страница 11: ...cycling systems for waste electrical and electronic products By ensuring that this product is disposed of correctly you will help prevent potentially negative consequences for the environment and human health and help conserve natural resources Please dispose of your waste product according to your national and local regulations Contact your service provider or Sepura for information on how to ret...

Страница 12: ...Connector sRAC Provides connection for accessories Remove the cover to fit the accessory Refit the cover when an accessory is not in use 4 Centre context key Groups Status Profiles Press to activate the feature or option that appears directly above the key 5 Right context key Press to activate the feature or option that appears directly above the key 4 SC21 Series 07 2017 ...

Страница 13: ...ld in the hand 13 Tri colour LED indicator Indicates various operational states of the radio 14 Blue LED indicator Indicates a missed event such as a call Callout or message 15 Navi knob A continuously rotating knob used to adjust the speaker volume 16 Side Button A B soft keys Press to activate a programmed feature 17 PTT Press to talk button Press and hold to talk during a group call Release to ...

Страница 14: ...ount of battery charge before lengthy periods of operation A fully charged battery should provide continuous operation for a full shift depending on a number of operational factors such as how the radio is operated the operating environment temperature and network signal strength and the condition of the battery When the radio is powered on the amount of charge remaining may be displayed as a perc...

Страница 15: ...tervals if enabled see GPS reporting options on page 130 Charging the battery Your radio is powered by a rechargeable battery The battery may be recharged many times but it will eventually need replacing to ensure continuous maximum performance from your radio First time battery charging New batteries Standard battery part no 300 01852 and High Capacity battery part no 300 01853 are supplied in st...

Страница 16: ...y may be charged separately from the radio using a battery only charger Charging a flat battery If the battery is completely flat without charge during storage or after a long period of non activity it may fail to recharge or stop charging after 20 minutes If this happens disconnect and then reconnect the charger or power off the charger then power on to reset the battery Tip Avoid charging a flat...

Страница 17: ...tery If a Belt clip or Shirt Pocket clip is attached lift the clip before removing the battery Push the safety latch on the bottom of the battery Lift the battery upwards and remove Using Sepura approved batteries The radio checks the authenticity of the battery when it is powered on and has a number of battery management features that only work when a genuine Sepura battery is fitted User Guide 9...

Страница 18: ...nd could potentially damage your radio invalidating your warranty and affect your radio s safety and IP compliance ratings Getting information about your battery You can see information about the battery attached to your radio such as the remaining battery charge whether the battery is authenticated a genuine Sepura battery and the battery serial number customisable Select Menu Options Battery Inf...

Страница 19: ... volume or enable disable Whisper Mode customisable Rotate Navi knob Move cursor and select characters in text entry mode Rotate Navi knob in Text Entry Mode or Editing Mode Scroll through available talkgroups From the Home screen press Groups rotate the Navi knob Scroll through available Status Messages From the Home screen press Groups 2 times rotate the Navi knob Scroll through available User P...

Страница 20: ...iting Tip When the display is inverted flipped upside down the left and right navigation keys work in opposite directions Soft keys Some keys on your radio may be customised to provide one touch access to regularly used features These programmable keys are referred to as soft keys To activate the soft key function assigned to a programmable soft key press and release assigned to other keys such as...

Страница 21: ...ch you use to select options displayed adjacent to them Context labels appear at the bottom of the screen directly above each context key These labels show the action of the key when it is pressed either activating a feature or performing a function such as clearing a call Clear or selecting an option Select The labels and actions of the context keys in the Home screen are Context key Label Action...

Страница 22: ...e Home screen Status icons Icons appear on the status line at the top of the display when the radio is engaged in certain activities or when certain functions are active Icon Description Security and Emergency Emergency Appears when emergency operation mode is active on your radio and an Alarm call is in progress Air Interface Encryption disabled Calls and Callouts will not be encrypted E2E Encryp...

Страница 23: ...ed an incoming TMO call The blue LED flashes Scanning enabled You radio is scanning listening to all available talkgroups within your scan list for activity Broadcast Call A high priority group call point to multi point initiated by your Dispatcher to all network radio users You cannot reply to the caller Direct Mode Operation DMO Incoming DMO call You are in a DMO call that was initiated by anoth...

Страница 24: ...s Migrated Your radio is registered on a Visited Network Signal Strength Shows the current signal strength More bars indicate a stronger signal Battery Strength Indicates the level of charge in your battery More bars indicates more charge Low battery warning Appears when there is less than 12 charge remaining in the battery Keypad locked Transmit Inhibit Indicates that you have activated transmit ...

Страница 25: ...radio is out of range of a gateway when another radio within range of the gateway is in a group call and you cannot participate in the call and that you cannot take part in the call a radio out of range of the gateway is attempting to respond to a group call and the speech if not being routed using the gateway to TMO users a radio within range of a DMO Repeater cannot make a call and attempts to s...

Страница 26: ...ed Indicates that the GNSS Global Navigation Satellite System function has been enabled GPS tracking not available LED indicators Blue LED The blue LED indicates either a missed event such as a missed call or unread message or your Bluetooth status if enabled Notifications alerting you to the missed calls Callouts or unread messages appear in the Shortcut Bar See Notifications on page 26 LED Indic...

Страница 27: ...ng telephone call or SDS Status message Intermittent four flashes orange Transmit Inhibit mode or Fallback mode are active Emergency button The button on your radio is typically programmed to activate an Alarm Call See Emergency operation on page 30 Press and hold 2 seconds the Emergency button to initiate an Alarm Call If the radio is powered off press and hold 3 seconds to power on and initiate ...

Страница 28: ... unlock and then lift the card holder to open it 2 Insert the card 3 Close and slide to the card holder right to lock Antenna Caution Your radio must be fitted with an antenna at all times unless your radio is used with an external antenna such as an RSM during operational periods Transmitting without an antenna attached may damage the product Your radio is designed for use with Sepura approved an...

Страница 29: ...ved from the radio Power on To power on press and hold 2 seconds the Cancel Home key Your radio attaches to the last selected talkgroup when it is powered off if it is in service This is customisable Depending on your radio s customisation any of the following may display the percentage of charge remaining if a Sepura battery is fitted a company logo a splash screen a welcome screen a PIN entry sc...

Страница 30: ...en the radio is powered on and it is the same accessory that was attached at power off the radio will continue to operate using the selected accessory profile See Accessory profiles on page 148 Power off Note Do not power off the radio by removing the battery The radio must be powered off correctly to ensure that it performs a controlled powered down To power off from the Home screen press and hol...

Страница 31: ...lso be customised so that you can press the Cancel Home key to reject the call and in this case the keypad remains locked Navi knob with locked keypad Your radio may be customised so that the Navi knob is locked when the keypad is locked In this case you cannot alter the volume by rotating the Navi knob Your radio can also be customised so that the Navi knob remains unlocked and in this case it ca...

Страница 32: ...rs when the radio powers on and when it is idle Tip To quickly get back to the home Screen press and hold 2 seconds the Cancel Home key The status line at the top of the screen displays various icons to indicate the state of operation or when certain functions such as keypad lock have been activated It can also be configured to display the Network Name when the radio is idle The context key labels...

Страница 33: ... folder and network name Mobile Network Code Alias 3 Context key options available in the Home screen Shortcut Bar You can easily access commonly used radio features such as your Inbox and turn features on and off using the Shortcut Bar The Shortcut Bar can contain up to 5 radio features and some of these can be paired with notifications to alert you to a missed call or a new message in your Inbox...

Страница 34: ... shortcuts commonly used radio features Some features can be paired with notifications such as your Inbox so when a message is received a notification appears in the Shortcut Bar to alert you to the unread message When paired with a feature the feature icon appears with a notification badge Notifications paired with features appear to the left of all other feature icons The following notifications...

Страница 35: ...r personal contacts within your personal folder Search or filter your contacts to locate the contact you want and initiate a call Review you call history Messages Read create save and send text SDS messages View picture messages if customised Clear your mailbox of unwanted messages Groups Search your talkgroup folders and select a talkgroup Enable scanning of your selected talkgroups Set up your s...

Страница 36: ... as a list of customised soft keys on your radio SmartMenus SmartMenus are designed to provide quick access to regularly used radio features usually with a common theme Your service provider or organisation may customise your radio with a number of SmartMenus for example you may have a SmartMenu containing all your Quick Status messages another for user profiles and another for selecting operation...

Страница 37: ...ys on the keypad press 0 for option 10 the Star key for option 11 and the Hash key for option 12 For options numbered 13 onwards scroll to the option highlight it and press Select Help The Help menu displays a free text area which is usually customised to indicate radio soft key assignments It may also be used to record any required help text To access help Use one of the following Press the Up na...

Страница 38: ...pendent If you are working in RF sensitive areas and have enabled Transmit Inhibit prohibiting radio transmission initiating an Alarm call will override the Transmit Inhibit feature and the Alarm call will be transmitted Your service provider or organisation can provide information on how your radio is customised for Alarm calls and how to operate your radio in emergency situations If you are work...

Страница 39: ...e expires or by pressing the PTT button Making an Alarm call You can still make an Alarm call if the keypad is locked To make an Alarm call 1 Press and hold 2 seconds the Emergency button a confirmation beep sounds 2 Release the button and speak into the microphone During an Alarm call the microphone is live for a programmed period seconds allowing you to speak hands free without pressing the PTT ...

Страница 40: ...TETRA Alarm call on the call originator s radio it will not remove the alarm from the system Radios alerted to the emergency may depending upon the infrastructure configuration remain in the TETRA Alarm call condition until the dispatcher clears the call from the system When the Alarm call is cancelled your radio returns to the talkgroup that was selected before the call was initiated Power on Ala...

Страница 41: ...User Assignment RUA which authenticates your radio on the network you may be prompted to log on to your network before the Alarm call is initiated Contact your service provider for information See Authentication on page 89 User Guide 33 ...

Страница 42: ...plays to indicates the current volume level The radio sounds an audible tone at the new volume level Note Adjusting the volume of an audio accessory is achieved using Accessory Profiles See Accessory profiles on page 148 Loudspeaker on off Tip A soft key may be customised to toggle the speaker on and off 1 Select Menu Options Settings Loudspeaker ON OFF 2 Press Toggle or press the Select Send key ...

Страница 43: ...press a programmed soft key increase the volume until the volume level meter displays at least the minimum level increase the volume to its loudest level then attempt to increase the volume further The radio sounds a low high level alert when Whisper mode is disabled Audible tone alerts Certain events on your radio initiate audible tone alerts These alerts are attenuated when you select a user pro...

Страница 44: ...ividual half duplex or full duplex calls Vibrator Data vibrate on incoming SDS or Status messages Vibrator Alarm Key vibrate when Emergency Button is pressed Vibrator Key Press vibrate when any key except Emergency Button and PTT is pressed 2 Press Toggle or the Send Select key to enable disable it as required 3 To return to the Display Settings menu press Back or the Cancel Home key Tip To stop t...

Страница 45: ...ttings Display Settings Invert Display 2 Press the Toggle context key When a tick appears in the check box the display is flipped and when the check box is empty the display is set to normal Note When the display is inverted the navigation keys work in opposite to their normal function Press the Up key to scroll down and the Down key to scroll up The Right key to scroll left and the Left key to sc...

Страница 46: ... working conditions Night mode reduces the glare from the display making it ideally suited for night time use When the preferences for day and night mode have been set switching between the modes automatically adjusts the backlight and display settings To change Day Night mode settings 1 Select Menu Options Settings Display Settings Day Night Mode 2 Scroll to each option highlight it to make your ...

Страница 47: ...th all other screens in Large mode Custom displays the Home screen menu and WAP browser in predefined text sizes set during customisation Only the Home screen supports Very Large mode with other screens set to either Normal or Large mode Note Depending on the customisation of the Home screen if the date is shown on the Home screen it may be truncated in Very Large Mode If the date format YYYY MM D...

Страница 48: ... the language option and then press the Select context key The Home screen appears and the display shows the selected language Menu style You can display the menu in Grid List or Compatibility style 1 Select Menu Options Settings Display Settings Menu Style 2 Select one option Grid set Grid menu style List set List menu style Card set Card Compatibility menu style Grid style highlight items using ...

Страница 49: ...en press Cancel or Cancel Home key Time and Date Your radio can be customised to display the current time and date on the Home screen The time is shown in 24 hour format The day and month appear in alphanumeric characters for example Wednesday 20 May Your radio may be customised to use shortened forms for the day Wed To view and edit the time and date 1 Select Menu Options Settings Time and Date 2...

Страница 50: ...4 Press OK or the Select Send key to save your changes press Cancel or the Cancel Home key to abandon your changes 42 SC21 Series 07 2017 ...

Страница 51: ...op level folder can have a number of sub folders similar to a folder structure on a computer and a folder can contain both folders and talkgroups If a folder contains sub folders and talkgroups two tabs appear one for sub folders and the other for talkgroups You can use the Left or Right navigation keys to switch between the tabs Your radio may be customised for Talkgroup Selection Mode or Folder ...

Страница 52: ...lkgroup programmed into your radio including those in special folders Only available on radios customised for Talkgroup Selection mode DGNA contains up to 50 dynamically assigned groups The contents are automatically maintained by the radio and are not customisable in Talkgroup Selection Mode You can select a DGNA talkgroup In Folder Selection Mode the scan state scanning enabled or disabled of a ...

Страница 53: ...Background talkgroups which the radio scans continuously for activity You cannot select a background talkgroup in this folder as your requested talkgroup User Guide 45 ...

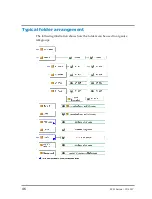
Страница 54: ...Typical folder arrangement The following illustration shows how the folders can be used to organise talkgroups 46 SC21 Series 07 2017 ...

Страница 55: ... the current network The scan list allows you to set scanning priorities on the talkgroups so the radio can prioritise calls between the scanned talkgroups See User Defined Scan Lists on page 50 Selecting a Talkgroup You can use one of the following methods to select a talkgroup From the Home screen press Groups From the Menu navigate to the Groups menu Use a soft key to return to your Quick Group...

Страница 56: ...kgroup name indicate the rotational direction of the Navi knob 3 Press the Select context key to attach to the talkgroup Opening a folder 1 Select Menu Groups Folders 2 Highlight a folder and press Open Tip To navigate back up the folders list press Back Searching for folders and talkgroups You can search for talkgroups or folders by filtering on a text string Items which do not match the string a...

Страница 57: ... box Create a favourite talkgroup folder To quickly access frequently used talkgroups you can add them to the Favourites folder 1 Select Menu Groups Folders Favourites 2 Press Options then select Open 3 Navigate to the New Group option then press Options 4 Press Insert 5 Select the talkgroup you want to add from any folder 6 Press Select to insert the talkgroup into the Favourites folder Tip If th...

Страница 58: ...s a list of talkgroups which are either fixed or user definable Any talkgroups in the UDSL that are invalid for the current network are disabled and are shown greyed out in the talkgroup list Until a UDSL is selected the talkgroups it contains are not scanned and your radio cannot receive calls from them Your radio can have a maximum of 20 UDSLs and up to 10 talkgroups can reside within each UDSL ...

Страница 59: ...DSL View and edit scan list 1 Select Menu Groups Scan Lists 2 Use the Up and Down navigation keys to select one of the UDSLs and press Open 3 Press Edit Change default selected talkgroup 1 Use the Up and Down navigation keys to select one of the talkgroups in the UDSL 2 Select Edit Options Select 3 Select Edit Options Save Add a talkgroup 1 Press Options Add 2 The talkgroup selection box is activa...

Страница 60: ... talkgroup and or one selected DMO talkgroup which the radio uses to make calls When a folder is selected and a talkgroup within that folder is selected as the requested talkgroup they appear on the Home screen If a folder is not selected when the radio powers on the message No Folder appears on the Home screen When a folder is selected that does not have a selected talkgroup the message No Select...

Страница 61: ... list that the radio uses to prioritise calls If a talkgroup is editable2 you can change its scan state to enable or disable scanning change its scanning priority see Scanning talkgroups on page 57 and select or deselect it A talkgroup can be copied from a folder to another editable folder3 for example you can copy talkgroups from Special folders such as the Always Attached folder into a generic f...

Страница 62: ...A Always Attached Background or Smart Call folder as your selected folder Tip A talkgroup within the folder must be selected before you can make calls See Selecting a talkgroup on the facing page To select a folder using the folder list 1 From the Home screen press Menu then select Groups Folders to open the current folder 2 Press Back to navigate back up the folders list 3 Scroll to the folder hi...

Страница 63: ...older ID Every folder has a unique identification number ID and you can use this ID to quickly select the folder Press the assigned soft key to open the Folder ID box Enter the number of the folder the name of the folder appears and press Select The folder is now your selected folder and the selected talkgroup within the folder is your requested talkgroup Tip If the folder name does not appear whe...

Страница 64: ...icate the rotational direction of the Navi knob 3 Press Select to attach to the talkgroup The talkgroup appears in bold typeface If you have selected a TMO talkgroup an icon appears to the left of the talkgroup name indicating the scanning priority and whether or not the talkgroup is scan enabled no icon appears for DMO talkgroups Copy a talkgroup to another folder Sometimes you may want to copy a...

Страница 65: ...open the current folder If you want to open another folder press Back to navigate up the folder list select the folder and then press Open 2 Select highlight the talkgroup you want to copy 3 Press Options scroll to the Copy option and press Select 4 A list of available folders appears Scroll to the folder you want to insert the talkgroup in to and press Select A green tick is displayed if the talk...

Страница 66: ...en another folder press Back to navigate up the folder list select the folder and press Open 2 Select the talkgroup you want to scan and press Options then select the Scanned option and press Select The scanning icon appears in the right hand corner of the scan priority icon Tip To stop scanning a talkgroup select the talkgroup and press Options scroll to the Not Scanned option and press Select To...

Страница 67: ...ers When all the folders are restored the DGNA folder is emptied of talkgroups and the radio will reboot on completion of restoring the folders 1 From the folder list press Options then scroll to the Restore Defaults option and press Select 2 Scroll to the Restore All Defaults option and press Select Press Select to confirm the request to reset all folders Viewing attached groups You can quickly v...

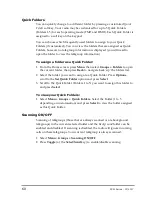
Страница 68: ...ck to navigate back up the folders list 2 Select the folder you want to assign to a Quick Folder Press Options scroll to the Set Quick Folder option and press Select 3 Scroll to the Quick Folder Folders 1 to 5 you want to assign this folder to and press Select To view your Quick Folders 1 Select Menu Groups Quick Folders Select the Folder 1 to 5 depending on customisation and press Select to view ...

Страница 69: ... radio or to a telephone of the first number associated with it Contacts are arranged in a series of up to 64 folders including the following All contains all contacts in the Phone book Menu contains options to create and delete contacts in your Personal folder Search allows you to search the entire Phone book for contacts and numbers Initially lists the names of all the folders in the phone book ...

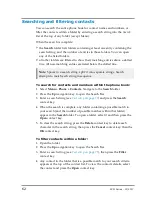
Страница 70: ...avigate to the Search folder 2 Press the Up navigation key to open the Search Bar 3 Enter a search string see Text entry on page 77 and press the Search context key 4 When the search is complete any folder containing a possible match to your search and the number of possible matches within that folder appear in the Search folder To open a folder select it and then press the Open context key 5 To c...

Страница 71: ... create are added to your Personal folder To create a contact 1 Select Menu Phone Contacts 2 Navigate to the Menu card and select Create Contact 3 Enter the contact name see Text entry on page 77 then press the Save context key 4 Select a dial mode for this contact either TETRA Network default or telephone mobile network To change the dial mode press the Up navigation key to select the dial mode l...

Страница 72: ...t personal contacts 1 Select Menu Phone Contacts and then select the Personal folder 2 Navigate to the contact you want to edit then press Open To edit the name 1 Select the name and then press Edit 2 Make changes as required then press Save To edit a number 1 Select the number and then press Options Select Edit and press Select 2 Make changes to add additional digits press the number keys to dele...

Страница 73: ...ersonal folder Tip You can also delete individual contacts or numbers associated with them see Editing contacts on the previous page To delete all contacts 1 Select Menu Phone Contacts 2 Navigate to the Menu card then select Delete User Contacts User Guide 65 ...

Страница 74: ...ubscriber via the Gateway Full duplex and half duplex calls are supported Individual calls to outside the TETRA network can be made between a terminal or a dispatcher and a telephone subscriber in a network to which the TETRA network has a gateway interface These calls are always full duplex A full duplex call is one in which both parties can speak at the same time The Select Send and Cancel Home ...

Страница 75: ...rt call priority can have a call priority value from 0 undefined to 15 pre emptive priority 4 emergency in TMO and to a value from 0 undefined to 3 Emergency pre emptive priority call in DMO Alarm Call The Alarm Call has the highest call priority in TETRA Usually initiated by pressing the Emergency Button Alerts all other radio users on the talkgroup of the emergency situation Data call types Data...

Страница 76: ...eleted if you do not switch off your radio correctly using the Cancel Home key To display the call history Select Menu Phone Call History To display the call information Select a call in the call history list then press Open To make a call from call history See Individual calls on page 70 Group calls Group point to multipoint calls are calls where you talk to other users within a nominated group o...

Страница 77: ...anges to solid green whilst the group call is active and your radio status text changes to Group Call 3 When you have finished your call press the Clear context key You can also clear the group call by pressing Clear Call soft key if customised Cancel Home key Receiving a group call When a group call is received the LED flashes red and your radio status changes to Group Call The name of the talkgr...

Страница 78: ...r phone book or the ISSI of the caller Privacy mode You can press a customised Privacy Mode soft key before dialling or during a call to prevent interruptions from other calls during important or sensitive call When you have Privacy Mode enabled calls made to your radio are marked as missed calls see Call History on page 68 Making individual calls half duplex mode Calling a contact 1 Select Menu P...

Страница 79: ... full duplex mode Calling a contact 1 Select Menu Phone Contacts to open the contacts menu 2 Navigate to a contacts folder such as the All folder and select your contact Press the Open context key then choose the phone number 3 To initiate the phone call press the Dial context key 4 To end the call press the Clear context key or the Cancel Home key Note If your radio has been customised with a sin...

Страница 80: ...e answered before any alerts are audible Answering phone calls in half duplex mode You can answer an incoming full duplex phone call as a half duplex call This is useful for example where a full duplex call could pick up too much background noise for clear communications 1 Press the PTT button to answer the call in half duplex mode 2 Continue as for Group calls and individual half duplex calls To ...

Страница 81: ... a position report Note Quick Calls cannot be made from a radio which is making or receiving an emergency call or if your radio is in Transmit Inhibit mode See Emergency operation on page 30 and Transmit Inhibit on page 91 Smart Calls A Smart Call is a high priority group or broadcast call to a specific talkgroup This can be useful for example where you need to make an announcement to everyone in ...

Страница 82: ...lect context key or the Select Send key to transmit to the chosen talkgroup To leave Smart Call Mode 1 Open the Smart Call menu either of the following Press a preconfigured soft key Use the Speech Call Settings menu see Speech call settings below 2 Select Group or Individual Group returns you to your previous talkgroup Individual allow you to make an individual call by dialling Speech call settin...

Страница 83: ... half duplex you need to press PTT before starting to speak releasing the PTT allows other parties to take the speech item and the top microphone and half duplex loudspeakers are used Tip When a radio is worn attached to your body a half duplex to full duplex call modification can be difficult to handle since the latter is a telephone type call To overcome this your radio can treat the full duplex...

Страница 84: ...s you to respond to the call Your radio provides a notification message to show the change of PTT behaviour either to selected group or to received group When the call is terminated the behaviour of the PTT button reverts to that selected using the menu option Note If your radio is operating in Gateway mode the radio can only respond to group calls in the selected talkgroup to selected group To se...

Страница 85: ...nter special characters To insert punctuation full stop comma or semi colon press zero 0 repeatedly until the symbol is highlighted in the Character Selection Box then press the Select context key or wait for the character to be auto inserted To insert a space press 1 on the keypad To insert symbols press the hash key repeatedly until the symbol is highlighted in the Character Selection Box then p...

Страница 86: ...er set Description Auto capitalisation Abc The first letter is entered in upper case with all following characters in lower case New sentences start with a capital letter and end with a full stop question mark or exclamation mark followed by one or more spaces Upper case ABC All characters are entered in upper case Lower case abc All characters are entered in lower case Numeric 123 All characters ...

Страница 87: ...b for example if there are 5 messages in your Inbox a new message will appear on tab number 6 If you want to read older messages use the navigation keys to scroll through the message tabs Unread message appear on black labelled tabs Note To keep the Inbox to a manageable size it is recommended that messages are deleted or saved after reading them See Saved messages on page 82 When a new message ar...

Страница 88: ... message Its contents are lost or damaged Saved Messages is nearly full to capacity customisable SDS message with Paging Alert unread SDS message with Paging Alert Picture message unread Picture message Inbox operations You can perform a number of functions from the Inbox With a message selected press the Options context key to perform one of the following functions Open the message View the messa...

Страница 89: ...Open your Inbox see To open the Inbox on the previous page 2 Select a message then use Options Details 3 To exit the Details screen press Cancel Item Description 1 Message location Inbox 2 Size Note this is a relative measure of the message size not number of characters You can use Size to decide which message s to delete if Saved Messages becomes full see Message Inbox on page 79 3 Sender 4 Time ...

Страница 90: ...your radio has been customised to do so URLs in text messages can open automatically in the WAP Browser when they are received Saved messages You can save up to 50 messages in your Saved messages folder When the remaining space is insufficient to save a particular message an error is displayed which indicates the amount of space required to store the current message Delete one or more messages to ...

Страница 91: ...r message text see Text entry on page 77 3 EITHER send the message immediately save the updated message Tip To return to the top level menu screen either wait for the inactivity timer to expire or press and hold the Cancel Home key or press and hold the clear soft key To send the message immediately See Sending messages on the next page Tip You can set an option to confirm that the message has bee...

Страница 92: ...ation you key in Note For setting default destination see Set default destination on page 86 1 Choose one of the following methods Create a text message described on the previous page Select a saved text message Select a status message from the Send Status List 2 Select Send or Options Send 3 Select a destination see below Send to default destination Select Send to Default then select Send The mes...

Страница 93: ...ar Press Shortcut to open the Shortcut Bar then select Quick Status if customised From the Home screen 1 In the Home screen double press the Groups key 2 Press the Left and Right navigation keys to scroll through the status messages 3 To send the message press Send then select Send to default or choose another destination such as your talkgroup contact in your phone book or dial the number Soft ke...

Страница 94: ...e cause a pop up box to open when sent messages are successfully delivered and read respectively 1 Select Menu Messages SDS Report Status 2 Navigate to a report type and press Toggle to toggle the report on ticked and off Set default destination You can enter and update the default destination address that your radio offers when you send a status or SDS message This can be either a talkgroup or an...

Страница 95: ...ts feature allows the radio to act as a pager when it is in normal operating mode or when you select a user profile which results in the radio appearing to be switched off See User profiles on page 114 The Paging Alerts feature is triggered by receipt of a Status message which is automatically displayed If there is also an associated SDS message to explain the reason for the Paging Alert this is a...

Страница 96: ...Tip Your radio can be customised so that a Paging Alert automatically makes it fully operational on receipt of the Status message which triggered the Paging Alert 88 SC21 Series 07 2017 ...

Страница 97: ...n identify you by you user name TETRA services including individual voice and data Status and SDS communication can be set up using your user name provided your user name and your corresponding user ISSI are in the Phonebook Caution If you power on your radio using the Emergency button you must log on to the network before an Alarm call can be initiated Note Network log on off may be initiated by ...

Страница 98: ...group selection see Talkgroups and folders on page 43 Tip Your radio can be configured to display the Network Name continuously on the Radio Status Line RSL subject to space when it is idle Tip If your radio registers on a Visited Network network the Migrated icon is displayed in the Radio Status Line RSL To manually change network 1 Select Menu Networks Change Network 2 Navigate to the required n...

Страница 99: ...4 Note Your radio automatically leaves Transmit Inhibit mode when you power it off when powered on again Transmit Inhibit is not activated To activate or deactivate Transmit Inhibit mode 1 Select Menu Networks Transmit Inhibit 2 Select Toggle to toggle Transmit Inhibit on off When Transmit Inhibit mode is activated The Transmit Inhibit icon appears in the Shortcut Bar as a notification or the stat...

Страница 100: ...t any radios using the base station will continue to operate but with a reduced service This is known as Fallback Mode The base station broadcasts the loss of communication to all radios which are using it In Fallback Mode your radio can only communicate with other radios that are registered on the same site no inter site communication is available When your radio enters Fallback Mode the radio st...

Страница 101: ...the tri colour LED stops flashing a text box pops up indicating normal operation the radio generates a warning tone User Guide 93 ...

Страница 102: ... In Repeater mode your radio enables two or more radios operating in DMO mode to communicate over an extended range automatically relaying voice and messages by operating as a repeater See also Repeater Mode on page 97 To change operating mode from the Home screen Press the Menu context key then select Networks Operating Mode Scroll to the mode highlight it and press Select Alternatively a soft ke...

Страница 103: ...group or if customised may switch to TMO to make the call If TMO is unavailable Alarm Calls are made using DMO See Emergency operation on page 30 Individual calls Your radio can be customised to allow you to make individual calls to other radios working in DMO which are attached to the same talkgroup In this case individual calls are initiated by pressing the PTT key See Making individual calls ha...

Страница 104: ...r user who is in range of a gateway and who is involved in a group call via the gateway In this case the Communication Mismatch icon is displayed to indicate that you cannot take part fully in the call If you attempt to respond to the overheard speech any radios within gateway range which can hear you also display a Communication Mismatch icon to tell them that the speech is not being routed via t...

Страница 105: ...d in radio contact before it attempts to set up the call GW Rep Filter Specify whether your radio uses or ignores any gateway and or repeater it detects In the Gateway Repeater Filter screen select one of the following options No GW Rep do not use any gateways and repeaters detected by your radio Use Repeater Use repeaters detected Use Gateway Use gateways detected Note If the radio selects a gate...

Страница 106: ...and C even though they are out of range of each other You can also use a repeater to enable communication between two radios which cannot communicate directly perhaps because their users are do not have line of sight with each other The following diagram shows radios A and B and a repeater which are on the same DMO talkgroup A and B are in range of the repeater Because of its location the repeater...

Страница 107: ... phonebook view the library of pre defined Status messages Participating in repeated calls A radio in Repeater Mode may depending on its customisation operate either as a Standard Repeater or as a Repeater with Call Participation Standard Repeater If your radio is configured to operate as a Standard Repeater you cannot take part in calls which are being relayed through it User Guide 99 ...

Страница 108: ... time or as a permanent installation in a remote location we recommend that you configure it as required select and attach the required Direct Mode talkgroup and then power the radio off This will save the configuration each time the radio is powered on again it will re start with the saved configuration This will ensure that the radio is always running with the correct repeater configuration even...

Страница 109: ...eral states of operation depending upon the status of calls through the repeater and whether it has detected other users of the direct mode channel These states are reported as the following top level screen messages Message Description Ready Repeater The repeater is ready and has no calls in progress Busy DMO Channel The repeater has detected that the DMO channel is being used In this case repeat...

Страница 110: ...ting distracted and to focus your attention on an incident To view Callout messages Press Menu then select Phone Callout Alternatively press the Up navigation key or Shortcut to open the Shortcut Bar then select Callout If Callout messages have been received they are listed with Callout icons on page 108 To see the options for a Callout Highlight a Callout and press Options OR press the Select Sen...

Страница 111: ...only one acceptance message is programmed in your radio an informative message is displayed to show that it has been sent to the originator of the Callout If multiple messages have been programmed select one of them and press Select to send it Alternatively if customised you can compose and send a free form text message Depending how the Callout has been configured it may either exit once the acce...

Страница 112: ...e message was received the severity of the Callout Alert the Callout ID icons to show whether the Callout is to a group or an individual whether the Callout is incoming or outgoing whether or not the Callout is End to End Encrypted User Response Allows you to compose and send a free form text message to the originator of the Callout customisable Callouts not requiring a response Some Callouts do n...

Страница 113: ...up or an individual whether the Callout is incoming or outgoing whether or not the Callout is End to End Encrypted Callout Test alert If you receive a Callout Test Message either respond or cancel the alert to cancel the Callout Test alert press the Cancel context key The Callout exits and the radio displays the top level screen You can still view the details from Messages Callouts to indicate tha...

Страница 114: ...ss the Back context key to display the previous screen When a Callout ends When a Callout times out or is cleared by the Callout originator the Callout ends your radio displays the top level screen and the functionality which had been suspended is restored Protected Callout Mode When it receives a Callout alert your radio goes into Protected Callout Mode and many features are disabled for a set ti...

Страница 115: ...has ended select Messages Callout The blue LED flashes and the Missed Call and or Missed Callout icons display after the new Callout has ended Missed Callouts To view information about the missed Callout select Menu Messages Callout Your radio ignores Callouts received when any of the following functions are active Ongoing Alarm Call a highest priority call Alarm Call Quick Call when customised as...

Страница 116: ...header text customisable 6 Information icons 7 Backdrop image customisable radios with colour display only Indicates severity of the Callout 8 Date received 9 Explanatory text about the Callout 10 Left Right Navigational keys available for more options Callout icons Icon Description Callout Alert message response required Missed Callout Callout Alert message user response has been sent 108 SC21 Se...

Страница 117: ...on active Either the Callout originator or the receiving radio has End to End Encryption switched off The Callout is addressed to an individual The Callout is addressed to a group Left and Right navigation keys The left and right arrow icons are displayed between the Context keys during Protected Callout Mode when there are more options than are shown on the Context keys EITHER Press the Left or R...

Страница 118: ...ing a group call the ISSI or shortened ISSI or identity of the transmitting party is displayed in place of CALLOUT on the Radio Status Line at the top left of the screen When the Callout has exited depending on the customisation the radio either reattaches to the group it was attached to before receiving the Callout or remains attached to the new group Information Phase Some Callouts do not exit a...

Страница 119: ...llout Alternatively you can select from a list of preconfigured messages Select View Response to check the complete message text before sending it Accept Sends an acceptance message to the originator of the Callout Reject Send a rejection message You are notified by an informative message confirming that the rejection message has been sent to the originator of the Callout and your radio exits from...

Страница 120: ...icons to show whether the Callout is to a group or an individual whether the Callout is incoming or outgoing whether or not the Callout is End to End Encrypted 112 SC21 Series 07 2017 ...

Страница 121: ...ccurs which turns on the back light Connector Protector When working in salt water environments or in an area with high salt laden humidity such as sea mist or fog enabling the Connector Protector feature will protect the Digital Accessory connector sDAC from potential corrosive damage when an accessory is not attached Note A cover must be fitted to the Rugged Accessory Connector RAC on the side o...

Страница 122: ...ry to re enable Connector Protector Tip If the water drop icon is displayed on a radio the radio cannot be programmed User profiles User profiles are pre set combinations of alerts and settings on your radio They allow you to switch settings easily to match your circumstances or environment An icon showing the number of the profile selected appears on the status line or the Shortcut Bar Up to ten ...

Страница 123: ...rom being connected to your radio Note Any calls made to a radio which has Group Focus selected are not recorded as Missed Calls Do Not Disturb This user profile allows you to focus on an important task It assumes you do not want to be distracted by a call or alert on your radio The profile sets your radio so that no incoming calls are allowed except calls from the current talkgroup Group Focus ab...

Страница 124: ...larly to ensure they are functioning correctly Warning Once started the Man Down Alarm sounds either until you switch it off see Cancelling false alarms on the facing page or until the battery runs down Ensure that the battery is charged regularly and check that it has as much charge as possible before activating Man Down Note Man Down is disabled if the radio is placed in a car kit or charger Not...

Страница 125: ...onsidered to have occurred and depending on the customisation of your radio various automatic actions are initiated For example an Emergency Status message may be sent to a pre defined destination To switch off the Man Down Alert false alarm situation press a designated key which is different from the soft key used to switch Man Down on and off or move the radio vigorously for a short period of ti...

Страница 126: ...which you must acknowledge usually by pressing a pre programmed key otherwise the radio sends an emergency status message to your dispatcher To enable Lone Worker scroll to a user profile which has Lone Worker enabled then press the Select context key See User profiles on page 114 To disable Lone Worker mode repeat the process and choose a different user profile 118 SC21 Series 07 2017 ...

Страница 127: ... the browser Exit at any time by pressing Back or the Cancel Home key if customised Navigation Press the Left navigation key to display the previous screen page and the Right navigation key to display the next screen page Entering text If customised your radio supports the entering of text to specify a URL and entering of data into a form and so on See Text entry on page 77 Saving check box or rad...

Страница 128: ... browser displays the last page viewed Bookmarks Select to view all the available bookmarks some of which may be collated into bookmark folders If customised you can create edit and delete bookmarks and bookmark folders and organise the bookmarks into different folders If there are no saved bookmarks the browser displays the bookmarks page and a warning message See Using bookmarks on page 124 Sett...

Страница 129: ...ptions to move to the next or previous page in the History if more than one page is stored in History Reload Reloads the current page Settings Selecting Settings from the Browser menu provides access to the Advanced settings Advanced Settings Homepage Select this option to set the Home page You can enter a new Home page URL and set it as the current and default home page Downloads You can disable ...

Страница 130: ... cancelling idle network requests Resend Data Prompt This option allows you to set on off whether the browser confirms whether to resend data to the radio This could be used for forms which are not stored locally in the browser cache and must be re requested from the server Security settings Secure Prompt Select this option to set on off whether the radio displays a warning message when it is chan...

Страница 131: ...or Cookies Restart Browser Select this option to restart your browser About Select this option to view information about the browser History menu The History page displays a list of up to nine of the most recently viewed Browser pages The currently viewed page is highlighted To revisit a page listed in the History select it and then press the Left context key If more than nine pages have been view...

Страница 132: ...ders the screen displays the message No saved bookmarks You can create up to 100 bookmarks and up to 10 folders a single folder can contain 100 bookmarks Press Bookmarks Menu to create your bookmarks New Bookmark Select this option to create a new bookmark Press the Edit key and enter the title of the bookmark URL and select the folder Select Save when done Tip If you want to create a new folder f...

Страница 133: ...nd name the folder Set as Homepage allows you to set the page as your Home page in the browser This page is displayed when you select the Go to Homepage card Call handling Outgoing While the browser is active it is possible to make a group call to the attached talkgroup by pressing the PTT If a talkgroup has not been attached the user may select a talkgroup see section on Group Calls During an out...

Страница 134: ...ser and you can answer the call If an Alarm Call is received the browser closes and the radio displays the Home screen allowing you to respond to the call You can still make a group call attached to a talkgroup but not a telephone type call whilst the browser is open SDS messages If an incoming SDS message is received while the browser is active and the message is marked for immediate display then...

Страница 135: ...perating in Transmit Inhibit mode you can still view any pages in the browser that have been stored locally but it is not possible to browse pages online If an attempt is made to browse pages online the browser active icon flashes and a warning message appears User Guide 127 ...

Страница 136: ...o which the GPS reports are sent may be changed over the air If your radio accepts a change of GPS destination command it sounds a customisable tone and sends you an SDS message to inform you Tip If customised you can enable disable the GPS function see GPS reporting options on page 130 Tip For the best GPS performance your radio needs an uninterrupted view of the sky GPS position To locate your G...

Страница 137: ...w long ago the position was first displayed to refresh the reading press Locate again GPS direction To read the direction your radio is moving 1 Select Menu GPS Direction The Direction screen gives information about the current direction and speed of travel If the radio is stationary no information is displayed However if the radio becomes stationary after a period of movement the direction inform...

Страница 138: ...nt over the air The warning icon is displayed on the top line of the screen as a reminder that GPS reporting has been explicitly disabled Always Send GPS reporting is enabled regardless of any instructions sent over the air No Override your radio will respond to instructions sent over the air GPS reports are sent if requested and is switched off if requested 130 SC21 Series 07 2017 ...

Страница 139: ...l the device is deleted from the list of paired devices Caution When you re customise or update the software on your radio the device pairings are preserved Therefore if the radio is being re customised and allocated to a different user with a different set of Bluetooth devices any unnecessary existing pairings must be manually deleted before the radio is reassigned to the new user Caution If you ...

Страница 140: ...e while a call is in progress either using the Bluetooth menu screens or a soft key disconnection only if customised It is also possible to connect to a headset by pressing the button on the headset Tip Before attempting to pair check that the audio device is switched on is set to the discoverable visible state and is close to your radio before attempting a new search If several devices are availa...

Страница 141: ...s found Tip If a device is not found check that the data device is switched on is set to the discoverable visible state and is close enough to your Sepura radio before attempting a new search Any audio devices found are listed on the screen as they are found Audio devices which may be worn on the body show the headset icon and non wearable audio devices such as a car kit or similar device show the...

Страница 142: ...also be necessary if you move out of the Bluetooth range while wearing a Bluetooth headset and then you move back within range Note that with these headsets the radio display may indicate that the headset is connected whether or not the audio is routed to the headset Tip If you are choosing a Bluetooth headset it is worth considering that some Bluetooth headsets have a single combined button for P...

Страница 143: ...h your radio using the generated passcode Refer to the User Guide of the device for details of how to do this Input and accept the generated passcode this passcode is not required after pairing 6 On your radio press Accept to accept the request and to connect with the device A message is displayed to confirm the pairing and the device is listed in the list of paired devices You can also Modify the...

Страница 144: ...empting a new search Any PCs laptop desktop or server found show a PC icon and hand held PDAs show a PDA icon No icon is shown alongside the name of a device which has a different Class of Bluetooth Device from a PC or PDA 4 Select the required device in the list and then press Pair The message Pairing appears 5 When a device has been paired the search results are lost and the radio displays the l...

Страница 145: ...ces screen You can edit the name of these devices or delete them 1 Press Menu then select Options Bluetooth Devices 2 Select the device name and press Modify To edit a device name Select Edit to rename different devices of the same type to make it easier to distinguish between them To delete a device Select Delete Device to delete the device from the list of paired devices User Guide 137 ...

Страница 146: ... You will need to enter the radio s 4 digit PIN at power on Your radio may be customised to allow you to change your PIN see Change PIN on the facing page Caution if you incorrectly enter the PIN 3 times the radio will lock You will then need the 8 digit Master Reset PIN or PUK to unlock the radio see Unlocking the radio after incorrect PIN entry on the facing page To unlock your radio 1 Enter you...

Страница 147: ...is 00000000 but this can be changed by your Communications or Security Manager To unlock the radio 1 Enter your 8 digit Master Reset PIN 2 Press Confirm or the Select Send key Note If you enter the Master Rest PIN incorrectly you need to wait at least 5 seconds before attempting to enter the PIN again If the Master Reset PIN is successful the radio reverts back to the last known PIN If you radio i...

Страница 148: ...o be exempt from End to End Encryption All telephone calls are also not end to end encrypted When dialling a separate Secure Comms icon is displayed in the dial box if the call or SDS will be End to End encrypted During voice calls only not SDS calls your radio may allow you to toggle End to End Encryption on off with a soft key When you are in a voice call the Secure Comms icon indicates whether ...

Страница 149: ...ally update E2EE keys Your radio must be in TMO mode to update E2EE keys Either press a suitably customised soft key or use the following procedure 1 Press Menu then select Security Crypto Settings 2 Scroll to New Key and press Send When the key update is in progress the Key agreement status icon appears Zeroising Radios that support End to End Encryption are loaded with sensitive cryptographic ke...

Страница 150: ...he State of Health of the battery which can also assist with auditing and end of life strategies Labelling The simplest form of asset management is to attach labels to your radios and batteries Self adhesive labels those with an adhesive backing are recommended as they are easy to apply and commercially available such as 3M Thermal Transfer Polyester label material 7815 Your radio and Sepura batte...

Страница 151: ...service centres and stock tracking It is also useful for pairing pool radios with resources persons and vehicles and facilitating the rights of access to secure areas These tags allow devices to be tracked through a communications network when the tag with a unique ID is moved within the proximity of a RFID read write unit it reads the stored data or writes data to the tag Your radio has an integr...

Страница 152: ...dio Your radio has a large number of parameters that can be customised using the programming software tool Radio Manager 2 These parameters are grouped into a series of templates that can be easily modified to suit the end user s preferences A complete set of parameters for your radio is called a customisation Radios can be customised either in bulk by fitting them into a Sepura programming pod wh...

Страница 153: ...ettings Users have the ability to add personal data to the radio such as adding contacts to the phonebook changing the talkgroups and sending and receiving SDS Status messages Such changes may be undesirable on fleet radios that have been specifically customised for fleet users where radios are not personal processions Using the Revert All Changes option the radio settings can be reset back to the...

Страница 154: ...lect the Revert User Changes option 2 Select the option you require Press the Select key 3 Confirm the request to revert the radio settings to the last customisation Press the Select key On completion of the revert process the radio will reboot 146 SC21 Series 07 2017 ...

Страница 155: ... to ensure that appropriate EMC testing has been conducted on accessories When your radio powers on and when you attach an accessory during operation your radio performs an authenticity check on any attached accessories including the battery If the accessory is not authenticated a message appears and the accessory should be removed Your radio has two connectors for attaching accessories The Rugged...

Страница 156: ...e accessory To select a profile highlight the profile and then press the Select key If you change to another accessory whilst operating the radio the Accessory Profile screen appears allowing you to select a new profile or accept the default profile for that accessory highlighted To select the profile press the Select key If you attach a second accessory such as adding an accessory to an RSM the A...

Страница 157: ...d to the mounting clip attachment points on the back of the radio You do not have to remove the clip before charging the battery The radio can be inserted into any of the SC21 battery chargers with the battery and belt clip attached Fit the belt clip 1 Using a PH1 screwdriver attach the belt clip to the two attachment points as shown Remove the belt clip 1 Using a PH1 screwdriver remove the belt c...

Страница 158: ...nting clip attachment points on the back of the radio You do not have to remove the clip before charging the battery The radio can be inserted into any of the SC21 battery chargers with the battery and belt clip attached Fit the shirt pocket clip 1 Using a PH1 screwdriver attach the shirt pocket clip to the two attachment points as shown 150 SC21 Series 07 2017 ...

Страница 159: ...ed together with the available dock kit that provides attachments for various types of belts clothing and locker or car dash board mountings The radio is first inserted into the dock It can then be angled as necessary To remove the radio from the dock it must be inverted before removing from the dock The stud is fitted to the mounting clip attachment points on the back of the radio Fit the stud 1 ...

Страница 160: ...Remove the stud 1 Using a PH1 screwdriver remove the stud from the two attachment points 152 SC21 Series 07 2017 ...

Страница 161: ...t an accessory to the sRAC 1 Secure the accessory by rotating the screw clockwise Fit an accessory to the sDAC 1 Connect the cable to the radio by inserting the hook on the connector into the slot as shown User Guide 153 ...

Страница 162: ...1 Secure the accessory in position by rotating the screw clockwise Do not over tighten 154 SC21 Series 07 2017 ...

Страница 163: ... the TETRA infrastructure Also referred to as half duplex operation one user talks at a time T DMO gateway Direct Mode Operation gateway A device that allows users working in Direct Mode Operation to communicate with users in Trunked Mode This is often used to extend the working range of a radio T DMO repeater Direct Mode Operation repeater A radio acting as a repeater provides a service to other ...

Страница 164: ...not use key mat keyboard or alphanumeric keypad PABX Public Automatic Branch eXchange sf picture message A small JPEG image file with an accompanying text message sent to recipients over the TETRA Air Interface S point to point call A half duplex call made to a contact on the network using the PTT button Unlike a group call a point to point call is a private call to an individual privacy screen A ...

Страница 165: ...dio similar to that when holding a telephone handset or mobile phone Do not use the term full duplex call in user documents See also private telephone call and group call Transmit Inhibit mode An operational mode for use in RF sensitive areas that allows the radio to continue operating without transmitting When Transmit Inhibit is activated and deactivated a status message is sent confirming the o...

Страница 166: ......

Отзывы: