1
Separett Model Villa 9210
IMPORTANT SAFEGUARDS
- READ ALL INSTRUCTIONS BEFORE USING –
When using electrical products, especially when children are present, basic safety
precautions should always be followed. Warning to reduce the risk of burns, electrocution,
fire or injury to persons:
1. Never put cigarette butts or other burning or hot objects in the toilet.
2. Use only attachments recommended by the manufacturer.
3. Close supervision is necessary when this product is being used by or near children or invalids.
4. Use this product only for its intended use as described in this manual.
5. Never block the air openings of the product or place it on a soft surface, such as a bed or couch, where the
air openings may be blocked. Keep the air openings free of lint, hair, and the like.
6. Never drop or insert any objects into ventilation openings.
7. Unplug this product before cleaning.
8. Never operate this product if it has a damaged cord or plug, if it is not working properly, if it has been
dropped or damaged, or if it has been dropped into water. Return the part to a service center for
examination and repair.
9. Keep the cord away from heated surfaces.
10. Connect this product to a properly grounded outlet only. See Grounding Instructions below.
- INSTALLATION INSTRUCTIONS -
Key installation considerations include:
1. A suitable outlet for the venting pipe & urine waste pipe. The preferred venting is through the wall, but
it can also go through the roof or up through the attic & out the gable.
2. A suitable outlet for the urine waste. These include in-ground options are existing septic system, grey
water pit or class 3 gravel leach bed (cesspool). Tank options include Ejektortank, pump-out tank or
portable tank.
3. Contact local authorities to find out which building and environmental regulations apply in your region.
4. A 12V or 120V power supply is necessary for the Villa 9210. However, if no power is available, the
vent pipe can be run above the roof line and a wind turbine vent can be added to create the draft
required to vent the toilet.
5. Please be aware that the fans are sensitive to voltage spikes. If you are using a 12V system, an
inverter from 12V to 120V is recommended and then using the adaptor reduces the chance of the
voltage spiking the fan motor
6. A good quality voltage regulator is highly recommended if you are running 12V directly to the fan,
Mounting the toilet:
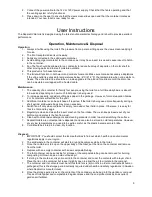
1. Place the toilet where it is to be installed and determine desired mounting.
2. Measure and make holes for the urine waste pipe and venting pipe.
3. Install the rubber gasket on the bottom of the toilet.
4. Attach the toilet to the floor using three (3) screws through holes in the rotation disc, or to the wall
using angle brackets or directly into a wall beam in lieu of the bracket.
5. If mounting to the floor, punch out the plugs in the screw holes with a screwdriver first.
6. If using the wall brackets, mark the location while the bracket is attached to the toilet, then remove the
bracket from the inside of the toilet. Mount the bracket to the wall and then mount the toilet to the
bracket.
Running the urine hose:
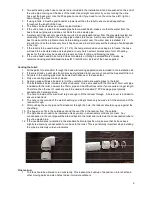
1. Run the flexible urine waste hose to the leach bed or tank. The waste pipe must have an adequate
drop through its entire length, so that the normal flow will prevent the build-up of salt deposits inside
this drain.


