

TR4-10 Basic Mobile DVR System
Quick Reference Guide
Information in this guide is subject to change without prior notice.
© 2004 Seon Design Inc.
www.seon.com
All rights reserved.
Document Part Number: 700-0030-01
Why isn't the DVR power light on?
Why doesn't the DVR start recording when I switch the ignition on?
Why does the DVR keep recording after I switch the ignition off?
What does the external alarm switch do?
Why doesn't the alarm light turn off?
Why won’t the
button respond when I press it?
Why won’t the
button respond when I press it?
How do I speed up or slow down the video playback speed?
Switch the ignition on. If the
power light is not on within 30 seconds, read
the troubleshooting section of the
.
The DVR may be programmed to start recording after a delay time (Delay-On), at
a specific time of day, or the disk-drive may be full.
The DVR may be programmed to keep recording for a period of time
after the ignition is switched off.
The
light may be programmed to stay on for a fixed length of time, until
any button is pressed, or until the ignition is switched off.
If the DVR is recording, press the
button and then press the
button
within 10 seconds.
The
button may be locked by a password . To enter the password: connect a
video monitor to the video output jack; press the
button; use the arrow buttons
and the
wheel to enter the password; select Done and press the
Use the
wheel to change the video playback speed and direction. Read
the
wheel description for details.
DVR
(Delay-Off)
Closing the external alarm switch marks the current date and time as an important
event that can be easily located during video playback. It may also increase the
recorded video quality and recording speed for the duration of the alarm.
button to
stop recording for 10 seconds. To program the DVR, press the
button and re-
enter the password.
TR4-10 Installation and User's Guide
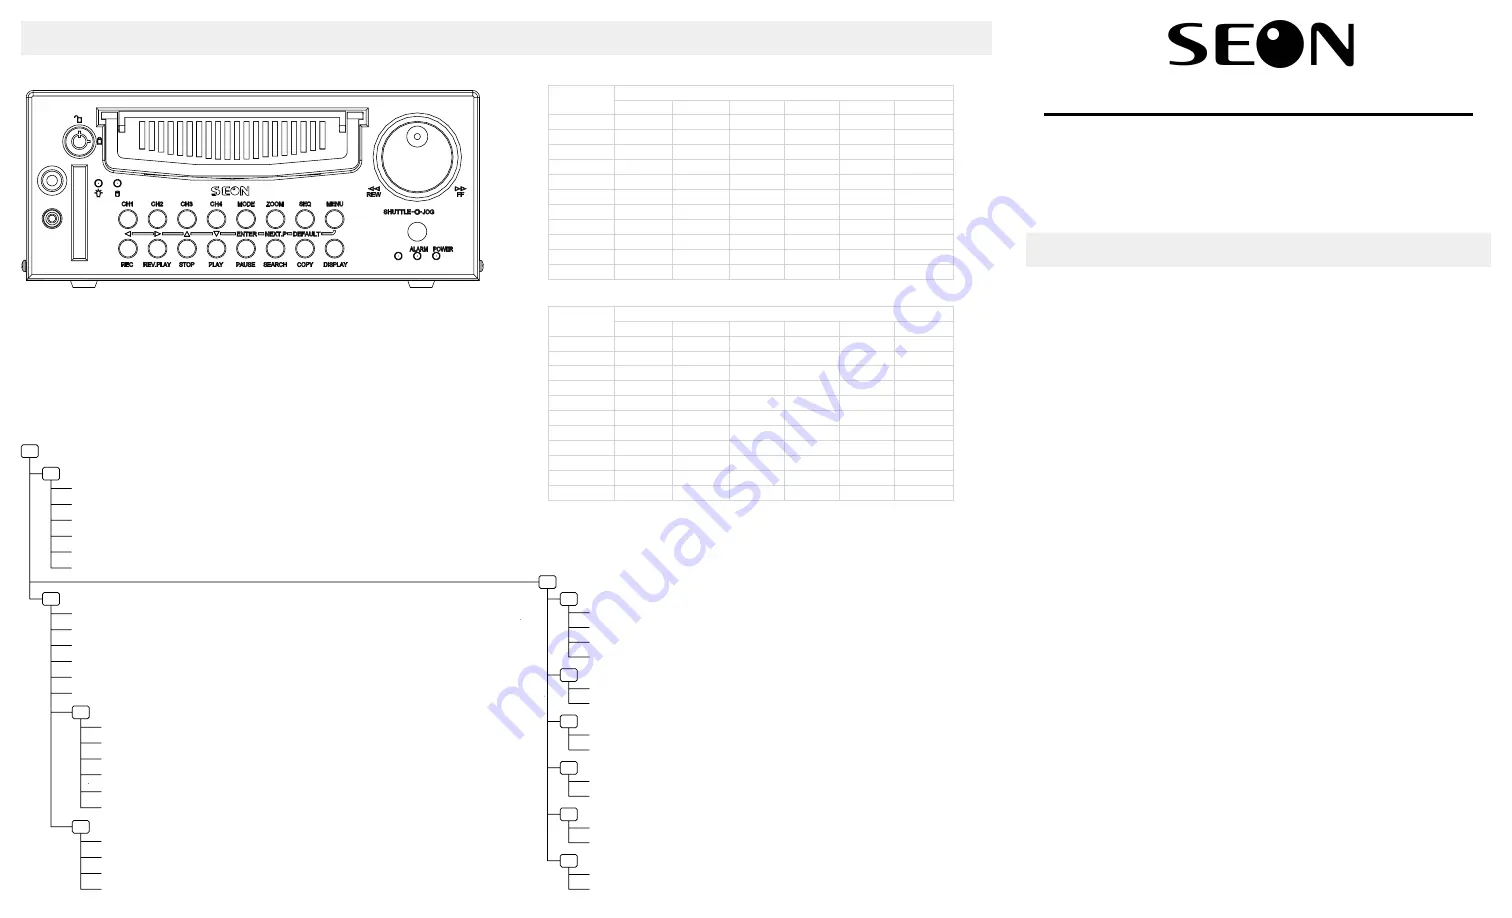
ALARM
STOP
MENU
SHUTTLE
SHUTTLE
MENU
STOP
STOP
STOP
JOG
ENTER
MENU
Why is the buzzer sounding and how do I stop it?
The buzzer may be programmed to sound if the external alarm switch is closed, if
the hard-drive is full, or if the video signal is lost. Press any button on the DVR to
silence the buzzer.
Main Menu
Set Time/Date/Titles
Set Time: hour:minute:second am/pm
Set Date: month/day/year
Auto Daylight Savings: [on]/off
Display Input Voltage: [on]/off
Camera Titles (1-4): maximum 12 characters (blank space, 0-9, A-Z, ().,+-/)
Main Title: maximum 28 characters (
,
, ().,+-/)
blank space, 0-9 A-Z
Record Mode/Schedule
Record Speed: 0.1 to 60 images/second [15]
Picture Quality: 1 to 6 (6 = highest quality) [4]
Repeat Record: [on]/off (on = overwrite the oldest image)
Record Audio: [on]/off
Delay-On Time: 0 to 60 minutes [30 seconds]
Delay-Off Time: 0 to 60 minutes [30 seconds]
Timers
Day: Sun to Sat, Weekend, Weekday, Daily
Start Time: hour:minute:second am/pm
Stop Time: hour:minute:second am/pm
Recording Speed: 0.1 to 60 images/second [15]
Timer: on/[off]
Enable Timers: on/[off]
Alarm Recording
Alarm Operation: [on]/off
Recording Speed (during alarm): 0.1 to 60 images/second [30]
Recording Quality (during alarm): 1 to 6 (6 = highest quality) [4]
Alarm Duration Time: 5 seconds to 60 minutes or non-stop [30 sec]
System/Defaults
Alarm Buzzer
Format Disk
System Update
Load Defaults
Format CF Card
Password
Buzzer Enable: on/[off]
No
No
No
No
Password Enable: on/[off]
Alarm-In: on/[off]
Yes (erases all information on the hard-drive)
Yes (updates DVR system software from CF card)
Yes (sets all DVR options to default values)
Yes (erases all information on the CF card)
Password: 6 characters
[888888]
(blank space, 0-9, A-Z, ().,+-/)
Disk Full: on/[off]
Video Loss: on/[off]
Programming the DVR
Frequently Asked Questions
To program the DVR, connect a video monitor to the jack on the front of the DVR. Press the
button and the
button within 10 seconds to display the Main Menu. Use the and
buttons to select menu items. Press the
button to display a selected sub-menu. Use the
and
buttons or the
wheel to change the value of a selected menu item. Press the
button to go back to a previous menu. From the Main Menu, press the
button to stop
programming and resume normal DVR operation.
Default values are shown below as [value].
STOP
MENU
ENTER
JOG
MENU
MENU
ñ
ò
ï
ð
Note:
Estimated Recording Times in Hours with 80 GB Hard-Drive
Recording Quality
Recording
Speed (ips)
1
2
3
4
5
6
60
24
18
14
12
10
9
30
48
36
28
24
20
18
20
72
54
42
36
30
27
15
96
72
56
48
40
36
10
144
108
84
72
60
54
5
288
216
168
144
120
108
1
1440
1080
840
720
600
540
0.5
2880
2160
1680
1440
1200
1080
0.3
4800
3600
2800
2400
2000
1800
0.2
7200
5400
4200
3600
3000
2700
0.1
14400
10800
8400
7200
6000
5400
Estimated Recording Times in Hours with 40 GB Hard-Drive
Recording Quality
Recording
Speed (ips)
1
2
3
4
5
6
60
12
9
7
6
5
4.5
30
24
18
14
12
10
9
20
36
27
21
18
15
13.5
15
48
36
28
24
20
18
10
72
54
42
36
30
27
5
144
108
84
72
60
54
1
720
540
420
360
300
270
0.5
1440
1080
840
720
600
540
0.3
2400
1800
1400
1200
1000
900
0.2
3600
2700
2100
1800
1500
1350
0.1
7200
5400
4200
3600
3000
2700
Recording speed
- The recording speed is the total number of images per second (ips)
recorded from all active video channels. At a recording speed of 60 ips for four active
video channels, each channel is recorded at a speed of 15 ips (60 4).
÷