Data Collection
35
6.1.2
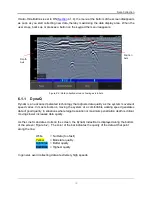
Back-Up Indicator
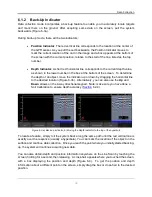
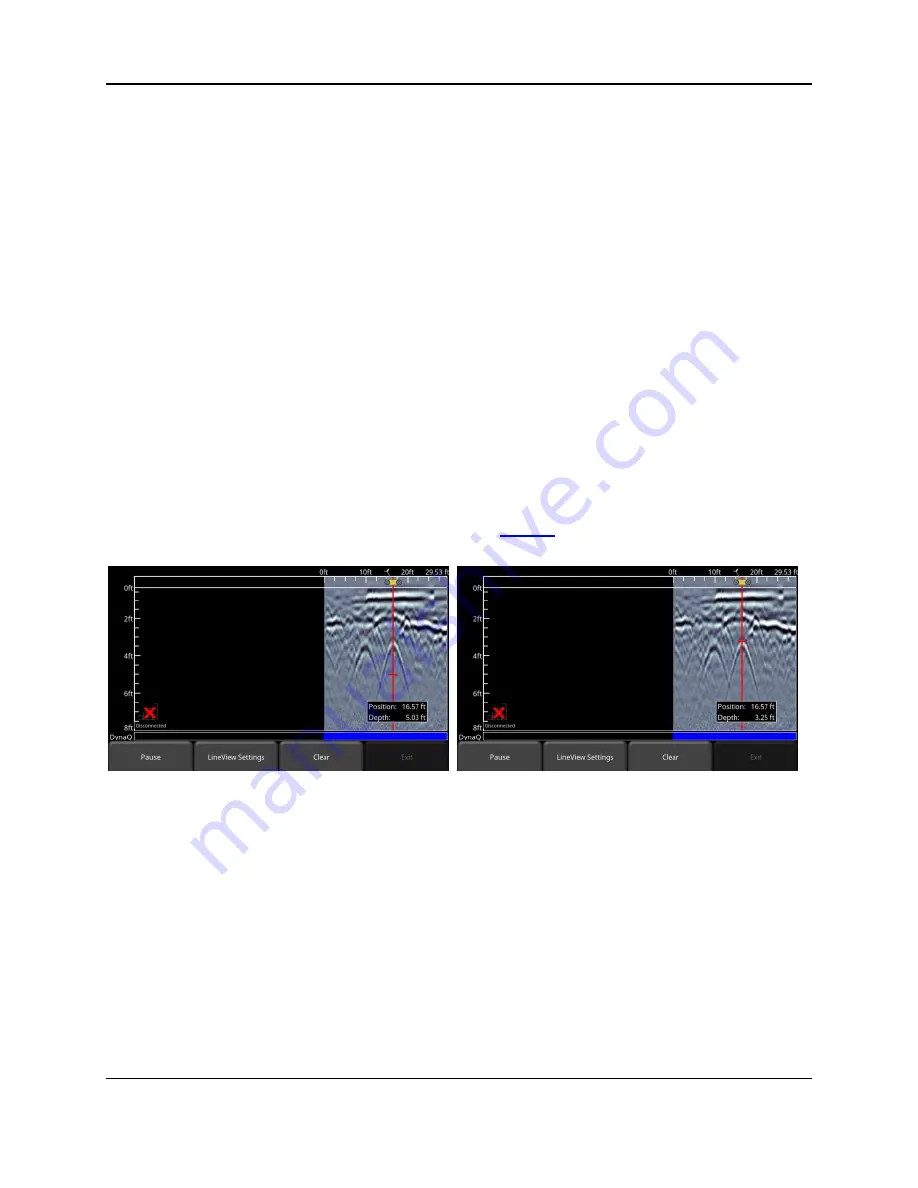
Data collection mode incorporates a back-up feature to enable you to accurately locate targets
and mark them on the ground. After acquiring some data on the screen, pull the system
backwards (Figure 6-3a).
During back-up mode, there will be two indicators:
•
Position Indicator
: The red vertical line corresponds to the location at the center of
the GPR sensor. As you pull the cart backwards, the Position Indicator moves to
mark the current location of the cart in the image and a box appears at the bottom of
the screen with the current position, relative to the start of the line, listed as the top
number.
•
Depth Indicator
: A short red horizontal line corresponds to the current depth value,
as shown in the lower number in the box at the bottom of the screen. To determine
the depth of an object, move the indicator up or down by dragging the horizontal line
to the desired location (Figure 6-3b). Alternatively, you can also use the
Up
and
Down
arrows on the 4-way directional keypad. Note: make sure you have done a
Soil Calibration to ensure depth accuracy (
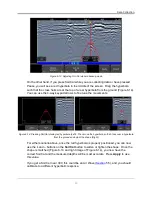
Figure 6-3: a) Back-up Indicator, b) Moving the Depth Indicator to the top of the hyperbola
To locate a feature, simply roll the system back along the same path until the red vertical line is
exactly over the response (usually a hyperbola). You can mark the location of the object on the
surface and continue data collection. Once you reach the point where you initially started backing-
up, the system will continue acquiring new data.
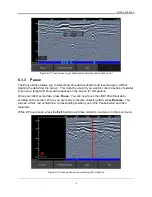
You can also obtain depth and position information anywhere on the Line Scan by touching the
screen, holding for a second, then releasing. A cross-hair appears where you touched the screen,
with a box displaying the position and depth (Figure 6-4). To get the position and depth
information about a different point on the screen, simply drag the box or cross-hair to the desired
position.
Содержание LMX100
Страница 1: ...2016 00048 05 ...
Страница 2: ...ii ...
Страница 4: ...Product Registration iv ...
Страница 10: ...x ...
Страница 14: ...Overview 2 ...
Страница 40: ...Tools 28 ...
Страница 44: ...GPR Concepts 32 ...
Страница 53: ...Data Collection 41 Figure 6 11 Varying displayed depth Figure 6 12 Varying position or horizontal scaling ...
Страница 58: ...Data Collection 46 ...
Страница 63: ...Screenshots Mini Reports 51 Figure 7 6 Example of a Mini Report ...
Страница 64: ...Screenshots Mini Reports 52 ...
Страница 68: ...Transferring Data to a PC 56 ...
Страница 72: ...Troubleshooting 60 ...
Страница 75: ...Care Maintenance 63 ...
Страница 76: ...Care Maintenance 64 ...
Страница 78: ...Parts List Accessories 66 ...
Страница 79: ...Parts List Accessories 67 11 2 Accessories The following accessories are available for purchase ...
Страница 80: ...Parts List Accessories 68 ...
Страница 82: ...Technical Specifications 70 ...
Страница 84: ...Appendix A Health Safety Certification 72 ...
Страница 92: ...Appendix B GPR Emissions Interference and Regulations 80 ...
Страница 94: ...Appendix C Instrument Interference 82 ...
Страница 96: ...Appendix D Safety around Explosive Devices 84 ...

