Sennheiser electronic GmbH & Co. KG
Am Labor 1, 30900 Wedemark, Germany, www.sennheiser.com
XS Wireless Digital - v2.1
Instruction Manual
XS Wireless Digital
Страница 1: ...Sennheiser electronic GmbH Co KG Am Labor 1 30900 Wedemark Germany www sennheiser com XS Wireless Digital v2 1 Instruction Manual XS Wireless Digital ...
Страница 2: ... XLR BASE SET LAVALIER SET PRESENTATION BASE SET XLR BASE SET INSTRUMENT BASE SET PEDALBOARD SET ...
Страница 3: ... PORTABLE INTERVIEW SET PORTABLE LAVALIER SET PORTABLE ENG SET PORTABLE BASE SET ...
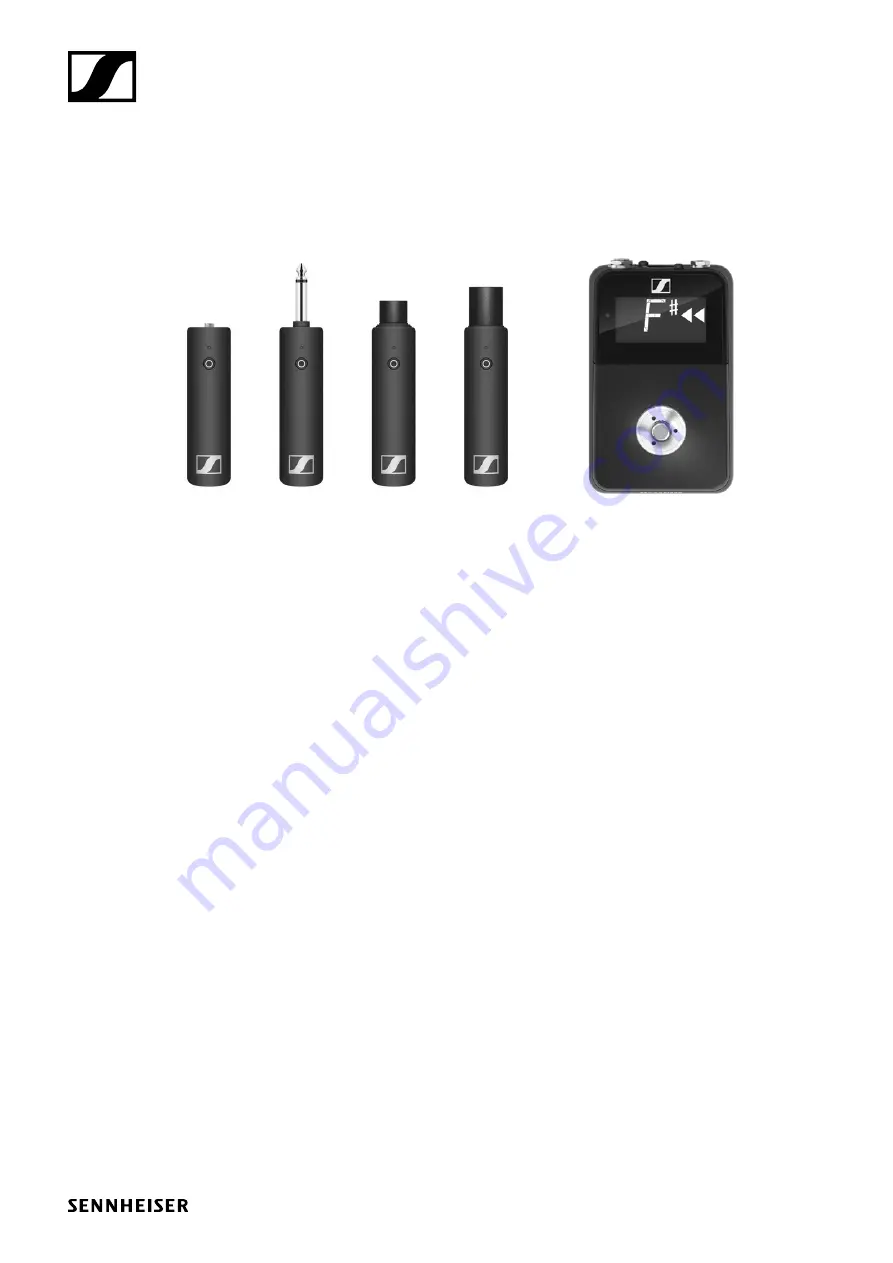
Страница 4: ...e to a stand 2 XSW Digital TX XLR transmitter female XLR socket for connecting to the vocal microphone 3 XSW Digital RX XLR receiver male XLR plug for connecting to a mixing console 4 Charging cable USB A to USB C for charging the transmitter and re ceiver 5 XS 1 vocal microphone 6 Stickers for labeling transmission paths ...
Страница 5: ...cting the transmitter to the vocal microphone Plug the transmitter into the XLR socket on the vocal microphone Connecting the receiver to a mixing console Plug the receiver into the XLR input of a channel on your mixing con sole ...
Страница 6: ...d may be distorted if the microphone basket is covered Switching on the transmitter and receiver Briefly press the button on the transmitter and the button on the receiv er The status LEDs indicate the charge level for four seconds During these four seconds check that the transmitter and receiver are sufficiently charged 75 5 75 5 If the status LED remains red you should charge the rechargeable ba...
Страница 7: ...g the charge level during use or the transmitter and receiver are not paired see Pairing Switching off the transmitter and receiver Press the button on the transmitter and the button on the receiver until the status LEDs switch off Muting the audio signal When using a set you can mute the audio signal The audio signal can then be unmuted To mute the audio signal Briefly press the button on the tra...
Страница 8: ...el falls below 5 the status LED flashes only red In addition to the local charge level the status LED on a transmitter or re ceiver also provides information about the charge level of the connected transmitter or receiver This allows you to check the charge levels at any time The charge level is below 15 The charge level of the connected transmitter receiver is below 15 The charge level is below 5...
Страница 9: ...n operation Plug the small end of the USB charging cable into the USB port on the transmitter or receiver Plug the large end of the USB charging cable into the USB port on a conventional USB power supply unit Plug the USB power supply unit into the wall socket The status LED indicates the charge level 5 5 75 75 100 Using stickers to label transmission paths You can use the colored stickers to show...
Страница 10: ...r and the button on the receiver until the status LEDs start flashing green and red in alternation The status LEDs will remain green once the transmitter and receiver are paired and connected If the status LEDs do not remain green the charge level is below 15 see Checking the charge level during use Out of range monitoring The status LEDs begin flashing red when the transmitter and receiver are al...
Страница 11: ... Digital TX 35 transmitter 3 5 mm jack socket for connecting to the clip on microphone 3 XSW Digital RX XLR receiver male XLR plug for connecting to a mixing console 4 Charging cable USB A to USB C for charging the transmitter and re ceiver 5 ME 2 2 clip on microphone 6 Stickers for labeling transmission paths ...
Страница 12: ...e can appear in the audio signal Insert the transmitter into the belt clip Fasten the belt clip to your clothes for example on your belt or waist band Attaching the clip on microphone Fasten the clip on microphone to your clothes for example on your col lar or lapel The distance to your mouth should be about 25 cm The distance af fects the sensitivity of the clip on microphone Reduce the distance ...
Страница 13: ...tery first If the status LED flashes red the charge level is too low You have to charge the rechargeable battery first see Charging the re chargeable battery After four seconds the status LED starts flashing green The flashing indicates that a wireless connection is being established The status LEDs remain green once the transmitter and receiver are connected If the status LEDs do not remain green...
Страница 14: ... using a set you can mute the audio signal The audio signal can then be unmuted To mute the audio signal Briefly press the button on the transmitter or receiver To unmute the audio signal Briefly press the button on the transmitter or receiver ...
Страница 15: ...el falls below 5 the status LED flashes only red In addition to the local charge level the status LED on a transmitter or re ceiver also provides information about the charge level of the connected transmitter or receiver This allows you to check the charge levels at any time The charge level is below 15 The charge level of the connected transmitter receiver is below 15 The charge level is below 5...
Страница 16: ...in operation Plug the small end of the USB charging cable into the USB port on the transmitter or receiver Plug the large end of the USB charging cable into the USB port on a conventional USB power supply unit Plug the USB power supply unit into the wall socket The status LED indicates the charge level 5 5 75 75 100 Using stickers to label transmission paths You can use the colored stickers to sho...
Страница 17: ...er and the button on the receiver until the status LEDs start flashing green and red in alternation The status LEDs will remain green once the transmitter and receiver are paired and connected If the status LEDs do not remain green the charge level is below 15 see Checking the charge level during use Out of range monitoring The status LEDs begin flashing red when the transmitter and receiver are a...
Страница 18: ...mitter 2 XSW Digital TX 35 transmitter 3 5 mm jack socket for connecting to a microphone with a jack plug 3 5 mm 3 XSW Digital RX XLR receiver male XLR plug for connecting to a mixing console 4 Charging cable USB A to USB C for charging the transmitter and re ceiver 5 Stickers for labeling transmission paths ...
Страница 19: ...e level for four seconds During these four seconds check that the transmitter and receiver are sufficiently charged 75 5 75 5 If the status LED remains red you should charge the rechargeable bat tery first If the status LED flashes red the charge level is too low You have to charge the rechargeable battery first see Charging the re chargeable battery After four seconds the status LED starts flashi...
Страница 20: ... receiver until the status LEDs switch off Muting the audio signal When using a set you can mute the audio signal The audio signal can then be unmuted To mute the audio signal Briefly press the button on the transmitter or receiver To unmute the audio signal Briefly press the button on the transmitter or receiver ...
Страница 21: ...el falls below 5 the status LED flashes only red In addition to the local charge level the status LED on a transmitter or re ceiver also provides information about the charge level of the connected transmitter or receiver This allows you to check the charge levels at any time The charge level is below 15 The charge level of the connected transmitter receiver is below 15 The charge level is below 5...
Страница 22: ...in operation Plug the small end of the USB charging cable into the USB port on the transmitter or receiver Plug the large end of the USB charging cable into the USB port on a conventional USB power supply unit Plug the USB power supply unit into the wall socket The status LED indicates the charge level 5 5 75 75 100 Using stickers to label transmission paths You can use the colored stickers to sho...
Страница 23: ...er and the button on the receiver until the status LEDs start flashing green and red in alternation The status LEDs will remain green once the transmitter and receiver are paired and connected If the status LEDs do not remain green the charge level is below 15 see Checking the charge level during use Out of range monitoring The status LEDs begin flashing red when the transmitter and receiver are a...
Страница 24: ... TX XLR transmitter female XLR socket for connecting to a microphone with an XLR plug male 2 XSW Digital RX XLR receiver male XLR plug for connecting to a mixing console 3 Charging cable USB A to USB C for charging the transmitter and re ceiver 4 Stickers for labeling transmission paths ...
Страница 25: ... Connecting the transmitter to the microphone Plug the transmitter into the XLR socket on your microphone Connecting the receiver to a mixing console Plug the receiver into the XLR input of a channel on your mixing con sole ...
Страница 26: ...utton on the transmitter and the button on the receiv er The status LEDs indicate the charge level for four seconds During these four seconds check that the transmitter and receiver are sufficiently charged 75 5 75 5 If the status LED remains red you should charge the rechargeable bat tery first If the status LED flashes red the charge level is too low You have to charge the rechargeable battery f...
Страница 27: ...re not paired see Pairing Switching off the transmitter and receiver Press the button on the transmitter and the button on the receiver until the status LEDs switch off Muting the audio signal When using a set you can mute the audio signal The audio signal can then be unmuted To mute the audio signal Briefly press the button on the transmitter or receiver To unmute the audio signal Briefly press t...
Страница 28: ...el falls below 5 the status LED flashes only red In addition to the local charge level the status LED on a transmitter or re ceiver also provides information about the charge level of the connected transmitter or receiver This allows you to check the charge levels at any time The charge level is below 15 The charge level of the connected transmitter receiver is below 15 The charge level is below 5...
Страница 29: ...in operation Plug the small end of the USB charging cable into the USB port on the transmitter or receiver Plug the large end of the USB charging cable into the USB port on a conventional USB power supply unit Plug the USB power supply unit into the wall socket The status LED indicates the charge level 5 5 75 75 100 Using stickers to label transmission paths You can use the colored stickers to sho...
Страница 30: ...er and the button on the receiver until the status LEDs start flashing green and red in alternation The status LEDs will remain green once the transmitter and receiver are paired and connected If the status LEDs do not remain green the charge level is below 15 see Checking the charge level during use Out of range monitoring The status LEDs begin flashing red when the transmitter and receiver are a...
Страница 31: ...6 3 mm jack plug for connecting to an instrument with a jack socket 6 3 mm or to the extension cable 3 XSW Digital RX 63 receiver 6 3 mm jack plug for connecting to an am plifier 4 Charging cable USB A to USB C for charging the transmitter and re ceiver 5 Extension cable jack socket to jack plug 6 3 mm 6 Stickers for labeling transmission paths ...
Страница 32: ... the transmitter so that you can easily see the status LED Connection with extension cable Plug the extension cable into the jack socket on your instrument Plug the transmitter into the jack socket on the extension cable Insert the transmitter into the belt clip Fasten the belt clip to the guitar strap or your clothes for example on your belt or waistband Connecting the receiver to an amplifier Pl...
Страница 33: ...s too low You have to charge the rechargeable battery first see Charging the re chargeable battery After four seconds the status LED starts flashing green The flashing indicates that a wireless connection is being established The status LEDs remain green once the transmitter and receiver are connected If the status LEDs do not remain green either the charge level is below 15 see Checking the charg...
Страница 34: ... using a set you can mute the audio signal The audio signal can then be unmuted To mute the audio signal Briefly press the button on the transmitter or receiver To unmute the audio signal Briefly press the button on the transmitter or receiver ...
Страница 35: ...el falls below 5 the status LED flashes only red In addition to the local charge level the status LED on a transmitter or re ceiver also provides information about the charge level of the connected transmitter or receiver This allows you to check the charge levels at any time The charge level is below 15 The charge level of the connected transmitter receiver is below 15 The charge level is below 5...
Страница 36: ...in operation Plug the small end of the USB charging cable into the USB port on the transmitter or receiver Plug the large end of the USB charging cable into the USB port on a conventional USB power supply unit Plug the USB power supply unit into the wall socket The status LED indicates the charge level 5 5 75 75 100 Using stickers to label transmission paths You can use the colored stickers to sho...
Страница 37: ...er and the button on the receiver until the status LEDs start flashing green and red in alternation The status LEDs will remain green once the transmitter and receiver are paired and connected If the status LEDs do not remain green the charge level is below 15 see Checking the charge level during use Out of range monitoring The status LEDs begin flashing red when the transmitter and receiver are a...
Страница 38: ...W Digital RX Pedal receiver with built in tuning device for connect ing to a guitar amplifier or mixing console power supply unit with appropriate country adapter included 4 Charging cable USB C to USB C for charging the transmitter via the receiver s USB C port 5 Charging cable USB A to USB C for charging the transmitter using a USB power supply unit 6 Extension cable jack socket to jack plug 6 3...
Страница 39: ...ansmitter into the jack socket on your instrument Align the transmitter so that you can easily see the status LED Connection with extension cable Plug the extension cable into the jack socket on your instrument Plug the transmitter into the jack socket on the extension cable Insert the transmitter into the belt clip Fasten the belt clip to the guitar strap or your clothes for example on your belt ...
Страница 40: ... input socket for connecting it with a cable Connecting the receiver to an amplifier You can connect the receiver to an amplifier using a cable with jack plugs 6 3 mm or connect it to the next device on the Pedalboard Connect the receiver s output to the input socket on your amplifier or on the next device on the Pedalboard If using multiple effects devices on your Pedalboard the receiver must alw...
Страница 41: ...During these four seconds check that the transmitter is sufficiently charged 75 5 75 5 If the status LED remains red you should charge the rechargeable bat tery first If the status LED flashes red the charge level is too low You must charge the rechargeable battery first see Charging the re chargeable battery After four seconds the status LED starts flashing green The flashing indicates that a wir...
Страница 42: ...ching off the transmitter and receiver Switching off the receiver Disconnect the receiver from the power supply system Switching off the transmitter Press the button on the transmitter until the status LED switches off ...
Страница 43: ...mute the audio signal The tuning device is ac tivated while the audio signal is muted To mute the audio signal Briefly press the button on the transmitter or the pedal switch on the receiver To unmute the audio signal Briefly press the button on the transmitter or the pedal switch on the receiver ...
Страница 44: ...ion when the charge level falls below 15 Once the charge level falls below 5 the status LED flashes only red The status LED on the receiver indicates the charge level of the connected transmitter This allows you to check the charge level at any time The charge level is below 15 The charge level of the connected transmitter is below 15 The charge level is below 5 The charge level of the connected t...
Страница 45: ...arging the battery However the transmitter can also be charged while in operation Use the charging cable to connect the USB port on the transmitter to the USB port on the receiver The status LED indicates the charge level 5 5 75 75 100 Using stickers to label transmission paths You can use the colored stickers to show which transmitter belongs to which receiver ...
Страница 46: ...al switch until a P appears on the display The LED will also begin to flash red and green in alternation Press the button on the transmitter until the status LED starts flashing green and red in alternation The status LEDs will remain green once the transmitter and receiver are paired and connected If the status LEDs do not remain green the charge level is below 15 see Checking the charge level du...
Страница 47: ...itter female XLR socket for connecting to a microphone with an XLR socket 3 XSW Digital RX 35 receiver 3 5 mm jack socket for connecting to the camera cable 4 Charging cable USB A to USB C for charging the transmitter and re ceiver 5 Camera cable jack plug to jack plug 3 5 mm for connecting to the camera 6 Stickers for labeling transmission paths ...
Страница 48: ...camera cable s screw on jack plug into the jack socket on the receiver Lock the jack plug by screwing down the coupling ring If the jack plug is not firmly locked crackling noise can appear in the audio signal Insert the receiver into the hot shoe adapter Slide the hot shoe adapter onto your camera Plug the camera cable s simple jack plug into the jack socket on your camera ...
Страница 49: ...utton on the transmitter and the button on the receiv er The status LEDs indicate the charge level for four seconds During these four seconds check that the transmitter and receiver are sufficiently charged 75 5 75 5 If the status LED remains red you should charge the rechargeable bat tery first If the status LED flashes red the charge level is too low You have to charge the rechargeable battery f...
Страница 50: ... the transmitter and the button on the receiver until the status LEDs switch off Adjusting the input level on the camera Once you have connected the receiver to the camera and switched it on you have to adjust the input level on the camera If the camera has automatic gain control AGC you should disable this function Set the input level in the camera s menu so that the audio signal does not overloa...
Страница 51: ... using a set you can mute the audio signal The audio signal can then be unmuted To mute the audio signal Briefly press the button on the transmitter or receiver To unmute the audio signal Briefly press the button on the transmitter or receiver ...
Страница 52: ...el falls below 5 the status LED flashes only red In addition to the local charge level the status LED on a transmitter or re ceiver also provides information about the charge level of the connected transmitter or receiver This allows you to check the charge levels at any time The charge level is below 15 The charge level of the connected transmitter receiver is below 15 The charge level is below 5...
Страница 53: ...in operation Plug the small end of the USB charging cable into the USB port on the transmitter or receiver Plug the large end of the USB charging cable into the USB port on a conventional USB power supply unit Plug the USB power supply unit into the wall socket The status LED indicates the charge level 5 5 75 75 100 Using stickers to label transmission paths You can use the colored stickers to sho...
Страница 54: ...er and the button on the receiver until the status LEDs start flashing green and red in alternation The status LEDs will remain green once the transmitter and receiver are paired and connected If the status LEDs do not remain green the charge level is below 15 see Checking the charge level during use Out of range monitoring The status LEDs begin flashing red when the transmitter and receiver are a...
Страница 55: ...ransmitter 3 5 mm jack socket for connecting to the clip on microphone 4 XSW Digital RX 35 receiver 3 5 mm jack socket for connecting to the camera cable 5 Charging cable USB A to USB C for charging the transmitter and re ceiver 6 ME 2 2 clip on microphone 7 Camera cable jack plug to jack plug 3 5 mm for connecting to the camera 8 Stickers for labeling transmission paths ...
Страница 56: ...e can appear in the audio signal Insert the transmitter into the belt clip Fasten the belt clip to your clothes for example on your belt or waist band Attaching the clip on microphone Fasten the clip on microphone to your clothes for example on your col lar or lapel The distance to your mouth should be about 25 cm The distance af fects the sensitivity of the clip on microphone Reduce the distance ...
Страница 57: ...nto the hot shoe adapter Slide the hot shoe adapter onto your camera Plug the camera cable s simple jack plug into the jack socket on your camera Switching on the transmitter and receiver Briefly press the button on the transmitter and the button on the receiv er The status LEDs indicate the charge level for four seconds During these four seconds check that the transmitter and receiver are suffici...
Страница 58: ...arge level during use or the transmitter and receiver are not paired see Pairing Switching off the transmitter and receiver Press the button on the transmitter and the button on the receiver until the status LEDs switch off Adjusting the input level on the camera Once you have connected the receiver to the camera and switched it on you have to adjust the input level on the camera If the camera has...
Страница 59: ... using a set you can mute the audio signal The audio signal can then be unmuted To mute the audio signal Briefly press the button on the transmitter or receiver To unmute the audio signal Briefly press the button on the transmitter or receiver ...
Страница 60: ...el falls below 5 the status LED flashes only red In addition to the local charge level the status LED on a transmitter or re ceiver also provides information about the charge level of the connected transmitter or receiver This allows you to check the charge levels at any time The charge level is below 15 The charge level of the connected transmitter receiver is below 15 The charge level is below 5...
Страница 61: ...in operation Plug the small end of the USB charging cable into the USB port on the transmitter or receiver Plug the large end of the USB charging cable into the USB port on a conventional USB power supply unit Plug the USB power supply unit into the wall socket The status LED indicates the charge level 5 5 75 75 100 Using stickers to label transmission paths You can use the colored stickers to sho...
Страница 62: ...er and the button on the receiver until the status LEDs start flashing green and red in alternation The status LEDs will remain green once the transmitter and receiver are paired and connected If the status LEDs do not remain green the charge level is below 15 see Checking the charge level during use Out of range monitoring The status LEDs begin flashing red when the transmitter and receiver are a...
Страница 63: ...tional information 1 Belt clip for the transmitter 2 Hot shoe adapter for the receiver 3 XSW Digital TX XLR transmitter female XLR socket for connecting to a microphone 4 XSW Digital TX 35 transmitter 3 5 mm jack socket for connecting to the clip on microphone ...
Страница 64: ...SB A to USB C for charging the transmitter and re ceiver 7 ME 2 2 clip on microphone 8 Camera cable jack plug to jack plug 3 5 mm for connecting to the camera 9 Stickers for labeling transmission paths Operation Connecting the transmitter to the microphone Plug the transmitter into the XLR socket on your microphone ...
Страница 65: ... appear in the audio signal Insert the transmitter into the belt clip Fasten the belt clip to your clothes for example on your belt or waist band Attaching the clip on microphone Fasten the clip on microphone to your clothes for example on your col lar or lapel The distance to your mouth should be about 25 cm The distance af fects the sensitivity of the clip on microphone Reduce the distance if yo...
Страница 66: ... the receiver Lock the jack plug by screwing down the coupling ring If the jack plug is not firmly locked crackling noise can appear in the audio signal Insert the receiver into the hot shoe adapter Slide the hot shoe adapter onto your camera Plug the camera cable s simple jack plug into the jack socket on your camera ...
Страница 67: ...s too low You have to charge the rechargeable battery first see Charging the re chargeable battery After four seconds the status LED starts flashing green The flashing indicates that a wireless connection is being established The status LEDs remain green once the transmitter and receiver are connected If the status LEDs do not remain green either the charge level is below 15 see Checking the charg...
Страница 68: ...evel in the camera s menu so that the audio signal does not overload the input During recording regularly check the input level on the camera to make sure that the audio signal is not overloading Muting the audio signal When using a set you can mute the audio signal The audio signal can then be unmuted To mute the audio signal Briefly press the button on the transmitter or receiver To unmute the a...
Страница 69: ...el falls below 5 the status LED flashes only red In addition to the local charge level the status LED on a transmitter or re ceiver also provides information about the charge level of the connected transmitter or receiver This allows you to check the charge levels at any time The charge level is below 15 The charge level of the connected transmitter receiver is below 15 The charge level is below 5...
Страница 70: ...in operation Plug the small end of the USB charging cable into the USB port on the transmitter or receiver Plug the large end of the USB charging cable into the USB port on a conventional USB power supply unit Plug the USB power supply unit into the wall socket The status LED indicates the charge level 5 5 75 75 100 Using stickers to label transmission paths You can use the colored stickers to sho...
Страница 71: ...er and the button on the receiver until the status LEDs start flashing green and red in alternation The status LEDs will remain green once the transmitter and receiver are paired and connected If the status LEDs do not remain green the charge level is below 15 see Checking the charge level during use Out of range monitoring The status LEDs begin flashing red when the transmitter and receiver are a...
Страница 72: ... 35 transmitter 3 5 mm jack socket for connecting to a microphone with a jack plug 3 5 mm 4 XSW Digital RX 35 receiver 3 5 mm jack socket for connecting to the camera cable 5 Charging cable USB A to USB C for charging the transmitter and re ceiver 6 Camera cable jack plug to jack plug 3 5 mm for connecting to the camera 7 Stickers for labeling transmission paths ...
Страница 73: ...belt or waist band Connecting the receiver to the camera Plug the camera cable s screw on jack plug into the jack socket on the receiver Lock the jack plug by screwing down the coupling ring If the jack plug is not firmly locked crackling noise can appear in the audio signal Insert the receiver into the hot shoe adapter Slide the hot shoe adapter onto your camera Plug the camera cable s simple jac...
Страница 74: ...s too low You have to charge the rechargeable battery first see Charging the re chargeable battery After four seconds the status LED starts flashing green The flashing indicates that a wireless connection is being established The status LEDs remain green once the transmitter and receiver are connected If the status LEDs do not remain green either the charge level is below 15 see Checking the charg...
Страница 75: ...evel in the camera s menu so that the audio signal does not overload the input During recording regularly check the input level on the camera to make sure that the audio signal is not overloading Muting the audio signal When using a set you can mute the audio signal The audio signal can then be unmuted To mute the audio signal Briefly press the button on the transmitter or receiver To unmute the a...
Страница 76: ...el falls below 5 the status LED flashes only red In addition to the local charge level the status LED on a transmitter or re ceiver also provides information about the charge level of the connected transmitter or receiver This allows you to check the charge levels at any time The charge level is below 15 The charge level of the connected transmitter receiver is below 15 The charge level is below 5...
Страница 77: ...in operation Plug the small end of the USB charging cable into the USB port on the transmitter or receiver Plug the large end of the USB charging cable into the USB port on a conventional USB power supply unit Plug the USB power supply unit into the wall socket The status LED indicates the charge level 5 5 75 75 100 Using stickers to label transmission paths You can use the colored stickers to sho...
Страница 78: ...er and the button on the receiver until the status LEDs start flashing green and red in alternation The status LEDs will remain green once the transmitter and receiver are paired and connected If the status LEDs do not remain green the charge level is below 15 see Checking the charge level during use Out of range monitoring The status LEDs begin flashing red when the transmitter and receiver are a...