background image

EN-1

Copyright © 2014, Fast ČR, a.s.  

 10/2014

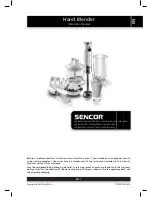
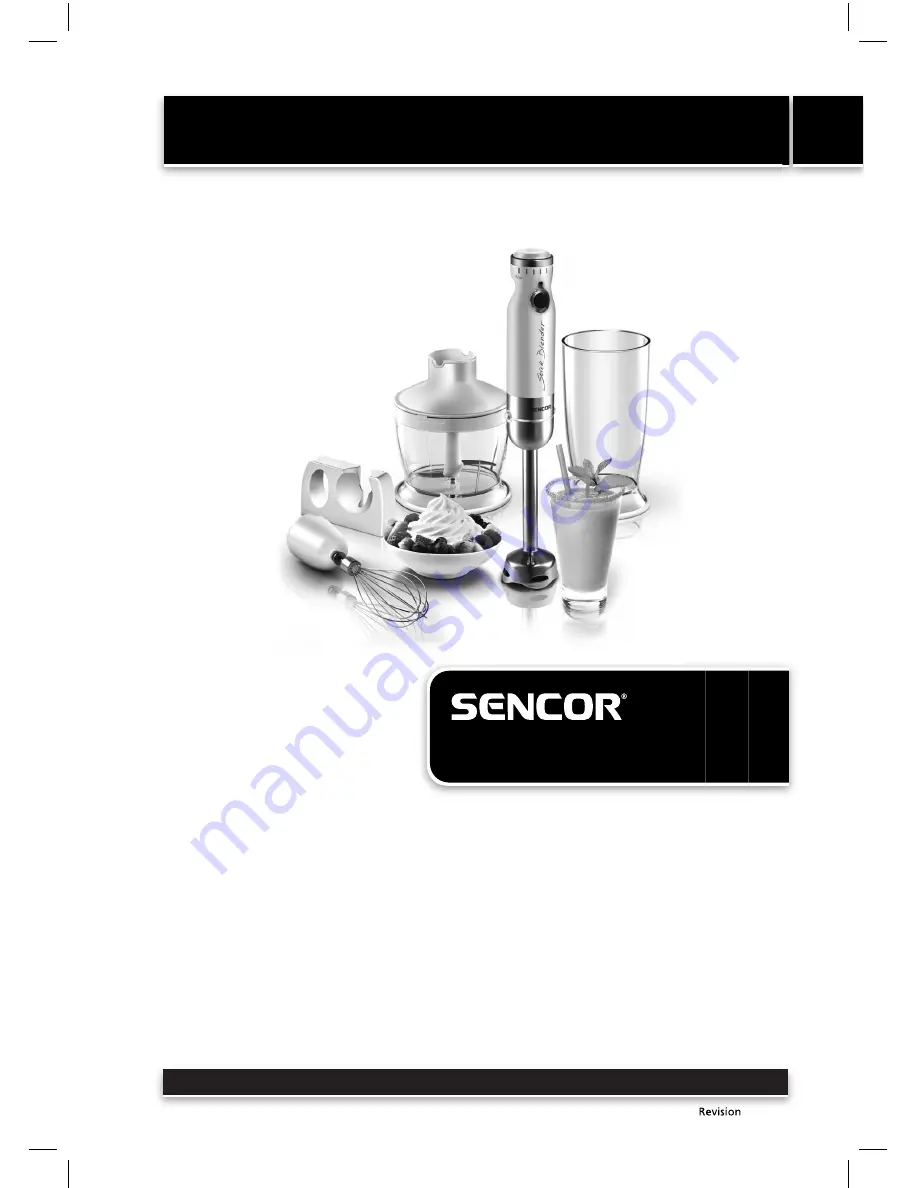
Hand Blender

Instruction manual

EN

SHB 436XXX-NAA1/SHB 4360-NAA1/ SHB 4361BL-NAA1/SHB 4362GR-NAA1/ 

SHB 4363OR-NAA1/ SHB 4364RD-NAA1/ SHB 4365VT-NAA1/

SHB 4366YL-NAA1/SHB 4367TQ-NAA1/SHB 4368RS-NAA1

Before use, please read the 

i

nstruct

i

on manual carefully, even 

i

f you already have an exper

i

ence w

i

th 

us

i

ng s

i

m

i

lar equ

i

pment

.

 Use m

i

xer only 

i

n accordance w

i

th the 

i

nstruct

i

ons 

i

ncluded 

i

n th

i

s manual

.


Save manual for future reference

.

Save the cardboard box, packag

i

ng mater

i

al, cush

i

on

i

ng, pro

äÛ

 of purchase rece

i

pt and the warranty 

pol

i

cy at least for the durat

i

on of the warranty per

i

od

.

 In case you need to sh

i

p the appl

i

ance back, use 

the or

i

g

i

nal packag

i

ng

.

Copyright © 2016, Fast ČR, a.s.  

 05/2016

Содержание SHB 4360-NAA1

Страница 1: ...instruction manual carefully even if you already have an experience with using similar equipment Use mixer only in accordance with the instructions included in this manual Save manual for future reference Save the cardboard box packaging material cushioning proäÛ of purchase receipt and the warranty policy at least for the duration of the warranty period In case you need to ship the appliance back...

Страница 2: ...ANT SAFEGUARDS 3 DEVICE DESCRIPTION 4 HOW TO USE THE HAND BLENDER 5 HOW TO USE THE CHOPPING ATTACHMENT 6 HOW TO USE THE WHISK ATTACHMENT 7 WALL HOLDER 7 CLEANING 8 TECHNICAL SPECIFICATIONS 8 CONTENT IMPORTANT SAFEGUARDS 3 DEVICE DESCRIPTION 5 HOW TO USE THE STICK BLENDER 6 HOW TO USE THE CHOPPING ATTACHMENT 7 HOW TO USE THE WHISK ATTACHMENT 8 WALL HOLDER 8 CLEANING 9 TECHNICAL SPECIFICATIONS 9 Cop...

Страница 3: ...ities at a time to reduce spillage 16 Don t put in water 17 Don t open until blades stop 18 Don t allow children to use the blender without supervision 19 Don t place the appliance in the hot ingredients 20 The appliance is constructed to process normal household quantities 21 Short time operating Use the appliance with blender stick A5 for no longer than 1 minute and don t operate hard food for l...

Страница 4: ...ver place fingers or other utensils into feed or discharge areas 36 Be certain cover is securely locked in place before operating appliance 37 When mixing liquids especially hot liquids use a tall container or make small quantities at a time to reduce spillage Caution The cutting knifes are very sharp Never attempt to touch the spinning kni es 38 Don t operate any appliance with a damaged cord or p...

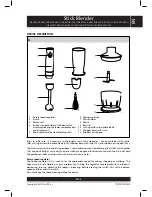
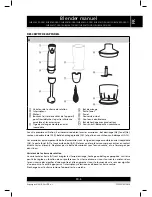
Страница 5: ...çêããÞãÜ ìÖéÚç ãäç ÞââÚçèÚ éÝÚâ Þã ìÖéÚç Rotary speed regulator The Speed regulator A1 is used to set the appropriate speed for mixing chopping or whisking The Speed can be set according to your preferences Turning the regulator ØäêãéÚçØáäØàìÞèÚ the speed is decreasing turn ing clockwise the speed is increasing Before pressing the switch first set the desired speed and then press the switch Do not ...

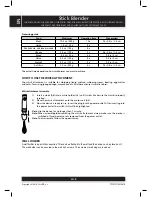
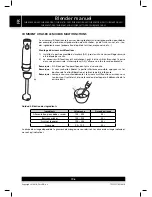
Страница 6: ...itch A2 will be highlighted Note Use the device for no longer than 1 minute Note If you want release the lower removable part press the attaching releasing buttons and remove the lower part Note When assembling disassembling the hand blender always make sure the hand blender is switched off and power cord is removed from the power outlet Ingredients processing guide Ingredients Volume in g Mixing ...

Страница 7: ...nto the bowl The amount should not exceed the maximum limit 500 ml that is marked on the bowl 4 Place a lid A9 on the bowl The bowl should be put so that the pressing center located on the underside of the lid is placed on the cross of the cutting knife as well as the security locks located on the sides of the lid fit into the bowl áäØàÞãÜ system Once the lid is placed correctly turn the lid clock...

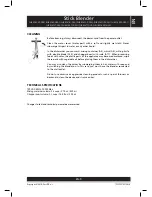
Страница 8: ... After inserting into the power outlet the switch A2 will be highlighted Note Use the device for no longer than 1 minute Note When assembling disassembling the whisk attachment always make sure the device is switched off and power cord is removed from the power outlet Note To disassemble follow the opposite way WALL HOLDER A wall holder is a part of accessories This can be attached to the wall and...

Страница 9: ...ing foods with color the plastic parts of the appliance may become discolored wipe these parts with vegetable oil before placing them in the dishwasher You may also clean the kniëes by submerging them in hot water with soap and by switching the blender on In this case you must have the blender connected to the wall outlet Do not use abrasive or aggressive cleaning products such as paint thinners o...

Страница 10: ...t ČR a s 10 2014 EN Stick Blender SHB 436XXX NAA1 SHB 4360 NAA1 SHB 4361BL NAA1 SHB 4362GR NAA1 SHB 4363OR NAA1 SHB 4364RD NAA1 SHB 4365VT NAA1 SHB 4366YL NAA1 SHB 4367TQ NAA1 SHB 4368RS NAA1 Copyright 2016 Fast ČR a s 05 2016 ...

Страница 11: ...tion veuillez lire le manuel d utilisation consciencieusement même si vous avez déjà utilisé un équipement similaire N utilisez le mixeur que conformément aux consignes incluses dans ce manuel Conservez le manuel pour pouvoir vous y référer dans le futur Conservez le carton les matériaux d emballage les cales les preuves d achat et de garantie au moins pendant la période de garantie Si vous deviez...

Страница 12: ...65VT NAA1 SHB 4366YL NAA1 SHB 4367TQ NAA1 SHB 4368RS NAA1 Copyright 2016 Fast ČR a s 05 2016 TABLE DES MATIERES MESURES DE SÉCURITÉ IMPORTANTES 3 DESCRIPTIF DE L APPAREIL 5 COMMENT UTILISER LE BLENDER MANUEL 6 COMMENT UTILISER LE HACHOIR 7 COMMENT UTILISER LE FOUET 8 SUPPORT MURAL 8 NETTOYAGE 9 CARACTERISTIQUES TECHNIQUES 9 ...

Страница 13: ...es pièces mobiles 14 L utilisation des accessoires non recommandés ou non vendus par le fabricant peut provoquer un incendie 15 Lorsque vous mixez des liquides et particulièrement des liquides chauds utilisez un grand récipient ou mixez de petites quantités à la fois afin d éviter les débordements 16 Ne placez pas l appareil dans l eau 17 N ouvrez pas l appareil avant que les lames ne soient arrêt...

Страница 14: ...les aliments à la main Utilisez toujours un ustensile 34 N utilisez jamais vos mains pour racler la nourriture sur le disque si l appareil est en marche Vous pourriez vous couper 35 Ne placez jamais vos doigts ou les ustensiles dans le système d alimentation ou la zone d écoulement 36 Assurez vous que le couvercle est verrouillé de façon sûre avant de mettre l appareil en marche 37 Lorsque vous mi...

Страница 15: ...l de mixage A6 fouet A8 couteau à double lame A10 bol de hachage gradué A11 et patin en caoutchouc anti dérapant A12 Les accessoires qui composent la boîte d accessoires sont la tige de mixage amovible en acier inoxydable A5 le porte fouet A7 et couvercle du bol A9 Ne lavez que les pièces conçues pour entrer en contact direct avec les aliments Ne placez pas la boîte d accessoires sous l eau couran...

Страница 16: ...xeur multifonctions est maintenant prêt à être utiliser Branchez la prise dans une prise murale L interrupteur A2 s allume une fois le cordon branché Remarque N utilisez pas l appareil pendant plus d un minute Remarque Si vous souhaitez libérer la partie inférieure amovible appuyez sur les boutons de fixation libération et retirez la partie inférieure Remarque Lorsque vous montez démontez le mixeur...

Страница 17: ...ants 3 Placez la nourriture que vous souhaitez hacher dans le bol La quantité ne doit pas dépasser la limite maximale 500 ml marquée sur le bol 4 Positionnez le couvercle A9 sur le bol Le bol doit être placé de façon que le centre poussoir situé sous le couvercle se trouve sur la croix du couteau et que les verrous de sécurité situés sur les deux côtés du couvercle entrent dans le système de sécur...

Страница 18: ... en petites quantités Montage du batteur 1 Insérez le fouet A7 dans le support A8 jusqu à entendre le clic Assurez vous que le fouet est correctement inséré 2 Placez le batteur sur le moteur A3 3 L appareil est maintenant prêt à être utilisé Branchez la prise dans une prise murale L interrupteur A2 s allume une fois le cordon branché Remarque N utilisez pas l appareil pendant plus d une minute Rem...

Страница 19: ...le couteau à double lame A10 et le bol de hachage gradué A11 Les pièces de l appareil en plastique peuvent se colorer lorsque vous utilisez des aliments colorés essuyez ces pièces avec de l huile végétale avant de les mettre dans le lave vaisselle Vous pouvez également nettoyer les couteaux en les plongeant dans l eau chaude savonneuse et en allumant le blender Dans ce cas le blender doit être bra...

Страница 20: ...R Blender manuel SHB 436XXX NAA1 SHB 4360 NAA1 SHB 4361BL NAA1 SHB 4362GR NAA1 SHB 4363OR NAA1 SHB 4364RD NAA1 SHB 4365VT NAA1 SHB 4366YL NAA1 SHB 4367TQ NAA1 SHB 4368RS NAA1 Copyright 2016 Fast ČR a s 05 2016 ...

Страница 21: ...o de equipos similares Utilice la batidora únicamente de conformidad con las instrucciones incluidas en este manual Guarde el manual para poder consultarlo en el futuro Guarde la caja de cartón el material de embalaje el material amortiguador el justificante de compra y la política de garantía al menos durante el periodo de garantía En caso de tener que devolver el aparato utilice el embalaje orig...

Страница 22: ...A1 SHB 4365VT NAA1 SHB 4366YL NAA1 SHB 4367TQ NAA1 SHB 4368RS NAA1 Copyright 2016 Fast ČR a s 05 2016 ÍNDICE SALVAGUARDAS IMPORTANTES 3 DESCRIPCIÓN DEL DISPOSITIVO 5 CÓMO USAR LA BATIDORA DE MANO 6 CÓMO USAR EL ACCESORIO DE CORTE 7 CÓMO USAR EL ACCESORIO DE VARILLA 8 COLGADOR 8 LIMPIEZA 9 ESPECIFICACIONES TÉCNICAS 9 ...

Страница 23: ... incendio 15 Al mezclar líquidos especialmente si están calientes utilice un contenedor alto o emplee pequeñas cantidades cada vez para evitar las salpicaduras 16 No sumergir en agua 17 No abrir hasta que las cuchillas se hayan detenido 18 No permita que los niños utilicen la batidora sin vigilancia 19 No coloque el dispositivo sobre ingredientes calientes 20 El dispositivo se ha diseñado para pro...

Страница 24: ...é en uso Podrían producirse cortes 35 Jamás coloque los dedos u otros utensilios en las zonas de alimentación o de descarga 36 Asegúrese de que la tapa esté correctamente bloqueada en su puesto antes de usar el dispositivo 37 Al mezclar líquidos especialmente si están calientes utilice un contenedor alto o emplee pequeñas cantidades cada vez para evitar las salpicaduras 38 No utilizar ningún dispo...

Страница 25: ...los accesorios recipiente de mezcla A6 varillas A8 cuchillo de corte de doble hoja A10 cuenco para cortar con peso A11 y alfombrilla de goma antideslizante A12 En los accesorios que incluyen engranajes eje de mezcla de acero inoxidable A5 sujetavarillas A7 y tapa del cuenco A9 lave sólo las partes que están diseñadas para tener contacto directo con la comida No ponga los engranajes bajo agua corri...

Страница 26: ...ndica mediante un clic 2 Ahora la batidora de mano está lista para usar Inserte el enchufe en la toma de corriente Después de la inserción en la toma de corriente el interruptor A2 resaltará Nota Usa el aparato no más de 1 minuto Nota Si desea quitar la parte inferior removible pulse los botones fijación liberación y quite la parte inferior Nota Durante el montaje desmontaje de la batidora de mano ...

Страница 27: ...arte de plástico Precaución La cuchilla está muy afilada 3 Coloque los alimentos que desee cortar en el recipiente La cantidad no debe exceder el límite máximo 500 ml que está marcado en el recipiente 4 Coloque una tapa A9 en el vaso El recipiente debe ser puesto de modo que el centro de presión situado en la parte inferior de la tapa se coloque en la cruz de la cuchilla de corte así como las cerr...

Страница 28: ...l accesorio de batir 1 Inserte el batidor A7 en el soporte del batidor A8 hasta que haga clic Asegúrese que el batidor está ensamblado adecuadamente 2 Coloque el accesorio de batir en la unidad motora A3 3 Ahora el aparato está listo para usar Inserte el enchufe en la toma de corriente Después de la inserción en la toma de corriente se iluminará el interruptor A2 Nota Usa el aparato durante no más...

Страница 29: ...con doble hoja A10 y cuenco de corte con peso A11 Cuando procese comida con color puede que las partes plásticas del dispositivo se decoloren unte estas piezas con aceite vegetal antes de colocarlas en el lavavajillas También puede lavar las cuchillas sumergiéndolas en agua caliente con jabón y conectando la batidora En ese caso la batidora debe estar conectada a una toma de corriente No debe util...

Страница 30: ... Batidora de mano SHB 436XXX NAA1 SHB 4360 NAA1 SHB 4361BL NAA1 SHB 4362GR NAA1 SHB 4363OR NAA1 SHB 4364RD NAA1 SHB 4365VT NAA1 SHB 4366YL NAA1 SHB 4367TQ NAA1 SHB 4368RS NAA1 Copyright 2016 Fast ČR a s 05 2016 ...

Страница 31: ... de mano SHB 436XXX NAA1 SHB 4360 NAA1 SHB 4361BL NAA1 SHB 4362GR NAA1 SHB 4363OR NAA1 SHB 4364RD NAA1 SHB 4365VT NAA1 SHB 4366YL NAA1 SHB 4367TQ NAA1 SHB 4368RS NAA1 ES ES 11 Copyright 2016 Fast ČR a s 05 2016 ...

Страница 32: ... Batidora de mano SHB 436XXX NAA1 SHB 4360 NAA1 SHB 4361BL NAA1 SHB 4362GR NAA1 SHB 4363OR NAA1 SHB 4364RD NAA1 SHB 4365VT NAA1 SHB 4366YL NAA1 SHB 4367TQ NAA1 SHB 4368RS NAA1 Copyright 2016 Fast ČR a s 05 2016 ...

Отзывы: