background image

mobile 

Phone

additional 

mobile 

Phones or 

mP3 Player

advanced 

Selective 

Pairing:  

Hands-Free 

or a2DP 

Stereo

Sena X1 Pro Smart Cycling Helmet Firmware v1.0  |  34

4.  PAIRING THE  

HELMET WITH 

OTHER BLUETOOTH 

DEVICES

menU

Before using X1 Pro’s Bluetooth system with other 
Bluetooth devices for the first time, they’ll need to 

be “paired.” This enables them to recognize and 

communicate with one another whenever they’re 

within range.

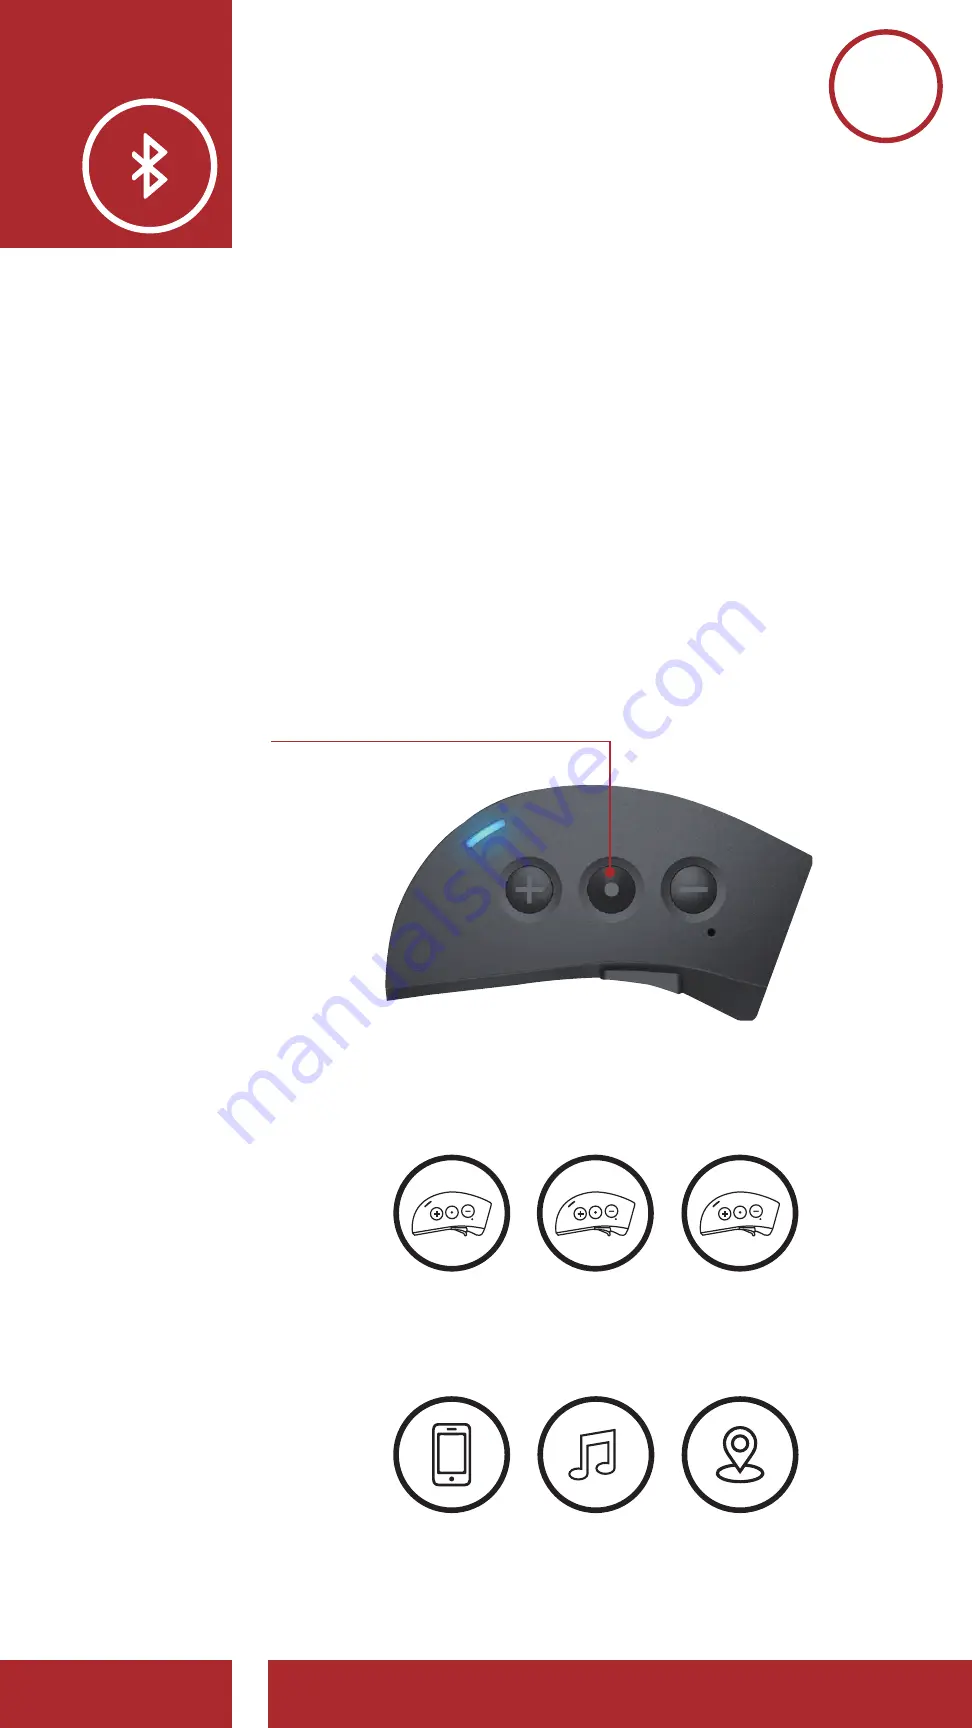
The helmet’s Bluetooth Module can pair with multiple 
Bluetooth devices such as a mobile phone, GPS, 
MP3 player or Sena SR10 Two-Way Radio Adapter via 

mobile Phone Pairing

 and 

Second mobile Phone 

Pairing

. The Bluetooth Helmet module can also be 

paired with up to three other Sena headsets.

Also pairs with:

Pairs with up to three Sena Headsets

Bluetooth 

Communication Module

Mobile

Phone

MP3 

Player

GPS

Devices

Содержание X1 PRO

Страница 1: ...Smart Cycling Helmet MENU ...

Страница 2: ...TINGS CLICK ANY SECTION TO BEGIN MOBILE PHONE USAGE USING THE FM RADIO TROUBLE SHOOTING MAINTENANCE AND CARE PAIRING WITH DEVICES ABOUT THE HELMET REMOTE CONTROL INTERCOM SETUP CAMERA OPERATION CAMERA CONFIG SETTINGS BLUETOOTH MODULE ...

Страница 3: ...Firmware v1 0 3 LEGEND Function Highlighted Button s to Tap or Hold Tap button the specified number of times Press and Hold button for the specified amount of time Audible prompt from the Bluetooth Module 10s HOLD 1x TAP Hello 1s HOLD ...

Страница 4: ... 1 2 Right Side 18 2 1 3 Front Side 19 2 2 Powering On and Off 19 2 3 Charging 20 2 4 Checking the Bluetooth Module s Battery Level 21 2 5 Volume Adjustment 22 2 6 Downloadable Sena Software 23 2 6 1 Sena Device Manager 23 2 6 2 Sena Smartphone App 23 2 6 3 Sena Camera App 24 2 7 Configuration Menu 24 2 7 1 Headset Configuration Setting 24 2 7 2 Camera Configuration Setting 27 3 1 Camera On or Off...

Страница 5: ...lective Pairing Hands Free or A2DP Stereo 38 4 3 1 Phone Selective Pairing Hands Free Profile 38 4 3 2 Media Selective Pairing A2DP Profile 39 6 1 Playing Music with Bluetooth Devices 47 6 2 Music Sharing 48 7 1 Intercom Pairing 49 7 2 Two Way Intercom 52 7 3 Multi Way Intercom 53 7 3 1 Starting a Three Way Intercom Conference 53 7 3 2 Starting a Four Way Intercom Conference 55 7 3 3 Ending Multi ...

Страница 6: ...ff 77 10 5 Auto Camera Sleep 78 10 6 Format SD Card 79 TABLE OF CONTENTS CONTINUED 8 Using the FM radio 62 8 1 FM Radio On Off 62 8 2 Seek and Save Radio Stations 63 8 3 Scan and Save Radio Stations 65 8 4 Temporary Station Preset 66 8 5 Navigating Preset Stations 67 8 6 Region Selection Default Worldwide 68 8 7 Radio Data System RDS Alternative AF Setting Default Enable 68 8 8 FM Station Guide De...

Страница 7: ...mart Cycling Helmet Firmware v1 0 7 11 Remote control 80 12 Troubleshooting 82 13 Maintenance and care 84 11 1 Pairing with the Remote Control 80 12 1 Fault Reset 82 12 2 Factory Reset 83 TABLE OF CONTENTS CONTINUED ...

Страница 8: ...ea is most likely to be impacted in a bicycle crash Make sure the helmet fits comfortably and is tightly fastened at all times WARNING Your helmet will not protect against injury in all types of accidents Even while wearing a helmet low speed accidents may result in serious head injury or death A bicycle helmet will not protect against injuries to the spine neck or face In the event of any impact ...

Страница 9: ...his helmet is for your child please take the time to read this manual as you should make sure your child understands everything in this User s Guide For maximum protection the Sena X1 Pro Smart Cycling Helmet must fit properly on the head and its chinstrap securely fastened under the chin With the retention system comfortably but firmly adjusted the helmet should allow sufficient peripheral vision...

Страница 10: ...ser s Guide belong to Sena Technologies Inc Reproduction or copying of the User s Guide without permission is strictly prohibited For United States Consumers this helmet has been tested and certified to meet and exceed the Bicycle Safety Standard for Bicycle Helmets 16 CFR Part 1203 A copy of this regulation can be obtained by visiting CPSC gov For European Consumers this helmet has been tested an...

Страница 11: ...Cycling Helmet Firmware v1 0 11 General Information Product Details Wearing the Helmet 1 2 Product Details Speakers Bluetooth Buttons DC Power Charging Firmware Upgrade MicroSD Card Slot QHD Action Camera Camera Control Buttons MicroSD card not included Microphone ...

Страница 12: ...ment For proper use the straps must be tight and evenly tensioned To properly wear your helmet 1 Position the helmet on your head with the front covering your forehead If the helmet is tipped back and is not covering your forehead then the helmet is not in the proper position WARNING Always wear the helmet in the proper position on your head with the front of the helmet covering your forehead for ...

Страница 13: ... 13 General Information Product Details Wearing the Helmet 2 Position the strap adjuster centered just below your ears 3 Position the helmet low on your forehead with the buckle under the chin and back against the throat The straps should fit comfortably around both ears Strap Adjuster Buckle ...

Страница 14: ...lling the chinstrap end through the buckle to either tighten or loosen as needed Use the O Ring to secure the excess strap Always wear the helmet with the chinstrap buckle fastened and the chinstrap pulled tight and positioned back against the throat With the strap buckled and the helmet positioned you should feel the chinstrap pull firmly against your chin as you open your mouth When properly adj...

Страница 15: ...etention system which helps stabilize the helmet in the correct position when you ride When wearing the helmet turn the retention system knob clockwise to tighten the helmet or counterclockwise to loosen the helmet Retention System Knob Retention System 6 To change the height of the retention system firmly pull or push the retention system upward or downward to a different position Retention Syste...

Страница 16: ... both hands and try to remove it by rolling the helmet forward and backward as far as you can This is an important test to ensure that the helmet fits correctly When you do this you should feel the chinstrap pull against the underside of your chin and the helmet will resist any movement If this isn t the case tighten the chinstrap and try it again until this happens If you cannot achieve the prope...

Страница 17: ...gh the rubber O ring Check for proper fit and adjustment often including each time you wear it and periodically during use This helmet has been designed for recreational bicycling This helmet has not been approved and is not intended for extreme uses such as downhill racing at high speeds jumping or leaping with a fully suspended bicycle snow sports water sports motor sports street hockey playgrou...

Страница 18: ...et Button Increase Volume Track Forward Scan Radio Stations Speed Dial Decrease Volume Track Back FM Tuner On Off WiFi Power On Off Enter Camera Configuration Settings Blue Red and Green LED Lights Center Button Camera Button 2 1 2 Right Side Answer End Phone Call Reject an Incoming Phone Call Start End Intercom Conversation Play Pause Music Enter Intercom Pairing Mode Enter Voice Configuration Se...

Страница 19: ...X1 Pro Smart Cycling Helmet Firmware v1 0 19 2 Getting started MENU 2 1 3 Front Side Camera Power On Off Start Stop Recording Camera LED Lights Camera Button 2 2 Powering On and Off Press and hold the Center Button and the Button at the same time for 1 second to turn the headset on or off Powering On Powering Off POWER ON DEVICE POWER OFF DEVICE 1s HOLD 1x TAP ...

Страница 20: ...dule can be charged using many common methods via the supplied USB power data cable 1 Plugged into a computer s USB port 2 With a USB equipped AC adapter via a wall outlet charger Note Please make sure to take off your helmet while charging The headset automatically turns off during charging Charging the Bluetooth Communication Module DC Power Charging Firmware Upgrade Port Depending upon the char...

Страница 21: ... Firmware v1 0 21 2 Getting started MENU 2 4 Checking the Bluetooth Module s Battery Level There are two ways to check battery level 1 Visually with LEDs when powering on Battery Level Visual Method Battery Level Audible Method AUDIBLE METHOD VISUAL METHOD HIGH MEDIUM LOW Battery level high medium low 1s HOLD 3s HOLD Note Blinking LEDs alternate from blue to red when battery power is low ...

Страница 22: ... Button for 3 more seconds as the headset powers on A prompt will announce the remaining battery level Battery Level Audible Method AUDIBLE METHOD HIGH MEDIUM LOW Battery level high medium low 3s HOLD 2 5 Volume Adjustment You can raise or lower the volume by tapping the Button or the Button Volume is set and maintained independently at different levels for each audio source i e phone intercom eve...

Страница 23: ...an assign speed dial presets FM radio station presets and more For more information on downloading the Sena Device Manager please visit sena com Click Here to Visit Sena com 2 6 2 Sena Smartphone App The Sena Smartphone App allows you to configure the Bluetooth Communication Module s settings as well as access the User s and Quick Start Guides To do so pair your mobile phone with your X1 Pro Smart...

Страница 24: ...ile phone with the X1 Pro Smart Cycling Helmet by following the instructions provided on the Sena Camera App You can download the Sena Camera App for Android and Apple operating systems 2 7 Configuration Menu 2 7 1 Headset Configuration Setting The Bluetooth Communication Module can be configured by following a series of voice prompts Further details about each of these settings will be explained ...

Страница 25: ...TAP 1x TAP Accessing the Configuration Menu Navigating Forward through the Menu Navigating Backward through the Menu Enable Disable or Execute a Feature NAVIGATE FORWARD NAVIGATE BACKWARD ACCESS CONFIG MENU Menu prompt Menu prompt ENABLE OR DISABLE EXECUTE 10s HOLD 3 You can enable disable the feature or execute the command by tapping the Center Button 1x TAP 1x TAP 1x TAP Accessing the Configurat...

Страница 26: ...e Center Button 1x TAP Phone Pairing Execute 2x TAP Second Mobile Phone Pairing Execute 3x TAP Phone Selective Pairing Execute 4x TAP Media Selective Pairing Execute 5x TAP Speed Dial Execute 6x TAP Voice Prompt Enable Disable 7x TAP RDS AF Setting Enable Disable 8x TAP FM Station Guide Enable Disable 6x TAP Advanced Noise Control Enable Disable 5x TAP Delete All Pairings Execute 4x TAP Remote Con...

Страница 27: ...l you hear the voice prompt Camera setup 1x TAP 1x TAP TAP Accessing the Camera Configuration Menu Navigating Forward through the Menu Navigating Backward through the Menu Enable Disable or Execute a Feature NAVIGATE FORWARD NAVIGATE BACKWARD ACCESS CAMERA CONFIG MENU Menu prompt Menu prompt 3s HOLD ENABLE OR DISABLE 2 Tap the Button or the Button to navigate between the menus You will hear voice ...

Страница 28: ...AVIGATE FORWARD NAVIGATE BACKWARD Menu prompt Menu prompt ENABLE OR DISABLE EXECUTE 3 You can change video modes video resolutions enable or disable a feature or execute a command by tapping the Center Button To exit the Camera Configuration Menu tap the Multi Function Button 1x TAP 1x TAP 1x TAP Navigating Forward through the Menu Navigating Backward through the Menu Enable Disable or Execute a F...

Страница 29: ...ed number of times Tap the Center Button 1x TAP Video Mode Video Mode Loop Recording Mode 2x TAP Video Resolution 1440p 30fps 1080p 60fps 1080p 30fps 3x TAP Date Caption Enable Disable 3x TAP Smart Audio MixTM Enable Disable 2x TAP Auto Camera Sleep Enable Disable 1x TAP Format SD Card Execute Note You cannot record videos without a microSD card Your SD card needs to be formatted using the X1 Pro ...

Страница 30: ... Recording Camera Off Stop Video Recording CAMERA ON START RECORDING CAMERA OFF STOP RECORDING 1s 1s HOLD HOLD 3s 1s HOLD HOLD Recording CAMERA LED STATUS Green LED Flashing 3 2 Video Recording 3 2 1 Normal Recording Mode 1 To record a normal video set the video mode setting in the Camera Configuration Menu to be Video Mode 2 Press and hold the Camera Button for 1 second to start video recording u...

Страница 31: ... Flashing 3 2 2 Loop Recording Mode Loop Recording mode continuously records videos to create footages of assigned length of time If the memory reaches maximum then the oldest footage will be deleted to store the most recent footage 1 To use loop recording set the video mode setting in the Camera Configuration Menu to be Loop Recording Mode 2 Press and hold the Camera Button for 1 second until you...

Страница 32: ...OLD Recording Recording stopped CAMERA LED STATUS Green LED Flashing Below is a table of approximate video recording times to microSD card size in specific resolutions and frame rates 1440p 30fps 1080p 60fps 1080p 30fps 1GB 4 min 4 min 9 min 2GB 8 min 8 min 18 min 4GB 16 min 16 min 36 min 8GB 33 min 33 min 1 h 12 min 16GB 1 h 5 min 1 h 5 min 2 h 24 min 32GB 2 h 11 min 2 h 11 min 4 h 48 min ...

Страница 33: ...ation Setting for more details The headset gives a warning and automatically stops recording when the microSD card is full or the battery becomes low Your video will be saved before the headset powers off If the headset becomes too hot it gives a high temperature warning Cool down your headset before further use The maximum size per video is limited to 4GB Therefore when the video reaches the 4GB ...

Страница 34: ...to be paired This enables them to recognize and communicate with one another whenever they re within range The helmet s Bluetooth Module can pair with multiple Bluetooth devices such as a mobile phone GPS MP3 player or Sena SR10 Two Way Radio Adapter via Mobile Phone Pairing and Second Mobile Phone Pairing The Bluetooth Helmet module can also be paired with up to three other Sena headsets Also pai...

Страница 35: ...4 1 Mobile Phone 1 Execute Phone Pairing in the Configuration Menu 1x TAP Access Phone Pairing in the Configuration Menu Alternating blue and red flashing lights indicate device is now discoverable NAVIGATE FORWARD 1X ACCESS CONFIG MENU BLUETOOTH LED STATUS PIN NUMBER Phone pairing Configuration menu 10s HOLD 2 With your mobile phone in Bluetooth pairing mode select Sena X1 Pro in the list of devi...

Страница 36: ... the first time they ll need to be paired This enables them to recognize and communicate with one another whenever they re within range The helmet s Bluetooth Module can pair with multiple Bluetooth devices such as a mobile phone for hearing navigational directions from a GPS app or health and training information from apps such as Strava and Cyclometer or an MP3 player via Mobile Phone Pairing an...

Страница 37: ...CESS CONFIG MENU BLUETOOTH LED STATUS Second mobile phone pairing Configuration menu PIN NUMBER 10s HOLD 2 With your mobile phone in Bluetooth pairing mode select Sena X1 Pro in the list of devices detected 3 If your mobile phone asks for a PIN enter 0000 1x TAP Access Phone Pairing in the Configuration Menu Alternating blue and red flashing lights indicate device is now discoverable NAVIGATE FORW...

Страница 38: ...ablish two Bluetooth profiles Hands Free or A2DP Stereo Advanced Selective Pairing allows the module to separate the profiles to enable connection with two devices 4 3 1 Phone Selective Pairing Hands Free Profile 1 Execute Phone Selective Pairing in the Configuration Menu 3x TAP Access Phone Selective Pairing in the Configuration Menu Blue flashing lights indicates device is now discoverable NAVIG...

Страница 39: ...cted 3 If it asks for a PIN enter 0000 3x TAP Blue flashing lights indicates device is now discoverable NAVIGATE FORWARD 3X BLUETOOTH LED STATUS PIN NUMBER Phone selective pairing 4 3 2 Media Selective Pairing A2DP Profile 1 Execute Media Selective Pairing in the Configuration Menu 4x TAP Access Media Selective Pairing in the Configuration Menu Red flashing light indicates device is now discoverab...

Страница 40: ...irmware v1 0 40 4 PAIRING THE HELMET WITH OTHER BLUETOOTH DEVICES MENU 2 With your A2DP device in Bluetooth pairing mode select Sena X1 Pro in the list of devices detected 3 If it asks for a PIN enter 0000 4x Red flashing light indicates device is now discoverable NAVIGATE FORWARD 4X BLUETOOTH LED STATUS PIN NUMBER Media selective pairing ...

Страница 41: ...re v1 0 41 5 Mobile phone usage MENU 5 1 Making and Answering Calls 3s HOLD 1x TAP Answer a Call End Reject a Call Make a Call with Voice Dialer ANSWER END REJECT VOICE DIAL 2s HOLD Note If you have a GPS device connected you will not hear its voice navigations during a phone call ...

Страница 42: ...the Configuration Menu by holding down the Center Button for 10 seconds then using the and Buttons to scroll through the menu Please refer to Section 2 7 Configuration Menu for more details 5x TAP 1x TAP 1x TAP NAVIGATE FORWARD 5X ACCESS CONFIG MENU Speed dial Configuration menu Speed dial Assigning Speed Dial Presets Navigate Forward through Preset Numbers EXECUTE NAVIGATE FORWARD 1X 10s HOLD ...

Страница 43: ...RD 5X Speed dial Speed dial Speed dial Save speed dial Cancel Navigate Forward through Preset Numbers Navigate Backward through Preset Numbers On Your Mobile Phone Dial Number Exit Menu Dial the phone number on your mobile phone EXECUTE NAVIGATE FORWARD 1X NAVIGATE BACKWARD 1X MOBILE PHONE EXIT MENU 3 On your mobile phone call the number to which you want to assign a Speed Dial Preset The call wil...

Страница 44: ...LE PHONE EXIT MENU CONFIRM CANCEL 4 Use this procedure to save other Speed Dial Presets 5 To exit the menu tap the Button or the Button until you hear the voice prompt Cancel then tap the Center Button to confirm 1x TAP 1x TAP 1x TAP Speed dial Speed dial Save speed dial Cancel Navigate Backward through Preset Numbers On Your Mobile Phone Dial Number Exit Menu Dial the phone number on your mobile ...

Страница 45: ...h Speed Dial Preset Numbers Navigate Backward through Speed Dial Preset Numbers Call a Speed Dial Preset Number Redial Last Number NAVIGATE FORWARD SPEED DIAL NAVIGATE BACKWARD SPEED DIAL Speed dial 3s HOLD 2 Tap the Button or the Button to navigate between the Speed Dial Presets 1x TAP 1x TAP 1x TAP Speed dial Enter Speed Dial Mode Navigate Forward through Speed Dial Preset Numbers Navigate Backw...

Страница 46: ...reset Number Redial Last Number NAVIGATE BACKWARD SPEED DIAL REDIAL 4 To call one of your Speed Dial Presets tap the Center Button when you hear the prompt Speed dial 1x TAP 1x TAP 1x TAP 1x TAP Speed dial Last number redial Enter Speed Dial Mode Navigate Forward through Speed Dial Preset Numbers Navigate Backward through Speed Dial Preset Numbers Call a Speed Dial Preset Number Redial Last Number...

Страница 47: ...tooth Devices 1 To play or pause music press and hold the Center Button for 1 second until you hear a double beep Play Pause Music Next Track Previous Track PLAY PAUSE SKIP TRACK FORWARD SKIP TRACK BACKWARD Beep Beep 1s HOLD 1s HOLD 1s HOLD 2 To adjust the volume tap the Button or the Button 1x TAP 1x TAP Volume Up Volume Down VOLUME DOWN VOLUME UP ...

Страница 48: ...RWARD SKIP TRACK BACKWARD Beep Beep 1s HOLD 1s HOLD 1s HOLD 6 2 Music Sharing You can share the music you re listening to with an Intercom Friend during an intercom conversation To start or terminate sharing music press the Center Button for 1 second during an intercom conversation until you hear a double beep Both you and your Intercom Friend can control music playback Sharing Music with an Inter...

Страница 49: ...ia intercom with the X1 Pro Smart Cycling Helmet simply by pairing their headsets 1x TAP BLUETOOTH LED STATUS Pairing with Intercom Friends Blue flashing LED confirms intercoms are paired INTERCOM FRIEND B B or B D C A 1 Press and hold the Center Button of two Bluetooth Modules for 5 seconds until you hear the voice prompt Intercom pairing Pairing with Intercom B YOU INTERCOM FRIEND B B Intercom p...

Страница 50: ...rcoms are paired YOU INTERCOM FRIEND B B A or B INTERCOM FRIEND B B Intercom pairing Red flashing light indicates device is now discoverable BLUETOOTH LED STATUS D C A 2 Tap the Center Button on either Bluetooth Module and wait until the LEDs of both turn blue 1x TAP BLUETOOTH LED STATUS On Either One of the Devices Pairing with Intercom Friends Blue flashing LED confirms intercoms are paired YOU ...

Страница 51: ...rsal Intercom Advanced Noise Control Sena X1 Pro Smart Cycling Helmet Firmware v1 0 51 7 INTERCOM SETUP MENU 3 Repeat steps 1 and 2 to pair with Intercom Friends C D Last Come First Served Intercom Friend 1 Intercom Friend 1 YOU YOU YOU Intercom Friend 1 Intercom Friend 2 Intercom Friend 2 Intercom Friend 3 A A A D C C B B B ...

Страница 52: ...o Way Intercom with Intercom Friend 2 Start End Two Way Intercom with Intercom Friend 3 INTERCOM FRIEND 1 INTERCOM FRIEND 2 INTERCOM FRIEND 3 2 Tap twice for Intercom Friend 2 2x TAP 3x TAP 1x TAP D C B Start End Two Way Intercom with Intercom Friend 1 Start End Two Way Intercom with Intercom Friend 2 Start End Two Way Intercom with Intercom Friend 3 INTERCOM FRIEND 1 INTERCOM FRIEND 2 INTERCOM FR...

Страница 53: ...ting a Three Way Intercom Conference You A can have a Three Way Intercom Conference with two other Intercom Friends B C by establishing two intercom connections simultaneously 1 Pair your headset A with those of two other Intercom Friends B C Please refer to Section 7 1 Intercom Pairing for pairing instructions Starting an Intercom Conversation with Intercom Friend B Starting an Intercom Conversat...

Страница 54: ...rcom Friend C may join the intercom by making an intercom call to you A Starting an Intercom Conversation with Intercom Friend B Starting an Intercom Conversation with Intercom Friend C Pair with Intercom Friends B C C B A You Intercom Friend B Intercom Friend C Three Way Conference C C C B B B A A A You You You Intercom Friend B Intercom Friend B Intercom Friend B Intercom Friend C Intercom Frien...

Страница 55: ... Four Way Intercom YOU Intercom Friend B Intercom Friend C Intercom Friend D A D C B 7 3 3 Ending Multi Way Intercom 1 Press the Center Button for 1 second until you hear a beep to terminate all intercom connections 2 Tap the Center Button to disconnect from your first Intercom Friend Double tap the Center Button to disconnect from your second Intercom Friend 7 4 Three Way Conference Phone Call wi...

Страница 56: ...g a conference phone call tap the Center Button 1x TAP 1x TAP 2s HOLD Invite an Intercom Friend into Phone Conference Disconnect Intercom Friend from Conference End Phone Call ADD AN INTERCOM FRIEND TO CALL DISCONNECT INTERCOM END MOBILE CALL 3 To disconnect the mobile phone call during a conference phone call press the Center Button for 2 seconds 1x TAP 1x TAP 2s HOLD Invite an Intercom Friend in...

Страница 57: ...and the Button simultaneously to begin Group Intercom The alternating blue and red flashing lights indicate that the device is now in Group Intercom mode and you will hear a voice prompt Group intercom 1x TAP Start Group Intercom End Group Intercom END GROUP INTERCOM START GROUP INTERCOM BLUETOOTH LED STATUS Group intercom Group intercom connected Group intercom terminated Green LED Flashing 1s HO...

Страница 58: ...tercom connected Group intercom terminated Green LED Flashing 1s HOLD 7 6 Universal Intercom Universal Intercom allows you to have intercom conversations with users of non Sena Bluetooth headsets You can pair the X1 Pro Smart Cycling Helmet with only one non Sena headset at a time The intercom distance depends on the performance of the Bluetooth headset to which it s connected When a non Sena Blue...

Страница 59: ...1 Pro Smart Cycling Helmet Firmware v1 0 59 7 INTERCOM SETUP MENU 3x TAP 1x TAP Access Universal Intercom in the Configuration Menu EXECUTE NAVIGATE BACKWARD 3X ACCESS CONFIG MENU Universal intercom Configuration menu 10s HOLD 2 Put the non Sena Bluetooth headset in Pairing Mode The X1 Pro Smart Cycling Helmet will automatically pair with a non Sena Bluetooth headset ...

Страница 60: ...our Way Universal Intercom You Non Sena Headset Non Sena Headset Sena Headset You Sena Headset Non Sena Headset Example of a Three Way Universal Intercom Example of a Four Way Universal Intercom You Non Sena Headset Non Sena Headset Sena Headset You Sena Headset Non Sena Headset 7 7 Advanced Noise Control Default Enable An Advanced Noise Control setting can be found in the Configuration Menu Pleas...

Страница 61: ...ers Group Intercom Universal Intercom Advanced Noise Control Sena X1 Pro Smart Cycling Helmet Firmware v1 0 61 7 INTERCOM SETUP MENU 6x TAP 1x TAP Access Advanced Noise Control in the Configuration Menu ENABLE OR DISABLE NAVIGATE BACKWARD 6X ACCESS CONFIG MENU Noise control Configuration menu 10s HOLD ...

Страница 62: ...on Radio Data System RDS Alternative AF Setting FM Station Guide Sena X1 Pro Smart Cycling Helmet Firmware v1 0 62 8 USING THE FM RADIO MENU 8 1 FM Radio On Off To turn on or shut off the FM radio press the Button for 1 second until you hear a double beep FM Radio On FM Radio Off FM RADIO OFF FM RADIO ON Beep Beep Beep Beep 1s HOLD 1s HOLD ...

Страница 63: ...rch for radio stations Seek Stations Forward Seek Stations Backward Enter Preset Selection Mode Navigate Forward through Preset Stations Navigate Backward through Preset Stations NAVIGATE FORWARD ENTER PRESET MODE SEEK FORWARD SEEK BACKWARD 1x TAP 3s HOLD Preset 2x TAP 2x TAP 2 To save the current station press and hold the Center Button for 3 seconds until you hear the voice prompt Preset Seek St...

Страница 64: ...tions Save Station to the Preset Number Delete Station from Memory DELETE STATION SAVE TO PRESET NAVIGATE BACKWARD NAVIGATE FORWARD ENTER PRESET MODE 1x TAP 1x TAP 3s HOLD 1s HOLD 1s HOLD Preset 4 Press and hold the Button for 1 second to save the station in the preset number you choose Or press and hold the Button for 1 second to delete the station from memory Enter Preset Selection Mode Navigate...

Страница 65: ...h the current station s frequency then up from there 1 Press and hold the Button for 1 second to scan for stations Preset Scan and Save Radio Stations Save the Current Station Stop Scanning START SCANNING SAVE STATION STOP SCANNING 1x TAP 1s HOLD 1s HOLD 2 The Sena tuner pauses at each station it finds for 8 seconds before moving to the next 3 To save the current station tap the Center Button The ...

Страница 66: ... scanning press the Button for 1 second Preset Save the Current Station Stop Scanning SAVE STATION STOP SCANNING 1x TAP 1s HOLD 8 4 Temporary Station Preset The Temporary Preset feature automatically finds and saves the nearest 10 radio stations without changing your existing preset stations 1 Tap the Button three times to automatically find and save 10 stations Temporary Stations TEMPORARY STATIO...

Страница 67: ...Sena X1 Pro Smart Cycling Helmet Firmware v1 0 67 8 USING THE FM RADIO MENU 8 5 Navigating Preset Stations Using the methods above up to 10 radio stations can be stored Press and hold the Center Button for 1 second to navigate through the saved stations Navigate through Preset Stations NAVIGATE FORWARD 1s HOLD Note You can use the Sena Device Manager or the Sena Smartphone App to save the preset s...

Страница 68: ...ou can optimize the seek function to avoid unnecessary frequency ranges Region Frequency range Step Worldwide 76 0 108 0 MHz 100 kHz North America South America and Australia 87 5 107 9 MHz 200 kHz Asia and Europe 87 5 108 0 MHz 100 kHz Japan 76 0 95 0 MHz 100 kHz 8 7 Radio Data System RDS Alternative AF Setting Default Enable The RDS AF setting can be found in the Configuration Menu Please refer ...

Страница 69: ...tions Region Selection Radio Data System RDS Alternative AF Setting FM Station Guide Sena X1 Pro Smart Cycling Helmet Firmware v1 0 69 8 USING THE FM RADIO MENU 7x TAP 1x TAP Access RDS AF Setting in the Configuration Menu ENABLE OR DISABLE NAVIGATE FORWARD 7X ACCESS CONFIG MENU RDS AF setting Configuration menu 10s HOLD ...

Страница 70: ...e setting can be found in the Configuration Menu Please refer to Section 2 7 1 Headset Configuration Setting for more details When FM Station Guide is enabled FM station frequencies are given by voice prompts as you select preset stations When FM Station Guide is disabled the voice prompts on FM station frequencies will not be given as you select preset stations 8x TAP 1x TAP Access FM Station Gui...

Страница 71: ... be interrupted by an incoming mobile phone call 9 2 Firmware Updates The X1 Pro Smart Cycling Helmet supports firmware upgrades You can upgrade the firmware using the Sena Device Manager Please refer to Section 2 6 1 Sena Device Manager for more details Please visit sena com to check for the latest software downloads Click Here to Visit Sena com 9 3 Voice Prompts A Voice prompt setting can be fou...

Страница 72: ...oth Pairing Information Sena X1 Pro Smart Cycling Helmet Firmware v1 0 72 9 HEADSET CONFIGURATION SETTINGS MENU 6x TAP 1x TAP Access Voice Prompt in the Configuration Menu ENABLE OR DISABLE NAVIGATE FORWARD 6X ACCESS CONFIG MENU Voice prompt Configuration menu 10s HOLD ...

Страница 73: ...elete All Bluetooth Pairing Information setting can be found in the Configuration Menu Please refer to Section 2 7 1 Headset Configuration Setting for more details Tap the Center Button when in this menu to Delete All Bluetooth Pairing Information stored in the headset 5x TAP 1x TAP Access Delete All Pairings in the Configuration Menu EXECUTE NAVIGATE BACKWARD 5X ACCESS CONFIG MENU Delete all pair...

Страница 74: ...to Section 2 7 2 Camera Configuration Setting for more details Tap the Center Button when in this menu to switch between Video Mode and Loop Recording Mode Video mode records a normal video Loop recording mode constantly records videos at timed intervals replacing old video files when memory is full 1x TAP Access Video Mode in the Camera Configuration Menu NAVIGATE FORWARD 1X ACCESS CAMERA CONFIG ...

Страница 75: ...tion setting can be found in the Camera Configuration Menu Please refer to Section 2 7 2 Camera Configuration Setting for more details Tap the Center Button when in this menu to select 1440p 30fps 1080p 60fps or 1080p 30fps 2x TAP Access Video Resolution in the Camera Configuration Menu NAVIGATE FORWARD 2X ACCESS CAMERA CONFIG MENU Video resolution setting Camera setup 3s HOLD 1x TAP 1440P 30FPS 1...

Страница 76: ...n the Camera Configuration Menu Please refer to Section 2 7 2 Camera Configuration Setting for more details Tap the Center Button when in this menu to record or hide the date caption during video recording If you select off the date caption will not be shown on your recorded video 3x TAP Access Date Caption in the Camera Configuration Menu NAVIGATE FORWARD 3X ACCESS CAMERA CONFIG MENU Date caption...

Страница 77: ...Tap the Center Button when in this menu to record everything you hear through your speakers as well as your voice during video recording The function that governs Smart Audio Mix is called Speaker Sound Recording Turn on the Speaker Sound Recording setting if you want to record music and intercom conversations on your video Turn off this setting if you want to record your voice only 3x TAP Access ...

Страница 78: ...he Camera Configuration Menu Please refer to Section Section 2 7 2 Camera Configuration Setting for more details Tap the Center Button when in this menu to set the camera to automatically power off after five minutes of inactivity This feature does not work while charging the camera 2x TAP Access Auto Camera Sleep in the Camera Configuration Menu NAVIGATE BACKWARD 2X ACCESS CAMERA CONFIG MENU Auto...

Страница 79: ...use a new card for the first time always format it before using the camera Please refer to Section 2 7 2 Camera Configuration Setting for more details Tap the Center Button when in this menu to remove all files from a microSD card When you use a new card for the first time always format it before using the camera 1x TAP Access Format SD Card in the Camera Configuration Menu NAVIGATE BACKWARD 1X AC...

Страница 80: ...emove your hands from the handlebars for button operations 11 1 Pairing with the Remote Control 1 Turn on the Bluetooth Module and the Remote Control device 2 Execute Remote Control Pairing in the Configuration Menu Please refer to Section 2 7 1 Headset Configuration Setting for more details 4x TAP 1x TAP Access Remote Control Pairing in the Configuration Menu Enter Pairing Mode EXECUTE NAVIGATE B...

Страница 81: ...control connected 3 Enter pairing mode in the Remote Control device The Bluetooth Module will automatically connect with the Remote Control device in pairing mode You will hear a voice prompt Remote control connected when they are successfully paired 4x TAP 1x TAP Enter Pairing Mode on Remote Control Enter Pairing Mode REMOTE CONTROL EXECUTE NAVIGATE BACKWARD 4X ACCESS CONFIG MENU Remote control p...

Страница 82: ...ena X1 Pro Smart Cycling Helmet Click Here to Visit Sena com 12 1 Fault Reset When the helmet s Bluetooth Module is not working properly you can easily reset the unit 1 Locate the pinhole reset button below the Button 2 Gently insert a paper clip into the hole and press and Fault Reset Button for 1 second with light pressure Fault Reset FAULT RESET 1x TAP 3 The communication module will shut down ...

Страница 83: ...gs and start fresh the headset can be restored to factory default settings using the Factory Reset feature in the Configuration Menu Please refer to Section 2 7 Configuration Menu for more details 2x TAP 1x TAP Access Factory Reset in the Configuration Menu EXECUTE NAVIGATE BACKWARD 2X ACCESS CONFIG MENU Factory reset Configuration menu 10s HOLD ...

Страница 84: ...olvents to clean the helmet These substances can cause serious damage to the helmet even though the resulting damage may not be visible This helmet can be damaged by contact with common substances for example certain solvents ammonia cleaners bleach paints abrasives and this damage may not be visible to the wearer Do not use this helmet if it has been exposed to such substances The full safety fun...

Страница 85: ...protective capability of your helmet will diminish over time dependent upon many factors such as dents dings and exposure to pollution harmful chemicals and long term exposure to the sun Sena recommends that helmets be replaced after five years Note The useful life of your helmet may be less than five years as a result of exposure to sunlight rough handling storage that results in dents or cuts or...

Страница 86: ...emote Wristband Remote SM10 SR10 SR10i are trademarks of Sena Technologies Inc or its subsidiaries These trademarks may not be used without the express permission of Sena GoPro is a registered trademark of Woodman Labs of San Mateo California Sena Technologies Inc Sena is not affiliated with Woodman Labs Inc The Sena Bluetooth Pack for GoPro is an aftermarket accessory specially designed and manuf...

Отзывы: