1
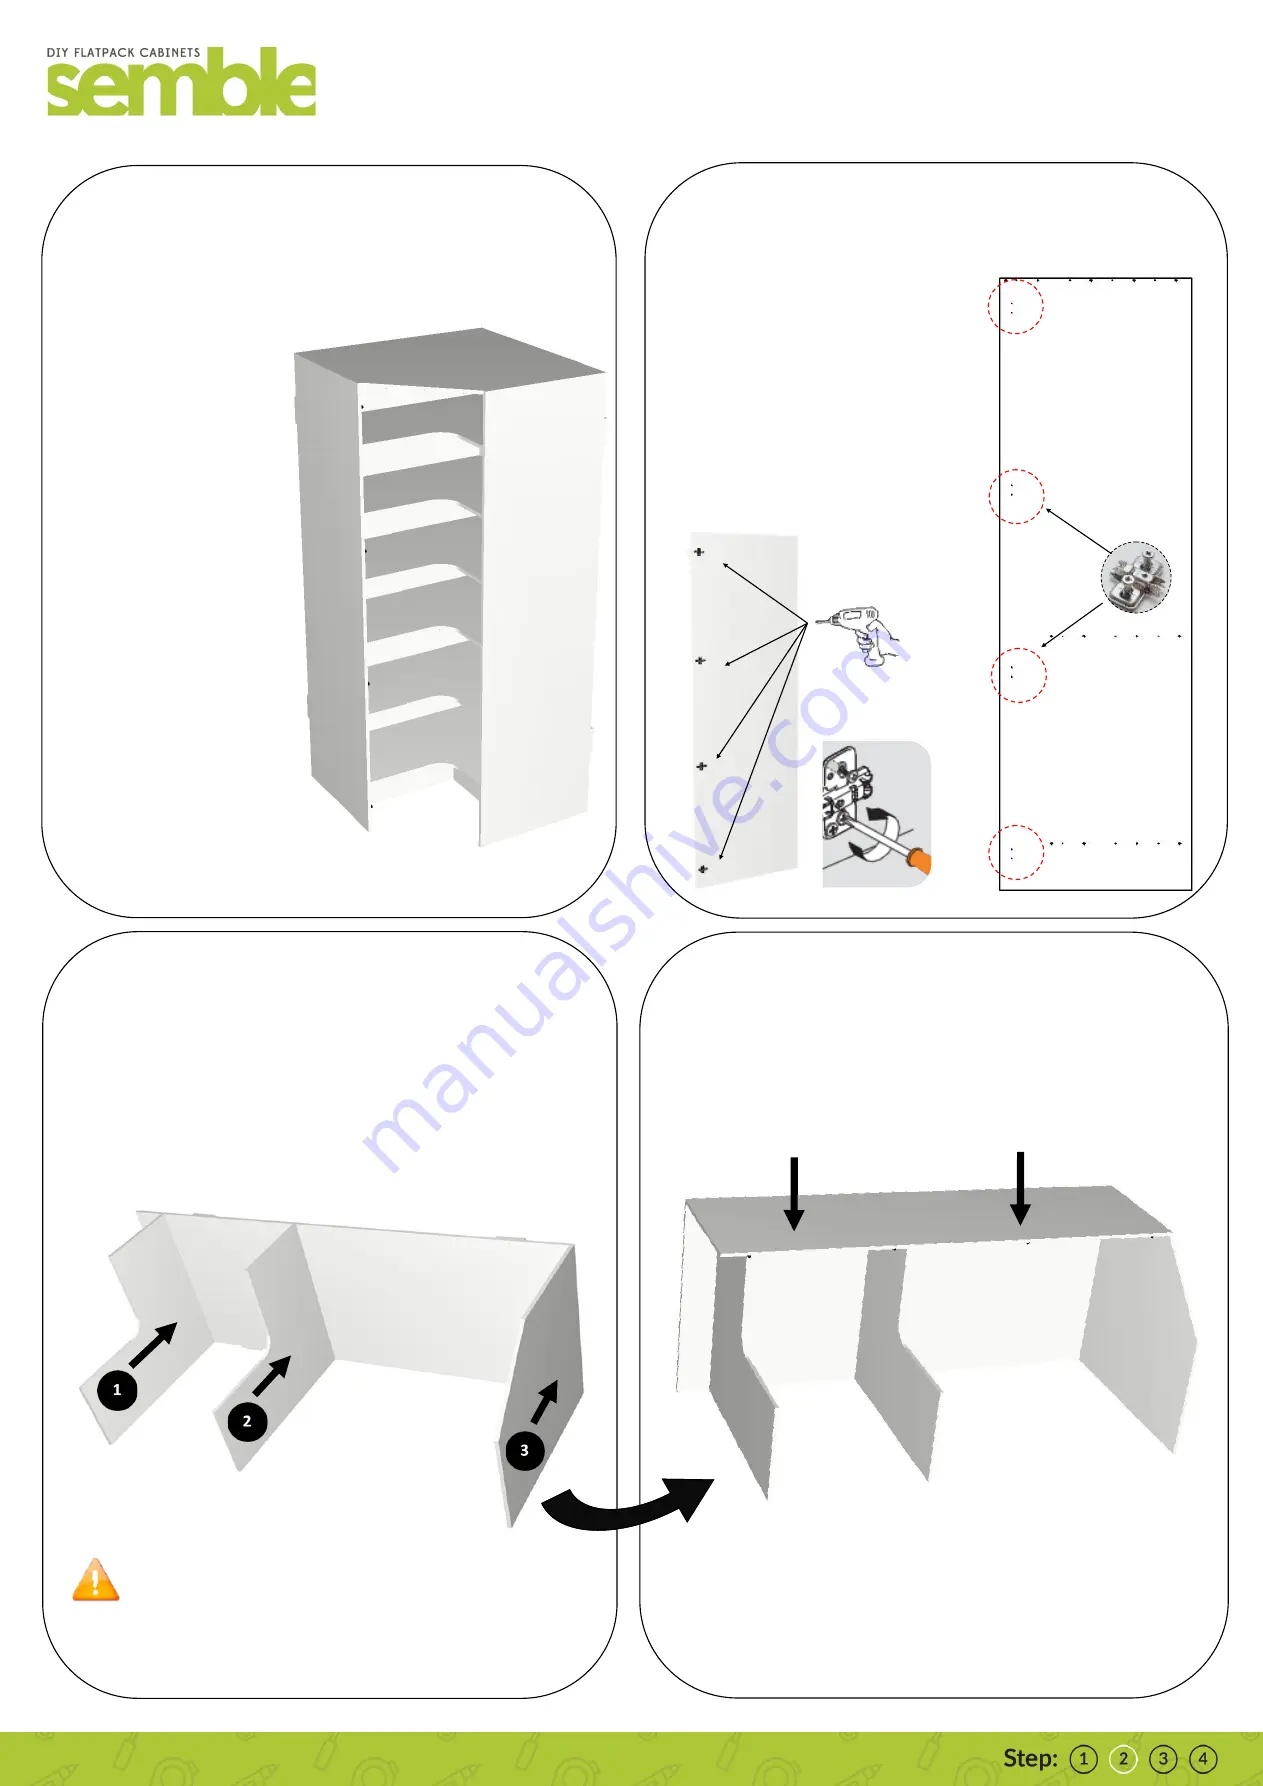
Orient the Gable:
look for the gables with the holes on
the inside face —find the four pairs of holes for the hinge
plate screws (see circles below) ...
Place the gables face down and open
your hardware pack . Find the four
hinge plates for this gable.
The hinge plates are designed for DIY
assembly and can simply be “pushed in”
and finished off by screwing in tight…
Identify the arrow on each plate and
ensure these face the front edge.
2
Large construction:
due to its size and weight, this cabi-
net is best assembled with two people. Please take care in
rotating, lifting or shifting this carcass.
This cabinet is constructed with several key differences:
(1) firstly, the cabinet has no
plastic feet but sits on its ga-
bles and a dowelled in kick.
(2) secondly, the cabinet is
designed to have a 16mm
void on both backs to allow
for some tolerance when in-
stalling against walls that
may not be perfectly square.
(3) finally, the carcass is held
together with the top,
bottom and a fixed shelf so
please ensure these are cor-
rectly seated and screwed
together tightly using the
supplied 45mm screws.
Fix the Door Gable:
Now take the Gable with the in-
serted hinge plates and ensure locate and seat correctly
on the dowels in the top, bottom and shelf from Step 3.
Ensure these components are correctly seated and then screws to-
gether tightly using the 45mm assembly screws provided. Ensure
that any visible hole has a screw when you are finished.
4
Find the short back:
identify the two backs for this cab-
inet—they are the largest pieces you have. Once of them is
slightly narrower then the other—you can also check the
dimensions on the label. It is the short one you want first.
Now, find the (1) bottom, (2) fixed shelf, and (3) angled top . You can
check your labels to ensure you have the right components. Insert
dowels and insert them into the short back.
Hint:
the bottom sits 147mm inset on the back so look for the
correct ends and insert to same orientation as shown here.
3
SCPA1D:
Corner Pantry Cabinet—1 Door


