


© 2017 by SEIKO EPSON Group
TITLE
EFSTA Fiscal Registry
Installation Manual
SHEET
REVISION
1.02
PRODUCT
TM-T88VI-
iHub (751F1)
NEXT
5
SHEET
4
3 First Installation
Download the package for first installation for EPSON printers from http://public.efsta.net/EFR/.
Format the micro SD card with the FAT32 file system and copy the file “install.zip” to the root of the micro
SD card.
Turn off the printer.
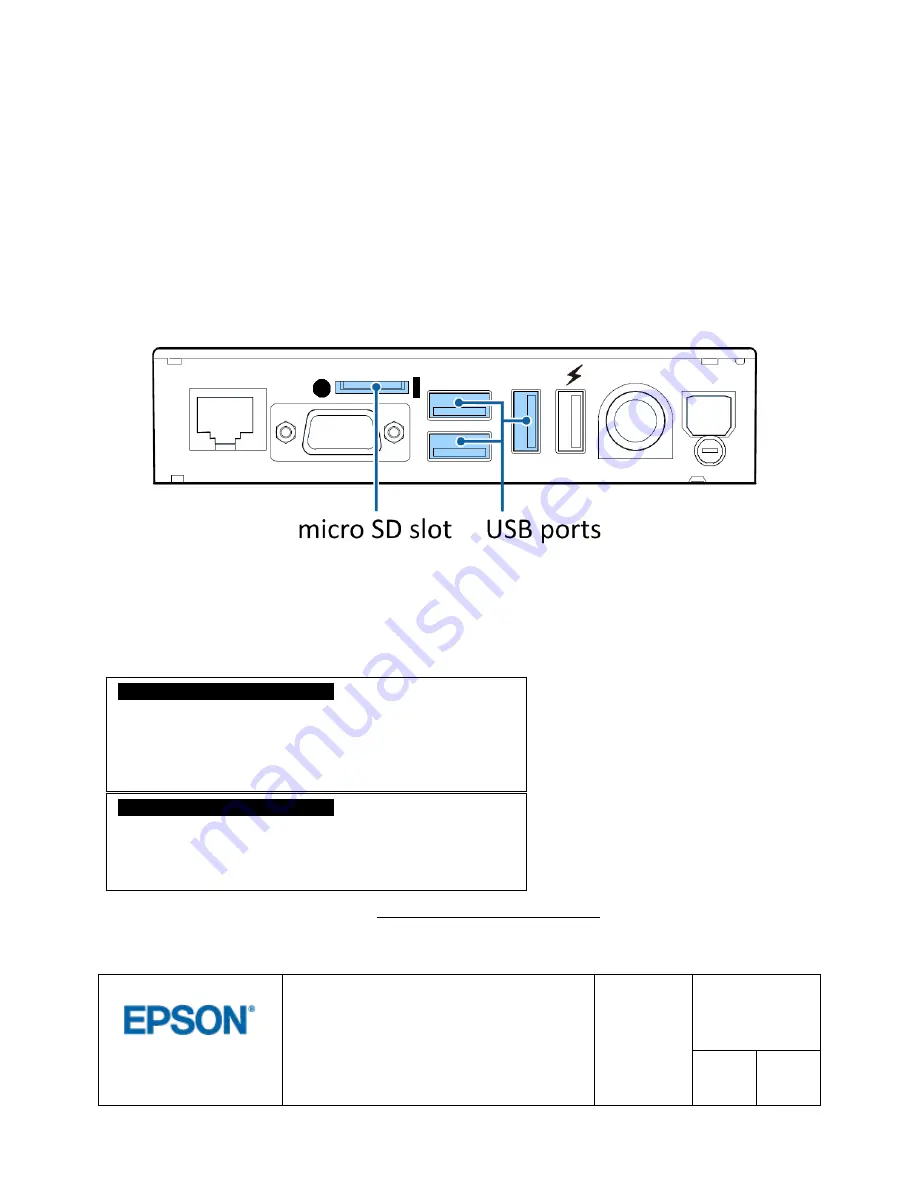
Now insert the micro SD card into the slot of the TM-T88VI-iHub. You will find it on the back panel above
the serial port. Please unscrew the cover of the slot and insert the card carefully into the slot, the contacts
on the card facing upwards. Please push the card inside until you sense a click.
To remove the card, please push the card further inside until you sense a click. Then release the card and
it will be pushed out of the slot automatically.
If you want to use local signature, please load your smart card reader with a valid RKSV card and connect
it to one of the USB ports of the printer. Please use only one of the three ports marked in blue on the
diagram above. The fourth port is only capable of supplying power to charge other devices.
Now turn on the printer. The EFR will be automatically unpacked and installed on the micro SD card.
About 2 minutes after boot up EFR is ready to be configured. The printer will print messages about the
progress:
Open your web browser and navigate to http://
{your-printer-ip}
:5618/config. For configuration and usage of
EFR please refer to EFSTA’s manuals.
EPSON TM88VI-iHUB FISCAL
*** 2017-04-18 07:44:57:076
- No manifest found
- Installer found, starting install process.
- Fiscal module installed successfully!
EPSON TM88VI-iHUB FISCAL
*** 2017-04-18 07:45:00:343
- EFR 1.2.4.0
- Fiscal module ready


