Rostock MAX v2 Assembly Guide
The problem with troubleshooting is sometimes trouble shoots back. :)
Your Rostock MAX v2 3D printer is a pretty complex piece of machinery even though it looks
pretty simple. As with any complex device sometimes things can go wrong in really weird ways. This
won’t be a comprehensive troubleshooting guide, but will touch on a few of the problems I’ve run into
with my printer. As others offer tips, they’ll be added to this section.
Print Layer Issues
When you first start a print, you should get a very even and consistent layer height. By properly
adjusting the machine, you should get this automatically if you’ve got all three towers adjusted exactly
the same. Unfortunately, that’s really difficult to do. The larger the object you print, the more obvious
first layer thickness inconsistencies will be, especially when using loops.
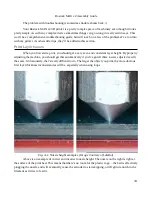
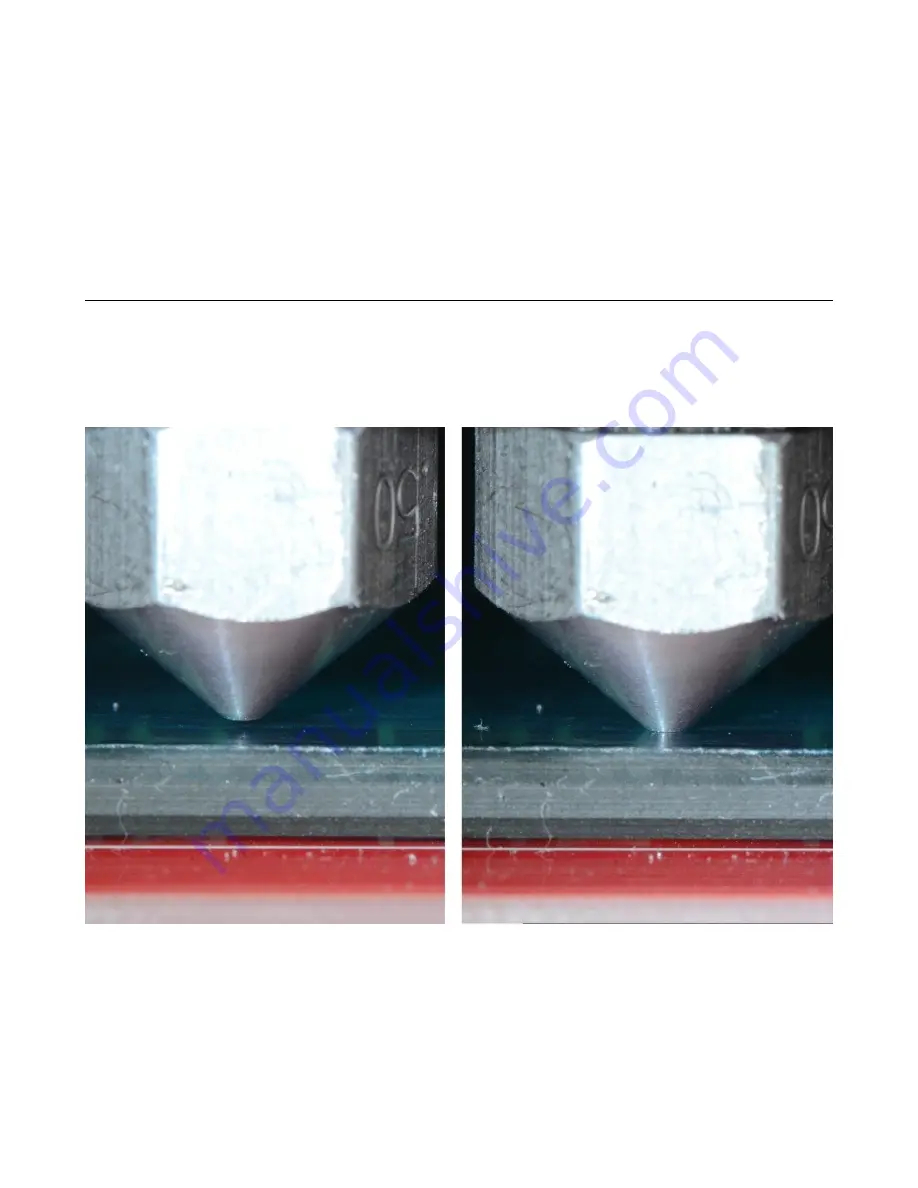
Above is an example of correct and incorrect nozzle height. The nozzle on the right is right at
the surface of the print bed. This means that there’s no room for the plastic to go – the bed is effectively
plugging the nozzle and will eventually cause the extruder to start skipping, or it'll grind a notch in the
filament as it tries to feed it.
311
Fig. A-1: Nozzle height examples. (Image Courtesy of LulzBot)
Содержание Rostock MAX v2
Страница 25: ...Rostock MAX v2 Assembly Guide Melamine Parts Sheet 1 25 ...
Страница 26: ...Rostock MAX v2 Assembly Guide Melamine Parts Sheet 2 Melamine Parts Sheet 3 26 ...
Страница 27: ...Rostock MAX v2 Assembly Guide Melamine Parts Sheet 4 27 ...
Страница 171: ...Rostock MAX v2 Assembly Guide 171 Fig 14 8 Spool holder support installed ...


