Aqua Whisper DX Modular 450-1800
Page 8-14
Maintenance
q) Run a rag through the High Pressure Vessel to
remove any biological film or debris from the
inside of the vessel.
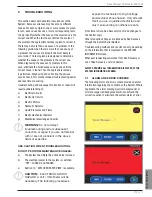
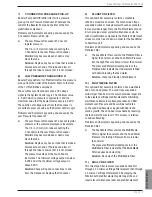
r) A new Sea Recovery R.O. membrane element
comes complete with a “U” cup Brine Seal
#8 at one end of the Element. This Brine Seal
must be positioned at the INLET end of the
Pressure Vessel. Refer to illustrations below.
Install a new R.O. membrane element with
attached “U” cup Brine Seal into the Pressure
Vessel. Place the end of the R.O. membrane
element that DOES NOT have the Brine Seal
attached into the INLET end of the Pressure
Vessel and slide it into the Pressure Vessel
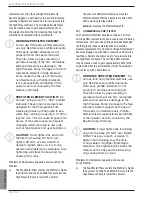
Insert the down stream end (end without
a brine seal) of the RO membrane element
into the upstream inlet end of the High
Pressure Vessel.
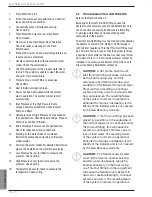
s) Slide the membrane element into the High
Pressure Vessel, past the brine seal, until the
membrane element product water tube is
4 in. (10.2 cm) past the end lip of the High
Pressure Vessel.
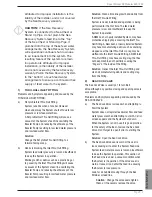
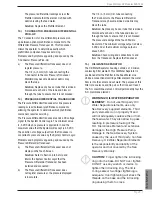
t) Insert the End Plug with new attached
O-Rings into the High Pressure Vessel while
aligning the High Pressure Port and Product
Water Port to the respective holes in the High
Pressure Vessel. Continue pushing inward on
the End Plug until its exposed end travels just
past the Segment Ring Groove in the Pressure
Vessel. Ensure that the Ports of the End Plug
are aligned with the Port Holes of the High
Pressure Vessel.
u) Insert the High Pressure Port Fitting with
attached O-Rings into the High Pressure Port.
v) Replace the Port Retainer.
w) Insert the three-piece Segment Ring Set
into the Segment Ring Groove of the High
Pressure Vessel. Align the Segment Ring
Set with the tapped holes in the End Plug
for insertion of the three Socket Head Cap
Screws. Attach the three Socket Head Cap
Screws and tighten.
x) Connect the High Pressure Hoses to the
respective fitting on the Pressure Vessel.
18. High Pressure Manifold. Replace the High Pressure
Manifold if it is visibly cracked or broken and
leaking. Replace High Pressure fitting O-rings if
damaged, worn, or leaking.
19. High Pressure Transducer: The Pressure
Transducers are not repairable and can
not be calibrated. If inoperative check connections
at the Transducer and at the Printed Circuit
Board to ensure there is no visible corrosion or
loose connections.
20. Brine Discharge Flow Meter: The electronic flow
meters used in the System are not repairable. If the
flow meter gives an inaccurate reading replace it.
21. Brine Discharge T-Connector: The Brine Discharge
T-Connector is not repairable. If it breaks or should
a crack develop replace it.
22. Brine Discharge Connector: This 90 degree elbow
fitting attaches to the over board thru-hull fitting
for connecting the brine discharge hose. If it
breaks or cracks replace it.
23. Multi Media Filter Waste & Brine Discharge Tee:
This 90 degree elbow fitting attaches to the over
board thru-hull fitting for connecting the brine
discharge hose. If it breaks or cracks replace it.
24. Thru-Hull Discharge Fitting: This Owner or
Installer supplied Discharge Thru-Hull Fitting is not
repairable. If it breaks or cracks replace it.
25. Product Water T-Collector: The Product Water
T-Collector is not repairable. If it breaks or should
a crack develop replace it.
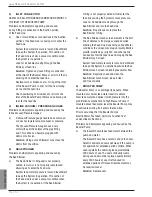
26. Salinity Probe: The salinity probe requires cleaning
from time to time should debris build up onto the
monel probes. Clean the probes once a year.
a) Unscrew the black tube fitting nut
below the probe to disconnect it from
the control manifold.
b) Using a soft bristle brush, scrub the probes
to remove any built up debris. Thoroughly dry
the probe area.
c) Should the salinity reading become inaccurate
replace it.
27. Product Water Flow Meter: The electronic flow
meters used in the System are not repairable. If the
flow meter gives an inaccurate reading replace it.
28. 3-way Product Water Diversion Solenoid Valve:
Содержание Aqua Whisper DX 1400-2
Страница 2: ......
Страница 3: ...Aqua Whisper DX Modular 450 1800 Owner s Manual...
Страница 4: ......
Страница 11: ...Introduction Aqua Whisper DX Modular 450 1800 Section 1 INTRODUCTION...
Страница 12: ...Introduction...
Страница 15: ...Description Aqua Whisper DX Modular 450 1800 Section 2 SYSTEM DESCRIPTION...
Страница 16: ...Description...
Страница 21: ...Aqua Whisper DX Modular 450 1800 Page 2 5 Description COMPLIANCE CERTIFICATES...
Страница 23: ...Aqua Whisper DX Modular 450 1800 Page 2 7 Description...
Страница 25: ...Aqua Whisper DX Modular 450 1800 Page 2 9 Description...
Страница 30: ...Aqua Whisper DX Modular 450 1800 Page 2 14 Description OPTIONAL ACCESSORIES...
Страница 38: ...Aqua Whisper DX Modular 450 1800 Page 2 22 Description This page is intentionally left blank...
Страница 39: ...Aqua Whisper DX Compact 450 1800 Section 3 PRE INSTALLATION NOTES Pre installation...
Страница 40: ...Pre installation...
Страница 56: ...Aqua Whisper DX Modular 450 1800 Page 3 16 Pre installation...
Страница 57: ...Aqua Whisper DX Modular 450 1800 Page 3 17 Pre installation...
Страница 65: ...Aqua Matic Compact 450 1800 Section 4 ELECTRICAL INFORMATION Electrical...
Страница 66: ...Electrical...
Страница 75: ...Aqua Whisper DX Modular 450 1800 Page 4 9 Electrical Electrical Motor Wiring Three Phase...
Страница 80: ...Electrical...
Страница 81: ...Installation Aqua Whisper DX Modular 450 1800 Section 5 INSTALLATION REQUIREMENTS...
Страница 82: ...Installation...
Страница 94: ...Aqua Whisper DX Modular 450 1800 Page 5 12 Installation...
Страница 95: ...Commissioning Aqua Whisper DX Modular 450 1800 Section 6 COMMISSIONING...
Страница 96: ...Commissioning...
Страница 106: ...Aqua Whisper DX Modular 450 1800 Page 6 10 Commissioning...
Страница 107: ...Operation Aqua Whisper DX Modular 450 1800 Section 7 OPERATION...
Страница 108: ...Operation...
Страница 120: ...Aqua Whisper DX Modular 450 1800 Page 7 12 Operation...
Страница 122: ...Aqua Whisper DX Modular 450 1800 Page 7 14 Operation...
Страница 123: ...Aqua Whisper DX Compact 450 1800 Section 8 MAINTENANCE AND REPAIR Maintenance...
Страница 124: ...Maintenance...
Страница 145: ...Troubelshooting Troubelshooting Aqua Whisper DX Modular 450 1800 Section 9 TROUBLESHOOTING...
Страница 146: ...Troubelshooting...
Страница 167: ...Parts View Aqua Whisper DX Modular 450 1800 Section 10 EXPLODED PARTS VIEW...
Страница 168: ...Parts View...
Страница 183: ...Aqua Whisper DX Modular 450 1800 Page 10 15 Parts View...
Страница 191: ...Aqua Whisper DX Modular 450 1800 Page 10 23 Parts View...
Страница 217: ...Sheet 11 3 Aqua Whisper DX Electrical Wiring Diagram 110 120 VAC 50 60 HZ Single Phase...
Страница 218: ...Sheet 11 4 Aqua Whisper DX Electrical Wiring Diagram 110 120 VAC 50 60 HZ Single Phase with Soft Start...
Страница 219: ...Sheet 11 5 Aqua Whisper DX Electrical Wiring Diagram 208 240 VAC 50 60 HZ Single Phase...
Страница 220: ...Sheet 11 6 Aqua Whisper DX Electrical Wiring Diagram 208 240 VAC 50 60 HZ Single Phase with Soft Start...
Страница 221: ...Sheet 11 7 Aqua Whisper DX Electrical Wiring Diagram 200 240 VAC 50 60 HZ Three Phase...
Страница 222: ...Sheet 11 8 Aqua Whisper DX Electrical Wiring Diagram 200 240 VAC 50 60 HZ Three Phase with Soft Start...
Страница 223: ...Sheet 11 9 Aqua Whisper DX Electrical Wiring Diagram 380 460 VAC 50 60 HZ Three Phase...
Страница 224: ...Sheet 11 10 Aqua Whisper DX Electrical Wiring Diagram 380 460 VAC 50 60 HZ Three Phase with Soft Start...
Страница 225: ......


