background image

Function

Focus adjustment ensures that the focus motor is adjusted to focus or
defocus on all types and thicknesses of image.

Technical data

-----

Tools and equipment required

2 mm allen key for lamp cover and back cover mounting screws
2.5 mm allen key for focus motor mounting screws
3 mm allen key (T-handle) for right hand drum cover mounting screws
Focus motor adjustment tool
Photoshop plug-in 2.1.7 or later versions
Extension board (part of the service kit)

5 • ADJUSTMENTS AND TESTING

Focus

Edition 1

January 1996 Service Manual • ScanMate 4000/5000

5•3a

Caution!

Turn off  power

• Before 

connecting or disconnecting cables.

• Before

carrying out service operations.

Do not

rotate the drum platform while the focus motor adjust-

ment tool is fitted.

When the hardware drawer is partially removed and power  turned
on, ensure that the open side of the heat sink on the driver board
is covered, with, for example a piece of cardboard or paper, in
order that cooling is still effective. 

Содержание ScanMate 4000

Страница 1: ...ScanMate 5000 ScanMate 4000 ...

Страница 2: ...ts have been tested and found to comply with the limits for a Class A digital device pursuant to part 15 of the FCC Rules These limits are designed to provide reasonable protection against harmful interference when the products are operated in a commercial environment These products are supplied with a shielded cable They must be operated with a shielded cable in order to meet FCC Class A emission...

Страница 3: ...ation Pre installation instructions Dimensions Unpacking and installation Section 3 Service Program ScanMate 4000 and 5000 monitor program Section 4 Part Replacement Function Technical data Tools and material required How to replace Adjustments required Illustrations Section 5 Adjustments and Testing Function Technical data Tools and equipment required How to adjust test Illustrations Section 6 Cl...

Страница 4: ...rcuit connection diagrams Section 8 Trouble Shooting Problem Possible cause Solution Section 9 Not allocated Section 10 Parts List and Spare Parts Policy Spare parts prices Accessories Service kits Recommended parts kit Service Manual ScanMate 4000 5000 Edition 1 January 1996 iv ...

Страница 5: ...s 1 6 Fuse values and test points 1 7 Drum speeds and aperture selections SM 4000 1 8 Drum speeds and aperture selections SM 5000 1 9 Standard equipment required 1 10 Service kit 1 10 Error reporting 1 10 Error report form 1 13 Software report Scanner Mac 1 15 Software report Scanner PC 1 17 1 GENERAL INFORMATION Contents Edition 1 January 1996 Service Manual ScanMate 4000 5000 1 1 ...

Страница 6: ......

Страница 7: ...222 x 303 mm in both A4 and B4 formats with a scanning resolution for the 4000 model from 50 to 4000 dpi and the 5000 model from 50 to 5000 dpi which allows for enlarging originals to as much as 1000 The ScanMate 5000 is basically identical to the ScanMate 4000 apart from the addition of an extra drum located behind a hinged flap bel ow the main drum and a drum bar code reader ScanMate 5000 is fou...

Страница 8: ...ual revision will name the revised page or pages For ease of reference Service Manuals will have their own edition num ber a number which will be the number of the latest section edition Service Manual ScanMate 4000 5000 Edition 1 January 1996 1 4 1 GENERAL INFORMATION Revision List Edition Date Section 1 General Information 1 January 1996 Section 2 Installation 1 January 1996 Section 3 Service pr...

Страница 9: ...scan ner and the computer last When handling always lift the ScanMate 4000 and 5000 by their bases Do not obstruct the ventilation intakes on the rear of the scanners The drums must be handled with utmost care to avoid scratches Use only non abrasive repro wipes and graphic arts drum cleaner to clean the drums The ScanMate 4000 and 5000 are class 1 electrical equipment and must be connected to a s...

Страница 10: ...d white point 7 Test picture Standard scan mode 8 Service mode Standard scan mode Set up facilities SCSI ID SW 1 2 3 1 On 0 Off 1 1 0 0 2 0 1 0 default 3 1 1 0 4 0 0 1 5 1 0 1 6 0 1 1 7 1 1 1 do not use on PC configuration Fuse Values and Test Points Driver Board Fuse Value Voltage LED Test point F3 T 5A 12V D29 TP26 only on latest rev boards F1 F2 T 2A 15V D22 TP20 F1 F2 T 2A 15V D26 TP21 F1 F2 T...

Страница 11: ... System Block Diagram 1 GENERAL INFORMATION Edition 1 January 1996 Service Manual ScanMate 4000 5000 1 7 Drum Blue PMT s TP48 TP47 TP46 TP57 clk Amps and AD converters Control board All test points are located on the control board CPU SCSI Green Red Original DC motor Encoder Sync signal Sensor Focus motor Aperture motor Fibre optics Fibre optics Trans mission light Reflec tion light Light tube Bea...

Страница 12: ...focus is adjusted automatically but can be overridden to produce smoothing of rasterised originals Manual adjustment is achieved as follows open photoshop plug in click on the options button choose an aperture range from 1 to 6 Note 1 is the smallest value choose a focus value from 500 to 500 Note positive is away from the drum The following table is a feature and not an adjustment Resolution Tran...

Страница 13: ...atically the aperture can be overridden by the system software to smooth large fields The focus is adjusted automatically but can be overridden to produce smoothing of rasterised originals Manual adjustment is achieved as follows open photoshop plug in click on the options button choose an aperture range from 1 to 6 Note 1 is the smallest value choose a focus value from 500 to 500 Note positive is...

Страница 14: ... mm T handle allen key 1 Extender board Error Reporting The aim of the Error Report is to give ScanView A S a standard error reporting medium where all the necessary information is given to Scan View s Support Department to enable the assessment of defects to be made in a rational and effective way A master copy of this error report is shown on page 1 13 and should be used to take all the necessar...

Страница 15: ...This will assist our support department in isolating software problems and speed up down time on your equipment A copy of these reports can be found on pages 1 15 and 1 17 respectively and should be used to take all the necessary copies 1 GENERAL INFORMATION Edition 1 January 1996 Service Manual ScanMate 4000 5000 1 11 ...

Страница 16: ......

Страница 17: ...orrect error ______ What was changed _______________ __________________ Checked for loose cables _______ Adjusted focus ________ Adjusted light transmision _______ Adjusted PMT _______ Description of the error If scanning is possible please supply an RGB image indicating the problem preferably on diskette This block for ScanView use Description Warranty ___ Warranty exchange ____ Service _____ Ser...

Страница 18: ......

Страница 19: ... ______ Version ______ Memory assigned _____________________________ System ______ MB ScanProc ______ MB SepProc ______ MB ColorQuartet ______ MB Photoshop ______ MB Free ______ MB Total available memory ______ MB Other devices on the same SCSI ______________ Is it possible to reproduce the error _____ Resolution ______ dpi Material supplied as documentation on Film ______ SyQuest ______ Diskette ...

Страница 20: ......

Страница 21: ...______________________ Version ______ ScanView software _____________________________ Version ______ Version ______ Other software _____________________________ Version ______ Network software _____________________________ Other devices on the same SCSI ______________ Windows memory ______________ MB Windows resources system ______ Is it possible to reproduce the error _____ Resolution ______ dpi ...

Страница 22: ......

Страница 23: ...2 INSTALLATION Contents Edition 1 January 1996 Service Manual ScanMate 4000 5000 2 1 Pre installation requirements 2 3 ScanMate 4000 and 5000 dimensions 2 3 Unpacking and installation 2 4 ...

Страница 24: ......

Страница 25: ...ical wall outlet 100 240 VAC 50 60 Hz ScanMate 4000 and 5000 Dimensions Caution The ScanMate 4000 and 5000 are Class 1 electrical equipment For personal safety they must be connected to a single phase mains out let with a protective ground earth in accordance with national and local regulations 840 mm 33 410 mm 16 340 mm 13 410 mm 16 840 mm 33 SM 4000 SM 5000 ...

Страница 26: ... its container by the base only Note damage will occur to the scanner if it is lifted by the drum 3 Place on a firm surface avoid obstructing the ventilation ducts at the rear of the scanner 4 Continue with hardware installation by refering to section 1 in the ScanMate 4000and 5000 Operators Manual 5 Perform a focus calibration by refering to section 5 4 Service Manual ScanMate 4000 5000 Edition 1...

Страница 27: ...k Z P L 3 6 Adjust PMT gain 3 6 Choose aperture 3 7 Check focus 3 7 Calibrate aperture 3 8 Toggle lamps 3 9 Turn on SCSI 3 9 Turn on SCSI in switch seek mode 3 9 Rotate drum 3 10 Set focus position to zero 3 10 Test bar code circuit 3 10 Show scanner options 3 11 3 SERVICE PROGRAM Edition 1 January 1996 Service Manual ScanMate 4000 5000 3 1 ...

Страница 28: ......

Страница 29: ...RS232 converter is required Although the ScanMate monitor program is a terminal program receiv ing and transmitting characters on the RS232 interface without hand shake it is possible to use other communication programs to interface to the ScanView scanner for example Windows terminal The monitor program controls the RS232 hardware directly and there fore overrides the BIOS The monitor program use...

Страница 30: ...the program is actu ally just a communication utility showing the baud rate Version 1 0 2 is the version number of the monitor program F3 for logfile to create a logfile that contains a transcript of all communication between the scanner and the monitor program press F3 The monitor program then asks for a file name for the log file Enter a file name for instance scanmate log and press Enter All th...

Страница 31: ...sconnect SCSI with power on Start the Mac or the PC in communication mode and turn on the scanner If you will start your PC monitor program from a disk type Scanmate 5000 To choose the com port type ScanMate 5000 2 com 2 The following will now scroll over the screen Hello World Motherboard number is xxx Focus point 0 xxxx My ID is X Prom version is x xx ScanMate 5000 monitor version x xx Commands ...

Страница 32: ...he following choices shown on the screen Press 1 for stop 2 for start Press 3 for left 4 for right Press 5 for speed down 6 for speed up Press 7 for current down 8 for current up Press 0 for Park position 9 for Zero position Press Q for utility end Adjust PMT gain 2 This command facility is used to adjust the PMT gain constants to a value suitable for hardware fine tuning Select 2 to enter the Adj...

Страница 33: ...r reflection T R Now we check the focus position In both sub menus T transmission and R reflection selection para meters are the same therefore only T will be shown below Select T to enter the transmission menu and the following sub menu will be shown Now we check the focus position Use BarCode or Index values B I Select B to enter the barcode sub menu and the following will be shown Status receiv...

Страница 34: ...ate apertures menu and the following will be shown Note The values shown are only examples Now we find the aperture positions Waiting for drum to settle with integrator enabled Drum speed is ok Not direct A D data Waiting for focus Focus position found Aperture point found Now we calibrate the aperture position Black level is x 1 3 search for xx 11 13 Aperture position calibrated to position xx F ...

Страница 35: ...s command faclility is used to turn on the SCSI interface and when activated the scanner can be controlled from and scan into the Mac or PC through the interface When the command is executed the only way to return to the monitor program mode is to turn the scanner off and then on again Select S to enter the Turn on SCSI menu and the following will be shown The ScanScsi routine is called now Status...

Страница 36: ...the following will be shown Enter wanted drum speed in rpm Drum speed set to xxxx RPM Press Enter To stop the drum after the drum speed has been entered select T then 0 and enter Set focus position to zero H This command facility is used to set the focus position to zero Select H to enter the Set focus position to zero menu and the following will be shown Now we set the focus position to zero Seek...

Страница 37: ...alue 0 20 100000 ApertureValue 1 4 920000 ApertureValue 2 4 180000 ApertureValue 3 3 750000 ApertureValue 4 2 210000 ApertureValue 5 2 660000 Aperture 1 PMTTransGain PMTReflectGain 51 60 Red TransGain ReflectGain 110 131 Green TransGain ReflectGain 106 130 Blue TransGain ReflectGain 100 103 Aperture 2 PMTTransGain PMTReflectGain 159 60 Red TransGain ReflectGain 115 131 Green TransGain ReflectGain ...

Страница 38: ...umber Dia TValue RValue 1339 505 1416 928 Focus Number Dia TValue RValue 1164 940 1408 1336 Focus Number Dia TValue RValue 182 940 3568 1000 Focus Number Dia TValue RValue 288 940 1360 1824 Focus Index TValue RValue 0 2000 1384 Focus Index TValue RValue 1 1528 1168 Focus Index TValue RValue 2 2000 1000 Focus Index TValue RValue 3 2000 1000 Focus Index TValue RValue 4 1536 1000 Focus Index TValue R...

Страница 39: ... board 4000 5000 960 20 000 20 4 7 SCSI controller 4000 5000 960 20 001 60 4 8 Amplifier board 4000 960 25 000 30 4 9 5000 960 20 000 30 4 9 Driver board 4000 960 21 000 40 4 10 5000 0200 model 960 20 000 40 4 10 5000 0210 model 960 21 000 40 4 10 PMT module 4000 5000 960 20 000 50 4 11 Indicator display 4000 5000 960 20 000 70 4 12 Fluorescent tube 4000 5000 960 20 001 00 4 13 Mechanical System S...

Страница 40: ......

Страница 41: ...e for left and right hand drum cover screws 3 mm allen key for left and right hand end plate mounting screws 2 mm allen key for back cover mounting screws 3 mm allen key for end plate mounting screws 4 PART REPLACEMENT 4000 and 5000 Access Panels Edition 1 January 1996 Service Manual ScanMate 4000 5000 4 2a Caution Turn off power Before connecting or disconnecting cables Before carrying out servic...

Страница 42: ...rew and lift the plate away from the drum cover 4 Right hand drum cover D is secured by four 3 mm allen screws on the inside of the cover securing it to the the frame First remove the end plate C remove the four allen screws and washers and lift the cover away 5 Left hand end plate E is secured by one 4 mm countersunk allen screw underneath the drum cover F Remove the allen screw and lift the plat...

Страница 43: ...al ScanMate 4000 5000 4 2c Back cover B Lamp cover A Lamp cover attachment screws x2 Back cover attachment screws x9 Left hand end plate E Right hand end plate C Right hand drum cover D Left hand drum cover F ScanMate 5000 shown covers on the ScanMate 4000 are identical ...

Страница 44: ......

Страница 45: ...ics cab le to the sensor module Technical data Halogen projector lamps 12V 75W Tools and materials required 2 5 mm allen key long for lamp cover mounting screws 4 PART REPLACEMENT PN 920 20 000 20 4000 and 5000 Halogen Lamps Edition 1 January 1996 Service Manual ScanMate 4000 5000 4 3a Caution Turn off power Before connecting or disconnecting cables Before carrying out service operations The lamps...

Страница 46: ...oning the tab on the lamp rim so that it faces towards the center of the lamp holder 5 Position the lamp rim under the spring and press it outwards against spring pressure until it can slide under the guide 6 Lock the lamp in place by allowing the spring pressure to slide the lamp into the holder Note ensure that the tab on the lamp rim fits into the slot of the holder 7 Reconnect the relevant con...

Страница 47: ... REPLACEMENT Halogen Lamps Edition 1 January 1996 Service Manual ScanMate 4000 5000 4 3c Transmission lamp Loosen the two 3 mm allen screws access is through the slots in cover A Lamp cover A Reflection lamp ...

Страница 48: ......

Страница 49: ...ey for sensor optics holder 2 5 mm allen key for lamp cover and back cover mounting screws 3 0 mm allen key T handle for right hand drum cover mounting screws 3 mm allen key for end plate and sensor mounting bracket screws 4 PART REPLACEMENT PN 960 20 001 10 4000 and 5000 Sensor Module Edition 1 January 1996 Service Manual ScanMate 4000 5000 4 4a Caution Turn off power Before connecting or disconn...

Страница 50: ...the four 4 mm allen screws C 9 Refit the optics holder to the sensor lens and tighten the 3 mm set screw B 10 Refit the three RGB fibre optic cables as marked in step 3 and tighten the three 3 mm set screws A Note avoid bending the fibre optics cables excessively 11 Reconnect the two 2 pin 6 pin and 8 pin connectors to the aperture and focus zero switches aperture motor and focus motor respectivel...

Страница 51: ...ice Manual ScanMate 4000 5000 4 4c 4 mm allen screws C x4 Focus zero switch Sensor module Focus motor Aperture motor Aperture zero switch Set screws A Set screw B securing optics holder Sensor optics holder Hardware unit ScanMate 5000 shown SM 4000 is identical ...

Страница 52: ......

Страница 53: ...0 20 001 70 5000 0200 model PN 960 21 001 70 5000 0210 model Edition 1 January 1996 Service Manual ScanMate 4000 5000 4 5a Caution Turn off power Before connecting or disconnecting cables Before carrying out service operations If a green colored connector is used in connection J20 on the control board ensure that is reconnected with the locking tabs on the right hand side viewed from the back of t...

Страница 54: ...k to the control board Note If J20 green is used it is possible to fit both ways If fitted in correctly it will cause the amplifiers in the PMT module to blow Ensure that the locking tabs on the connector fit into the locks on the control board that is facing to the right hand side viewed from the back of the scanner 10 Connect connector J4 and the connector from the two ventilation fans to the dr...

Страница 55: ...4 PART REPLACEMENT Hardware Unit Edition 1 January 1996 Service Manual ScanMate 4000 5000 4 5c Hardware unit Control board Driver board Cooling fans Slide the hard ware unit Countersunk screws A ...

Страница 56: ......

Страница 57: ...d hardware unit mounting screws Posidrive screwdriver 4 PART REPLACEMENT PN 960 25 000 10 4000 Control Board PN 960 20 000 10 5000 0200 model PN 960 21 000 10 5000 0210 model Edition 1 January 1996 Service Manual ScanMate 4000 5000 4 6a Caution Turn off power Before connecting or disconnecting cables Before carrying out service operations If a green colored connector is used in connection J20 on t...

Страница 58: ... 10 Fit the control board and secure with the nine 2 5 mm posidrive screws 11 Refit the CPU module onto connectors J12 and J13 on the control board 12 Reconnect connectors J16 J18 and J19 13 On ScanMate 5000 0210 model reconnect the connector from the bar code board into IC21 14 Partially refit the hardware unit section 4 5 steps 7 10 Note if connector J20 green is used on the control board ensure...

Страница 59: ...nual ScanMate 4000 5000 4 6c Connector J19 Connector J18 Connector J16 Control board Bar code board only on SM 5000 SN 0210 xxxx models CPU board Enlarged drawing of control board in section 7 5 Hardware unit Countersunk screws A Connector J3 Connector J2 Connector J1 ...

Страница 60: ......

Страница 61: ...troller Technical data Tools and materials required 2 mm allen key for back cover and hardware unit mounting screws 4 PART REPLACEMENT PN 960 20 000 20 4000 and 5000 CPU Board Edition 1 January 1996 Service Manual ScanMate 4000 5000 4 7a Caution Turn off power Before connecting or disconnecting cables Before carrying out service operations ...

Страница 62: ...is to the right hand side as viewed from the back of scanner 5 Partially refit the hardware unit section 4 5 steps 7 10 6 Carry out the adjustment and test operations specified below 7 Carefully push the hardware unit fully in connector J1 on the driver board mates with the backplane and fit the two 2 5 mm counter sunk allen screws A on each side of the unit 8 If no further replacement operations ...

Страница 63: ... PART REPLACEMENT CPU Board Edition 1 January 1996 Service Manual ScanMate 4000 5000 4 7c CPU board 2 5 mm countersunk screws A Hardware unit SCSI controller Enlarged drawing of CPU board in section 7 6 ...

Страница 64: ......

Страница 65: ...2 mm allen key for back cover and hardware unit mounting screws PLCC removal tool for SCSI controller 4 PART REPLACEMENT PN 960 20 001 60 4000 5000 SCSI Controller Edition 1 January 1996 Service Manual ScanMate 4000 5000 4 8a Caution Turn off power Before connecting or disconnecting cables Before carrying out service operations only use the special PLCC removal tool for the SCSI controller Do not ...

Страница 66: ...tool Do not use other tools otherwise the chip socket will be damaged Assembly 4 Fit a new SCSI controller into IC20 on the CPU board 5 Carefully push the hardware unit fully in connector J1 on the driver board mates with the backplane and fit the two 2 5 mm counter sunk allen screws A on each side of the unit 6 If no further replacement operations are required refit the covers removed in step 1 i...

Страница 67: ...4 PART REPLACEMENT SCSI Controller Edition 1 January 1996 Service Manual ScanMate 4000 5000 4 8c CPU board 2 5 mm countersunk screws A Fig 2 Fig 1 Fig 3 Hardware unit SCSI controller ...

Страница 68: ......

Страница 69: ...n is to amplify RGB signal data Technical data PN 960 25 000 30 SM 4000 PN 960 20 000 30 SM 5000 0200 and 0210 models Tools and materials required 2 mm allen key for back cover and hardware unit mounting screws 4 PART REPLACEMENT PN 960 25 000 30 4000 Amplifier Board PN 960 20 000 30 5000 Edition 1 January 1996 Service Manual ScanMate 4000 5000 4 9a Caution Turn off power Before connecting or disc...

Страница 70: ...s remove 1 amplifier board first on J1 on the control board followed by 2 on J2 and then 3 on J3 Assembly 5 Refit the amplifier board s to the control board by carefully mount ing at an angle rotating to the vertical position and locking with the two side clips 6 Reconnect connector J4 on the driver board 7 Carefully push the hardware unit fully in connector J1 on the driv er board mates with the ...

Страница 71: ...Amplifier Board Edition 1 January 1996 Service Manual ScanMate 4000 5000 4 9c 2 5 mm countersunk screws A Driver board Control board Hardware unit Amplifier boards x3 Amplifier board for SM4000 Amplifier board for SM5000 ...

Страница 72: ......

Страница 73: ...5 VDC digital Tools and materials required 2 mm allen key for back cover and hardware unit mounting screws Posidrive screwdriver 4 PART REPLACEMENT PN 960 21 000 40 4000 Driver Board PN 960 20 000 40 5000 0200 model PN 960 21 000 40 5000 0210 model Edition 1 January 1996 Service Manual ScanMate 4000 5000 4 10a Caution Turn off power Before connecting or disconnecting cables Before carrying out ser...

Страница 74: ...Lift the board completely away Assembly 10 On ScanMate 5000 0200 model connect the ground earth connect ion from the new driver board to the hardware unit using the 2 5 mm posidrive screw before mounting the board 11 Fit the left hand edge of the driver board underneath the two locating tabs and secure with the two 2 5 mm posidrive screws A 12 Support the driver board and fit the eight 2 5 mm posi...

Страница 75: ...ard Connector J1 to backplane Posidrive screws A J8 to cooling fans red black leads to a 2 pin connector Connector J4 to transformer Enlarged drawing of driver board in section 7 7 Driver board Booster print board Dotted outline Booster print board 2 5 mm posi drive screws B x8 Hardware unit Only on ScanMate 5000 0210 model Bar code board Cooling fans ...

Страница 76: ......

Страница 77: ...nit mounting screws 2 5 mm allen key for PMT module mounting screw 4 PART REPLACEMENT PN 960 20 000 50 4000 5000 PMT Module Edition 1 January 1996 Service Manual ScanMate 4000 5000 4 11a Caution Turn off power Before connecting or disconnecting cables Before carrying out service operations If a green colored connector is used in connection J20 on the control board ensure that is reconnected with t...

Страница 78: ...king tabs on the connector fit into the locks on the control board that is facing to the right hand side viewed from the back of the scanner 8 Carry out a PMT amplifier gain adjustment section 5 6 9 Fit the new PMT module by positioning the board onto its tray and carefully pushing in 10 Tighten the 3 mm allen screw B 11 Partially refit the hardware unit section 4 5 steps 7 10 Note if J20 green is...

Страница 79: ...Edition 1 January 1996 Service Manual ScanMate 4000 5000 4 11c PMT module rotated 180 Potentiometers Green cable connection Black cable connection PMT module Allen screw B 3 mm set screws A Hardware unit Control board Sensor module ...

Страница 80: ......

Страница 81: ... 2 5 mm allen key for internal protection cover 3 mm allen key T handle for left and right hand drum cover mounting screws 3 mm allen key for end plate Isopropylalcohol 4 PART REPLACEMENT PN 960 20 000 70 4000 and 5000 Indicator Display Edition 1 January 1996 Service Manual ScanMate 4000 5000 4 12a Caution Turn off power Before connecting or disconnecting cables Before carrying out service operati...

Страница 82: ...ool peel the indicator display away from the scanner Assembly 6 Clean the area on the cabinet where the new display is to be fitted with isopropyl alcohol 7 Peel the protective paper from the back of the new display feed the ribbon cable through the opening in the drum and firmly press the display into place 8 Reconnect the connector and press the ribbon cable down onto the adhesive pad 9 Position...

Страница 83: ...CEMENT Indicator Display Edition 1 January 1996 Service Manual ScanMate 4000 5000 4 12c Connector B Indicator display Internal protection cover Allen screws A Allen screws A ScanMate 5000 shown SM 4000 is identical ...

Страница 84: ......

Страница 85: ...tes the spare drum compartment underneath the main compartment Technical data 8W fluorescent tube Tools and materials required Small screwdriver for light cover 4 PART REPLACEMENT PN 960 85 000 40 4000 and 5000 Fluorescent Light Tube Edition 1 January 1996 Service Manual ScanMate 4000 5000 4 13a Caution Turn off power before replacing the light tubes Access is limited to the light tubes therefore ...

Страница 86: ... hinged cover and remove the spare drum if mounted 2 Remove the plastic cover by holding in the middle and carefully pulling away from the two end flanges 3 Rotate the tube 90 in either direction lift upwards and remove Note it may be necessary to use a small screwdriver between the fitting and the tube between the two pins on the tube in order to rotate the tube However we recommend that this met...

Страница 87: ... Edition 1 January 1996 Service Manual ScanMate 4000 5000 4 13c Main light tube and plastic cover only on 0210 model DotMate 5000 Auxilliary light tube and plastic cover both 0200 and 0210 models DotMate 4000 Main light tube and plastic cover ...

Страница 88: ......

Страница 89: ...gle shaft PH265 step motor 6 V 0 85 current per phase Tools and materials required 3 mm allen key T handle for left hand drum cover 3 mm allen key for end plate and motor mounting screws Loctite 222 or equivalent for motor shaft mounting screw 4 mm lock washer 4 PART REPLACEMENT PN 960 20 000 90 4000 and 5000 Spindle Step Motor Edition 1 January 1996 Service Manual ScanMate 4000 5000 4 14a Caution...

Страница 90: ... screw and lock washer 6 Remove the four 4 mm allen screws B retaining the step motor to its mounting bracket and lift the motor away Assembly 7 Mount a new step motor and refit the four 4 mm allen screws 8 Align the holes in the step motor shaft and spindle and refit the 4 mm dome head allen screw and new lock washer 9 Reconnect the connector to the step motor 10 Carry out the adjustment and test...

Страница 91: ...REPLACEMENT Spindle Step Motor Edition 1 January 1996 Service Manual ScanMate 4000 5000 4 14c Step motor 4 mm dome head allen screw A Step motor 4 mm allen screws B x4 ScanMate 5000 shown SM 4000 is identical ...

Страница 92: ......

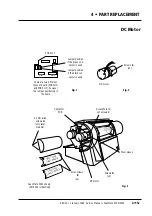
Страница 93: ...r left hand drum cover mounting screws 3 mm allen key for drum end plate and motor mounting screws Loctite 243 or equivalent for set screws Tape for sealing set screw access hole 4 PART REPLACEMENT PN 960 20 000 80 4000 and 5000 DC Motor Edition 1 January 1996 Service Manual ScanMate 4000 5000 4 15a Caution Turn off power Before connecting or disconnecting cables Before carrying out service operat...

Страница 94: ... three 4 mm allen screws E securing the outer sleeve of the new motor mount the motor and push it firmly against the drum sleeve 13 Check that the flat face on the motor shaft is positioned correctly in the access hole and using loctite 243 fit a new set screw C 14 Rotate the drum 180 and using loctite 243 fit the second new 4 mm set screw C 15 Push the outer sleeve of the motor up against the dru...

Страница 95: ...ews D x2 Access hole for set screws C 2 5 mm allen screws A only later models Drum sleeve DC motor Screws E x3 Jumper position if the green con nector is used There are two different types of board PCB011D and PCB 011F however the jumper positioning is the same Jumper position if the black con nector is used PCB 011F Green Black Fig 1 Fig 2 Fig 3 ScanMate 5000 shown SM 4000 is identical ...

Страница 96: ......

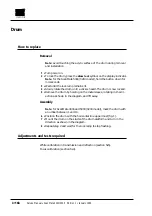
Страница 97: ...riginals to be scanned Technical data Drum material acrylic Dimensions 100 x 314 mm Tools and materials required No tools or materials required 4 PART REPLACEMENT PN 960 21 001 00 Drum Edition 1 January 1996 Service Manual ScanMate 4000 5000 4 16a Caution Turn off power Before connecting or disconnecting cables Before carrying out service operations ...

Страница 98: ...holding on the metal sleeve rotating in the dir ection as shown in the diagram and lift away Assembly Note for ScanMate 4000 and 5000 0200 model mark the drum with a number between 1 and 10 6 Position the drum with the horizontal line uppermost fig 1 7 Mount the drum on the studs of the drum platform and turn in the direction as shown in the diagram 8 Repeat step 2 and wait for the lock lamp to st...

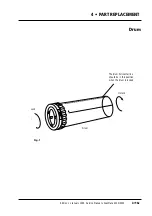
Страница 99: ...4 PART REPLACEMENT Drum Edition 1 January 1996 Service Manual ScanMate 4000 5000 4 16c Drum Lock Unlock Fig 1 The drum horizontal line should be in this position when the drum is locked ...

Страница 100: ......

Страница 101: ...us 5 3 Focus calibration 5 4 Electrical System White calibration in transmission 5 5 White calibration in reflection 5 5 PMT amplifier gain 5 6 Mechanical System Zero point horizontal 5 7 Zero point vertical 5 8 Drum alignment 5 9 Testing Focus test 5 10 Focus sharpness 5 11 Register error 5 12 Stripes in shadow 5 13 Noise in highlight 5 14 ...

Страница 102: ......

Страница 103: ... handle for right hand drum cover mounting screws Extension board part of the service kit Voltmeter with probes 5 ADJUSTMENTS AND TESTING Light Tube Edition 1 January 1996 Service Manual ScanMate 4000 5000 5 2a Caution Turn off power Before connecting or disconnecting cables Before carrying out service operations When the hardware drawer is partially removed and power turned on ensure that the ope...

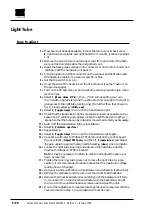
Страница 104: ... fig 1 enough so that the tube can be rotated or moved horizontally as necessary 11 Switch off the transmission light press 0 twice 12 Select 9 Calibrate aperture 13 Repeat step 8 14 Select 0 Toggle lamps to turn on the transmission light again 15 Connect a voltmeter to TP46 and TP100 ground on the control board fig 2 select 2 Adjust PMT gain and then T Transmission and adjust the gain value to ap...

Страница 105: ...5 ADJUSTMENTS AND TESTING Light Tube Edition 1 January 1996 Service Manual ScanMate 4000 5000 5 2c TP46 TP 100 Fig 2 Fig 1 Locking ring use C spanner in the service kit to loosen ...

Страница 106: ......

Страница 107: ...op plug in 2 1 7 or later versions Extension board part of the service kit 5 ADJUSTMENTS AND TESTING Focus Edition 1 January 1996 Service Manual ScanMate 4000 5000 5 3a Caution Turn off power Before connecting or disconnecting cables Before carrying out service operations Do not rotate the drum platform while the focus motor adjust ment tool is fitted When the hardware drawer is partially removed ...

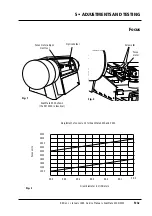
Страница 108: ... to the sensor The motor will now move to the rear under spring pressure 15 From the service program main menu select 1 Move drum Z P L then dot allows setting your own drum position parameters and move the drum spindle until the adjustment tool is directly in front of the sensor 16 Push the focus motor towards the drum tool until the sensor head and tool touch The tool should now rotate with ligh...

Страница 109: ... Fig 2 Fig 3 Focus motor adjust ment tool Optics holder Screws B Focus motor Adjustment of sensor unit for ScanMate 4000 and 5000 Drum diameter in millimeters Focus units 3000 2800 2600 2400 2200 2000 1800 1600 1400 1200 99 6 99 5 99 4 99 3 99 2 99 1 99 0 ScanMate 5000 shown the SM 4000 is identical ...

Страница 110: ......

Страница 111: ...nted Technical data Tools and materials required Mac or PC both if possible Photoshop plug in 2 1 7 or later versions Auto focus adjustment target 5 ADJUSTMENTS AND TESTING Focus Calibration Edition 1 January 1996 Service Manual ScanMate 4000 5000 5 4a Caution Turn off power Before connecting or disconnecting cables Before carrying out service operations ...

Страница 112: ...the paper on the drum 7 Make a preview scan of the target selecting transmission or reflect ion as applicable 8 Crop a square of approximately 20 x 20 mm 1 x 1 in the center of the target 9 If the drum is not bar coded click on Options to open the Focus Aperture dialogue Choose the desired drum number from the Drum menu and click on OK Note this step is not necessary if the drum has a bar code 10 ...

Страница 113: ...5 ADJUSTMENTS AND TESTING Focus Calibration Edition 1 January 1996 Service Manual ScanMate 4000 5000 5 4c ...

Страница 114: ......

Страница 115: ...ired Mac or PC both if possible Photoshop plug in 2 1 7 or later versions White paper 5 ADJUSTMENTS AND TESTING White Calibration in Transmission and Reflection Edition 1 January 1996 Service Manual ScanMate 4000 5000 5 5a Caution Turn off power Before connecting or disconnecting cables Before carrying out service operations ...

Страница 116: ... a clean and clear area of the drum 9 Press the alt key to access calibrate 10 Click on Calibrate and the scanner will now calibrate for approx imately 3 minutes Note the calibration takes place on the top line of the cropped area Reflection Fig 2 11 Mount a piece of white paper onto the drum Note The same type or whiter than the most frequently used orig inals 12 Select Reflection 13 Make a previ...

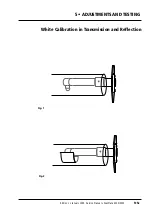
Страница 117: ...5 ADJUSTMENTS AND TESTING White Calibration in Transmission and Reflection Edition 1 January 1996 Service Manual ScanMate 4000 5000 5 5c Fig 1 Fig 2 ...

Страница 118: ......

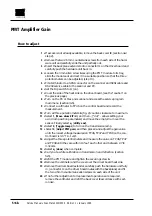
Страница 119: ...ey for right hand end plate mounting screw 3 mm allen key T handle for right hand drum cover mounting screws Voltmeter Extension board part of the service kit 5 ADJUSTMENTS AND TESTING PMT Amplifier Gain Edition 1 January 1996 Service Manual ScanMate 4000 5000 5 6a Caution Turn off power Before connecting or disconnecting cables Before carrying out service operations When the hardware drawer is pa...

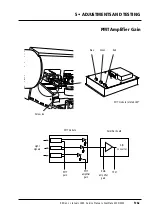
Страница 120: ...Select 1 Move drum Z P L and then dot allows setting your own drum position parameters and move the empty drum over the sensor Finally select q utility end 12 Select 0 Toggle lamps to turn on the transmission lamp 13 Select 2 Adjust PMT gain and then press 2 and adjust the gain value until the lowest voltage measured on TP46 TP47 and TP48 on the con trol board is 3 0 0 1 volt 14 Adjust the three p...

Страница 121: ... Amplifier Gain Edition 1 January 1996 Service Manual ScanMate 4000 5000 5 6c A D converter PMT module Screw A RGB amplifier gain PMT gain PMT amplifier gain TP 47 Light signals Amplifier board Red Green Blue PMT module rotated 180 ...

Страница 122: ......

Страница 123: ...r microswitch adjustment screws 3 mm allen key for right hand end plate mounting screw 3 mm allen key T handle for right hand drum cover mounting screws A piece of transparent tape Photoshop plug in 2 1 7 or later versions 5 ADJUSTMENTS AND TESTING Zero Point Horizontal Edition 1 January 1996 Service Manual ScanMate 4000 5000 5 7a Caution Turn off power Before connecting or disconnecting cables Be...

Страница 124: ...ion in plug in 8 Make a preview in the zero corner 10 x 10 mm approximately 9 The horizontal line on the monitor short line should be visible in the zero position as shown in fig 1 Note The horizontal and vertical lines on the drum need not be shown in full width half the width of the lines is sufficient 10 If incorrect and access is not already available remove the follow ing panels Right hand en...

Страница 125: ...5 ADJUSTMENTS AND TESTING Zero Point Horizontal Edition 1 January 1996 Service Manual ScanMate 4000 5000 5 7c Access holes for allen screws A Fig 2 Fig 1 ...

Страница 126: ......

Страница 127: ...s 2 5 mm allen key long for lamp cover mounting screws 3 mm allen key for right hand end plate mounting screw 3 mm allen key T handle for right hand drum cover mounting screws Oscilloscope with 2 channels Extension board part of the service kit 5 ADJUSTMENTS AND TESTING Zero Point Vertical Edition 1 January 1996 Service Manual ScanMate 4000 5000 5 8a Caution Turn off power Before connecting or dis...

Страница 128: ...the channel which is coupled to the analog signal black line on the drum This gives an overview of the encoder signal position in relation to the zero line 14 The pulse on the oscilloscope could as an example appear as shown in fig 1 the encoder and amplifier pulses show one revolution of the drum 15 If the pulse does not appear on channel 1 select 2 Adjust PMT gain and adjust the gain value until...

Страница 129: ...ertical Edition 1 January 1996 Service Manual ScanMate 4000 5000 5 8c Fig 1 Fig 2 Fig 3 Fig 4 Channel 1 Channel 2 Channel 1 Channel 2 Channel 1 Channel 2 Amp pulse Adjustment screws A Sync pulse ScanMate 5000 shown the SM 4000 is identical ...

Страница 130: ......

Страница 131: ...cover mounting screws 5 mm allen key for mounting adjustment screw Loctite 243 or equivalent for set screw Oscilloscope with test probes Photoshop plug in 2 1 7 or latest version UGRA test target 1982 to measure the focus value ScanView focus adjust targets 5 ADJUSTMENTS AND TESTING Drum Alignment Edition 1 January 1996 Service Manual ScanMate 4000 5000 5 9a Caution Turn off power Before connectin...

Страница 132: ...on 5 10 steps 11 16 and note the overlap values 11 Perform a focus test on the right hand test target again in accord ance with section 5 10 steps 11 16 and compare the overlap val ues obtained in step 10 above If the values are not the same pro ceed with step 12 12 Remove the right hand end plate C and right hand drum cover D section 4 2 steps 3 and 4 13 Remove the two DC motor covers section 4 1...

Страница 133: ...nment Edition 1 January 1996 Service Manual ScanMate 4000 5000 5 9c Fig 1 First position Second position Fig 2 Both test targets mounted together Mounting adjustment screw A Set screw B Fig 3 ScanMate 5000 shown the SM 4000 is identical ...

Страница 134: ......

Страница 135: ...5 mm allen key long for lamp cover mounting screws Oscilliscope with test probes ScanView focus adjust target Photoshop plug in 2 1 7 or latest version Extension board part of the service kit 5 ADJUSTMENTS AND TESTING Focus Test Edition 1 January 1996 Service Manual ScanMate 4000 5000 5 10a Caution Turn off power Before connecting or disconnecting cables Before carrying out service operations ...

Страница 136: ...zontal line fig 1 10 Access the service program main menu section 3 5 11 Position the target over the sensor lens by selecting 1 Move drum Z P L and then dot allows setting your own drum position parameters Finally select q utility end 12 Connect the oscilloscope signal probes to TP46 channel 1 TP100 ground and TP57 use channel 2 as trigger 13 Select 0 Toggle lamps to turn on the transmission ligh...

Страница 137: ...5 ADJUSTMENTS AND TESTING Focus Test Edition 1 January 1996 Service Manual ScanMate 4000 5000 5 10c Fig 2 Fig 1 Maximum focus as shown on oscilloscope ...

Страница 138: ......

Страница 139: ...Photoshop plug in 2 1 7 or latest version UGRA test target to measure the focus value 5 ADJUSTMENTS AND TESTING Focus Sharpness Edition 1 January 1996 Service Manual ScanMate 4000 5000 5 11a Caution Turn off power Before connecting or disconnecting cables Before carrying out service operations Ensure the UGRA test target is free of dust otherwise false indica tions are likely ...

Страница 140: ...00 dpi resolution White black point max 255 min 0 10 Make a scan of the area 11 Select Adjust levels in Photoshop image menu 12 Define the background of the circles in the Levels window by clicking on the white marker A and moving it to the right peak of the histogram as shown in fig 1 Note adjustment must be at least 250 for white point 13 Select Map threshold in Photoshop image menu 14 Click on ...

Страница 141: ...5 ADJUSTMENTS AND TESTING Focus Sharpness Edition 1 January 1996 Service Manual ScanMate 4000 5000 5 11c Fig 2 Fig 1 Marker A Correct pixel spread at 6µ ...

Страница 142: ......

Страница 143: ...ipment required ScanView focus adjust target Anti static cloth Photoshop plug in 2 1 7 or latest version 5 ADJUSTMENTS AND TESTING Register Error Edition 1 January 1996 Service Manual ScanMate 4000 5000 5 12a Caution Turn off power Before connecting or disconnecting cables Before carrying out service operations ...

Страница 144: ... Gamma 1 4 Neutral gradation curve Max resolution 9 Select the standard area 24 x 36 mm and make a preview 10 Crop an area of 20 x 15 mm that starts approximately 5 mm from the first black line so that three black stripes can be seen Fig 2 11 Perform a scan and crop an area A as shown in fig 2 Note the area should be approximately 1000 pixels on the y axis and 10 20 pixels on the x axis 12 Select ...

Страница 145: ...r Edition 1 January 1996 Service Manual ScanMate 4000 5000 5 12c Fig 2 Fig 3 Fig 5 Fig 4 Area A Enlarge approx 10 times Zoom in 4 1 Value should be less than 1 5 pixel zero point First line of the target is on the drum horizontal line Fig 1 ...

Страница 146: ......

Страница 147: ...Max 2 levels Tools and equipment required A piece of aluminium foil 5 ADJUSTMENTS AND TESTING Stripes in Shadow Edition 1 January 1996 Service Manual ScanMate 4000 5000 5 13a Caution Turn off power Before connecting or disconnecting cables Before carrying out service operations ...

Страница 148: ...approximately 20 x 20 mm in the middle of the aluminium foil without making a preview first 7 Select adjust level and move the left hand black marker to the right until level 2 is obtained fig 1 8 Now move the right hand white marker to the left until level 4 is obtained 9 Check the image and ensure that there are no stripes on the screen fig 1 10 Fig 2 shows an example of stripes in shadow when t...

Страница 149: ...5 ADJUSTMENTS AND TESTING Stripes in Shadow Edition 1 January 1996 Service Manual ScanMate 4000 5000 5 13c Fig 1 Fig 2 ...

Страница 150: ......

Страница 151: ...cal data Max standard deviation of 5 Tools and equipment required 5 ADJUSTMENTS AND TESTING Noise in Highlight Edition 1 January 1996 Service Manual ScanMate 4000 5000 5 14a Caution Turn off power Before connecting or disconnecting cables Before carrying out service operations ...

Страница 152: ...s Transmission color Gamma 0 78 Neutral gradation curve 600 dpi resolution White black point max 255 min 0 5 Scan an area of approximately 20 x 20 mm at the end of the drum without making a preview first 6 Select Image and then Histogram and check that the standard deviation in gray red green and blue is not greater than 5 fig 1 7 If the standard deviation is greater than 5 contact ScanView s supp...

Страница 153: ...5 ADJUSTMENTS AND TESTING Noise in Highlight Edition 1 January 1996 Service Manual ScanMate 4000 5000 5 14c Fig 1 ...

Страница 154: ......

Страница 155: ...aning 6 3 Spindle and drum guides lubrication 6 4 Clean the hardware unit and mechanical parts 6 6 Clean the sensor optics 6 7 6 CLEANING AND MAINTENANCE Contents Edition 1 January 1996 Service Manual ScanMate 4000 5000 6 1 ...

Страница 156: ......

Страница 157: ...non abrasive repro wipes and graphic arts drum cleaner carefully 6 CLEANING AND MAINTENANCE Edition 1 January 1996 Service Manual ScanMate 4000 5000 6 3 Frequency Operation Page Reference As required Drum cleaning 6 3 As required Spindle lubrication 6 4 As required Drum guides lubrication 6 4 As required Clean the hardware unit 6 6 and mechanical parts Every 6 months Clean the sensor optics 6 7 Ca...

Страница 158: ...tch to 8 on 5 Turn on the PC or Mac and access the service program section 3 5 6 Switch on the scanner select 1 Move drum Z P L and then Z zero the drum moves to the the zero position this gives access to the full length of the spindle and the drum guides to enable cleaning and lubrication to carried out 7 Using a lint free cloth clean the spindle and drum guides before applying a thin film of lub...

Страница 159: ...ate 4000 5000 6 5 Apply lubricating grease to the spindle on the end of a thin screwdriver Spindle protection tube Lower iternal protection cover Internal protection cover Allen screws B Allen screws A Allen screws A Allen screws B ScanMate 5000 shown SM 4000 is identical ...

Страница 160: ...hardware unit paying particlarly attention to the area around the ventilation fans 4 Vacuum clean carefully around the sensor module and transmis sion and reflection lamps 5 Slide the hardware unit fully in connector J1 on the driver board mates with the backplane and fit the two 2 5 mm countersunk allen screws on each side of the unit 6 Refit the covers removed in step 1 in accordance with sectio...

Страница 161: ...ns of the sensor and remove the holder 3 Using a dry cotton swab or lint free cloth carefully clean the optics on both sides 4 Refit the optics holder to the sensor lens and tighten the 3 mm set screw A 6 CLEANING AND MAINTENANCE Edition 1 January 1996 Service Manual ScanMate 4000 5000 6 7 ScanMate 4000 shown SM 5000 is identical Set screw A securing optics holder Sensor optics holder ...

Страница 162: ......

Страница 163: ...w 7 4 Layout diagrams Control board 7 5 CPU board 7 6 Driver board 7 7 Circuit connection diagram SM 4000 7 8 Circuit connection diagram SM 5000 0210 model 7 9 7 DIAGRAMS AND LAYOUTS Contents Edition 1 January 1996 Service Manual ScanMate 4000 5000 7 1 ...

Страница 164: ......

Страница 165: ... 1 January 1996 Service Manual ScanMate 4000 5000 7 3 A Drum B Fluorescent tube main compartment C Light tube D Sensor module E Fluorescent tube auxilliary compartment F Indicator display G DC motor H Spindle step motor A C D E B G F H Scanner viewed from the front ...

Страница 166: ... Reflection lamp C Transmission lamp D DC motor E Spindle step motor F Booster print board SM 4000 and SM 5000 0210 model only G Driver board H Hardware unit I Bar code board SM 5000 0210 model only J SCSI controller K CPU board L Control board M Amplifier board x3 N PMT module D K M E F G H J A B C I L N Scanner viewed from the back ...

Страница 167: ...7 DIAGRAMS AND LAYOUTS Control Board Edition 1 January 1996 Service Manual ScanMate 4000 5000 7 5 TP 48 TP 47 TP 46 TP 57 TP100 ground ...

Страница 168: ...Service Manual ScanMate 4000 5000 Edition 1 January 1996 CPU Board 7 6 7 DIAGRAMS AND LAYOUTS SCSI controller ...

Страница 169: ...river Board Edition 1 January 1996 Service Manual ScanMate 4000 5000 7 7 Connector J2 Connector J3 Fuse F3 TP 19 TP 21 TP 23 Fuse F5 Fuse F1 Fuse F2 Fuse F4 Connector J8 TP 26 TP 24 TP 18 TP 100 TP 22 TP 200 TP 20 Connector J4 ...

Страница 170: ......

Страница 171: ...ScanMate 4000 Type 250 Circuit Connection Diagram ...

Страница 172: ...ScanMate 5000 Type 210 Circuit Connection Diagram ...

Страница 173: ...Scanning problems 8 3 General 8 4 8 TROUBLE SHOOTING Contents Edition 1 January 1996 Service Manual ScanMate 4000 5000 8 1 ...

Страница 174: ......

Страница 175: ...sion 1 Transmission bulb blown Change bulb scan 2 Cables loose Secure cables Contact ScanView support Scan out of focus 1 Defective sensor or focus Replace sensor module motor Color cast in scan 1 Calibration required Carry out white calibration Register error 1 DC motor bearings noisy Replace DC motor 8 TROUBLE SHOOTING Edition 1 January 1996 Service Manual ScanMate 4000 5000 8 3 Caution Turn off...

Страница 176: ...alibrate aperture see ment section 3 8 No ready light 1 Defective park position Replace switch switch Contact ScanView support No lights on front panel 1 Cable faults Replace cable s 2 Defective power supply Replace power supply Contact ScanView support Nothing is working 1 Fuse in the scanner blown Change the fuse Contact ScanView support SCSI 1 Dip switch setting incorrect Set Dip switch to the ...

Отзывы: