


STK-81H-SCA user manual
4
www.scaltek.com
5. OPERATION CONTROLS AND FUNCTIONS
a. Front Panel
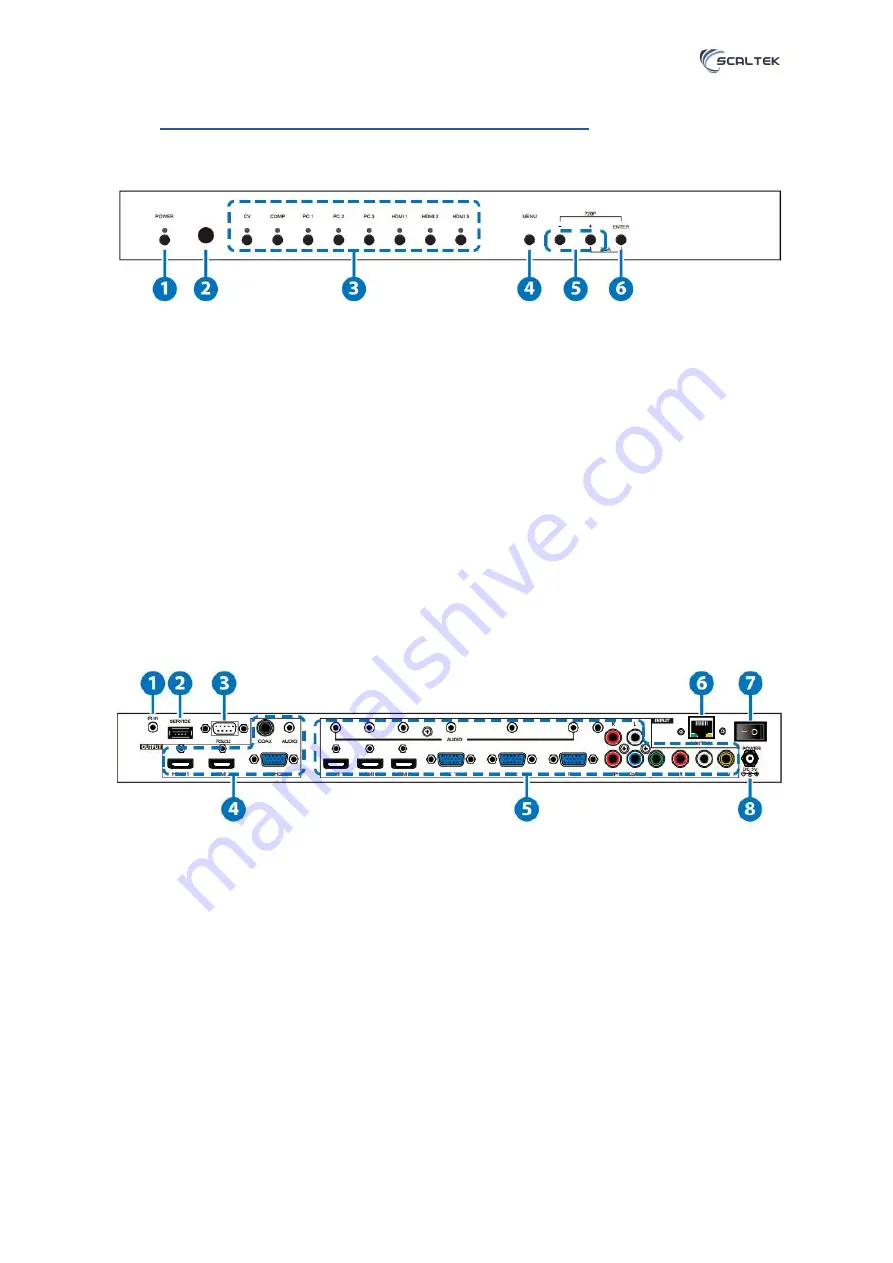
1- POWER Button and LED: Press this button to switch the device on or to set it to standby mode.
Once the device is connected to an active power supply and the Power Switch on the back panel is
turned on, the LED will illuminate and the device will switch on automatically.
2- IR Receiver Window: Receives only the IR signal from the remote control included in the package.
3- INPUT Buttons and LEDs: Press these buttons to switch directly to the required source. An LED will
illuminate to indicate the selected input source.
4- MENU: Press this button to enter the On-screen Display (OSD) menu.
5-
Plus/Minus (−/+) Buttons: Press these buttons to navigate down and up in the OSD menu
6- ENTER: Press this button to confirm the selection in the OSD menu.
Note: Press this button simultaneously with the '+' (plus) button to instantly switch the output to XGA
reso
lution or with the '−' (minus) button to instantly switch the output to 720p resolution.
b. Rear Panel
1- IR IN: Connect the supplied IR extender to receive the IR signal from the included IR remote.
Ensure that the remote is within the direct line-of-sight of the IR extender
2- SERVICE: Reserved for manufacturer use only.
3- RS-232: Connect to a PC/Laptop or RS-232 control system to use RS-232 commands to control the
device (See Section 6.5 for details on RS-232 commands).
4- OUTPUTS
a) HDMI 1/2: Connect to an HDMI display or AV Receiver for video and/or audio output.
b) PC/HD: Connect to a monitor/display for video output. For HD (Component) output, use the
supplied D-Sub 9pin to 3 RCA adaptor cable for HD resolutions from 480p~1080p.Note: When the
selected HDMI input source signal has HDCP content the VGA/Component output will not display any
image.