Setup and Installation | 55
To flush all the print heads, select [All Heads].
To flush the print head for cyan and black, select [Head 1].
To flush the print head for yellow and magenta, select [Head 2].
6. Press the [OK] selection key.
Head flushing starts.
Head Position
Adjusts the print head. Perform this operation if printed lines are vertically misaligned.
If there are several lines in the test pattern, check adjustment values for each line, and
adjust the print head positions. If the adjustment value is set to "0", adjustment is not
necessary. Adjust all lines so their adjustment values indicate "0".
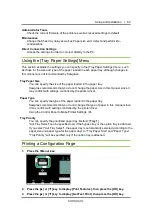
1. Press the [ Menu] key.
2. Press the
[▲] or [▼] key
to display [Print Features], then press the [OK] key.
3. Press the
[▲] or [▼] key
to display [ListTest Prnt], then press the [OK] key.
4. Press the
[▲] or [▼] key
to display [Head Position], then press the [OK] key.
5. Press the
[▲] or [▼] key
to display [Pr.Test Pattern], then press the [OK] key.
6. Press the
[▲] or [▼] key
to select the target's resolutions, then press the [OK]
key.
7. Press the [Print] selection key
A test pattern to adjust print head positions is printed.
Содержание SG1000EU
Страница 1: ...Table of Contents i ...


