Multimedia Projector
Saville PowerLite Spi-2600
Owner's Manual
Страница 1: ...Multimedia Projector Saville PowerLite Spi 2600 Owner s Manual...
Страница 2: ...30 38 Quick Termination The AC power cord can be unplugged immediately after turning off the projector without waiting for the termination of the cooling fan rotation Note The On Screen Menu and figu...
Страница 3: ...om and Focus Adjustment 22 Keystone Correction 22 Sound Adjustment 23 Remote Control Operation 23 Computer Input 25 Input Source Selection 25 Computer System Selection 26 Auto PC Adjustment 27 Manual...
Страница 4: ...d Provide appropriate space on the top sides and rear of the projector cabinet for allowing air circulation and cooling the projector Minimum clearance must be maintained If the projector is to be bui...
Страница 5: ...out parts that could result in a fire or electric shock Never spill liquid of any kind on the projector Safety Instructions Voor de klanten in Nederland Bij dit produkt zijn batterijen geleverd Wanne...
Страница 6: ...not point the projector up to project an image Do not point the projector down to project an image Do not put the projector on either side to project an image Install the projector properly Improper...
Страница 7: ...boratories UL and certified by the Canadian Standard Association CSA AC Power Cord has a grounding type AC line plug This is a safety feature to be sure that the plug will fit into the power outlet Do...
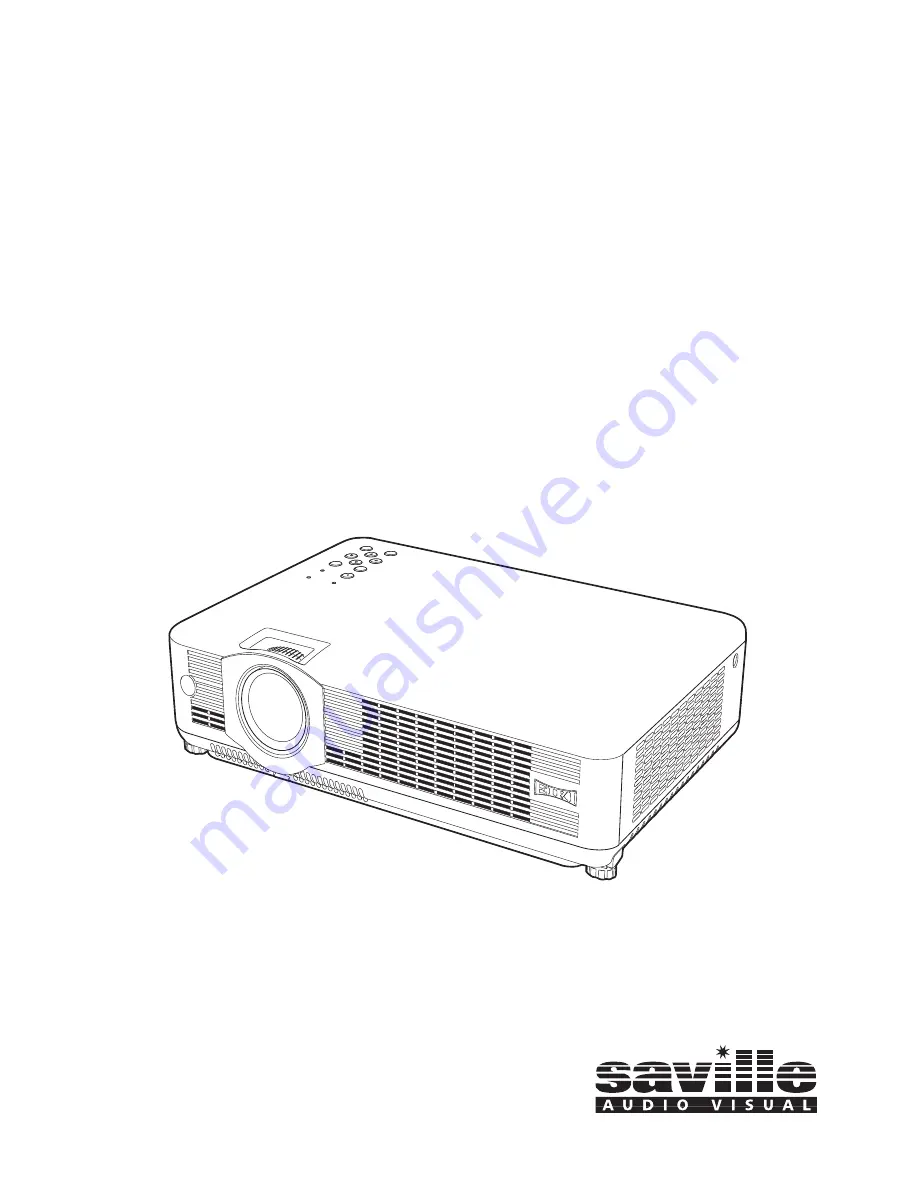
Страница 8: ...Connectors 0 Top Controls and Indicators 1 Exhaust Vents CAUTION Hot air is exhausted from the exhaust vent Do not put heat sensitive objects near this side 2 Lamp Cover 3 Air Intake Vents back and b...
Страница 9: ...art 21 pin video output or component video output to this terminal p15 17 When the cable is of the longer variety it is advisable to use this terminal and not COMPUTER IN 2 MONITOR OUT r S VIDEO IN Co...
Страница 10: ...OWER indicator Emit a red light until the projector gets ready to be turned on It turns red when the projector is in the stand by mode It remains green while the projector is under operation p 18 19 6...
Страница 11: ...n Operate the P timer function p 24 o NO SHOW button Temporarily turn off the image on the screen p 24 5 KEYSTONE button Correct the keystone distortion p 22 42 t Point ed 7 8 VOLUME buttons Select an...
Страница 12: ...batteries Risk of explosion if a battery is replaced by an incorrect type Dispose of used batteries according to the instructions Open the battery compartment lid Install new batteries into the compar...
Страница 13: ...Adjustable Feet Feet Lock Latches Adjustable Feet Screen Size W x H mm 4 3 aspect ratio Zoom min 40 Zoom max 813 x 610 5 2 1 6 m 100 2032 x 1524 13 8 4 2 m 11 5 3 5 m 150 3048 x 2286 20 7 6 3 m 17 1...
Страница 14: ...er Cord Connect the AC power cord supplied to the projector The AC outlet must be near this equipment and must be easily accessible NOTE ON THE POWER CORD AC power cord must meet requirements of the c...
Страница 15: ...GA cable This terminal is switchable Set up the terminal as either Computer input or Monitor output See Page 47 COMPUTER IN 2 MONITOR OUT Note Input sound to the COMPUTER COMPONENT AUDIO IN terminal w...
Страница 16: ...cting AUDIO OUT to external audio equipment the projector s built in speaker is disconnected Unplug the power cords of both the projector and external equipment from the AC outlet before connecting ca...
Страница 17: ...OMPONENT AUDIO IN Audio cable stereo Audio cable stereo Audio Input Component Video Output Y Pb Cb Pr Cr RGB Scart 21 pin Output Audio Output Scart VGA cable Component VGA cable AUDIO OUT stereo Compo...
Страница 18: ...tart to operate the projector If you entered an incorrect PIN code PIN code and the number turns red Enter the correct PIN code all over again What is PIN code PIN Personal Identification Number code...
Страница 19: ...p 48 The running speed of cooling fans is changed according to the temperature inside the projector Do not put the projector in a case before the projector is cooled enough If the WARNING TEMP indica...
Страница 20: ...oint 7 8 buttons Refer to the following pages for each adjustment To close the On Screen Menu press the MENU button again Press the MENU button to display the On Screen Menu Note The selected item is...
Страница 21: ...Gamma p 31 32 Sound Menu Used to adjust the volume or mute the sound p 23 PC Adjust Menu Used to adjust parameters to match with input signal format p 27 29 Input Menu Used to select input source eith...
Страница 22: ...by pressing the Point ed buttons Keystone adjustment can be memorized p 42 Reduce the upper width with Point e button Reduce the lower width with Point d button Keystone Correction The arrows are whi...
Страница 23: ...the SELECT button Volume Mute Press the Point 8 button to turn up the volume and press the Point 7 button to turn down the volume Menu Operation Remote Control Operation For some frequently used oper...
Страница 24: ...timer starts to count time 00 00 59 59 To stop the P Timer press the P TIMER button Press the P TIMER button again then the P timer display disappears P TIMER button Press the IMAGE button on the remo...
Страница 25: ...er red arrow to Computer 2 and press the SELECT button Move the pointer to RGB and press the SELECT button Source Select Menu Computer 1 Press the MENU button to display the On Screen Menu Press the P...
Страница 26: ...computer Check the connection between your c o m p u t e r a n d t h e p r o j e c t o r S e e Troubleshooting on page 57 Auto The preset system is manually adjusted in the PC Adjust Menu The adjusted...
Страница 27: ...LECT button twice Auto PC Adj Menu Operation 1 2 Move the red framed pointer to the Auto PC Adj item and press the SELECT button Please wait message appears while Auto PC adjustment is in process PC A...
Страница 28: ...r 1 2 Eliminate flicker from the image displayed Press the Point 7 8 buttons to adjust the value From 0 to 31 Fine sync Adjust the number of total dots in one horizontal period Press the Point 7 8 but...
Страница 29: ...ed data select Reset and press the SELECT button The confirmation box appears and then select Yes All adjustments return to their previous figures Mode free To clear the stored data move the red frame...
Страница 30: ...32 Press the MENU button to display the On Screen Menu Press the Point 7 8 buttons to move the red framed pointer to the Image Select Menu icon Press the Point ed buttons to move the red framed pointe...
Страница 31: ...n the red tone and the Point 8 button to deepen the red tone From 0 to 63 White balance Red Press the Point 7 button to lighten the green tone and the Point 8 button to deepen the green tone From 0 to...
Страница 32: ...ed 7 8 buttons When adjusted the arrows turns red When reached to the correction limit the arrows disappears 1 Wide Provide the image to fit wide video aspect ratio 16 9 by expanding the image width...
Страница 33: ...t the Horizontal Vertical screen position Common Save the adjusted scale to all the inputs Press the SELECT button at Common to display a confirmation box To save the scale press the SELECT button at...
Страница 34: ...To exit the Digital zoom mode press any button except the D ZOOM ed buttons SELECT and Point buttons To return to the previous screen size select a screen size from the Screen Size Adjustment or sele...
Страница 35: ...ct Menu 1 2 Move the pointer to the source that you want to select and then press the SELECT button 3 Menu Operation Auto When selecting Auto the projector automatically detects the incoming video sig...
Страница 36: ...Menu Operation Press the MENU button to display the On Screen Menu Press the Point 7 8 buttons to move the red framed pointer to the Input Menu icon When the input source is coming from video equipme...
Страница 37: ...ts itself to optimize its performance If the projector cannot reproduce proper video image it is necessary to select a specific component video signal format among 480i 575i 480p 575p 720p 1035i and 1...
Страница 38: ...y the On Screen Menu Press the Point 7 8 buttons to move the red framed pointer to the Image Select Menu icon Press the Point ed buttons to move the red framed pointer to the level that you want to se...
Страница 39: ...7 button to lighten the green tone and the Point 8 button to deepen the green tone From 0 to 63 White balance Green Press the Point 7 button to lighten the blue tone and the Point 8 button to deepen t...
Страница 40: ...in the Image Level Selection on page 38 Store Exit the Image Adjust Menu Quit Note Noise reduction and Progressive cannot be selected when 480p 575p 720p 1035i or 1080i is selected p 37 Interlaced vi...
Страница 41: ...just the screen scale and position manually with this function Press the SELECT button at Custom and the Custom is displayed on the screen for a few seconds and then the Aspect dialog box appears Scal...
Страница 42: ...e Setting dialog box appears This function corrects distortion of a projected image Select either Store or Reset with the Point 7 8 buttons and then press the SELECT button The keystone dialog box app...
Страница 43: ...en the lamp is not bright enough Off Do not show On Screen Displays except On Screen Menu Power off message P Timer No signal message for Power management item p 47 Please wait message Arrows for True...
Страница 44: ...1080i When capturing the image that has been adjusted by the Keystone function the adjustment data is automatically reset and the projector captures an image without keystone adjustment When the Logo...
Страница 45: ...ect Logo PIN code all over again To Change the Logo PIN code Logo PIN code can be changed to your desired four digit number Select Logo PIN code change with the Point d button and press the SELECT but...
Страница 46: ...the COMPUTER button or VIDEO button on the remote control On2 Input search works under the situation below When turning on the projector with pressing the POWER ON STAND BY button on the top control o...
Страница 47: ...been fully cooled down the power is turned off Off Power management function is off Then set the countdown timer with the Point 7 8 buttons Time left before Lamp is off Press the SELECT button at Pow...
Страница 48: ...the code make sure the remote control operates properly Remote control Press and hold MENU and IMAGE buttons for more than 10 seconds On start When this function is On the projector is automatically t...
Страница 49: ...d person and provides the following settings for security options Off the projector is not locked with a PIN code On1 require to enter a PIN code every time turning on the projector On2 require to ent...
Страница 50: ...y pressing the Point ed buttons And then press the Point 8 button to fix the number and move the pointer Repeat it to complete entering a four digit number After entering the four digit number move th...
Страница 51: ...ogo PIN code lock Logo PIN code lock and the lamp counter to the factory default settings This function provides the following alternatives in the cooling fans operation after turning off the projecto...
Страница 52: ...you provide appropriate space for the projector to be ventilated Check the installing condition to see if ventilation slots are not blocked Is the projector not installed near the ventilation duct of...
Страница 53: ...jector RECOMMENDATION We r e c o m m e n d a v o i d i n g d u s t y s m o k y environments when operating the projector Usage in these environments may cause a poor image quality When using the proje...
Страница 54: ...projector in an appropriate carrying case to protect it from dust and scratches Cleaning the Projection Lens Disconnect the AC power cord before cleaning When the projector is not in use replace the l...
Страница 55: ...p Turn off the projector and disconnect the AC power cord Allow the projector to cool for at least 45 minutes Remove 2 screws of the lamp with a screwdriver and pull out the lamp upwards vertically by...
Страница 56: ...nvironment of use There is no guarantee of the same life for each lamp Some lamps may fail or terminate their life in a shorter period of time than other similar lamps If the projector indicates that...
Страница 57: ...ning See page 54 Moving the projector from a cool to warm place may result in moisture condensation on the projection lens If this occurs leave the projector off and wait until condensation evaporates...
Страница 58: ...no obstruction between the projector and remote control Make sure you are not too far from the projector when using the remote control Maximum operating range is 16 4 5 m Make sure the code of the re...
Страница 59: ...rent mode Clamp Display area H Reset Mode free 0 31 PC Adjust Mode 3 Mode 4 Mode 5 Quit Yes No H sync freq V sync freq Quit Mode 1 Mode 2 Display area V Store Mode 3 Mode 4 Mode 5 Quit Mode 1 Mode 2 Q...
Страница 60: ...h Polish Chinese Korean Japanese Store Reset On Off On Countdown off Off Keystone Blue back Display Ceiling Rear Power management On start Quit Russian Capture Ready Shut down Hour s Security Timer 1...
Страница 61: ...NG TEMP red The projector detects an abnormal condition and cannot be turned on Unplug the AC power cord and plug it again to turn on the projector If the projector is turned off again disconnect the...
Страница 62: ...1152 x 900 61 20 65 20 SVGA 10 800 x 600 32 70 51 09 SXGA 13 1280 x 1024 50 00 86 00 Interlace ON SCREEN DISPLAY RESOLUTION H Freq kHz V Freq Hz VGA 1 640 x 480 31 47 59 88 VGA 2 720 x 400 31 47 70 0...
Страница 63: ...erLite Spi 2600 200W Interface Video Input Jack RCA Type x 1 S Video Input Jack Mini DIN 4 pin x 1 Audio Input Jacks RCA Type x 2 Computer Input 1 Component Input Terminal Analog RGB Mini D sub 15 pin...
Страница 64: ...e LCD panels are manufactured to the highest possible standards Even though 99 99 of the pixels are effective a tiny fraction of the pixels 0 01 or less may be ineffective by the characteristics of th...
Страница 65: ...s of Terminals Serial GND R X D RTS CTS T X D GND 4 1 3 2 5 6 7 GND 8 Appendix Red R Cr Input Output Ground Horiz sync Green G Y Input Output Blue B Cb Input Output Ground Red Ground Green Ground Blue...
Страница 66: ...he service station PIN Code Number Memo Factory default set No 1 2 3 4 Should the four digit number be changed the factory set number will be invalid PIN Code Lock No Logo PIN Code Lock No Factory def...
Страница 67: ...Saville Audio Visual Head Ofiice Millfield Lane York YO26 6PQ Tel 0870 606 1100 Fax 0870 241 6364 E mail head office saville av com www saville av com...