background image

8

   Snooze

. When the alarm sounds, press any button other than the Standby
    button will silence the alarm for 5 minutes. “        ’ will appear on
    the display.

2. To adjust the silence time for the snooze timer, press the Menu 
    button to enter the menu setting.

3. Press the Tuning up/down until “SNOOZE X” shown on the
    display, then press the Band/Select button to enter the setting.
    Press the Tuning up/down button to adjust the silence time. There
    are 5, 0, 5 and 20 minutes for the snooze timer. Press the   

    Band/Select to confirm the setting.

4. To cancel the snooze timer while the alarm is suspended, press
    the Standby button.

   Sleep timer - radio auto shut off

Your radio can be set to turn off automatically after a preset time 

has elapsed. The Sleep Timer setting can be adjusted between 
5,30, 45, 60, 90 and 20 minutes.

. Press and hold the Standby button to enter the Sleep Timer 
    setting. “SLEEP XX” will show on the display.

2. Keep holding the Standby button and the Sleep Timer options 
    will start switching on the display. Stop until the desired Sleep 
    Timer setting appears on the display. The setting will be saved 
    and the LCD will return to normal display.

Содержание RCR-22

Страница 1: ...RCR 22 Version 1 GB...

Страница 2: ...heat Do not defeat the safety purpose of the polarized or grounding type plug A polarized plug has two blades with one wider than the other A grounding type plug has two blades and a third grounding...

Страница 3: ...g periods of time Refer all servicing to qualified service personnel Servicing is required when the apparatus has been damaged in any way such as power supply cord or plug is damaged liquid has been s...

Страница 4: ...nd easy to be approached that during the emergency to disconnect the power from the radio just unplug the power plug from the AC power slot Where the MAINS plug or an appliance coupler is used as the...

Страница 5: ......
Страница 6: ...tton Band Select button Time capsule Date button Time button Alarm 2 button Alarm 1 button Display Power button Sleep button Nap button Info button Light button Reset button Light level control Aux in...

Страница 7: ...signal RDS indicator Sleep Snooze indicator Nap indicator Alarm 1 with buzzer alarm indicator Alarm 1 with radio alarm indicator Alarm 2 with buzzer alarm indicator Alarm 2 with radio alarm indicator...

Страница 8: ...play and the indicator will flash The radio will scan for signal and if a signal is found and received completely it will then show on the screen without flashing Now the radio will show the current t...

Страница 9: ...onfirm the setting Now the clock setting is completed Manual date setting only if automatic setting fails 1 Press and hold the Date button to enter the date setting and then the year digits will flash...

Страница 10: ...he setting 2 Press the Tuning up or down until date format is highlighted on the display Press the Band Select button to enter the setting 3 Press the Tuning up down button to choose your desired form...

Страница 11: ...Tuning up or down button to change the frequency B Scan tuning 1 Press the Power button to turn on your radio 2 Press the Band button repeatedly to select AM MW or FM waveband 3 Press and hold the Tu...

Страница 12: ...t buttons from 1 to 7 Press and hold one of preset buttons until the radio beeps and the station frequency will be saved into the chosen preset 5 Repeat the procedure for the remaining presets Your ra...

Страница 13: ...100kHz for FM radio and 9kHz 10kHz for AM radio Then press the Band Select button to confirm the setting Note If the unit is bought in Russian areas FM step options will be 50kHz 10kHz Display modes...

Страница 14: ...Setting the clock time Radio controlled clock There are three options to set up the clock time Radio controlled clock FM Radio Data System RDS and Manual setting When the unit is first plugged in the...

Страница 15: ...at an interval of 3 seconds 5 The radio will synchronize its clock time on the hour If the radio time has been synchronized with radio controlled clock time the radio controlled time icon will stay o...

Страница 16: ...ck time The radio cock time will be valid for 24hours each time the radio time is synchronized with RDS CT Manual setting When choosing manual setting as the clock time setting of your radio the radio...

Страница 17: ...ting 2 The hour setting of alarm 1 for example will begin to flash Press the Tuning up down button to select the required alarm hour and press the Band Select button to confirm the setting Press the T...

Страница 18: ...arm has now been set Symbol for active alarm such as or is shown on the display When the alarm sounds When the buzzer alarm activates the alarm will start softly and gradually increase in level It wil...

Страница 19: ...oze timer Press the Band Select to confirm the setting 4 To cancel the snooze timer while the alarm is suspended press the Standby button Sleep timer radio auto shut off Your radio can be set to turn...

Страница 20: ...timer button and the options will start switching on the display from 5 to 120 minutes Stop until the required Nap Timer setting appears on the display The setting will be saved and the LCD will retur...

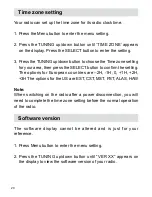
Страница 21: ...e SELECT button to confirm the setting The options for European countries are 2H 1H 0 1H 2H 3H The options for the US are EST CST MST PST ALAS HAW Note When switching on the radio after a power discon...

Страница 22: ...urn on the loudness function then press the Select button to confirm the setting 4 To turn off the loudness function select OFF and press the Select button to confirm the setting Display backlight The...

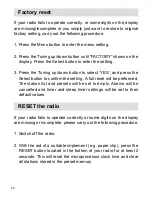
Страница 23: ...the Select button to confirm the setting A full reset will be performed The station list and presets will be set to empty Alarms will be cancelled and timer and sleep timer settings will be set to th...

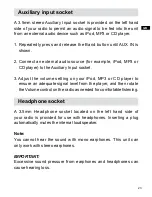
Страница 24: ...ry Input socket 3 Adjust the volume setting on your iPod MP3 or CD player to ensure an adequate signal level from the player and then rotate the Volume control on the radio as needed for comfortable l...

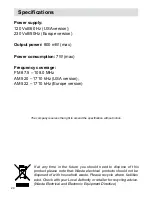
Страница 25: ...0 kHz Europe version The company reserves the right to amend the specification without notice If at any time in the future you should need to dispose of this product please note that Waste electrical...

Отзывы: