background image

COMe-cEL6 - User Guide, Rev.1.3 


www.kontron.com 


// 93 


6.5.


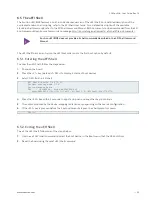
The uEFI Shell 

The Kontron uEFI BIOS features a built-in and enhanced version of the uEFI Shell. For a detailed description of the 
available standard shell scripting, refer to the EFI Shell User Guide. For a detailed description of the available 
standard shell commands, refer to the EFI Shell Command Manual. Both documents can be downloaded from the EFI 
and Framework Open Source Community homepage: http://sourceforge.net/projects/efi-shell/files/documents/. 


Kontron uEFI BIOS does not provide all shell commands described in the EFI Shell Command 
Manual. 


The uEFI Shell forms an entry into the uEFI boot order and is the first boot option by default. 

6.5.1.


Entering the uEFI Shell 

To enter the uEFI Shell, follow the steps below: 

1.


Power on the board. 

2.


Press the <F7> key (instead of <DEL>) to display a choice of boot devices. 

3.


Select ‘UEFI: Built-in EFI shell’. 

EFI Shell version 2.40 [5.11] 
Current running mode 1.1.2 
Device mapping table 
Fs0 

:HardDisk - Alias hd33b0b0b fs0 

   Acpi(PNP0A03,0)/Pci(1D|7)/Usb(1, 0)/Usb(1, 0)/HD(Part1,Sig17731773) 


4.


Press the <ESC> key within 5 seconds to skip startup.nsh, and any other key to continue. 

5.


The output produced by the device-mapping table can vary depending on the board’s configuration. 

6.


If the <ESC> key is pressed before the 5 second timeout elapses, the shell prompt is shown: 

Shell> 


6.5.2.


Exiting the uEFI Shell 

To exit the uEFI Shell, follow one of the steps below: 

1.


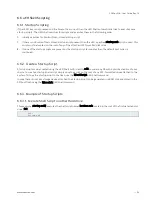
Use the exit uEFI Shell command to select the boot device, in the Boot menu, that the OS boots from. 

2.


Reset the board using the reset uEFI Shell command. 


Содержание kontron COMe-cEL6

Страница 1: ...USER GUIDE www kontron com COMe cEL6 User Guide Rev 1 3 Doc ID 1068 2881...

Страница 2: ...COMe cEL6 User Guide Rev 1 3 www kontron com 2 This page has been intentionally left blank...

Страница 3: ...uitable for the specified use without further testing or modification Kontron expressly informs the user that this user guide only contains a general description of processes and instructions which ma...

Страница 4: ...h all legal regulatory safety and security related requirements concerning your products You are responsible to ensure that your systems and any Kontron hardware or software components incorporated in...

Страница 5: ...t Find Kontron contacts by visiting https www kontron com support and services kontron europe and asia support contact support Customer Service As a trusted technology innovator and global solutions p...

Страница 6: ...cribed by the law may endanger your life health and or result in damage to your material ESD Sensitive Device This symbol and title inform that the electronic boards and their components are sensitive...

Страница 7: ...ntral grounding point shall remain connected The earth ground cable shall be the last cable to be disconnected or the first cable to be connected when performing installation or removal procedures on...

Страница 8: ...oduct then re pack it in the same manner as it was delivered Special care is necessary when handling or unpacking the product See Special Handling and Unpacking Instruction Quality and Environmental M...

Страница 9: ...1 2 Industrial Temperature Grade Modules E2 40 C to 85 C 16 2 2 Accessories 16 2 3 Functional Specification 18 2 3 1 Block Diagram 18 2 3 2 Processors 18 2 3 3 Platform Controller Hub PCH 20 2 3 4 Sy...

Страница 10: ...1 3 12 2 Booting the SPI Flash Chip 42 3 12 3 External SPI Flash Boot on Modules with Intel Management Engine 42 3 13 TPM 2 0 42 3 14 UART option 43 3 15 Watchdog Timer WTD Dual Stage 43 3 15 1 Watchd...

Страница 11: ...Settings 29 Table 10 Heatspreader Temperature Specification 30 Table 11 Fan Connector 3 Pin Pin Assignment 32 Table 12 Temperature Grades and Humidity Specification 32 Table 13 Standards and Certifica...

Страница 12: ...lues 34 Figure 7 Module Dimensions Top Side 35 Figure 8 Module Dimensions Bottom Side 36 Figure 9 Module and Carrier Height 36 Figure 10 Metal Heat Slug Dimensions 37 Figure 11 COMe Interface Connecto...

Страница 13: ...and Celeron processors with an integrated PCH to combine increased efficiency and performance with TDP as low as 6 W and no more than 12 W and with Intel s extensive HD Graphics capabilities Key COMe...

Страница 14: ...computer packaged as a super component The product name for Kontron COM Express Computer On Modules consists of Industry standard short form COMe Module form factor b basic 125mm x 95mm c compact 95mm...

Страница 15: ...Module COM with all the components necessary for a bootable host computer packaged as a highly integrated computer All Kontron COM Express modules are very compact and feature a standardized form fact...

Страница 16: ...e 3 Product Number for Industrial Grade Modules 40 C to 85 C operating Part Number Product Name Description 36034 0000 R1 2 COMe cEL6 E2 x6212RE COM Express compact pin out type 6 with Intel Atom x621...

Страница 17: ...ption 97020 0432 CEL6 DDR4 3200 SODIMM 4GB_CEL6 Memory for Computer on Module min specification DDR4 3200 4GB 260P 1600MHz PC4 3200 SODIMM 97020 0832 CEL6 DDR4 3200 SODIMM 8GB_CEL6 Memory for Computer...

Страница 18: ...USB 3 1 HSIO 0 1 USB 2 0 Host TPM 2 0 SATA HSIO 10 11 TPM USBSS 1 3 USB 3 0 USB Hub USBSS 1 USB 3 0 LAN HSIO 7 PCIe 0 4 HSIO 2 6 SATA alternatively conf as GbE GbE Misc Signals LPC eSPI 2x UART PCIe...

Страница 19: ...Premium IO Intel PSE Intel PSE Intel PSE Intel PSE Use Condition PC Client PC Client PC Client PC Client Tjunction Min 0 C 105 C 2 0 C 105 C 2 0 C 105 C 2 0 C 105 C 2 Max Intel Atom Atom Atom Atom Ato...

Страница 20: ...cification 2 3 3 Platform Controller Hub PCH The COMe cEL6 s Multi Chip Package MCP includes an integrated Platform Controller Hub PCH 2 3 4 System Memory The COMe cEL6 supports up to 64 GByte with DD...

Страница 21: ...60 Hz DDI1 port B DP V 1 2 DP 4K resolution with up to 3 simultaneous displays 4096 x 2160 60 Hz DDI2 port C DP V 1 2 DP 4K resolution with up to 3 simultaneous displays 4096 x 2160 60Hz 1 Default is...

Страница 22: ...Support 2 3 8 USB The COMe cEL6 supports two USB 3 1 Gen 2 ports backwards compatible with USB 2 0 and six dedicated USB 2 0 ports On request up to four USB 3 1 ports are possible by routing USB _SS1...

Страница 23: ...rt Description SATA0 10 SATA 0 SATA Gen 3 6 Gb s to COMe SATA1 11 SATA 1 SATA Gen 3 6 Gb s to COMe 2 3 10 Ethernet LAN The COMe cEL6 supports one Ethernet port with 1 Gb s or on request up to 2 5 Gb s...

Страница 24: ...1 10 Gb s 2 PCIe 0 0 PCIe 3 0 lane 3 PCIe 0 1 PCIe 3 0 lane 4 PCIe 0 2 PCIe 3 0 lane 5 PCIe 0 3 PCIe 3 0 lane 6 PCIE 3 0 PCIe 3 0 lane 7 GbE 0 GBE 1 GbE or optional 2 5 GbE 8 PCIe 1 0 PCIe 3 0 lane 9...

Страница 25: ...orted Sleep Signal Supported SM Bus Supported Fast I2C Connected to module EEPROM carrier EEPROM and RTC clock Watchdog Support Dual staged RTC Internal RTC with external RTC on request Display DDI Up...

Страница 26: ...12 V single power rail voltage and a wide input voltage range of 8 5 V to 20 V Other supported voltages are 5 V standby and 3 3 V RTC battery input Table 6 COMe cEL6 Electrical Specification Supply V...

Страница 27: ...tions are available within the BIOS set up menu Advance ACPI Settings 2 4 2 1 Suspend States If power is removed 5 V can be applied to the V_5V_STBY pins to support the ACPI suspend states Suspend to...

Страница 28: ...SUS_STAT indicates an imminent suspend operation Used to notify LPC devices After a complete power loss including battery voltage there is an additional cold reset This additional reset will not happ...

Страница 29: ...ower button or reconnect VCC Suspend Standby states are not supported in single power supply mode Table 9 Single Power Supply Mode Settings State PWRBTN PWR_OK V5_Standby VCC G3 0V x 1 0V x 1 0V x 1 0...

Страница 30: ...hip package comes with a preconfigured heatspreader and the supplied metal heat slug is not required 2 5 2 Active Passive Cooling Solutions Both active and passive thermal management approaches can be...

Страница 31: ...i e DTS based values differences are expected These differences are due to the design and are not to be considered as an error The MCP s temperature is referred to as CPU temperature in the BIOS set...

Страница 32: ...um supply current to the on board fan connector is 350 mA The maximum supply current reduces to 150 mA if the input voltage to the module is between 13 V and 20 V Always check the fan specification ac...

Страница 33: ...ock test half sinusoidal 11 ms 15 g Vibration IEC EN 60068 2 6 Non operating vibration sinusoidal 10 Hz 2000 Hz 0 15 mm 2 g RoHS II Directive 2011 65 EU incl 2015 863 EU Restriction of Hazardous Subst...

Страница 34: ...nds on both temperature and operating conditions When the module is connected to external power the only battery drain is from leakage paths Figure 6 shows MTBF de rating values for commercial grade m...

Страница 35: ...nical Specification The COMe cEL6 is compliant with the COM Express PICMG COM 0 Rev 3 0 mechanical specification 2 8 1 Module Dimensions The compact module dimensions are 95 mm x 95 mm 3 74 x 3 74 Fig...

Страница 36: ...e bottom of the module s PCB board to the top of the heatspreader The overall height of the module and carrier board depends on the implemented cooling solution The height of the cooling solution is n...

Страница 37: ...Rev 1 3 www kontron com 37 2 8 3 Metal Heat Slug Dimensions The metal heat slug 35 mm x 24 mm is located on top of the multi chip package Figure 10 Metal Heat Slug Dimensions All dimensions shown in m...

Страница 38: ...Flash Card eMMC is eMMC 5 1 compatible The standard COMe cEL6 variants support MLC On request eMMC pSLC can be offered During the manufacturing process Multi Level Cell MLC eMMC is reconfigured to ac...

Страница 39: ...S driver changes and additional hardware changes by adding external termination resistors on the carrier board to override the weak on module pull up resistors with a lower resistance pull down e g 10...

Страница 40: ...ated offload engine for IoT functions such as embedded controller low DMIP computing network proxy out of band device management network proxy real time and sensor hub The COMe cEL6 supports Intel PSE...

Страница 41: ...PI Boot The SPI Flash chip stores the BIOS to be booted The COMe cEL6 supports SPI boot from the 32 MByte SPI Flash chip on the module and the external 32 MByte SPI Flash chip on the carrier board The...

Страница 42: ...l during the next start The Management Engine ME binds itself to every module it has previously flashed which in the case of an external SPI Flash is the module present when flashed To avoid this issu...

Страница 43: ...ter a specific time With the aim to bring the system back from a non responsive to normal state The COMe cEL6 supports a watchdog that works with two stages that can be programmed independently and us...

Страница 44: ...Internally reserved No A0h 50h Module EEPROM YES AEh 57h Carrier board EEPROM Optional 64h 32h External RTC Optional 4 2 System Management SM Bus The 8 bit SMBus address uses the LSB bit 0 for the dir...

Страница 45: ...8 mm depends on the height of the carrier board s connector The module is powered on by connecting to the carrier board using the interface connector Before connecting the module s interface connecto...

Страница 46: ...the COM 0 Rev 3 0 Type 6 standard For more information contact Kontron Support Table 21 General Signal Description Type Description Type Description NC Not Connected on this product O 1 8 1 8 V Output...

Страница 47: ..._S3 Indicates Suspend to RAM or deeper O 3 3 PD 100 k A16 SATA0_TX SATA Transmit Data Pair 0 DP O AC Coupled on Module A17 SATA0_TX A18 SUS_S4 Indicates Suspend to Disk or deeper state O 3 3 PD 100 k...

Страница 48: ...ster Chip select 1 IO 3 3 OD PU 8 2 k 3 3 V S0 A51 GND Power Ground PWR GND A52 PCIe_Tx5 PCI Express transmit lane 5 DP O AC coupled on module A53 PCIe_Tx5 A54 GPI0 General purpose input 0 I 3 3 PU 10...

Страница 49: ...o module from carrier SPI SPI Master IN Slave Out I 3 3 A93 GPO0 General purpose output 0 O 3 3 PD 100 k A94 SPI_CLK SPI clock Clock from Module to Carrier SPI O 3 3 A95 SPI_MOSI SPI master Out Slave...

Страница 50: ...K LPC 24 MHz clock output O 3 3 33 MHz LPC B11 GND Power Ground PWR GND B12 PWRBTN Power Button event I 3 3 PU 10 k 3 3V S5 Brings a system out of S5 soft off and other suspend states and powers the m...

Страница 51: ...pairs port 1 DP I O PD 14 25 k to 24 8 k B46 USB1 B47 ESPI_EN Enable disable ESPI mode LPC mode I 3 3 PU 20 k 3 3 V S5 B48 USB0_HOST_PRSNT USB Host present on USB0 I 3 3 PD 100 K B49 SYS_RESET Reset b...

Страница 52: ...on VGA option B93 VGA_HSYNC Analog Video H_SYNC NC Only on VGA option B94 VGA_VSYNC Analog Video V_SYNC NC Only on VGA option B95 VGA_I2C_CK Display data channel clock NC Only on VGA option B96 VGA_I...

Страница 53: ...s Lane 7 Receive NC C23 PCIE_RX7 NC C24 DDI1_HPD DDI1 Hotplug Detect multiplexed with DP1_HPD and HDMI1_HPD I 3 3 PD 1 M C25 DDI1_PAIR4 Digital Display Interface pair 4 NC C26 DDI1_PAIR4 NC C27 RSVD R...

Страница 54: ...Express Graphics Receive Inputs differential Pair 3 NC C62 PEG_RX3 NC C63 RSVD Reserved for future use NC C64 RSVD NC C65 PEG_RX4 PCI Express Graphics Receive Inputs differential Pair 4 NC C66 PEG_RX...

Страница 55: ...13 NC C96 GND Power ground PWR GND C97 RSVD Reserved for future use NC C98 PEG_RX14 PCI Express Graphics Receive Inputs differential Pair 14 NC C99 PEG_RX14 NC C100 GND Power ground PWR GND C101 PEG_R...

Страница 56: ...SDVO1_CTRLDATA DP1_AUX and HDMI1_ CTRLDATA I O 3 3 PU 100 K 3 3 V S0 D17 RSVD MIsc signals for SGMIIport I O PSE_GBE1_MDC_R D18 RSVD PSE_GBE1_MDIO_R D19 PCIE_TX6 PCI Express Lane 6 Transmit NC D20 PC...

Страница 57: ...und PWR GND D61 PEG_TX3 PCI Express Graphics Transmit Output differential Pair 3 NC D62 PEG_TX3 D63 RSVD Reserved for future use NC D64 RSVD D65 PEG_TX4 PCI Express Graphics Transmit Output differenti...

Страница 58: ...13 NC D96 GND Power ground PWR GND D97 RSVD Reserved for future use NC D98 PEG_TX14 PCI Express Graphics Transmit Output differential Pair 14 NC D99 PEG_TX14 NC D100 GND Power Ground PWR GND D101 PEG_...

Страница 59: ...the first characters appear on the screen POST messages or splash screen 3 Press the DEL key 4 If the uEFI BIOS is password protected a request for password will appear Enter either the User Password...

Страница 60: ...p window provides an explanation of the respective function 6 4 Setup Menus The Setup utility features a selection bar at the top of the screen that lists the menus Figure 12 Setup menu Selection Bar...

Страница 61: ...u Sub screen Description BIOS Information Read only field BIOS Information BIOS vendor Core version Compliancy Project version Access level FSP information PSE Information Build date Board information...

Страница 62: ...en The following table shows the Advanced sub screen and describes the function Default settings are in bold Table 28 Advanced Setup menu Sub screens and Functions Sub screen Next Level Sub screens De...

Страница 63: ...ed CPU Flex Ratio Setting Read only field CPU Flex Ratio setting 18 Hardware Prefetcher Turns on OFF the MLC streamer prefetcher Enabled Disabled Adjacent Cache Line Prefetch Turns on OFF prefetching...

Страница 64: ...P State When set to 0 disables access to ENERGY_PERFORMANCE BIAS MSR and CPUID function 6 ECX reads 0 indicating no support for energy efficient policy setting When set to 1 enables access to ENERGY P...

Страница 65: ...herwise leave enabled Enabled Disabled Platform PL1 Enable Platform power limit programming Enable activated the PL1 value to be used by the processor to limit the average power of given time window E...

Страница 66: ...1ns 32ns 1024ns 32768ns 1048576ns 33554432ns Latency Interrupt response time limit value bits 9 0 Enter 0 to 1023 0 C8 Latency Control MSR 0x633 Time Unit Unit of measurement for IRTL value bits 12 10...

Страница 67: ...Next Level Sub screens Description PCH FW Configuration Read Only field Firmware version mode SKU States 1 Status 2 ME State When disables ME goes into ME Temporarily Disabled Mode Enabled Disabled M...

Страница 68: ...mperature values Enable uses DTS SMM mechanism to obtain CPU temperature values Out of Spec uses EC reported temp values and DTS SMM and DTS is used to handle Out of Spec condition Enabled Disabled Cr...

Страница 69: ...driver interface to OS Enabled Disabled System Time and Alarm Source Selects source of system time and alarm functions ACPI Time and Alarm Device Legacy RTC Intel Trusted Device Setup Boot Enable or...

Страница 70: ...he SATA port RTD3 functionality Enabled Disabled PCIe Remapped CR1 PCIe RTD3 setup conflicts with SATA RTD3 Enabled Disabled PCIe Remapped CR2 PCIe RTD3 setup conflicts with SATA RTD3 Enabled Disabled...

Страница 71: ...ub screens Description ACPI Settings Enable ACPI Auto Configuration Enabled Disabled Enable Hibernation System ability to hibernate OS S4 sleep state Note This option may not be effective with some op...

Страница 72: ...touched by BIOS Enabled Disabled GPIO IRQ Sets IRQ to trigger by the CPLD on GPIO event Enabled Disabled I2C IRQ Sets the IRQ number to trigger by cPLD on I2C event Enabled Disabled Local FW Update Al...

Страница 73: ...on of Runtime Variables Controls NVRA runtime variable protection through system admin Password Enabled Disabled Sub screen Next Level Sub screens Description Serial Port Consol Redirection COM1 PCI B...

Страница 74: ...ge after system restart Use Automatic Settings IO 378h IRQ 5 IO 378h IRQ 5 6 7 9 10 11 12 IO 2F8h IRQ 5 6 7 9 10 11 12 IO 3E8h DMA IRQ 5 6 7 9 10 11 12 IO 2E8h IRQ 5 6 7 9 10 11 12 Mode STD Printer Mo...

Страница 75: ...b screens Description NVMe Read only field No device found in the system Sub screen Next Level Sub screens Description SDIO Configuration SDIO Access Mode Auto Access SD device in DMA mode if controll...

Страница 76: ...ord Management Read only field Not Installed Change Admin Password New password must be between 8 and 32 Characters include lower and upper case number and symbol Note input old admin password I fit w...

Страница 77: ...re Configuration Firmware Configuration option Note Ignore policy update is to skip policy update and will only work on a platform Ignore Policy Update Production Test Sub screen Next Level Sub screen...

Страница 78: ...sabled Maximum Memory Frequency Maximum frequency MHz must divide by 133 or 100 according to RefCLK In GEAR2 must divide by 2666 or 200 Lowest GEAR2 speed is 2133 Auto 1067 1200 4200 4267 Max TOULD Dy...

Страница 79: ...D28 F0 to F7 PCIE8 to PCIE15 of D29 FO to FF7 PCIE16 to PCIe19 of D27 F0 to F3 Graphics device should be primary PCIE Auto PCIE1 PCIe2 PCIE18 PCIE19 Internal Graphics Auto Disabled Enabled GTT Size 2...

Страница 80: ...for each root port Platform POR Enabled Disabled PCIe Function Swap Disabled prevents PCIe root port function swap If any function other than 0th is enabled 0th will become visible Enabled Disabled PC...

Страница 81: ...porting Enabled Disabled SEFE System error on fatal error Enabled Disabled SENFE System error on non fatal error Enabled Disabled SECE System error on correctable error Enabled Disabled PME SCI Enable...

Страница 82: ...Enabled LTR override values forced and LTR messages from the device ignored Disabled LTR override values are not forced Enabled Disabled LTR Lock PCIe LTR configuration lock Enabled Disabled Extra Opt...

Страница 83: ...aggressively enter link power state Enabled Disabled Serial ATA Read only field CT120BX500SSD1 120 0 GB Software Preserve Read only Field SUPPORTED Port Enable or disable the SATA port 0 or 1 Enabled...

Страница 84: ...SB Overcurrent Disable for pin based debug If Pin based debug enabled and USB overcurrent is not disabled USB Dbc does not work Enabled Disabled USB Over Current Lock Select if USB Over current used E...

Страница 85: ...able only if HAD codec supports selected frequency 6 MHz 12 MHz 24 MHz iDisplay Audio Link Frequency Selects iDisplay Link frequency 48 MHz 96 MHz iDisplay Audio Link T Mode Indicates whether SDI is o...

Страница 86: ...e Enable UART OS driver uses DMA when possibleDisable OS driver enforces PIO mode Enabled Disabled Sub screen Next Level Sub screens Description PCH IO Configuration SCS Config eMMC 5 1 Controller Ena...

Страница 87: ...latency of legacy OP Some systems require lower Io latency irrespective of power This is a tradeoff between power and IO latency Enabled Disabled PCH Energy Reporting Enable energy Report MUST set as...

Страница 88: ...Port Enabled Disabled Integrated eDP to LVDS Bridge Disabled Auto LFP Resolution Selects the LFP used by internal graphics device Auto Custom PAID VGA 640x480 1x18 WVGA 800x480 1x18 SVGA 800x600 1x18...

Страница 89: ...ctions Sub screen Next Level Sub screens Description Setup Administrator Password Sets administrator password User Password Sets user password HDD Security Configuration PO CT120BX500SSD1 HDD Password...

Страница 90: ...Reset to Set Up Mode Key Management Factory Key Provision Restore factory default after platform rest and while system is in setup mode Enabled Disabled Restore Factor Keys Restore factor defaults Yes...

Страница 91: ...econds that the firmware waits for setup activation key The value 65535 FFFFh means an indefinite wait 1 Bootup NumLock State Selects keyboard NumLock state ON OFF Quiet Boot Quiet Boot Enabled Disabl...

Страница 92: ...iscard Changes and Exit Exits system setup without saving changes Yes No Save Changes and Reset Resets system after saving changes Yes No Discard Changes and Reset Resets system setup without saving c...

Страница 93: ...ult 6 5 1 Entering the uEFI Shell To enter the uEFI Shell follow the steps below 1 Power on the board 2 Press the F7 key instead of DEL to display a choice of boot devices 3 Select UEFI Built in EFI s...

Страница 94: ...e startup script terminates then the default boot order is continued 6 6 2 Create a Startup Script Startup scripts can be created using the uEFI Shell built in editor edit or under any OS with a plain...

Страница 95: ...vered as a ZIP archive Please find the latest available BIOS ZIP archive on Kontron s Customer Section Further information about the firmware update procedure can be found in the included flash_instru...

Страница 96: ...equipment is repaired or replaced within the stipulated warranty period Follow these steps before returning any product to Kontron 1 Visit the RMA Information website https www kontron com en support...

Страница 97: ...s General Terms and Conditions of Sale 8 1 Limitation Exemption from Warranty Obligation In general Kontron shall not be required to honor the warranty even during the warranty period and shall be ex...

Страница 98: ...tor I2C Inter Integrated Circuit IOL IPMI Over LAN IOT Internet of Things IPMI Intelligent Platform Management Interface KCS Keyboard Controller Style KVM Keyboard Video Mouse LPC Low Pin Count Bus LV...

Страница 99: ...s With its standard products and tailor made solutions based on highly reliable state of the art embedded technologies Kontron provides secure and innovative applications for a variety of industries A...

Отзывы: