background image

Settings

103

Registering Samsung accounts

You need a Samsung account when using some Samsung apps. You can back up or restore 
data saved in the device to your Samsung account. Register your Samsung account to the 
device to conveniently use Samsung services.

On the Settings screen, tap 

Accounts


Add account

.

Tap 

Samsung account

.

Follow the on-screen instructions to complete the account setup.

Once your Samsung account has been registered, you can use apps requiring your Samsung 
account without the sign in procedure.

Removing accounts

On the Settings screen, tap 

Accounts

, select an account name, select the account to remove, 

and then tap 

MORE


Remove account

.

Google

Configure settings for some features provided by Google.
On the Settings screen, tap 

Google

.

Backup and reset

Change the settings for managing settings and data.
On the Settings screen, tap 

Backup and reset

.

•  

Back up my data

: Back up your personal information and app data to the Samsung 

server. You can also set the device to automatically back up data.

•  

Restore

: Restore previously backed up personal information and app data from your 

Samsung account.

Содержание Tab A 10.1

Страница 1: ...www samsung com User Manual SM P580 English 01 2017 Rev 1 1 ...

Страница 2: ...ening apps 32 S Pen features 40 Multi window 44 Samsung account 46 Transferring data from your previous device 48 Device and data management 50 Quick connect 53 Sharing features Applications 54 Installing or uninstalling apps 56 Contacts 58 Internet 60 Email 61 Camera 67 Gallery 69 Samsung Notes 75 PEN UP 77 S Planner 79 My Files 79 Clock 81 Calculator 82 Kids Mode 83 Google apps Settings 85 Intro...

Страница 3: ... 95 S Pen 96 Advanced features 96 Users 98 Wallpaper 98 Home screen 98 Lock screen and security 99 Privacy 101 Accessibility 102 Accounts 103 Google 103 Backup and reset 104 Language and input 105 Battery 105 Storage 105 Accessories 106 Date and time 106 User manual 106 About device Appendix 107 Troubleshooting 112 Removing the battery ...

Страница 4: ...stry settings or modified operating system software Attempting to customise the operating system may cause the device or apps to work improperly Software sound sources wallpapers images and other media provided with this device are licensed for limited use Extracting and using these materials for commercial or other purposes is an infringement of copyright laws Users are entirely responsible for i...

Страница 5: ... contents Check the product box for the following items Device Quick start guide The items supplied with the device and any available accessories may vary depending on the region or service provider The supplied items are designed only for this device and may not be compatible with other devices Appearances and specifications are subject to change without prior notice You can purchase additional a...

Страница 6: ...out Device Volume key Back key Memory card slot Power key Front camera Touchscreen Light sensor Recents key Home key Headset jack GPS antenna Multipurpose jack Microphone Rear camera Loud speaker Flash Loud speaker S Pen ...

Страница 7: ...magnetic fields Connectivity problems and battery drain may occur in the following situations If you attach metallic stickers on the antenna area of the device If you attach a device cover made with metallic material to the device Using a Samsung approved screen protector is recommended Unapproved screen protectors may cause the sensors to malfunction Do not allow water to contact the touchscreen ...

Страница 8: ...tems on the screen to access additional S Pen features such as Air Button and the air view feature S Pen button Hover the S Pen over the screen and press the S Pen button to display the air command features While pressing and holding the S Pen button drag the S Pen over items to select them Tweezers Remove the S Pen nib with the tweezers when replacing the nib ...

Страница 9: ...ending on the S Pen detachment option setting To change the setting open the Apps screen and tap Settings S Pen Detachment options When you insert the S Pen into the slot insert the S Pen s nib first Failure to do so can cause the S Pen to become stuck Forcefully detaching the S Pen from the slot may cause damage to the S Pen and your device ...

Страница 10: ...ur fingers with the tweezers Do not reuse old nibs Doing so may cause the S Pen to malfunction Do not press the nib excessively when inserting the nib into the S Pen Do not insert the round end of the nib into the S Pen Doing so may cause damage to the S Pen or your device Do not bend or apply excessive pressure with the S Pen while using it The S pen may be damaged or the nib may be deformed ...

Страница 11: ...en visit the Samsung website Battery Charging the battery Charge the battery before using it for the first time or when it has been unused for extended periods Use only Samsung approved chargers batteries and cables Unapproved chargers or cables can cause the battery to explode or damage the device 1 Connect the USB cable to the USB power adaptor and then plug the end of the USB cable into the mul...

Страница 12: ... screen and tap Apps Settings Battery The actual charging time may vary depending on the status of your device and the charging conditions The remaining charging time may not be displayed when you charge the device in very cold or very hot conditions Reducing the battery consumption Your device provides various options that help you conserve battery power Optimise the device using the Smart manage...

Страница 13: ...ly charge the battery If the device receives an unstable power supply while charging the touchscreen may not function If this happens unplug the charger from the device While charging the device and the charger may heat up This is normal and should not affect the device s lifespan or performance If the battery gets hotter than usual the charger may stop charging If you charge the device while the ...

Страница 14: ...Memory card microSD card Installing a memory card Your device accepts memory cards with maximum capacities of 256 GB Depending on the memory card manufacturer and type some memory cards may not be compatible with your device Some memory cards may not be fully compatible with the device Using an incompatible card may damage the device or the memory card or corrupt the data stored in it Use caution ...

Страница 15: ... the Home screen tap Apps Settings Storage DETAIL SD card Unmount 1 Open the cover of the memory card slot 2 Push the memory card until it disengages from the device and then pull it out 3 Close the cover of the memory card slot Do not remove the memory card while the device is transferring or accessing information Doing so can cause data to be lost or corrupted or damage to the memory card or dev...

Страница 16: ...n and off Press and hold the Power key for a few seconds to turn on the device When you turn on your device for the first time or after performing a data reset follow the on screen instructions to set up your device To turn off the device press and hold the Power key and then tap Power off Follow all posted warnings and directions from authorised personnel in areas where the use of wireless device...

Страница 17: ...may not recognise touch inputs close to the edges of the screen which are outside of the touch input area Leaving the touchscreen idle for extended periods may result in afterimages screen burn in or ghosting Turn off the touchscreen when you do not use the device It is recommended to use fingers or the S Pen when you use the touchscreen Tapping To open an app to select a menu item to press an on ...

Страница 18: ...hold an item or the screen for more than 2 seconds to access available options Dragging To move an item tap and hold it and drag it to the target position Double tapping Double tap on a webpage or image to zoom in Double tap again to return ...

Страница 19: ... Home screen or the Apps screen to view other panels Swipe upwards or downwards to scroll through a webpage or a list of items such as contacts Spreading and pinching Spread two fingers apart on a webpage map or image to zoom in a part Pinch to zoom out ...

Страница 20: ...atures It displays widgets shortcuts to apps and more To view other panels swipe to the left or right or tap one of the screen indicators at the bottom of the screen A widget An app A folder Screen indicators Favourite apps Apps screen icon News screen indicator View the latest articles in various categories ...

Страница 21: ... to the Home screen and more Wallpapers Change the wallpaper settings for the Home screen and the locked screen Widgets Add widgets to the Home screen Widgets are small apps that launch specific app functions to provide information and convenient access on your Home screen Adding items Tap and hold an app or a folder from the Apps screen and then drag it to the Home screen To add widgets tap and h...

Страница 22: ...e to another panel and drag the item to a new location Removing items Tap and hold an item and then drag it to Remove at the top of the screen Creating folders Create folders and gather similar applications to quickly access and launch apps 1 On the Home screen tap and hold an app and then drag it over another app 2 Drop the app when a folder frame appears around the apps A new folder containing t...

Страница 23: ...in Home screen tap Apps screen The Apps screen displays icons for all apps including newly installed apps On the Home screen tap Apps to open the Apps screen To view other panels swipe to the left or right or select a screen indicator at the bottom of the screen Moving items This feature may not be available depending on the region or service provider On the Apps screen tap EDIT Tap and hold an it...

Страница 24: ...app by dragging it to the folder on the Apps screen To delete a folder select a folder with Only the folder will be deleted The folder s apps will be relocated to the Apps screen Rearranging items You can rearrange items in alphabetical order on the Apps screen On the Apps screen tap A Z SAVE Searching for items You can search for items on the Apps screen On the Apps screen tap SEARCH and enter ch...

Страница 25: ...g Wi Fi connected Bluetooth feature activated GPS activated Alarm activated Mute mode activated Flight mode activated Error occurred or caution required Battery power level Lock screen Pressing the Power key turns off the screen and locks it Also the screen turns off and automatically locks if the device is not used for a specified period The screen is locked with Swipe the default screen lock met...

Страница 26: ...d with at least four characters numbers or symbols to unlock the screen None Do not set a screen lock method If the unlock code is forgotten take the device to a Samsung Service Centre to reset it You can set your device to perform a factory data reset if you enter the unlock code incorrectly several times in a row and reach the attempt limit On the Apps screen tap Settings Lock screen and securit...

Страница 27: ...w user accounts View more quick setting buttons Launch Quick connect Access the notification settings Quick setting buttons Using quick setting buttons Tap quick setting buttons to activate some features Swipe to the left or right on the buttons area or tap to view more buttons To view more detailed settings tap and hold a button To rearrange buttons tap EDIT tap and hold a button and then drag it...

Страница 28: ...ories Entering text Keyboard layout A keyboard appears automatically when you enter text to send emails create memos and more Text entry is not supported in some languages To enter text you must change the input language to one of the supported languages Delete a preceding character Break to the next line Move the cursor Enter punctuation marks Enter uppercase For all caps tap it twice Switch to h...

Страница 29: ...art or pause entering text by voice Delete a preceding word Switch to handwriting mode Switch between number mode and character mode Change the keyboard settings This feature may not be available depending on the region or service provider Add an item from the clipboard Enter emoticons Switch to the floating or split keyboard You can move the keyboard to another location by dragging the tab Change...

Страница 30: ... captured images in Gallery You can also capture screenshots by swiping your hand to the left or right across the screen If this feature is not activated open the Apps screen tap Settings Advanced features Palm swipe to capture and tap the switch to activate it It is not possible to capture a screenshot while using some apps and features Capturing screenshots with the S Pen You can also use the Ai...

Страница 31: ...ons Scroll capture Capture more content that continues across multiple screens such as a web page The screen will automatically scroll down and more content will be captured Draw Write or draw on the screen Crop Crop a portion from the screenshot Share Share the screenshot Opening apps On the Home screen or the Apps screen select an app icon to open it To open an app from the list of recently used...

Страница 32: ...lect Screen write Air command icon Translate Air command settings Create note Launch Samsung Notes and create a new note Refer to Samsung Notes for more information Smart select Collect content quickly Refer to Smart select for more information Screen write Capture edit and write memos on screenshots and then share them Refer to Screen write for more information Translate Hover the S Pen over a wo...

Страница 33: ... select an area and perform actions such as sharing or saving 1 When there is content you want to capture such as a part of an image open the Air command panel and tap Smart select 2 Drag the S Pen across the content you want to select Reshape the selected area by selecting a shape icon on the toolbar or tap Auto select to automatically reshape the selected area 3 Select an option to use with the ...

Страница 34: ...nt that continues across multiple screens such as a webpage tap Scroll capture to capture more content The screen will automatically scroll down and allow you to select SCROLL CAPTURE again When you are finished capturing tap DONE 3 Write a memo on the screenshot 4 Select an option to use with the screenshot Crop Crop the screenshot Share Share the screenshot with others Save Save the screenshot i...

Страница 35: ... that allow you to perform a screen capture 1 Open the Air command panel and tap Translate 2 Select the languages on the translator panel at the top of the screen 3 Hover the S Pen over the word you want to translate The translated word will appear above the original word Tap to listen to the pronunciation To view more definitions tap the translated word 4 To close the translator tap on the transl...

Страница 36: ...nd select apps or functions to open from the panel To edit shortcuts open the Air command panel and tap Shortcuts You can also remove the Create note shortcut Air view Hover over an item on the screen with the S Pen to perform various functions Previewing information Point at the screen to preview content or view information in a pop up window ...

Страница 37: ...eview window using Air Button Air Button If this feature is not activated open the Apps screen tap Settings S Pen Air view and then tap the switch to activate it Pen Select While pressing and holding the S Pen button drag the S Pen over text or item lists to select multiple items or text You can also copy and paste the selected items or text into another app or share them with others ...

Страница 38: ...using your handwriting with the S Pen 1 Hover the S Pen over a text field 2 Tap to open the handwriting field 3 Write with the S Pen If this feature is not activated open the Apps screen tap Settings S Pen Direct pen input and then tap the switch to activate it ...

Страница 39: ...pen the Apps screen tap Settings S Pen and then tap the Screen off memo switch to activate it When the screen is off detach the S Pen and write a memo Tap SAVE or reinsert the S Pen into the slot Then the memo will be saved in Samsung Notes To view memos open the Apps screen and then tap Samsung Notes COLLECTIONS Screen off memo ...

Страница 40: ...Introduction Multi window lets you run two apps at the same time in the split screen view You can also run multiple apps at the same time in the pop up view Some apps may not support this feature Split screen view Pop up view ...

Страница 41: ... recently used apps 2 Swipe upwards or downwards and tap on a recent app window The selected app will launch in the upper window 3 Swipe to the left or right to select another app to launch You can also launch the split screen view by tapping and holding ...

Страница 42: ...ect an app window and tap the circle between the app windows to access the following options Switch locations between app windows Drag and drop text or copied images from one window to another Tap and hold an item in the selected window and drag it to a location in another window ...

Страница 43: ... 43 Some apps may not support this feature Minimise the window Maximise the window Close the app Adjusting the window size Drag the circle between the app windows up or down to adjust the size of the windows ...

Страница 44: ...on Samsung account Introduction Your Samsung account is an integrated account service that allows you to use a variety of Samsung services provided by mobile devices TVs and the Samsung website Once your Samsung account has been registered you can use apps provided by Samsung without signing in to your account Create your Samsung account with your email address To check the list of services that c...

Страница 45: ...count 2 Tap Samsung account 3 Enter your email address and password and then tap SIGN IN If you forget your account information tap Forgotten your ID or password You can find your account information when you enter the required information and security code displayed that is on the screen Removing your Samsung account When you remove your registered Samsung account from the device your data such a...

Страница 46: ...and a computer You can download the app from www samsung com smartswitch Samsung Smart Switch is not supported on some devices or computers Limitations apply Visit www samsung com smartswitch for details Samsung takes copyright seriously Only transfer content that you own or have the right to transfer Transferring data from a mobile device Transfer data from your previous device to your device 1 O...

Страница 47: ...ad Smart Switch 2 On the computer launch Smart Switch If your previous device is not a Samsung device back up data to a computer using a program provided by the device s manufacturer Then skip to the fifth step 3 Connect your previous device to the computer using the USB cable 4 On the computer follow the on screen instructions to back up data from the device Then disconnect your previous device f...

Страница 48: ... to the computer using the USB cable 2 Open the notification panel and then tap Transferring media files via USB Transferring media files If the computer cannot recognise your device tap Transferring images 3 Tap ALLOW to permit the computer to access your device s data When the computer recognises your device the device will appear in My PC 4 Transfer files between your device and the computer Up...

Страница 49: ...ating disconnect all other media devices from the computer Backing up and restoring data Keep your personal information app data and settings safe on your device You can back up your sensitive information to a backup account and access it later You must sign in to your Google or Samsung account to back up or restore data Refer to Samsung account and Accounts for more information Using a Samsung ac...

Страница 50: ...factory data reset ensure you back up all important data stored on the device Refer to Backing up and restoring data for more information On the Apps screen tap Settings Backup and reset Factory data reset RESET DEVICE DELETE ALL The device automatically restarts Quick connect Introduction Quickly search for and connect with nearby devices such as Bluetooth headsets orTVs using the Quick connect f...

Страница 51: ...e from the list and connect to it by following the on screen instructions The next steps may vary depending on the connected device To change your device s visibility setting tap MORE Set device visibility and then select an option Sharing content Share content with the connected devices 1 Open the notification panel and tap Quick connect 2 Tap Scan for nearby devices 3 Select a device from the li...

Страница 52: ...need to activate the Screen Mirroring feature on theTV depending on theTV you want to connect If theTV does not support the Screen Mirroring feature use compatible accessories to enable the feature Compatible accessories include HomeSync and an AllShare Cast dongle TV to mobile device WatchTV on your device s screen You can continue watchingTV within the allowed connection range ControlTV Use your...

Страница 53: ...Share content by using various sharing options The following actions are an example of sharing images 1 Tap Gallery on the Apps screen 2 Select an image 3 Tap Share and select a sharing method such as Bluetooth and email You can also use the following options SmartView View your device s displayed content on a larger screen via a wireless connection Nearby sharing Share content with nearby devices...

Страница 54: ...ALL To purchase and download apps where charges apply tap the price and follow the on screen instructions To change the auto update settings tap Settings Auto update apps and then select an option Play Store Purchase and download apps Tap Play Store on the Apps screen Installing apps Browse apps by category or tap the search field to search for a keyword Select an app to view information about it ...

Страница 55: ...ssions For some apps to operate properly they may need permission to access or use information on your device When you open an app a pop up window may appear and request access to certain features or information Tap ALLOW on the pop up window to grant permissions to the app To view your app permission settings open the Apps screen and tap Settings Applications Application manager Select an app and...

Страница 56: ...acts on the Apps screen 2 Tap and select a storage location 3 Enter contact information Add an image Add or delete a contact field 4 Tap SAVE Importing contacts Import contacts from storage services to your device 1 Tap Contacts on the Apps screen 2 On the contacts list tap MORE Settings Import Export contacts IMPORT and select an import option ...

Страница 57: ...s list to scroll through it quickly Tap the search field at the top of the contacts list and enter search criteria Once a contact is selected take one of the following actions Add to favourite contacts Compose an email Sharing contacts You can share contacts with others by using various sharing options 1 Tap Contacts on the Apps screen 2 Tap MORE Share 3 Tick contacts and tap SHARE 4 Select a shar...

Страница 58: ...Samsung Internet on the Apps screen 2 Tap the address field 3 Enter the web address or a keyword and then tap Go To view the toolbars drag your finger downwards slightly on the screen Move to the previously visited page Open a new tab Close the tab Access additional options Refresh the current webpage Open the homepage View your bookmarks saved webpages and recent history ...

Страница 59: ...using this feature for the first time set whether to use a password for secret mode In secret mode you cannot use some features such as screen capture In secret mode the device will change the colour of the toolbars Changing security settings You can change your password Tap MORE Settings Privacy Secret mode security Change password Deactivating secret mode Tap MORE Disable Secret mode Alternative...

Страница 60: ...ount If you have more than one email account you can set one as the default account Tap MORE Settings MORE Set default account Sending emails 1 Tap to compose an email 2 Add recipients and enter an email text 3 Tap SEND to send the mail Reading emails When Email is open the device will automatically retrieve new emails To manually retrieve emails swipe downwards on the screen Tap an email on the s...

Страница 61: ...y prohibited Do not take photos or record videos in places where you may violate other people s privacy Taking photos or recording videos 1 Tap the image on the preview screen where the camera should focus 2 Tap to take a photo or tap to record a video Spread two fingers apart on the screen to zoom in and pinch to zoom out To adjust the brightness of photos or videos tap the screen When the adjust...

Страница 62: ...ing mode and which camera is being used The camera automatically shuts off when unused Make sure that the lens is clean Otherwise the device may not work properly in some modes that require high resolutions Launching Camera on the locked screen To quickly take photos launch Camera on the locked screen On the locked screen drag outside the large circle This feature may not be available depending on...

Страница 63: ... Pro mode Take photos while manually adjusting various shooting options such as exposure value and ISO value On the preview screen tap MODE Pro Select options and customise the settings and then tap to take a photo Select an appropriate white balance so images have a true to life colour range Select an ISO value This controls camera light sensitivity Low values are for stationary or brightly lit o...

Страница 64: ...on Keep the image within the frame on the camera s viewfinder Avoid taking photos of indistinct backgrounds such as an empty sky or a plain wall Continuous shot Take a series of photos of moving subjects On the preview screen tap MODE Continuous shot Tap and hold to take several photos continuously HDR Rich tone Take photos with rich colours and reproduce details even in bright and dark areas On t...

Страница 65: ...e is up the device will take a photo To use various shooting options for the front camera tap Settings Shooting methods front and then tap the switches to activate them Night Take a photo in low light conditions without using the flash On the preview screen tap MODE Night Beauty face Take a photo with lightened faces for gentler images On the preview screen tap MODE Beauty face Sports Take a photo...

Страница 66: ...esult in higher quality photos but they will take up more memory Camera settings On the preview screen tap Settings The available options may vary depending on the shooting mode and which camera is being used Video size rear Video size front Select a resolution for videos Using a higher resolution will result in higher quality videos but they will take up more memory Save pictures as previewed Inv...

Страница 67: ...hutter or zoom function Reset settings Reset the camera settings Gallery Introduction View and manage photos and videos stored in the device Viewing images 1 Tap Gallery on the Apps screen 2 Select an image or a video Access additional options Add the image to favourites Move to the previous screen Automatically adjust the image Image and video preview thumbnails Share the image with others Delete...

Страница 68: ... rewind Skip to the next video Tap and hold to fast forward Access additional options Display your videos Move the control panel to the right Switch to the pop up video player Adjust the volume Pause and resume playback Drag your finger up or down on the left side of the playback screen to adjust the brightness or drag your finger up or down on the right side of the playback screen to adjust the v...

Страница 69: ...deos to delete 3 Tap DELETE Sharing images or videos Select an image or a video tap Share at the bottom of the screen and then select a sharing method Samsung Notes Introduction Create notes by entering text from the keyboard or by writing or drawing on the screen with the S Pen You can also insert images or voice recordings into your notes Creating notes 1 On the Apps screen tap Samsung Notes ALL...

Страница 70: ...recording and insert it into the note Voice recording will start immediately Enter text using the keyboard Write or draw with pens Paint with brushes Insert an image Insert a voice recording 3 When you are finished composing the note tap SAVE Composing notes in handwriting mode On the note composer screen tap Pen to write or draw with the S Pen Undo Redo Pen mode Eraser mode Selection mode Extend ...

Страница 71: ...rom a note tap 2 Tap an area to erase The whole line on the area will be erased The line eraser can erase your note line by line To only erase the area you touch with the S Pen tap once more and tap Erase touched area You can adjust the size of the eraser by dragging the size adjustment bar To clear the note tap ERASE ALL You can also erase an area in pen mode by tapping it while pressing and hold...

Страница 72: ...t to another location select the input and then drag it to a new location To change the size of the selection tap the input and drag a corner of the frame that appears 3 Edit the input using the available options Cut Cut out the input To paste it to another location tap and hold the location and then tap Paste Copy Copy the input To paste it to another location tap and hold the location and then t...

Страница 73: ...new colour using the colour picker Eraser mode Change the brush colour Change the brush s radius or opacity Post the painting to PEN UP Inserting images into a note On the note composer screen tap Image Tap CAMERA to take a photo or tap GALLERY or OTHER to select an image The image will be inserted into your note Inserting voice recordings into a note On the note composer screen tap Voice to make ...

Страница 74: ...category 3 Select a note and tap Pin to home screen The note will be added to the Home screen On the Home screen tap and hold a note to move or resize it To replace the note with another one tap CHANGE Deleting notes 1 On the Apps screen tap Samsung Notes 2 Tap ALL or tap COLLECTIONS and select a category 3 Tap and hold a note to delete To delete multiple notes tick more notes to delete 4 Tap DELE...

Страница 75: ... for sharing artwork drawn with the S Pen Post your artwork view others artwork and get useful drawing tips Post your artwork Your profile View your recent activity history View artwork by category You can sign in to PEN UP with your Samsung account or other SNS accounts ...

Страница 76: ... to post and enter a title description and hashtag Add your artwork to post Add hashtags Share your artwork with your other SNS accounts Enter a description Select where to post the artwork Select a category Enter a title 3 Tap POST Posting artwork from other apps To post your artwork from Gallery or other drawing apps select the artwork from an app and tap Share PEN UP ...

Страница 77: ...as a favourite Repost the artwork View comments and add a comment To download artwork tap Save artwork Downloaded artwork will be saved in Gallery You can only download artwork permitted by owners S Planner Introduction Manage your schedule by entering upcoming events or tasks in your planner Creating events 1 Tap S Planner on the Apps screen 2 Tap or double tap a date If the date already has save...

Страница 78: ... Enter the location of the event Enter a title Set a start and end date for the event Add more details Set an alarm 4 Tap SAVE to save the event Creating tasks 1 Tap S Planner on the Apps screen 2 Tap TASKS 3 Enter task details and tap TODAY or TOMORROW to set a due date To add more details tap 4 Tap SAVE to save the task ...

Страница 79: ...an account to sync with and sign in When an account is added it will appear on the list My Files Access and manage various files stored in the device On the Apps screen tap My Files View files by category or view files stored in the device To check the status of used and available memory tap STORAGE USAGE To search for files or folders tap SEARCH Clock Introduction Set alarms check the current tim...

Страница 80: ... alarms tap the clock icon next to the alarm in the alarms list Stopping alarms Tap DISMISS to stop an alarm If you have previously enabled the snooze option tap SNOOZE to repeat the alarm after a specified length of time Deleting alarms Tap on an alarm in the list of alarms WORLD CLOCK On the Apps screen tap Samsung Clock WORLD CLOCK Creating clocks Enter a city name or select a city from the glo...

Страница 81: ...ear lap times tap RESET TIMER 1 On the Apps screen tap Samsung Clock TIMER 2 Set the duration and then tap START To open the keypad to enter the duration tap the duration input field 3 Tap DISMISS when the timer goes off Calculator Perform simple or complex calculations Tap Samsung Calculator on the Apps screen You can see the calculation history at the upper part of the screen To clear the histor...

Страница 82: ...s mode tap Kids Mode on the Home or Apps screen When you launch this app for the first time set PIN Then follow the on screen instructions Kids Gallery Kids Store Kids Camera KidsVideo Kids Music Exit kids mode Access parental controls Kids Drawing Kids MagicVoice Kids House To move to the contents page swipe to the right on the kids mode screen This feature may not be available depending on the r...

Страница 83: ... labelled differently depending on the region or service provider Chrome Search for information and browse webpages Gmail Send or receive emails via the Google Mail service Maps Find your location on the map search for locations and view location information for various places Play Music Discover listen to and share music on your device Play Movies TV Download videos to watch from Play Store Drive...

Страница 84: ...otos Search for manage and edit all your photos and videos from various sources in one place Hangouts Chat with your friends individually or in groups and use images emoticons and video calls while you are chatting Google Search quickly for items on the Internet or your device ...

Страница 85: ...re to connect to aWi Fi network and access the Internet or other network devices Your device uses a non harmonised frequency and is intended for use in all European countries TheWLAN can be operated in the EU without restriction indoors but cannot be operated outdoors Turn offWi Fi to save the battery when not in use 1 On the Settings screen tap Wi Fi and then tap the switch to activate it 2 Selec...

Страница 86: ... Tap Wi Fi Direct The detected devices are listed If the device you want to connect to is not in the list request that the device turns on its Wi Fi Direct feature 3 Select a device to connect to The devices will be connected when the other device accepts theWi Fi Direct connection request Sending and receiving data You can share data such as contacts or media files with other devices The followin...

Страница 87: ...ata sent or received via Bluetooth Always ensure that you share and receive data with devices that are trusted and properly secured If there are obstacles between the devices the operating distance may be reduced Some devices especially those that are not tested or approved by the Bluetooth SIG may be incompatible with your device Do not use the Bluetooth feature for illegal purposes for example p...

Страница 88: ...e connected when the other device accepts the Bluetooth connection request Sending and receiving data Many apps support data transfer via Bluetooth You can share data such as contacts or media files with other Bluetooth devices The following actions are an example of sending an image to another device 1 Tap Gallery on the Apps screen 2 Select an image 3 Tap Share Bluetooth and then select a device...

Страница 89: ...and landing After takeoff you can use the device in flight mode if allowed by aircraft personnel Data usage Keep track of your data usage amount On the Settings screen tap Data usage More connection settings Options Customise settings to control other features On the Settings screen tap More connection settings Nearby device scanning Set the device to scan for nearby devices to connect to Printing...

Страница 90: ...nstalled on the device You can connect the device to a printer viaWi Fi orWi Fi Direct and print images or documents Some printers may not be compatible with the device Adding printer plug ins Add printer plug ins for printers you want to connect the device to 1 On the Settings screen tap More connection settings Printing Download plug in 2 Search for a printer plug in in Play Store 3 Select a pri...

Страница 91: ... your device s battery storage RAM and system security You can also automatically optimise the device with one tap of your finger Using the quick optimisation feature On the Settings screen tap Smart Manager CLEAN ALL The quick optimisation feature improves device performance through the following actions Clearing some memory Deleting unnecessary files and closing apps running in the background Sc...

Страница 92: ...battery usage for each app tap DETAIL for the app power saving and tap the switch to activate it Storage Check the status of the used and available memory On the Settings screen tap Smart Manager Storage Managing the memory To delete residual files such as cache tap DELETE To delete files or uninstall apps that you do not use any more tap DETAIL for the user data and select a category Then tick it...

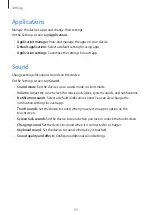
Страница 93: ...vice to use sound mode or silent mode Volume Adjust the volume level for music and videos system sounds and notifications Notification sounds Select a default notification sound You can also change the notification settings for each app Touch sounds Set the device to sound when you select an app or option on the touchscreen Screen lock sounds Set the device to sound when you lock or unlock the tou...

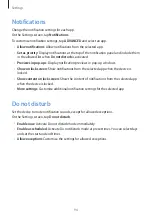
Страница 94: ...p windows Show on lock screen Show notifications from the selected app when the device is locked Show content on lock screen Show the content of notifications from the selected app when the device is locked More settings Customise additional notification settings for the selected app Do not disturb Set the device to mute notification sounds except for allowed exceptions On the Settings screen tap ...

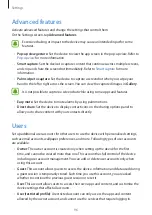
Страница 95: ...t apps or functions to open from the Air command panel Air view Activate the air view feature to perform various actions with the S Pen Direct pen input Set the device to display the handwriting field icon when hovering the S Pen over a text input field Pointer Set the device to display the S Pen pointer when hovering the S Pen over the screen Detachment options Set the device to open the Air comm...

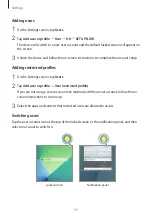
Страница 96: ...act icons on the sharing options panel to allow you to share content with your contacts directly Users Set up additional user accounts for other users to use the device with personalised settings such as email accounts wallpaper preferences and more Following types of user accounts are available Owner The owner account is created only when setting up the device for the first time and cannot be cre...

Страница 97: ...nt setup Adding restricted profiles 1 On the Settings screen tap Users 2 Tap Add user or profile User restricted profile If you are not using a secure screen lock method with the owner account follow the on screen instructions to set one up 3 Select the apps and content that restricted users are allowed to access Switching users Tap the user account icon at the top of the locked screen or the noti...

Страница 98: ...information On the Settings screen tap Home screen Lock screen and security Change settings for securing the device On the Settings screen tap Lock screen and security The available options may vary depending on the screen lock method selected Screen lock type Change the screen lock method Info and app shortcuts Change settings for the items displayed on the locked screen Notifications on lock scr...

Страница 99: ...rypt files on a memory card If you reset your device to the factory defaults with this setting enabled the device will not be able to read your encrypted files Disable this setting before resetting the device Other security settings Configure additional security settings Privacy Options Change the settings for maintaining your privacy On the Settings screen tap Privacy Location Change settings for...

Страница 100: ...when private mode is activated To hide items stored in the private folder deactivate private mode Hiding content 1 On the Apps screen launch an app to hide items 2 Select an item and tap MORE Move to Private If private mode is not activated follow the on screen instructions to enter the preset private mode access code The selected items will be moved to the private folder Viewing hidden content Yo...

Страница 101: ... Follow the on screen instructions to enter the preset private mode access code 3 Tap the Auto disable switch to activate it When the Auto disable option is enabled the device will fail to transfer files to the private folder if the screen turns off during transfer Accessibility Configure various settings to improve accessibility to the device On the Settings screen tap Accessibility Vision Custom...

Страница 102: ...of dragging it Manage accessibility Export or import the accessibility settings to share them with other devices Services View accessibility services installed on the device Accounts Add your Samsung and Google accounts or other accounts to sync with Adding accounts Some apps used on your device require a registered account Create accounts to have the best experience with your device 1 On the Sett...

Страница 103: ...apps requiring your Samsung account without the sign in procedure Removing accounts On the Settings screen tap Accounts select an account name select the account to remove and then tap MORE Remove account Google Configure settings for some features provided by Google On the Settings screen tap Google Backup and reset Change the settings for managing settings and data On the Settings screen tap Bac...

Страница 104: ...et Reset settings to the factory default values and delete all data Language and input Select device languages and change settings such as keyboards and voice input types Some options may not be available depending on the selected language On the Settings screen tap Language and input Language Select a display language for all menus and apps Default keyboard Select a default keyboard type for text...

Страница 105: ...impler layout and allowing limited access to an app Refer to Ultra power saving mode for more information Percentage on status bar Set the device to display the remaining battery life Storage View memory information for your device On the Settings screen tap Storage The actual available capacity of the internal memory is less than the specified capacity because the operating system and default app...

Страница 106: ...ing across time zones When this feature is deactivated you can manually set the date and time Select time zone Set the device to receive time zone information from the network when you move across time zones Use 24 hour format Display time in 24 hour format User manual View help information to learn how to use the device and apps or configure important settings On the Settings screen tap User manu...

Страница 107: ...M or USIM card is blocked usually as a result of entering your PIN incorrectly several times You must enter the PUK supplied by your service provider PIN2 When you access a menu requiring the PIN2 you must enter the PIN2 supplied with the SIM or USIM card For more information contact your service provider Your device displays network or service error messages When you are in areas with weak signal...

Страница 108: ...tched or damaged visit a Samsung Service Centre Your device freezes or encounters a fatal error Try the following solutions If the problem is still not resolved contact a Samsung Service Centre Restarting the device If your device freezes or hangs you may need to close apps or turn off the device and turn it on again Forcing restart If your device is frozen and unresponsive press and hold the Powe...

Страница 109: ...roperly Visit a Samsung Service Centre and have the battery replaced The battery depletes faster than when first purchased When you expose the device or the battery to very cold or very hot temperatures the useful charge may be reduced Battery consumption increases when you use messaging features or some apps such as games or the Internet The battery is consumable and the useful charge will get sh...

Страница 110: ...ia files If you receive error messages or multimedia files do not play when you open them on your device try the following Free some memory by transferring files to a computer or deleting files from your device Ensure that the music file is not Digital Rights Management DRM protected If the file is DRM protected ensure that you have the appropriate licence or key to play the file Ensure that the f...

Страница 111: ... cable you are using is compatible with your device Ensure that you have the proper driver installed and updated on your computer If you are aWindows XP user ensure that you haveWindows XP Service Pack 3 or higher installed on your computer Your device cannot find your current location GPS signals may be obstructed in some locations such as indoors Set the device to useWi Fi or a mobile network to...

Страница 112: ...ng the battery To remove the battery contact an authorised service centre To obtain battery removal instructions please visit www samsung com global ecodesign_energy For your safety you must not attempt to remove the battery If the battery is not properly removed it may lead to damage to the battery and device cause personal injury and or result in the device being unsafe Samsung does not accept l...

Страница 113: ... storing in any information storage and retrieval system without the prior written permission of Samsung Electronics Trademarks SAMSUNG and the SAMSUNG logo are registered trademarks of Samsung Electronics Bluetooth is a registered trademark of Bluetooth SIG Inc worldwide Wi Fi Wi Fi Protected Setup Wi Fi Direct Wi Fi CERTIFIED and theWi Fi logo are registered trademarks of theWi Fi Alliance All o...

Отзывы: