background image

imagine

 the possibilities

Grazie per aver acquistato un prodotto Samsung.
Per ricevere un servizio più completo, 
Registra il tuo prodotto su

www.samsung.com/register

Robot aspirapolvere

Manuale dell’utente

  Prima di utilizzare questo prodotto, leggere attentamente le istruzioni.

 Solo per uso interno.

Italiano

Questo manuale è realizzato interamente con carta riciclata.

SR8824
SR8825

DJ68-00620J.indb   1

DJ68-00620J.indb   1

2011.9.22   2:36:49 PM

2011.9.22   2:36:49 PM

Содержание SR8824

Страница 1: ...rodotto su www samsung com register Robot aspirapolvere Manuale dell utente Prima di utilizzare questo prodotto leggere attentamente le istruzioni Solo per uso interno Italiano Questo manuale è realizzato interamente con carta riciclata SR8824 SR8825 DJ68 00620J indb 1 DJ68 00620J indb 1 2011 9 22 2 36 49 PM 2011 9 22 2 36 49 PM ...

Страница 2: ... al fine di facilitare la comprensione da parte dell utente dell uso corretto del prodotto INFORMAZIONI SULLA SICUREZZA Prima di utilizzare il prodotto leggere attentamente questo manuale e conservarlo per future consultazioni Dal momento che queste istruzioni coprono diversi modelli del prodotto le caratteristiche dell aspirapolvere acquistato potrebbero differire leggermente da quanto descritto i...

Страница 3: ...rretta supervisione e istruzione all uso I bambini devono essere controllati per evitare che giochino con l apparecchio BASE DI RICARICA Non modificare la spina polarizzata per adattarla a una presa non polarizzata o a un cavo di prolunga Non utilizzare in esterno o su superfici bagnate Scollegare la base di ricarica dalla presa elettrica in caso di inutilizzo e prima di effettuare la manutenzione U...

Страница 4: ... idraulico Non aspirare oggetti in fiamme o che possano causare fumo quali sigarette fiammiferi o braci Non utilizzare per aspirare liquidi infiammabili o combustibili quali benzina né usare in luoghi dove tali sostanze potrebbero essere presenti Non usare il robot aspirapolvere in spazi ristretti in cui siano presenti vapori rilasciati da vernici a base d olio diluenti antitarme polveri infiammabili ...

Страница 5: ...nstallazione della base di ricarica 21 Ricarica 22 Informazioni sulla batteria 23 Avviare interrompere la pulizia 24 Ricarica 25 Pulizia automatica 26 Pulizia spot 27 Pulizia max 28 Pulizia bordi 29 Pulizia programmata MANUTENZIONE STRUMENTI E FILTRO 30 30 Pulizia del robot aspirapolvere 30 Tenere a mente i metodi di pulizia e manutenzione 30 Pulizia della spia del sensore e della telecamera 31 Pu...

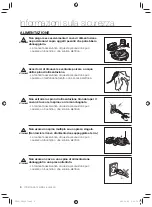
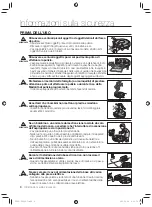
Страница 6: ...tipla su una presa singola Non lasciare il cavo di alimentazione appoggiato a terra La mancata osservanza di questa precauzione può causare un incendio o una scarica elettrica Non estrarre la spina di alimentazione tirandola per il cavo né toccare la spina con le mani bagnate La mancata osservanza di questa precauzione può causare un incendio o una scarica elettrica Accertarsi di rimuovere eventua...

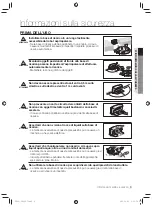
Страница 7: ...triali locali separati distanti dall edificio principale luoghi esposti all acqua o all umidità come bagni o lavanderie e vicino o sopra tavoli o ripiani Se usato in tali luoghi possono verificarsi seri danni malfunzionamenti o rotture Aprire tutte le porte delle stanze per effettuarne la pulizia Quando una porta è chiusa il robot aspirapolvere non è in grado di accedere alla stanza Tuttavia verifica...

Страница 8: ...polvere I bambini potrebbero cadere provocandosi lesioni o danneggiare seriamente il prodotto Se un bambino o un animale domestico viene lasciato da solo all interno della casa accertarsi che l interruttore di accensione dell aspirapolvere sia in posizione off L aspirapolvere può attrarre la loro attenzione Nelle ruote di guida o nella spazzola potrebbero restare intrappolati dita piedi abiti cape...

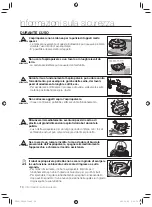
Страница 9: ... precauzione può causare gravi danni al prodotto I liquidi potrebbero spandersi tramite le ruote dell apparecchio sporcando la zona intorno ATTENZIONE Eventuali oggetti posizionati di fronte alla base di ricarica possono impedire all aspirapolvere di effettuare autonomamente la ricarica Mantenere la zona sgombra da oggetti AVVERTENZA Non devono essere presenti ostacoli entro 0 5 m sulla sinistra e...

Страница 10: ...dall aspirapolvere spegnere immediatamente l apparecchio e chiamare il centro assistenza ATTENZIONE Non usare l aspirapolvere su un tavolo o in luoghi elevati da terra La caduta accidentale può causare danni all unità AVVERTENZA Durante il suo funzionamento l aspirapolvere può urtare contro l arredamento per esempio le gambe delle sedie dei tavoli pezzi di arredamento lunghi e sottili ecc Per acce...

Страница 11: ... volatili quali benzina diluenti o alcool La mancata osservanza di questa precauzione può causare gravi danni al prodotto AVVERTENZA L unità deve essere disassemblata o riassemblata solo da tecnici dell assistenza qualificati La mancata osservanza di questa precauzione può causare danni al prodotto AVVERTENZA Non premere con forza il paracolpi del robot aspirapolvere In caso di danneggiamento del s...

Страница 12: ...uzione può causare un incendio o una scarica elettrica ATTENZIONE Prima di pulire la base di ricarica scollegare il cavo di alimentazione ATTENZIONE Durante la rimozione di corpi estranei spegnere l apparecchio prima di verificare la spazzola di pulizia La mancata osservanza di questa precauzione può comportare l accensione accidentale dell unità e causare lesioni personali o gravi danni al prodott...

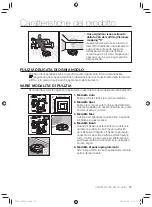
Страница 13: ...el soffitto è in grado di pulire anche ogni angolo del pavimento 1 Modalità Auto Pulisce tutte le stanze in modo automatico 2 Modalità Spot Pulisce in modo accurato una zona delimitata Questa modalità può essere utilizzata per pulire briciole di pane o di torta 3 Modalità Max Continua ad effettuare la pulizia fino a quando la batteria è quasi scarica 4 Modalità Bordi Quando il Sensore ostacoli rilev...

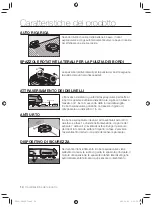
Страница 14: ...patto la fase 2 prevede l assorbimento dell urto da parte del sensore paracolpi SPAZZOLE ROTATIVE LATERALI PER LA PULIZIA DEI BORDI Le spazzole rotative laterali per la pulizia dei bordi eseguono la pulizia dei punti più inaccessibili AUTO RICARICA Quando il livello di carica della batteria è basso il robot aspirapolvere si dirige automaticamente verso la base di ricarica per effettuare una ricari...

Страница 15: ...dell aspirapolvere 02 MONTAGGIO DELL ASPIRAPOLVERE COMPONENTI Base di ricarica Stazione Corpo principale Others Components Manuale dell utente Spazzola per pulizia DJ68 00620J indb 15 DJ68 00620J indb 15 2011 9 22 2 36 51 PM 2011 9 22 2 36 51 PM ...

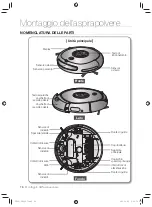
Страница 16: ...te di guida Copribatteria Spazzola principale Coperchio spazzola principale Interruttore di alimentazione Ruote di guida Sensore di dislivello Spazzola laterale Sensore di dislivello Contatti di ricarica Sensore di dislivello Contatti di ricarica Rullo Tasto di funzionamento Sensore ostacoli Sensore ostacoli Sensore paracolpi Display DJ68 00620J indb 16 DJ68 00620J indb 16 2011 9 22 2 36 52 PM 201...

Страница 17: ...pirapolvere 02 MONTAGGIO DELL ASPIRAPOLVERE Montaggio dell aspirapolvere 17 Base di ricarica Stazione Contatti di ricarica Ventole Spia di ricarica Spia di alimentazione DJ68 00620J indb 17 DJ68 00620J indb 17 2011 9 22 2 36 52 PM 2011 9 22 2 36 52 PM ...

Страница 18: ...izia viene premuto viene visualizzata la modalità di pulizia corrispondente a Modalità Auto Questa icona si attiva quando la modalità di pulizia Auto è selezionata b Modalità Spot Questa icona si attiva quando la modalità di pulizia Spot è selezionata c Modalità Max Questa icona si attiva quando la modalità di pulizia Max è selezionata d Modalità Bordi è acceso quando è selezionata la modalità di ...

Страница 19: ...RAPOLVERE ACCENSIONE E SPEGNIMENTO AVVERTENZA Inserendo il robot spento nella base di ricarica la ricarica delle batterie non avverrà Per utilizzare il robot aspirapolvere è necessario accenderlo Spegnendo il prodotto tutte le sue impostazioni verranno ripristinate allo stato iniziale 1 Girare l unità per accenderla Se le icone non si illuminano ciò indica che la carica delle batterie si è esaurit...

Страница 20: ...uto separato dalla base di ricarica la batteria inizia a scaricarsi 2 Non devono essere presenti ostacoli entro 0 5 m sulla sinistra e sulla destra ed entro 1 m sul davanti 1 Installare la base di ricarica su una superficie piana 3 Installare la base di ricarica in un luogo facilmente accessibile dal robot aspirapolvere 5 Se il pavimento è in legno installare la base di ricarica nella stessa direzi...

Страница 21: ...caricato automaticamente in modo regolare verificare le seguenti condizioni Spegnere e riaccendere l unità agendo sul tasto posto sul fondo del prodotto Reset Ricollegare l aspirapolvere alla base di ricarica Reset Verificare che non vi siano corpi estranei sul connettore della base di ricarica e pulire il connettore posto sull unità e quello della base di ricarica con un panno asciutto Verificare ch...

Страница 22: ...mentato da una batteria ricaricabile nichel metallo idruro NiMH ed è dotato di una protezione per la sovraccarica al fine di garantirne una lunga durata Il periodo di garanzia della batteria è di 6 mesi dalla data di acquisto Prima di acquistare una nuova batteria fornire al centro di assistenza il nome del modello della batteria e richiedere il ricambio originale recante il simbolo Se le batterie ...

Страница 23: ...All inizio del ciclo di pulizia il robot aspirapolvere inizia a muoversi La pressione del tasto senza la selezione di una modalità di pulizia attiva la modalità di pulizia Auto Interrompere Per arrestare le operazioni del robot premere il tasto il tasto sull unità principale Quando le operazioni di pulizia vengono interrotte il robot aspirapolvere si ferma E possibile attivare o disattivare tutte ...

Страница 24: ...arica Risoluzione dei problemi nel caso il robot aspirapolvere non ritorni alla base di ricarica Verificare l installazione della base di ricarica Quando la base di ricarica si trova in una posizione dalla quale non è in grado di guidare il robot fino ad essa Quando la base di ricarica si trova a una distanza superiore ai 5m dal robot aspirapolvere Il robot può impiegare un tempo superiore per torna...

Страница 25: ...carica per poi riprendere la pulizia una volta ricaricate le batterie Numero di operazioni di pulizia riprese una Durante la pulizia Una volta terminata la pulizia Informazioni sulla funzione Riprendi pulizia Se il robot aspirapolvere valuta che la pulizia è stata completata la funzione Riprendi pulizia non viene eseguita Spostando il robot aspirapolvere o premendo un tasto mentre l unità è in car...

Страница 26: ...nata la pulizia Nella modalità di pulizia Spot il robot aspirapolvere esegue la pulizia di un area di 1 5 m x 1 5 m Una volta terminata la pulizia il robot aspirapolvere visualizzerà sul display i messaggi Fine Arresto e Stand by Quando il robot aspirapolvere è inserito nella base di ricarica la funzione di pulizia spot non è supportata Annullare la modalità 2 1 Impostare la modalità Tasto unità p...

Страница 27: ...apolvere tornerà automaticamente alla base di ricarica per poi riprendere la pulizia una volta ricaricate le batterie Numero di operazioni di pulizia riprese una AVVERTENZA Non spostare il robot aspirapolvere o premere un tasto durante la pulizia In caso contrario avvierà nuovamente la pulizia dall inizio Durante la pulizia Informazioni sulla funzione Riprendi pulizia Se il robot aspirapolvere giu...

Страница 28: ...polvere giudicherà la pulizia come completata terminando l attività Non spostare il robot aspirapolvere o premere un tasto durante la pulizia In caso contrario il robot aspirapolvere avvierà nuovamente la pulizia dall inizio AVVERTENZA NOTA Il robot aspirapolvere si muove autonomamente ed esegue la pulizia automatica della casa fino al suo completamento Se le operazioni di pulizia hanno inizio quan...

Страница 29: ... viene aumentato o diminuito 2 1 Attivare la modalità di Pulizia Programmata Terminare l impostazione 3 Annullare l impostazione 4 Tasto unità principale Sequenza configurazione Flash Flash Esempio Per avviare la pulizia dopo 5 ore dall ora corrente NOTA Una volta terminata l impostazione e premendo il tasto al posto del tasto Delay Start Avviamento ritardato la programmazione della pulizia viene ...

Страница 30: ... posto sul fondo prima di effettuare la manutenzione del robot aspirapolvere Non spruzzare acqua diluenti benzina o sostanze simili direttamente sul corpo del robot aspirapolvere Spegnere sempre l unità premendo il tasto di alimentazione posto sul fondo prima di effettuare la manutenzione del robot aspirapolvere In caso contrario il robot potrebbe attivarsi improvvisamente causando lesioni Pulire ...

Страница 31: ...guenti casi 1 Quando nella vaschetta si è accumulata una quantità eccessiva di polvere 2 Quando la Potenza di aspirazione si è ridotta 3 Quando improvvisamente la rumorosità è aumentata 3 Separare il filtro dalla vaschetta di raccolta estraendolo nella direzione illustrata dalla freccia in figura 5 Rimontare il filtro nella vaschetta di raccolta Accertarsi che la griglia del filtro sia rivolta verso i...

Страница 32: ... unità premendo il tasto di alimentazione posto sul fondo prima di effettuare la manutenzione del robot aspirapolvere 3 Sollevare la spazzola dal corpo dell aspirapolvere 4 Rimuovere dalla spazzola eventuali corpi estranei quali capelli o filamenti usando una spazzola per la pulizia o un aspirapolvere AVVERTENZA Dal momento che la polvere raccolta nella vaschetta potrebbe fuoriuscire estrarre la va...

Страница 33: ...ZA Al fine di prevenire l otturazione del robot aspirapolvere prestare attenzione a non aspirare stuzzicadenti o bastoncini di cotone Se la rimozione degli oggetti è complicata contattare il Centro di assistenza Poiché il robot aspira la sporcizia presente sul pavimento è possibile che aspiri anche capelli e altri filamenti Controllare ed eventualmente pulire regolarmente la spazzola DJ68 00620J ind...

Страница 34: ...ndo la spazzola ripetere la procedura descritta al punto 2 4 Se si sono incastrati capelli o filamenti tra la spazzola e il corpo dell unità con un cacciavite a croce svitare ed estrarre la vite di ritenuta posta sul lato della spazzola Prima di rimontare la spazzola verificare che il segno L sul bordo della spazzola e il segno L sul corpo principale siano allineati quindi rimontare la spazzola La l...

Страница 35: ...e 1 Nel pulire le ruote di guida posizionare un panno morbido sul pavimento e capovolgere il corpo principale appoggiandolo con cura Spegnere sempre l unità premendo il tasto di alimentazione posto sul fondo prima di effettuare la manutenzione del robot aspirapolvere Se il robot aspirapolvere inizia a procedere a zig zag verificare che non vi siano corpi estranei incastrati fra le ruote di guida DJ...

Страница 36: ...iere i cavi Il robot si è fermato di fronte a un dislivello La ruota di guida si è sollevata Spegnere il robot aspirapolvere e spostarlo in un altro punto da pulire Sulla spazzola si è avvolto un fazzoletto o un altro oggetto simile Spegnere il robot aspirapolvere e rimuovere il fazzoletto Il robot è rimasto incastrato nella soglia della porta Spegnere il robot aspirapolvere e spostarlo in un altr...

Страница 37: ...premendo il tasto sul fondo del robot e rimuovere il corpo estraneo impigliato nella ruota di guida destra Verificare il sensore paracolpi Tirare leggermente verso l esterno il paracolpi incastrato La spia del sensore Ostacoli è sporca polvere macchie o altro Spegnere l unità premendo il tasto sul fondo del robot e pulire la spia del sensore anteriore e posteriore usando un panno morbido La spia de...

Страница 38: ...e del prodotto Base di ricarica Stazione Corpo principale 93 mm altezza 355 mm lunghezza 355 mm larghezza 275 mm larghezza 161 mm lunghezza 122 mm altezza DJ68 00620J indb 38 DJ68 00620J indb 38 2011 9 22 2 36 55 PM 2011 9 22 2 36 55 PM ...

Страница 39: ... vaschetta di raccolta polvere Circa 0 6 ℓ Tipo di ricarica Ricarica automatica Ricarica manuale Modalità di pulizia Auto Spot Max Bordi Pulizia programmata Tempo di ricarica Circa 120 minuti Durata pulizia calcolato sulla base di pavimenti con superfici lisce Circa 90 minuti Metodo di pulizia Riconoscimento forma soffitto Tipo tasto unità principale Tipo tasto Questo aspirapolvere è approvato confo...

Страница 40: ... avete commenti o domande sui prodotti Samsung contattate il Servizio Clienti Samsung 800 SAMSUNG 726 7864 www samsung com DJ68 00620J indb 40 DJ68 00620J indb 40 2011 9 22 2 36 55 PM 2011 9 22 2 36 55 PM ...

Страница 41: ...www samsung com register Robo Sauger Benutzerhandbuch Lesen Sie die Anweisungen sorgfältig durch ehe Sie das Gerät in Betrieb nehmen Nur zum Einsatz in geschlossenen Räumen geeignet Deutsch Dieses Handbuch ist zu 100 auf Recyclingpapier gedruckt SR8824 SR8825 DJ68 00620J indb 1 DJ68 00620J indb 1 2011 9 22 2 36 55 PM 2011 9 22 2 36 55 PM ...

Страница 42: ...chen weist darauf hin dass Erklärungen folgen damit die Benutzer besser verstehen wie sie das Gerät richtig verwenden sollen SICHERHEITSINFORMATIONEN Bitte lesen Sie die Bedienungsanleitung gründlich durch und bewahren Sie sie zum späteren Nachschlagen auf Da die folgenden Hinweise zum Betrieb für verschiedene Modelle gelten können die Eigenschaften Ihres Staubsaugers sich leicht von den in diesem...

Страница 43: ...ung zur Bedienung des Geräts erhalten haben Kinder müssen beaufsichtigt werden damit sie nicht mit dem Gerät spielen können BATTERIELADEGERÄT Manipulieren Sie den gepolten Stecker nicht damit er an eine ungepolte Steckdose oder ein ungepoltes Verlängerungskabel angeschlossen werden kann Verwenden Sie das Gerät nicht im Freien oder auf nassen Flächen Ziehen Sie den Stecker des Ladegeräts aus der Do...

Страница 44: ...uf Saugen Sie nichts auf was brennt oder Rauch erzeugt z B Zigaretten Streichhölzer oder heiße Asche Verwenden Sie das Gerät nicht um leicht entzündliche oder brennbare Flüssigkeiten wie Benzin aufzusaugen und setzen Sie es nicht an Stellen ein wo solche Stoffe vorhanden sein könnten Verwenden Sie den Robo Sauger nicht in geschlossenen Räumen wenn die Luft darin Dämpfe von lösungsmittelhaltigen Fa...

Страница 45: ...llieren des Ladegeräts 21 Laden 22 Informationen zur Batterie 23 Starten Stoppen des Staubsaugers 24 Aufladen 25 Automatisches Saugen 26 Punktuelles Saugen 27 Maximalsaugen 28 Knten reinigung 29 Zeitplanermodus GEBRAUCH UND WARTUNG VON ZUBEHÖR 30 30 Reinigen des Robo Saugers 30 Beachten Sie die Reinigungs und Wartungshinweise 30 Reinigen des Sensorfensters und der Kamera 31 Reinigen des Staubbehält...

Страница 46: ...n Sie nicht mehrere Geräte an eine Steckdose an Lassen Sie das Kabel nicht ungeschützt auf dem Boden herumliegen Andernfalls besteht die Gefahr von Stromschlägen oder Brand Ziehen Sie niemals am Kabel um den Netzstecker aus der Steckdose zu ziehen und berühren Sie den Netzstecker nicht mit nassen Händen Andernfalls besteht die Gefahr von Stromschlägen oder Brand Entfernen Sie Schmutz und Wasser vo...

Страница 47: ...striegebäude isolierte Zimmer die weit vom Hauptgebäude entfernt sind Feuchträumen z B Badezimmer oder Waschküchen sowie schmale und hochgelegene Flächen z B Tischen oder Regale Bei Einsatz in solchen Bereichen können schwerste Schäden Betriebsstörungen und Bruch auftreten Öffnen Sie alle Türen damit alle Zimmer gesaugt werden Wenn eine Tür geschlossen ist kann der Robo Sauger nicht in dieses Zimm...

Страница 48: ...ten hinfallen und sich verletzen oder können schwerste Schäden am Gerät auftreten Wenn ein Kind oder Haustier alleine zu Hause ist vergessen Sie nicht den Robo Sauger mit dem Netzschalter auszuschalten Der Robo Sauger könnte ihre Aufmerksamkeit erregen Wenn das rotierende Rad oder die rotierende Bürste Finger Füße Kleidung oder Haare einfängt kann dies zu Verletzungen führen Wenn ein Kind oder ein...

Страница 49: ...saugt Dies kann zu schwersten Schäden am Gerät führen Die Flüssigkeiten können sich über die Räder ausbreiten und so zu Verunreinigungen führen WARNUNG Gegenstände vor dem Ladegerät verhindern dass der Robo Sauger automatisch geladen wird Stellen Sie sicher dass der Robo Sauger ungehindert die Ladestation erreichen ka VORSICHT Es dürfen sich rechts und links im Abstand von 0 5 m und vorn im Abstan...

Страница 50: ...en Sie das Gerät sofort mit dem Netzschalter aus und rufen Sie das Kundendienstzentrum an WARNUNG Verwenden Sie den Robo Sauger nicht auf Tischen oder an anderen erhöhten Stellen Dies kann zu Schäden am Gerät führen wenn er während des Betriebes herunterfällt VORSICHT Der Robo Sauger kann im Betrieb gegen Möbel z B Stuhlbeine Tischbeine dünne und lange Möbel und usw stoßen Für schnellere und besse...

Страница 51: ...n sprühen oder es mit Chemikalien wie Reinigungsbenzin Verdünner oder Alkohol abwischen Dies kann zu schwersten Schäden am Gerät führen VORSICHT Das Gerät darf ausschließlich von qualifizierten Wartungstechnikern auseinander genommen oder zusammengebaut werden Andernfalls kann es zu schwersten Schäden am Gerät kommen VORSICHT Drücken Sie nicht mit Kraft gegen die Stoßfänger des Robo Saugers Wenn de...

Страница 52: ...rnfalls besteht die Gefahr von Stromschlägen oder Brand WARNUNG Vergewissern Sie sich vor dem Reinigen des Ladegeräts zu Ihrer Sicherheit das Netzkabel aus der Dose gezogen ist WARNUNG Wenn Sie Fremdstoffe entfernen verwenden Sie die Reinigungsbürste nachdem Sie das Gerät am Netzschalter ausgeschaltet haben Andernfalls kann das Gerät möglicherweise unerwartet in Betrieb gehen und Verletzungen oder...

Страница 53: ...atikbetrieb Reinigt alle Zimmer automatisch 2 Punktsaugen Reinigt einen abgegrenzten Bereich intensiv Diese Betriebsart kann verwendet werden um z B Brot oder Kekskrümel zu reinigen 3 Maximalmodus Der Sauger läuft bis die Batterie fast ganz leer ist 4 Kanten Wenn der Hindernissensor beim Saugen ein Hindernis erkennt reduziert der Robo Sauger seine Geschwindigkeit um die Auswirkung der Kollision zu...

Страница 54: ...ernisse und falls der Robo Sauger trotzdem mit einem Hindernis kollidieren sollte absorbieren die 2 Stoßsensor in Stufe 2 den Stoß SEITLICH ROTIERENDE KANTENBÜRSTE Die seitlich Rotierenden Kantenbürsten entfernen Staub von den Rändern AUTOMATIKBETRIEB Wenn die Batterie schwach ist wird der Robo Sauger automatisch zum Ladegerät geführt damit er automatisch geladen werden kann SICHERHEITSVORRICHTUNG...

Страница 55: ..._15 Inbetriebnahme des Staubsaugers 02 INBETRIEBNAHME DES STAUBSAUGERS KOMPONENTEN Ladestation Sauger Weiteres Zubehör Benutzerhandbuch Reinigungsbürste DJ68 00620J indb 15 DJ68 00620J indb 15 2011 9 22 2 36 58 PM 2011 9 22 2 36 58 PM ...

Страница 56: ... Auswerftaste für den Staubbehälter Antriebsrad Batteriefach deckel Saugbürste Kraftbürstena bdeckung Netzschalter Antriebsrad Absturzsensor Seitenbürste Absturzsensor Ladekontakt Höhensensor Ladekontakt Roller Einschalttaste Fahrsensor Fahrsensor Stoßstangensensor Fernbedienungssensor Display DJ68 00620J indb 16 DJ68 00620J indb 16 2011 9 22 2 36 58 PM 2011 9 22 2 36 58 PM ...

Страница 57: ... des Staubsaugers 02 INBETRIEBNAHME DES STAUBSAUGERS BEZEICHNUNGEN DER TEILE Inbetriebnahme des Staubsaugers 17 Ladestation Ladestift Lüftungsschlitze Ladelampe Netzlampe DJ68 00620J indb 17 DJ68 00620J indb 17 2011 9 22 2 36 58 PM 2011 9 22 2 36 58 PM ...

Страница 58: ...einigungsmodus wird der entsprechende Reinigungsmodus angezeigt a Automatikbetrieb Dieses Symbol leuchtet wenn Automatikbetrieb ausgewählt wird b Punktsaugen Dieses Symbol leuchtet wenn Punktsaugen ausgewählt wird c Maximalmodus Dieses Symbol leuchtet wenn der Maximalmodus ausgewählt wird d Kantenmodus leuchtet wenn Kantensaugen ausgewählt wird TASTENBEREICH 6 Start Stopp Drücken Sie diese Taste u...

Страница 59: ...auger zu verwenden müssen Sie das Gerät mit dem Netzschalter einschalten Wenn Sie den Netzschalter ausschalten werden alle Einstellungen zurückgesetzt 1 Drehen Sie das Gerät um und schalten Sie es Gerät mit dem Netzschalter ein Wenn die Symbole nicht eingeschaltet werden bedeutet dies dass die Batterien des Geräts leer sind Um den Robo Sauger in diesem Fall zu verwenden müssen Sie das Gerät mit de...

Страница 60: ...nt wird wird die Batterie automatisch entladen 2 Es dürfen sich rechts und links im Abstand von 0 5 m und vorn im Abstand von 1 m keine Hindernisse befinden 1 Stellen Sie das Ladegerät auf einer ebenen Fläche auf 3 Stellen Sie das Ladegerät an einer Stelle auf die für den Robo Sauger gut zugänglich ist 4 Legen Sie das Netzkabel an der Wand entlang 5 Wenn der Boden aus Holz besteht stellen Sie das L...

Страница 61: ...der ein zurücksetzen Trennen Sie den Netzstecker des Ladegeräts kurzzeitig vom Stromnetz zurücksetzen Kontrollieren Sie ob am Ladeanschluss Fremdstoffe vorhanden sind und wischen Sie den Ladeanschluss am Saugschlitten und dem Ladegerät mit einem trockenen Tuch ab Prüfen Sie ob es in der Nähe des Ladegerät Objekte gibt die als starke Reflektoren wirken können Wenn Sie den Robo Sauger vom Ladegerät t...

Страница 62: ... in Ihrem Land geltenden gesetzlichen Bestimmungen Der Robo Sauger wird über eine aufladbare umweltfreundliche Nickelmetallhydrid Batterie NiMH mit Strom versorgt Der Überladungsschutz garantiert deren lange Lebensdauer Die Garantiezeit für die Batterie beträgt 6 Monate ab dem Kaufdatum Bevor Sie eine Batterie kaufen fragen Sie das Kundendienstcenter nach dem Echtheitssymbol und nach der Modellnumm...

Страница 63: ...imal oder Kante auszuwählen Wenn Sie die Taste drücken ohne inen Reinigungsmodus zu wählen beginnt der Robo Sauger im Automatikmodus Anhalten Um den Robo Sauger anzuhalten drücken Sie die Taste auf am Sauger Wenn das Saugen beendet ist wird der Robo Sauger angehalten Sie können alle Funktionen des Robo Saugers starten oder anhalten Die Funktionen des Robo Saugers stehen nur zur Verfügung nachdem d...

Страница 64: ... die Ladetaste Fehlerbehebung wenn der Robo Sauger nicht zum Ladegerät zurückkehrt Überprüfen Sie die Aufstellung des Ladegeräts Befindet sich das Ladegerät an einer Stelle von der aus es den Robo Sauger nicht zum Ladegerät führen kann Befindet sich das Ladegerät an einer Stelle die mehr als 5m vom Robo Sauger entfernt ist Es kann länger dauern bis der Robo Sauger zum Ladegerät zurückgekehrt ist Lad...

Страница 65: ... aufgeladen ist Anzahl der wieder aufgenommenen Reinigungsvorgänge Einmal Beim Reinigen Nach Abschluss des Reinigens Informationen zum Fortsetzen des Reinigens Wenn der Robo Sauger feststellt dass die Reinigung abgeschlossen ist wird die Funktion zum Fortsetzen des Reinigens nicht ausgeführt Wenn Sie eine Taste drücken oder den Robo Sauger bewegen während er geladen wird geht der Robo Sauger davon...

Страница 66: ...nigen Nach Abschluss des Reinigens Im Punktreinigungsmodus säubert der Robo Sauger einen Bereich mit einer Länge und Breite von 1 5 m Wenn das Saugen beendet ist zeigt der Robo Sauger Ende Stopp und Standby an Wenn der Robo Sauger an die Ladestation angedockt ist kann eine punktuelle Reinigung nicht durchgeführt werden ca 1 5 m ca 1 5 m Modus beenden 2 1 Modus einstellen Tasten am Sauger Konfigura...

Страница 67: ...rsprüngliche Position für die Rückfahrt speichert Wenn die Batterieladung beim Saugen zu schwach wird kehrt der Robo Sauger automatisch zur Ladestation zurück und setzt das Reinigen erst wieder fort wenn seine Batterie wieder aufgeladen ist Anzahl der fortgesetzten Reinigungsvorgänge Einmal VORSICHT Beim Reinigen Informationen zum Fortsetzen des Reinigens Wenn der Robo Sauger feststellt dass die R...

Страница 68: ...t das Reinigen erst wieder fort nachdem seine Batterie wieder aufgeladen ist Anzahl der wieder aufgenommenen Reinigungsvorgänge Einmal Beim Reinigen Nach Abschluss des Reinigens Informationen zum Fortsetzen des Reinigens Wenn der Robo Sauger feststellt dass die Reinigung abgeschlossen ist wird die Funktion zum Fortsetzen des Reinigens nicht ausgeführt Wenn Sie eine Taste drücken oder den Robo Saug...

Страница 69: ...ckt wird wird der Startzeitpunkt verschoben früher oder später 2 1 Starten Sie die Starzeitvorwahl Abschließen der Einstellungen 3 Abbrechen der Einstellungen 4 Tasten am Sauger Konfigurationsreihenfolge Flash Flash Beispiel Reinigen in 5 Stunden HINWEIS Wenn das Gerät eingestellt ist und Sie drücken auf die Taste statt auf die Taste Startverzögerung wird die eingestellte Reinigungszeit storniert ...

Страница 70: ...nten am Sauger immer aus ehe Sie den Robo Sauger reinigen Sprühen Sie niemals Wasser Verdünner Reinigungsbenzin usw direkt auf den Sauger des Robo Saugers Schalten Sie den Netzschalter unten am Sauger immer aus ehe Sie den Robo Sauger reinigen Der Robo Sauger könnte plötzlich angehen und eine Verletzung verursachen Wischen Sie das Sensorfenster und die Kamera leicht mit einem weichen Tuch ab Posit...

Страница 71: ...t zu verschütten Leeren Sie den Staubbehälter in folgenden Situationen 1 Staub hat sich im Staubbehälter angesammelt 2 Die Saugleistung geht plötzlich zurück 3 Der Lärm nimmt zu 5 Einsetzen des Filters in den Staubbehälter Vergewissern Sie sich dass das Gitter des Filters nach unten zeigt Es kann nicht in der falschen Richtung eingesetzt werden 4 Wischen Sie den Staub vom Filter und Staubbehälter ...

Страница 72: ...ger immer aus ehe Sie den Robo Sauger reinigen 3 Heben Sie die Saugbürste aus dem Gerät 4 Entfernen Sie Fremdstoffe z B lange Haare oder Schnüre die sich um die Saugbürste gewickelt haben mit Hilfe einer Reinigungsbürste oder eines Staubsaugers Da der Staub aus dem Staubbehälter herausfallen kann entfernen Sie den Staubbehälter ehe Sie die Saugbürste reinigen 5 Nach dem Reinigen setzen Sie die Kra...

Страница 73: ...ORSICHT Um zu verhindern dass der Robo Sauger verstopft achten Sie darauf keine Fremdkörper aufzusaugen Wenn sich die Fremdstoffe nur mit Schwierigkeiten entfernen lassen wenden Sie sich an ein Kundendienstcenter Da die Saugbürste den Staub vom Boden aufnimmt können sich lange Schnüre oder Haare um die Bürste wickeln Kontrollieren und reinigen Sie die Kraftbürste regelmäßig DJ68 00620J indb 33 DJ6...

Страница 74: ...en Sie den Vorgang aus Schritt 2 4 Wenn sich Haare oder Schnüre zwischen dem Sauger und der seitlichen Drehbürste verfangen haben lösen Sie die Schraube der seitlichen Drehbürste mit Hilfe eines Kreuzschlitzschraubendrehers und ziehen Sie die Bürste ab Wenn Sie die Bürste wieder einbauen bringen Sie die L Markierungen an der seitlichen Drehbürste und am Sauger übereinander und bauen Sie die seitli...

Страница 75: ...der einer Pinzette mit stumpfen Zangen 1 Wenn Sie das Antriebsrad reinigen legen Sie ein weiches Tuch auf den Boden und drehen Sie den Saugschlitten vorsichtig auf die Oberseite Schalten Sie den Netzschalter unten am Sauger immer aus ehe Sie den Robo Sauger reinigen Wenn der Robo Sauger plötzlich im Zickzack zu fahren beginnt kann es sein dass Fremdstoffe am Antriebsrad haften DJ68 00620J indb 35 ...

Страница 76: ...ied hängen Das Antriebsrad ist hochgehoben Schalten Sie die Stromversorgung aus und bringen Sie den Robo Sauger an eine andere Stelle um sauber zu machen Hat sich ein dünnes Handtuch Tuch um das Antriebsrad gewickelt Schalten Sie das Gerät aus und entfernen Sie das Tuch Steckt der Robo Sauger an einer Türschwelle fest Schalten Sie die Stromversorgung aus und bringen Sie den Robo Sauger an eine and...

Страница 77: ...rnen Sie die Fremdstoffe vom rechten Antriebsrad Überprüfen Sie den Stoßsensor Ziehen Sie den festgeklemmten Stoßsensor leicht heraus Fremdstoffe Schnur Papier Spielzeug usw haften auf dem Fenster des Fahrsensors Unterbrechen Sie die Stromversorgung am Schalter an der Geräteunterseite und wischen Sie die Fremdstoffe mit einem weichen Tuch vom vorderen und hinteren Sensorfenster ab Fremdstoffe Schn...

Страница 78: ...chnische daten Technische Daten Ladestation Sauger 93 mm Höhe 355 mm Länge 355 mm Breite 275 mm Breite 161 mm Länge 122 mm Höhe DJ68 00620J indb 38 DJ68 00620J indb 38 2011 9 22 2 37 1 PM 2011 9 22 2 37 1 PM ...

Страница 79: ...A Technische Daten Reinigung Kapazität des Staubehälters Etwa 0 6 ℓ Ladezeit Automatisch Manuell Laden Reinigungsmodus Auto Punkt Maximal Kanten Zeitplanermodus Ladezeit Etwa 120 Minuten Reinigungsdauer auf hartem Untergrund Etwa 90 Minuten Reinigungsmethode Deckenformerkennung Steuerung am Saugers Tasten Dieser staubsauger erfüllt die nachfolgenden Richtlinien emV Richtlinie 2004 108 EEC Sicherhe...

Страница 80: ...der Anregungen zu Samsung Produkten haben wenden Sie sich bitte an den Samsung Kundendienst 01805 SAMSUNG 726 7864 0 14 Min www samsung com DJ68 00620J indb 40 DJ68 00620J indb 40 2011 9 22 2 37 1 PM 2011 9 22 2 37 1 PM ...

Страница 81: ...egister your product at www samsung com register Robotic Vacuum Cleaner User Manual Before operating this unit please read the instructions carefully For indoor use only English This manual is made with 100 recycled paper SR8824 SR8825 DJ68 00620J indb 1 DJ68 00620J indb 1 2011 9 22 2 37 1 PM 2011 9 22 2 37 1 PM ...

Страница 82: ...ins terms to help users understand how use the product properly SAFETY INFORMATION Before operating the appliance please read this manual thoroughly and retain it for your reference Because these following operating instructions cover various models the characteristics of your vacuum cleaner may differ slightly from those described in this manual WARNING WARNING DJ68 00620J indb 2 DJ68 00620J indb...

Страница 83: ...he appliance by a person responsible for their safety Children should be supervised to ensure that they do not play with the appliance BATTERY CHARGER Do not modify the polarized plug to fit a non polarized outlet or extension cord Do not use outdoors or on wet surfaces Unplug the charger from the outlet when not in use and before servicing Use only the charger supplied by the manufacturer to recha...

Страница 84: ...t pick up anything that is burning or smoking such as cigarettes matches or hot ashes Do not use to pick up flammable or combustible liquids such as gasoline nor use on areas where they may be present Do not use robotic vacuum cleaner in an enclosed space filled with vapours given off by oil based paint paint thinner moth proofing substances flammable dust or other explosive or toxic vapours Leaks fro...

Страница 85: ...alling the charger 21 Charging 22 About the battery 23 Starting stopping cleaning 24 Recharging 25 Auto cleaning 26 Spot cleaning 27 Max cleaning 28 Edge cleaning 29 Scheduled Cleaning MAINTAIN TOOLS AND FILTER 30 30 Cleaning robotic vacuum cleaner 30 Please keep the cleaning and maintenance methods in mind 30 Cleaning the sensor window and the camera 31 Cleaning the dust bin and the Filter 32 Cle...

Страница 86: ... Do not use multiple plugs in a single socket Do not leave the cord lying exposed on the floor This may result in fire or electric shock Do not pull the power plug by the cord or touch the plug with wet hands This may result in fire or electric shock Make sure to remove any dust or water from the power plug Failing to do so may result in a malfunction or electric shock WARNING WARNING WARNING WARNING...

Страница 87: ...parate rooms distant from the main building locations exposed to wet or damp conditions such as bathrooms or wash rooms and narrow and highly situated locations such as tables or shelves Critical damage abnormal operation and breakage may occur when used in these locations CAUTION Open all doors to clean all rooms When a door is closed the robotic vacuum cleaner will not be able to enter that room...

Страница 88: ...ower brush This can cause objects to fall from the table CAUTION Remove small objects or brittle items from the area to be cleaned in advance Make sure to clear any objects before cleaning Make sure to remove fragile items such as china glass objects flowerpots etc Robotic vacuum cleaner does not recognize coins rings or other valuable items such as jewelry CAUTION Ensure that children do not step ...

Страница 89: ...charger in a location that can be easily accessed by the robotic vacuum cleaner If the charger is installed in a corner this may cause extra movements and may disturb the automatic recharging process Make sure that there is no trace of liquids on the charger station Failing to do so may result in fire or electric shock WARNING Do not short circuit the charge pins with metal objects such as chopstic...

Страница 90: ...diately turn off the Power Switch and call the customer care center WARNING Do not use the robotic vacuum cleaner on a table or other high locations This may result in damage when the unit accidentally drops CAUTION Robotic vacuum cleaner may bump into furniture such as chair legs table legs thin and long furniture etc while operating For a quicker and cleaner performance place the chairs on top o...

Страница 91: ...e unit must not be disassembled or reconstructed by anyone other than a qualified service engineer This may result in damage to the product CAUTION Do not forcefully press the bumper on the robotic vacuum cleaner If the bumper sensor gets damaged the robotic vacuum cleaner may bump into walls or furniture CAUTION Remove any foreign substances accumulated on the Obstacle and Cliff sensors on a regul...

Страница 92: ...r Failing to do so may result in fire or electric shock WARNING Before cleaning the charger make sure to disconnect the power cord for safety WARNING When removing foreign substances always use the cleaning brush after turning the Power Switch off Failing to do so may result in sudden operation of the unit and cause an injury or critical damage to the product WARNING Power brush Power brush Edge Ed...

Страница 93: ...on function it cleans every corner of the floor 1 Auto Mode Cleans all rooms automatically 2 Spot Mode Cleans a localized area intensely It can be used to clean bread or cookie crumbs 3 Max Mode Runs until the battery is nearly depleted 4 Edge Mode When the Obstacle Sensor detects an obstacle during the cleaning the Robot Cleaner reduces its speed to minimize the bumping impact and the Bumper Senso...

Страница 94: ...age 1 and if the robotic vacuum cleaner does crash into an obstacle the 2 bumper sensors absorb the impact EDGE CLEANING SIDE ROTATING BRUSH The edge cleaning side rotating brush cleans dust from the edges AUTO CHARGING When the battery is low the robotic vacuum cleaner is automatically guided to the charger to enable it to perform a quick auto charge SAFETY DEVICE When the robotic vacuum cleaner ...

Страница 95: ...aner _15 Assembling the cleaner 02 ASSEMBLING THE CLEANER COMPONENTS Charger Station Main Body Others Components User Manual Cleaning Brush DJ68 00620J indb 15 DJ68 00620J indb 15 2011 9 22 2 37 3 PM 2011 9 22 2 37 3 PM ...

Страница 96: ...t Button Driving Wheel Battery Cover Power Brush Power Brush Cover Power Switch Driving Wheel Cliff Sensor Side Brush Cliff Sensor Charge Pin Cliff Sensor Charge Pin Roller Operating Button Obstacle Sensor Obstacle Sensor Bumper Sensor Display Panel DJ68 00620J indb 16 DJ68 00620J indb 16 2011 9 22 2 37 4 PM 2011 9 22 2 37 4 PM ...

Страница 97: ...ssembling the cleaner 02 ASSEMBLING THE CLEANER NAME OF EACH PART Assembling the cleaner 17 Charger Station Charge Pin Vents Charging Lamp Power Lamp DJ68 00620J indb 17 DJ68 00620J indb 17 2011 9 22 2 37 4 PM 2011 9 22 2 37 4 PM ...

Страница 98: ...g Mode Display Each time the cleaning mode button is pressed the corresponding cleaning mode is displayed a Auto Mode This icon turns on when Auto cleaning mode is selected b Spot Mode This icon turns on when Spot cleaning mode is selected c Max Mode This icon turns on when Max cleaning mode is selected d Edge Mode is on when Edge cleaning mode is selected BUTTON PART 6 Start Stop Press to start s...

Страница 99: ...ed off the robotic vacuum cleaner will not be charged even if it is docked with the charger station To use the robotic vacuum cleaner you must turn the Power Switch on If you turn the Power Switch off all settings will be reset 1 Turn over the main unit and turn the Power Switch on If the icons are not turned on it indicates that the battery charge is depleted In this case dock the robotic vacuum ...

Страница 100: ...ry is automatically discharged 2 There should be no obstacles 0 5 m to the left and right and within 1 m of the front 1 Install the charger on a flat surface 3 Install the charger in a location where it can be easily accessed by the robotic vacuum cleaner 4 Arrange the power cord along the wall 5 When the floor is made of wood install the charger in the same direction as the grain of the wood Power ...

Страница 101: ...owing Turn the Power Switch at the bottom of the robotic vacuum cleaner off and on Reset Re plug the power of the charger Reset Check whether there are any foreign substances on the charge connector and wipe the charge connector on the main unit and the charger with a dry cloth Check whether there are objects near the charger that are strong reflectors When separating the robotic vacuum cleaner fro...

Страница 102: ...es If the battery is out of order do not disassemble it Contact your nearest customer care center An increased charging time and a shorter battery life indicates the near end of the battery life Please contact an authorized customer care center to replace your battery The rechargeable battery incorporated in this product is not user replaceable For information on its replacement please contact you...

Страница 103: ... and then pressing the button When cleaning begins the robotic vacuum cleaner starts to move Pressing the button without selecting cleaning mode starts to perform the Auto mode cleaning Stopping To stop press the main unit button When cleaning is stopped the robotic vacuum cleaner stops You can run or stop all robotic vacuum functions Each robotic vacuum function only runs when the Power Switch is...

Страница 104: ...arging button Troubleshooting when the robotic vacuum cleaner does not return to the charger Check the installation of the charger When the charger is in a location where the charger cannot guide the robotic vacuum cleaner to the charger When the charger is more than 5m away from robotic vacuum cleaner It may require a longer time for the robotic vacuum cleaner to return to the charger Manually ch...

Страница 105: ...rging its battery Number of cleaning operations resumed Once While cleaning When cleaning is complete About the Resume Cleaning function If the robotic vacuum cleaner has evaluated that cleaning is complete the resume cleaning function is not performed If you move the robotic vacuum cleaner when it is being charged or press a button the robotic vacuum cleaner judges cleaning to be complete and doe...

Страница 106: ...aning is complete In Spot cleaning mode the robotic vacuum cleaner cleans an area with a length of 1 5m and a width of 1 5m When cleaning is completed the robotic vacuum cleaner will display End Stop and Stand by Cancel the mode 2 1 Set the mode When the robotic vacuum cleaner is docked with the charger station spot cleaning is not supported Main unit button Configuration Sequence 2time NOTE About...

Страница 107: ...ion and resumes cleaning after charging the battery Number of resumed cleaning operations Once CAUTION Do not move the robotic vacuum cleaner while it is cleaning or press a button while cleaning Otherwise the robotic vacuum cleaner judges cleaning to be complete and starts cleaning again from the beginning While cleaning Cancel the mode 2 1 Set the mode About the Resume Cleaning function If the r...

Страница 108: ...tery level becomes too low while cleaning the robotic vacuum cleaner will automatically return to the charger station and resume cleaning after charging its battery Number of cleaning operations resumed Once While cleaning When cleaning is complete About the Resume Cleaning function If the robotic vacuum cleaner has evaluated that cleaning is complete the resume cleaning function is not performed ...

Страница 109: ...ton is pressed the time is increased or decreased 2 1 Enter the Scheduled Cleaning mode Finish the setting 3 Cancel the setting 4 Main unit button Configuration Sequence Flash Flash Example To clean 5 hours Later from now NOTE When setting is complete and you press the button instead of the Delay Start button the scheduled cleaning time is canceled After completing the setting if you manually move...

Страница 110: ...ERA You must turn off the Power Switch at the bottom of the main unit before cleaning the robotic vacuum Never spray water thinner benzene etc directly onto the main unit of robotic vacuum cleaner Always turn off the power switch at the bottom of the main unit before cleaning the robotic vacuum The robotic vacuum cleaner could operate suddenly and cause an injury Lightly wipe the sensor window or ...

Страница 111: ...ty the dust bin in the following cases 1 When dust has accumulated inside the dust bin 2 When the suction power suddenly becomes weak 3 When the noise suddenly increases 3 Separate the Filter from the dust bin by pulling it in the direction of the arrow in the figure 5 Install the Filter into the dust bin Make sure that the grid pattern of the Filter is facing downwards It cannot be installed in th...

Страница 112: ...he main unit before cleaning the robotic vacuum 3 Lift the power brush up from the main unit 4 Remove any foreign substances such as long hairs or strings wrapped around the power brush using a cleaning brush or a vacuum cleaner CAUTION Because the dust in the dust bin may come out separate the dust bin first before cleaning the power brush 5 When cleaning is complete fix the Power Switch side of th...

Страница 113: ...ON To prevent the robotic vacuum cleaner from becoming clogged be careful not to vacuum tooth picks or cotton swabs When removing foreign substances becomes difficult contact a customer care center Because the power brush vacuums the dust on the floor long strings or hair can become wrapped around the brush Check and clean the power brush regularly DJ68 00620J indb 33 DJ68 00620J indb 33 2011 9 22 2...

Страница 114: ...ide rotating brush repeat the procedures in Step 2 4 If hair or string is wrapped between the main unit and the side rotating brush undo the screw of the side rotating brush using a driver to remove it When reassembling the brush check the L mark on the edge cleaning side rotating brush and the L mark on the main unit and then reassemble the side rotating brush Letter R is carved at the right side...

Страница 115: ...nt nippers if necessary 1 When cleaning the driving wheel place a soft cloth on the floor and flip the main unit placing it down carefully You must turn off the Power Switch at the bottom of the main unit before cleaning the robotic If the robotic vacuum cleaner suddenly starts to zigzag there may be foreign substances stuck on the driving wheel DJ68 00620J indb 35 DJ68 00620J indb 35 2011 9 22 2 37...

Страница 116: ... a height difference The driving wheel is lifted Turn off the Power Switch and move the cleaning robotic vacuum to another place to clean Is there a thin towel cloth wrapped around the driving wheel Turn off the Power Switch and remove the thin towel Is the robotic vacuum cleaner stuck on the doorsill Turn off the Power Switch and move the robotic vacuum cleaner to another place to clean The sucti...

Страница 117: ...and remove the foreign substance from the right driving wheel Check bumper sensor Slightly pull the stuck bumper outward A foreign substance dust stain etc is on the Obstacle sensor window Turn off the Power Switch at the bottom and wipe the foreign substance from the front and rear sensor windows using a soft cloth A foreign substance Dust stain etc is on the Cliff sensor window Turn off the Powe...

Страница 118: ...cification Product specification Charger Station Main Body 93 mm Height 355 mm Length 355 mm Width 275 mm Width 161 mm Length 122 mm Height DJ68 00620J indb 38 DJ68 00620J indb 38 2011 9 22 2 37 7 PM 2011 9 22 2 37 7 PM ...

Страница 119: ...leaning Specifications Dust bin capacity About 0 6 ℓ Charging type Auto Charging Manual Charging Cleaning mode Auto Spot Max Edge Scheduled Cleaning Charging time About 120 minutes Cleaning time on the basis of hard floor About 90 minutes Cleaning method Ceiling shape recognition Main unit button type Button type This Vacuum cleaner is approved the following Electromagnetic Compatibility Directive 2...

Страница 120: ...Memo DJ68 00620J indb 40 DJ68 00620J indb 40 2011 9 22 2 37 7 PM 2011 9 22 2 37 7 PM ...

Страница 121: ...Memo DJ68 00620J indb 41 DJ68 00620J indb 41 2011 9 22 2 37 7 PM 2011 9 22 2 37 7 PM ...

Страница 122: ...DJ68 00620J indb 42 DJ68 00620J indb 42 2011 9 22 2 37 7 PM 2011 9 22 2 37 7 PM ...

Страница 123: ... registrirajte na www samsung com register Robotski sesalnik Uporabniški priročnik Pred uporabo izdelka pozorno preberite navodila Samo za uporabo v zaprtih prostorih Slovenščina Ta priročnik je izdelan iz 100 recikliranega papirja SR8824 SR8825 DJ68 00620J indb 1 DJ68 00620J indb 1 2011 9 22 2 37 7 PM 2011 9 22 2 37 7 PM ...

Страница 124: ...azlaga izrazov za boljše razumevanje pravilnega načina uporabe izdelka VARNOSTNE INFORMACIJE Pred uporabo sesalnika preberite ta priročnik in ga shranite za poznejšo uporabo Ker so ta navodila namenjena različnim modelom bodo značilnosti vašega sesalnika morda drugačne od tistih v tem priročniku OPOZORILO OPOZORILO POZOR OPOZORILO OPOMBA DJ68 00620J indb 2 DJ68 00620J indb 2 2011 9 22 2 37 8 PM 20...

Страница 125: ... treba nadzorovati in tako zagotoviti da se ne igrajo z aparatom POLNILNIK BATERIJE Ne spreminjajte polariziranega vtiča tako da se bo prilegal nepolarizirani vtičnici ali kabelskemu podaljšku Sesalnika ne uporabljajte na prostem ali na mokrih površinah Ko sesalnika ne uporabljate in pred servisiranjem polnilnik izključite iz vtičnice Baterijo polnite samo s polnilnikom ki ga je priložil proizvaja...

Страница 126: ... ne uporabljajte za sesanje predmetov ki gorijo ali se kadijo kot so cigarete vžigalice in vroč pepel Ne vsesavajte vnetljivih ali gorljivih tekočin kot je bencin in izdelka ne uporabljajte v prostorih kjer so te tekočine lahko prisotne Robotskega sesalnika ne uporabljajte v zaprtem prostoru kjer so prisotni hlapi barv na osnovi olja hlapi razredčil za barve snovi za zaščito pred molji vnetljiv pr...

Страница 127: ... stikala za napajanje 20 Namestitev polnilnika 21 Polnjenje 22 Baterija 23 Zagon ustavitev sesanja 24 Polnjenje 25 Samodejno sesanje 26 Sesanje območja 27 Maksimalno sesanje 28 Sesanje robov 29 Sesanje po urniku VZDRŽEVANJE NASTAVKOV IN FILTRA 30 30 Čiščenje robotskega sesalnika 30 Upoštevajte načine čiščenja in vzdrževanja 30 Čiščenje okenca senzorja in kamere 31 Čiščenje posode za prah in filtra ...

Страница 128: ...požar ali električni udar V eni vtičnici ne uporabljajte več vtičev Kabla ne pustite ležati nezaščitenega na tleh To lahko povzroči požar ali električni udar Napajalnega vtiča ne vlecite za kabel ali ga prijemajte z mokrimi rokami To lahko povzroči požar ali električni udar Z napajalnega vtiča odstranite morebitni prah ali vodo Sicer lahko pride do okvare ali električnega udara OPOZORILO OPOZORILO...

Страница 129: ...odstrešjih v kleteh skladiščih industrijskih zgradbah prostorih ločenih od glavne zgradbe prostorih izpostavljenih vodi ali vlagi kot so kopalnice ali pralnice ter na ozkih in visokih mestih kot so mize ali police Pri uporabi na takšnih mestih lahko pride do nepravilnega delovanje ali resnih poškodb izdelka Odprite vsa vrata da posesate vse prostore Če so vrata zaprta robotski sesalnik ne more pos...

Страница 130: ... otroci robotskega sesalnika ne bodo pohodili ali se nanj usedli Otroci lahko padejo in se poškodujejo ali pa lahko pride do resnih poškodbe izdelka Ko je otrok ali hišni ljubljenček sam doma se prepričajte da ste izklopili stikalo za napajanje na robotskem sesalniku Robotski sesalnik bo morda pritegnil njihovo pozornost Če se v vrtljivo kolesce ali krtačo zataknejo prsti noge obleka ali lasje lah...

Страница 131: ...iztrebki hišnih ljubljenčkov To lahko povzroči resno poškodbo izdelka Tekočina se lahko raznese s kolesci in poveča umazanijo OPOZORILO Če se pred polnilnikom nahajajo predmeti se robotski sesalnik ne more samodejno polniti Odstranite morebitne predmete POZOR Poskrbite da 0 5 m levo in desno od polnilnika ter 1 m pred njim ni ovir OPOZORILO Poskrbite da na polnilni postaji ni tekočine Sicer lahko ...

Страница 132: ...koj izklopite stikalo za napajanje in pokličite center za pomoč strankam OPOZORILO Robotskega sesalnika ne uporabljajte za sesanje miz ali drugih visokih mest Sesalnik lahko pade in se poškoduje POZOR Robotski sesalnik se lahko med sesanjem zadane v pohištvo kot so noge stolov in miz ozko in dolgo pohištvo ipd Za hitrejše in natančnejše sesanje stole položite na mizo Če med sesanjem sesalnik vsesa...

Страница 133: ...redno z vodo in ga brišite z vnetljivimi sredstvi kot so bencin razredčilo ali alkohol To lahko resno poškoduje izdelek POZOR Izdelek lahko razstavlja ali sestavlja samo ustrezno usposobljen servisni inženir V nasprotnem primeru lahko pride do poškodbe izdelka POZOR Na odbijača robotskem sesalniku ne pritiskajte s silo Če se senzor odbijača poškoduje lahko robotski sesalnik udarja ob stene ali poh...

Страница 134: ... lahko pride do požara ali električnega udara OPOZORILO Pred čiščenjem polnilnika iz varnostnih razlogov izključite napajalni kabel OPOZORILO Ko odstranjujete morebitne tujke najprej izklopite stikalo za napajanje in nato uporabite čistilno krtačo Če tega ne upoštevate se izdelek lahko nenadoma vklopi in povzroči telesne poškodbe ali resne poškodbe izdelka OPOZORILO Zmogljiva krtača Zmogljiva krta...

Страница 135: ... sesanja vseh območij tal 1 Način samodejnega sesanja Samodejno sesanje vseh prostorov 2 Način sesanja območja Temeljito sesanje določenega območja Lahko se uporablja za sesanje drobtinic kruha ali piškotov 3 Način maksimalnega sesanja Sesalnik deluje dokler baterija ni skoraj izpraznjena 4 Način sesanja robov Ko senzor za ovire med sesanjem zazna oviro robotski sesalnik zmanjša hitrost in skupaj ...

Страница 136: ...otski sesalnik zaleti vanje 2 senzorja odbijača ublažita udarec STRANSKA VRTLJIVA KRTAČA ZA SESANJE ROBOV Stranska vrtljiva krtača za sesanje robov čisti prah na robovih SAMODEJNO POLNJENJE Ko je stanje baterije nizko je robotski sesalnik samodejno usmerjen proti polnilniku da se izvede hitro samodejno polnjenje VARNOSTNA NAPRAVA Če med sesanjem robotski sesalnik dvignete senzor samodejno ustavi p...

Страница 137: ... Sestava sesalnika 02 SESTAVA SESALNIKA SESTAVNI DELI Osrednji del Polnilnik postaja Drugi sestavni deli Uporabniški priročnik Čistilna krtača DJ68 00620J indb 15 DJ68 00620J indb 15 2011 9 22 2 37 9 PM 2011 9 22 2 37 9 PM ...

Страница 138: ...olesce Pokrov baterij Zmogljiva krtača Pokrov zmogljive krtače Stikalo za napajanje Pogonsko kolesce Senzor za stopnice Stranska krtača Senzor za stopnice Vtič za polnjenje Senzor za stopnice Vtič za polnjenje Valjček Gumb za upravljanje Senzor za ovire Senzor za ovire Senzor odbijača Nadzorna plošča DJ68 00620J indb 16 DJ68 00620J indb 16 2011 9 22 2 37 9 PM 2011 9 22 2 37 9 PM ...

Страница 139: ...ka 02 SESTAVA SESALNIKA IME POSAMEZNEGA DELA Sestava sesalnika 17 Polnilnik postaja Vtič za polnjenje Odprtine za izpihani zrak Lučka polnjenja Lučka napajanja DJ68 00620J indb 17 DJ68 00620J indb 17 2011 9 22 2 37 9 PM 2011 9 22 2 37 9 PM ...

Страница 140: ...e gumb za način sesanja se prikaže ustrezen način sesanja a Način samodejnega sesanja ikona se vklopi ko izberete način samodejnega sesanja b Način sesanja območja ikona se vklopi ko izberete način sesanja območja c Način maksimalnega sesanja ikona se vklopi ko izberete način maksimalnega sesanja d Način sesanja robov se vklopi če izberete način sesanja robov GUMBI 6 Start Stop Zagon ustavitev Pri...

Страница 141: ...e robotski sesalnik ne polni tudi če je priključen na polnilnik Za uporabo robotskega sesalnika vklopite stikalo za napajanje Če izklopite stikalo za napajanje se vse nastavitve ponastavijo 1 Obrnite glavno enoto in vklopite stikalo za napajanje Če ikone ne svetijo to pomeni da je baterija prazna V tem primeru vklopite stikalo za napajanje in robotski sesalnik namestite na polnilno postajo Če izkl...

Страница 142: ...ljučen na polnilnik se baterija samodejno prazni 2 Poskrbite da 0 5 m levo in desno od polnilnika ter 1 m pred njim ni ovir 1 Polnilnik namestite na ravno površino 3 Polnilnik namestite na mesto kjer bo robotski sesalnik zlahka dostopal do njega 4 Napajalni kabel speljite ob steni 5 Če so tla lesena namestite polnilnik v enaki smeri kot so položena tla Lučka napajanja Lučka napajanja Lučka polnjen...

Страница 143: ...spodnji strani robotskega sesalnika ponastavitev Znova priključite napajanje ponastavitev Preverite ali so se na priključek polnilca ujeli morebitni tujki ter priključek polnilca na glavni enoti in polnilec obrišite s suho krpo Preverite ali se poleg polnilnika nahajajo predmeti ki motijo polnjenje baterije Ko robotski sesalnik vzamete s polnilnika se baterija začne prazniti Zato imejte robotski s...

Страница 144: ...lnik je opremljen z okolju prijazno sekundarno nikelj metal hidridno baterijo NiMH funkcija za preprečevanje prekomernega polnjenja pa zagotavlja dolgo življenjsko dobo baterije Garancijska doba baterije je 6 mesecev od datuma nakupa Ob nakupu baterije od centra za pomoč strankam zahtevajte simbol izvirnega dela in številko modela Če baterija ne deluje je ne razstavljajte Obrnite se na najbližji c...

Страница 145: ...ato pa pritisnete gumb Sesanje se začne tako da se robotski sesalnik začne premikati Če pritisnete gumb ne da bi izbrali način sesanja se uporabi način samodejnega sesanja Ustavitev Za ustavitev sesanja pritisnite gumb na glavni enoti Ko sesanje ustavite se robotski sesalnik ustavi Lahko zaženete ali ustavite vse funkcije robotskega sesalnika Vsaka od funkcij robotskega sesalnika deluje samo če je...

Страница 146: ...e gumb da prekličete delovanje in pritisnite gumb Recharging Polnjenje Odpravljanje težav ko se robotski sesalnik ne vrne k polnilniku Preverite namestitev polnilnika Če je polnilnik nameščen na mestu kamor ne more voditi robotskega sesalnika Če se polnilnik oddaljen več kot 5 m od robotskega sesalnika V teh primerih bo robotski sesalnik morda potreboval več časa da se vrne k polnilniku Robotski s...

Страница 147: ... po polnjenju Nadaljevanje sesanja enkrat Med sesanjem Ko je sesanje končano Funkcija nadaljevanja sesanja Če robotski sesalnik oceni da je sesanje končano se funkcija nadaljevanja sesanja ne izvede Če robotski sesalnik med polnjenjem prestavite ali pritisnete gumb sesalnik oceni da je sesanje končano in ne nadaljuje sesanja Prekličite način 2 1 Nastavite način Gumb na glavni enoti Vrstni red nast...

Страница 148: ...e končano V načinu sesanja območja robotski sesalnik posesa 1 5 m dolgo in 1 5 m široko območje Ko je sesanje končano se na zaslonu prikaže End Končano Stop Ustavitev in Standby V pripravljenosti Če se robotski sesalnik nahaja na polnilniku način sesanja območja ni podprt Pribl 1 5 m Pribl 1 5 m Prekličite način 2 1 Nastavite način Gumb na glavni enoti Vrstni red nastavitve Dvakrat OPOMBA DJ68 006...

Страница 149: ... k polnilniku in nadaljuje sesanje po polnjenju Nadaljevanje sesanja enkrat POZOR Med sesanjem ne premikajte robotskega sesalnika in ne pritiskajte gumbov Sicer bo sesalnik ocenil da je sesanje končano in bo začel sesati od začetka Med sesanjem Funkcija nadaljevanja sesanja Če robotski sesalnik oceni da je sesanje končano se funkcija nadaljevanja sesanja ne izvede Če robotski sesalnik med polnjenj...

Страница 150: ... baterije med sesanjem prenizko se robotski sesalnik samodejno vrne k polnilniku in nadaljuje sesanje po polnjenju Nadaljevanje sesanja enkrat Med sesanjem Ko je sesanje končano Funkcija nadaljevanja sesanja Če robotski sesalnik oceni da je sesanje končano se funkcija nadaljevanja sesanja ne izvede Če robotski sesalnik med polnjenjem prestavite ali pritisnete gumb sesalnik oceni da je sesanje konč...

Страница 151: ...mb namesto gumba Delay Start Zakasnitev začetka se načrtovano sesanje prekliče Če po končani nastavitvi ročno premaknete robotski sesalnik s polnilne postaje se načrtovani čas sesanja prekliče Ikona je izklopljena S pritiskom gumba zvišate ali znižate časovno nastavitev 2 1 Preklopite v način sesanja po urniku Končajte nastavitev 3 Prekličite nastavitev 4 Gumb na glavni enoti Vrstni red nastavitve...

Страница 152: ...ika izklopite stikalo za napajanje na spodnji strani glavne enote Nikoli ne pršite vode razredčila bencina itd neposredno na glavno enoto robotskega sesalnika Pred čiščenjem robotskega sesalnika izklopite stikalo za napajanje na spodnji strani glavne enote Robotski sesalnik se lahko nenadoma vklopi in povzroči poškodbe Okence senzorja in kamero nežno obrišite z mehko krpo Sprednje okence senzorja ...

Страница 153: ...rese prah Posodo za prah izpraznite v naslednjih primerih 1 Ko se v posodi za prah nabere prah 2 Ko se moč sesanja nenadoma močno zmanjša 3 Ko se hrup nenadoma močno poveča 3 Iz posode za prah odstranite filter tako da ga povlečete v smeri puščice na sliki 5 Namestite filter v posodo za prah Mrežast vzorec na filtru mora biti obrnjen navzdol Ni ga mogoče namestiti narobe obrnjenega 4 Obrišite prah s ...

Страница 154: ...m robotskega sesalnika izklopite stikalo za napajanje na spodnji strani glavne enote 3 Dvignite zmogljivo krtačo iz glavne enote 4 S čistilno krtačo ali sesalnikom odstranite morebitne tujke kot so dolgi lasje ali vrvice ki so se navile okoli zmogljive krtače POZOR Preden očistite zmogljivo krtačo odstranite posodo za prah saj lahko iz nje uide prah 5 Ko zmogljivo krtačo očistite jo najprej pritrd...

Страница 155: ... da se zaskoči na mestu POZOR Da ne pride do zamašitve robotskega sesalnika ne sesajte zobotrebcev in vatiranih palčk Če morebitnih tujkov ne morete odstraniti se obrnite na center za pomoč strankam Ker zmogljiva krtača sesa prah s tal se lahko okoli nje ovijejo lasje Zmogljivo krtačo redno pregledujte in čistite DJ68 00620J indb 33 DJ68 00620J indb 33 2011 9 22 2 37 11 PM 2011 9 22 2 37 11 PM ...

Страница 156: ... na spodnji strani glavne enote 3 Obrnite stransko vrtljivo krtačo in ponovite postopek v 2 koraku 4 Če so se okoli glavne enote in stranske vrtljive krtače ovili lasje ali vrvice krtačo odvijte s križnim izvijačem in jo odstranite Pri nameščanju krtače preverite da se oznaka L na stranski vrtljivi krtači za sesanje robov ujema z oznako L na glavni enoti Črka R je odtisnjena na desni stranski vrtl...

Страница 157: ...otrebi odstranite s palčko ali topo pinceto 1 Ko želite očistiti pogonsko kolesce na tla položite mehko krpo in previdno obrnite glavno enoto na glavo Pred čiščenjem robotskega sesalnika izklopite stikalo za napajanje na spodnji strani glavne enote Če robotski sesalnik nenadoma začne begati so na pogonskem kolescu morda zagozdeni tujki DJ68 00620J indb 35 DJ68 00620J indb 35 2011 9 22 2 37 12 PM 2...

Страница 158: ...salnik obtičal ker ne more prečkati višinske ovire Pogonsko kolesce je dvignjeno Izklopite stikalo za napajanje in prestavite robotski sesalnik v prostor ki ga želite posesati Ali je okoli pogonskega kolesca ovita drobna krpa blago Izklopite stikalo za napajanje in odstranite tujek Ali robotski sesalnik ne more prečkati praga Izklopite stikalo za napajanje in prestavite robotski sesalnik v prostor...

Страница 159: ...anite tujek z desnega pogonskega kolesca Preverite senzor odbijača Zagozdeni odbijač malce povlecite ven Na okencu senzorja za ovire je tuja snov prah madež ali podobno Izklopite stikalo za napajanje na spodnji strani in z mehko krpo obrišite tujo snov s sprednjega in hrbtnega okenca senzorja Na okencu senzorja za stopnice je tuja snov prah madež ali podobno Izklopite stikalo za napajanje na spodn...

Страница 160: ...lka Specifikacije izdelka Polnilnik postaja Osrednji del 93 mm višina 355 mm dolžina 355 mm širina 275 mm širina 161 mm dolžina 122 mm višina DJ68 00620J indb 38 DJ68 00620J indb 38 2011 9 22 2 37 12 PM 2011 9 22 2 37 12 PM ...

Страница 161: ... za prah Približno 0 6 l Način polnjenja Samodejno polnjenje ročno polnjenje Način sesanja Samodejno sesanje sesanje območja maksimalno sesanje sesanje robov sesanje po urniku Čas polnjenja Pribl 120 minut Čas sesanja na podlagi sesanja trdih tal Pribl 90 minut Metoda sesanja Prepoznavanje oblike stropa Vrsta gumba na glavni enoti Vrsta gumba Sesalnik je skladen z naslednjima direktivama Direktiva...

Страница 162: ...Beležka DJ68 00620J indb 40 DJ68 00620J indb 40 2011 9 22 2 37 12 PM 2011 9 22 2 37 12 PM ...

Страница 163: ...Beležka DJ68 00620J indb 41 DJ68 00620J indb 41 2011 9 22 2 37 12 PM 2011 9 22 2 37 12 PM ...

Страница 164: ...Code No DJ68 00620J REV 0 1 DJ68 00620J indb 42 DJ68 00620J indb 42 2011 9 22 2 37 12 PM 2011 9 22 2 37 12 PM ...

Отзывы: