background image

27

Tip:

Assign pictures to Contacts entries. The entry’s assigned picture appears in the display when you 
receive a call from that entry. See 

“Assigning a Picture to a Contacts Entry” 

on page 56. 

The phone continues to notify you of the call until one of the following events occur: 

• 

You answer the call.

• 

The calling party ends the call.

• 

The call is sent to voicemail.

Call Notification Features

Your phone notifies you of a call in a variety of ways. 

• 

Eight ring volume settings: 

Ringer Off

Vibrate

Low

Low/Medium

Medium

Medium/High

High

, or 

Vibrate/High

• 

Different ring types or melodies to distinguish callers. 

• 

Name display with caller ID. (If the caller’s name is programmed into your 
Contacts). 

• 

Information about the last 90 each of incoming, missed, and outgoing calls are 
automatically stored to a call log. 

Set Call Ringer Volume

1.

In standby mode, press the Volume key on the right side of the phone. 

2.

Press the Volume key up or down to set the call ringer volume as desired. 

Adjust the Ringer

1.

In standby mode, press the Volume key (

) on the right side of the phone 

up or down. Options are:

2.

Press 

 once you’re satisfied with the setting. The phone returns to 

standby mode.

Tip:

You can also enter the 

Volume

 > 

Voice Calls

 sub-menu by pressing the 

MENU

 (left) soft key (

), 

then pressing the 

, and 

 keys. Use the Volume key on the right side 

of your phone to adjust the ringer volume setting. 

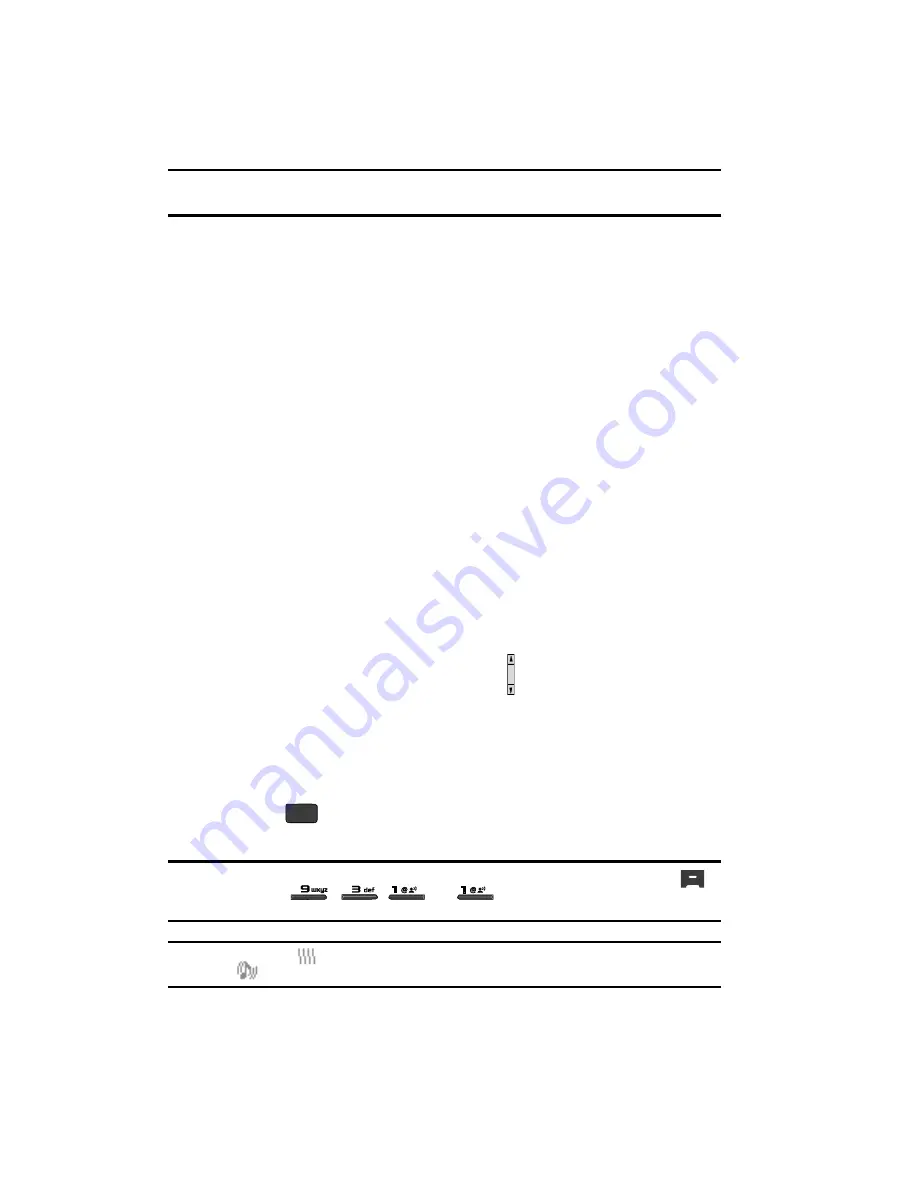
Note:

The Vibrate icon (

) appears in the display when the call ringer is set to 

Vibrate

. The Vibrate/Ring 

icon (

) appears in the display when the call ringer is set to 

Vibrate/High

• Ringer  Off 

• Medium 

• Vibrate  • Medium/High 
• Low  • High 
• Low/Medium • Vibrate/High

OK

Содержание SCH-r410 Series

Страница 1: ...SCH r410 Series P O R T A B L E D U A L M O D E M O B I L E P H O N E User Manual Please read this manual before operating your phone and keep it for future reference...

Страница 2: ...hat you will not and will not attempt to modify prepare derivative works of reverse engineer decompile disassemble or otherwise attempt to create source code from the software No title to or ownership...

Страница 3: ...S OR IMPLIED WARRANTY OF ANY KIND WHATSOEVER WITH RESPECT TO THE PRODUCT INCLUDING BUT NOT LIMITED TO THE MERCHANTABILITY OF THE PRODUCT OR ITS FITNESS FOR ANY PARTICULAR PURPOSE OR USE THE DESIGN CON...

Страница 4: ...Making a Call 22 Answering a Call 26 Calls 29 Section 4 Menu Navigation 36 Menu Navigation 36 Menu Shortcuts 37 Navigation Key Shortcuts 37 Navigate Using a Shortcut 38 Menu Outline 38 Section 5 Ente...

Страница 5: ...6 Using MetroWEB 87 Using Links 87 How MetroWEB Keys Work 88 Section 10 Voice SVC 89 Voice SVC Options 89 Voice Command 90 Voice Settings 91 Section 11 Multimedia 95 Camera 96 Using My Images Gallery...

Страница 6: ...ety 150 Responsible Listening 151 Operating Environment 153 Using Your Phone Near Other Electronic Devices 153 Potentially Explosive Environments 155 Emergency Calls 156 FCC Notice and Cautions 157 Ot...

Страница 7: ...tures begins on page 167 Also included is important safety information that you should know before using your phone Most of this information is near the back of the guide beginning on page 141 Notes a...

Страница 8: ...e gold contacts on the inside of the battery to those on the phone 2 Press lightly on the bottom end of the battery down into the phone until it slips into place 3 Press lightly down and inward on the...

Страница 9: ...onvenient light weight charger that rapidly charges your phone from any 120 220 VAC outlet 1 Plug the large end of the Travel Adapter into a standard 120 VAC or 220 VAC wall outlet Important For conne...

Страница 10: ...Phone On 1 Press and hold the key until the display lights Note As with any other radio transmitting device do not touch the antenna while using your phone as this can affect call quality and can cau...

Страница 11: ...menu to view details of voice messages in your Voicemail box 1 In standby mode press and hold the key or the key or dial your own mobile number to dial Voicemail 2 Follow the prompts in the new user...

Страница 12: ...when the phone is in use Features of Your Phone Domestic and international voice and text messaging service available on participating networks High speed data CDMA 2000 1x Technology Bluetooth Wirele...

Страница 13: ...scroll through the phone menu options In Standby mode lets you access preset functions 4 Left Soft Key Used to navigate through menus and applications and to select the choice indicated at the bottom...

Страница 14: ...ff When you receive an incoming call press to send the call to voicemail 13 Camera Key Launches the Camera feature of your phone 14 CLR Key Deletes characters from the display when you are in text ent...

Страница 15: ...text entry mode between ABC and 123 modes SHIFT key toggles ABC mode capitalization between ABC Abc and abc 6 Left Soft Key Used to navigate through menus and applications and to select the choice ind...

Страница 16: ...res on your phone 14 Voice Recognition Key In standby mode pressing and holding this key launches VoiceSignal options 15 SEND Key Lets you place or receive a call In standby mode press the key once to...

Страница 17: ...ringer during an incoming call 3 Mirror Lets you position the Camera Lens to take self portraits 4 Camera Lens The lens of your built in camera 5 Power Accessory Connector Used to plug in charging acc...

Страница 18: ...ft key function is Options press the Options right soft key and a pop up menu appears When the Right soft key function is Back press the Back right soft key to back up one menu level OK Key In a menu...

Страница 19: ...4 Press twice in standby mode to call the most recent number 5 Press to pick up a waiting call Press again to switch back to the other call Navigation Key Use the directional keys on the Navigation ke...

Страница 20: ...op line of the display To access the Icon Glossary In standby mode press the MENU left soft key then press for Settings for Phone Info and for Icon Glossary A list shows of the icons that can appear o...

Страница 21: ...he pop up menu using the Navigation key Optional input modes are T9 Word Abc ABC Symbol and 123 See Entering Text on page 44 for more information Note With the QWERTY keypad open T9 Word is not availa...

Страница 22: ...ssage appears in the display when a new message arrives The following call message options appear View Now This selection allows you to view the messages now View Later This selection allows you to vi...

Страница 23: ...phone returns to standby mode Vibrate Mode In standby mode repeatedly press the volume key down until Vibrate appears in the display The volume key is on the upper right side of phone Adjust the Ringe...

Страница 24: ...take pictures In Camera mode you can also adjust the resolution and appearance of your pictures See Multimedia on page 95 for more information Entering Camera Mode In standby mode press the Camera ke...

Страница 25: ...ress to place the call Emergency Calls When you call an Emergency Number such as 911 your SCH r410 phone locks itself in emergency mode only allowing you to make calls to the emergency call center you...

Страница 26: ...play 2 Sec Pause A 2 second pause after which dialing resumes Wait A hard pause waits for input from you 3 Use the Up Down navigation or arrow keys to highlight the desired pause 4 Press the key or ke...

Страница 27: ...ber key representing the third digit of the desired Contact s speed dial number Example To speed dial the Contacts entry assigned to speed dial 325 press or press or then press and hold the key or the...

Страница 28: ...s the number If Voice Dial is not sure which name you said it displays a choice list of up to three names and prompts you with Did you say followed by the first name on the list 4 Say Yes to confirm t...

Страница 29: ...o select the correct number from the list See See Choice Lists on page 91 for more information Press the Repeat right soft key or to say the name again Press the Settings left soft key or then press t...

Страница 30: ...last 90 each of incoming missed and outgoing calls are automatically stored to a call log Set Call Ringer Volume 1 In standby mode press the Volume key on the right side of the phone 2 Press the Volum...

Страница 31: ...coming Contact your Wireless Carrier for availability 1 Press to connect and ask the calling party to remain on the line 2 Press and the second caller is placed on hold and you re returned to the orig...

Страница 32: ...option enabled in the Security settings This option is enabled by default Location Turn your GPS location on or set GPS location for emergency calls only Voice Memo Record this call Recorded calls ar...

Страница 33: ...all Erase all unlocked calls from your Outgoing call list View Timers Call Timer screen appears in the display listing the number and types of calls and their total durations See Call Timer on page 3...

Страница 34: ...appears in the display 2 Use the Up and Down navigation keys to highlight a call then press to view further information about the call 3 Press the Options right soft key to display a pop up menu that...

Страница 35: ...s in the display as well as the options Yes and No 5 To Erase all calls press the Yes left soft key To keep the calls press the No right soft key Data Call The last 90 data calls are stored in the Dat...

Страница 36: ...nce the last reset Outgoing Calls Shows the number and total duration of all calls originated by your phone since the last reset Roaming Calls Shows the number and total duration of all calls originat...

Страница 37: ...n keys to highlight the timer you want to reset and press the Reset left soft key 3 To reset all timers except Lifetime Data Counter press the Reset All right soft key 4 Press to exit the Data Counter...

Страница 38: ...e the Up and Down navigation keys to highlight Save 5 Select Create New to add the number as a Contacts entry or select Update Existing to find a Contact with which to associate the new number 6 Follo...

Страница 39: ...in your phone using the navigation key and soft keys or or use a shortcut 1 In standby mode press the MENU left soft key The first of several menus appear in the display Note More than one menu may a...

Страница 40: ...left soft key then press for Messages and for Outbox Navigation Key Shortcuts QWERTY Keypad Closed In standby mode and with the QWERTY keypad closed press a navigation key to launch the key s corresp...

Страница 41: ...u or sub menu of your choice Before you can navigate using a shortcut you ll need the menu or sub menu number that you wish to access 1 In standby mode press the MENU left soft key 2 Press the number...

Страница 42: ...1 2 Picture Message 3 2 Inbox 3 3 Outbox 3 4 Drafts 3 5 Voicemail 3 6 Erase Messages 3 6 1 Inbox 3 6 2 Outbox 3 6 3 Drafts 3 6 4 All Messages 3 7 Msg Settings 3 7 1 General 3 7 1 1 Auto Save 3 7 1 2...

Страница 43: ...C 6 1 Voice Commands 6 2 Voice Settings 6 2 1 Choice Lists 6 2 2 Sensitivity 6 2 3 Digit Dialing 6 2 3 1 Adapt Digits 6 2 3 2 Reset Digits 6 2 4 Sound 6 2 4 1 Prompts 6 2 4 2 Digits 6 2 4 3 Names 6 2...

Страница 44: ...8 2 Calendar 8 3 Memo Pad 8 4 Alarm Clock 8 4 1 Alarm 1 8 4 2 Alarm 2 8 4 3 Alarm 3 8 5 World Time 8 6 Calculator 8 7 Stop Watch 8 8 Converter 8 8 1 Currency 8 8 2 Length 8 8 3 Weight 8 8 4 Volume 8...

Страница 45: ...ges 9 3 1 3 Alarms 9 3 1 4 Key Tone 9 3 2 Ringer Type 9 3 2 1 Voice Calls 9 3 2 1 1 My Ringtones 9 3 2 1 2 My Sounds 9 3 2 2 Messages 9 3 2 2 1 Text Message 9 3 2 2 2 Picture Message 9 3 2 2 3 Voicema...

Страница 46: ...5 3 3 3 Empty 9 5 3 4 Reset Phone 9 5 3 5 Erase All Entry 9 5 3 6 Restriction 9 5 3 6 1 Outgoing 9 5 3 6 2 Incoming 9 5 4 NAM Selection 9 5 5 System Select 9 5 6 Clock Set 9 5 6 1 Set Time 9 5 6 2 Set...

Страница 47: ...y Using Abc Mode Entering Numbers Entering Symbols This section outlines how to select the desired text entry mode when entering characters using the phone keypad or the nested QWERTY keyboard style k...

Страница 48: ...call for you to use the QWERTY keypad Other functions requiring text entry such as Messaging and Memo Pad accept text entry from whichever keypad you prefer Changing the Text Entry Mode Text messages...

Страница 49: ...he number above the symbol in the Symbols pop up window The current text entry mode T9 Word Abc ABC 123 or Symbols is indicated in the lower part of a text entry screen To change the text entry mode d...

Страница 50: ...2 Enter characters while in Abc mode by using one of following keypads Using the QWERTY keypad press the key labeled with the desired character such as press for G and for H Using the phone keypad Pre...

Страница 51: ...the key s labeled with the corresponding symbol s that you wish to insert into your message To return to Abc mode press the Left soft key use the Navigation key to highlight Abc then press Using the...

Страница 52: ...rm these procedures using the QWERTY keypad Contacts Up to 500 entries can be stored in Contacts Each entry can have up to five associated phone numbers and one e mail address Each phone number can be...

Страница 53: ...and In standby mode press and hold until the phone prompts Say a command Say Go to Contacts into the microphone 2 Use the Up Down navigation keys to highlight the option of your choice and press the k...

Страница 54: ...ase this entry from your Contacts list Press the EDIT key to add or change information for this entry Press the Options right soft key and the following options popup in the display New Contact Erase...

Страница 55: ...Name Card With Bluetooth Send a copy of a Contacts entry to another Bluetooth device Use the Up Down navigation keys to highlight an option then press the key The highlighted option s sub menu appears...

Страница 56: ...highlight one of the following fields Mobile 1 Home Work E Mail 1 Group Ringtone Mobile 2 Fax E Mail 2 4 Enter a phone number in the highlighted field 5 Repeat steps 3 and 4 as needed 6 Press the key...

Страница 57: ...or input from you Use the Up Down navigation keys to highlight the desired option then press the key 5 When you re finished changing the contents of a field press the key Your changes are saved and a...

Страница 58: ...en you re finished entering information press the key to store the number to Contacts Pause Dial from Contacts 1 If you stored the number using 2 second pause s simply recall the number from Contacts...

Страница 59: ...l photos See Using My Images Gallery on page 103 for more information 4 Use the Up Down navigation keys to highlight the picture that you wish to assign to the Contacts entry If there are no pictures...

Страница 60: ...d option then press the key The My Ringtones or the My Sounds file list appears in the display 5 Use the Up Down navigation keys to highlight the ringtone or sound that you wish to assign to the Conta...

Страница 61: ...ntry then press the key 3 Enter a name for the new entry see Entering Text on page 44 for more information 4 Press the key The new entry is saved to your Contacts list Add to an Existing Entry 1 Use t...

Страница 62: ...s entry assigned to Location 35 press then press and hold the key 2 touch dialing To speed dial the Contacts entry assigned to Location 235 press press then press and hold the key 3 touch dialing You...

Страница 63: ...umber assignment 6 Press the Yes left soft key to save your Speed Dial assignment and return to the Add New Entry screen Note Press the No right soft key to discard the assignment and return to the Sp...

Страница 64: ...New Edit Contact Option To add a Contact to a Group using either the Add New Contact option or the Edit Contact option do the following 1 Create a Contacts entry see Adding a New Contacts Entry on pa...

Страница 65: ...hlight Add then press the key The Add Contacts screen appears in the display showing a list of Contacts entries 4 Do one of the following Use the Up Down navigation keys to highlight an entry you want...

Страница 66: ...ve completed your changes to the Group name press the SAVE key Group Renamed appears in the display followed by the Group List screen showing your renamed Group Add a New Group The New option lets you...

Страница 67: ...e No right soft key to retain the Group Deleting a Contacts Entry 1 Find the Contacts entry you want to delete See Finding a Contacts Entry on page 50 for more information 2 Use the Up Down navigation...

Страница 68: ...dby mode press the MENU left soft key then press for Contacts and for Memory Info The Memory Info Contacts screen appears in the display showing the amount of memory Used and remaining Free for Contac...

Страница 69: ...rmation contact your Wireless Carrier Accessing metro Mobile Shop 1 Open the QWERTY keypad Note metro is only accessible using the QWERTY keypad 2 In standby mode do one of the following to launch met...

Страница 70: ...downloaded applications between available folders Manage Apps View used and available memory Main Menu View Select whether you wish to view the main Mobile Shop menu in a list or icon format View Log...

Страница 71: ...y remove apps that are no longer needed When you remove an app you cannot use the application unless you purchase it again To remove an app choose Settings Manage Apps Then select the app you want to...

Страница 72: ...y Mode Receive Picture Messages Message Boxes Erase Messages Message Settings This section explains how to send or receive different types of messages This section also describes the features and func...

Страница 73: ...of the message 2 Enter the phone number or e mail address of the recipient then press the key The Text appears in the display 3 Enter the text content of your message using the keypad See Entering Tex...

Страница 74: ...y Receive Messages While in a Call When you receive a message while in a call New Message appears in the display along with the closed envelope icon The date and time of the message also appear in the...

Страница 75: ...Down navigation key until the Text field is highlighted then enter the message text using the keypad See See Entering Text on page 44 for more information 7 Your new picture appears in the Pic field...

Страница 76: ...the send status Send Picture Messages in Standby Mode Send Picture messages to recipients with a compatible phone or other device and accompany the Picture message with a voice memo ring tone or downl...

Страница 77: ...ou are returned to the Create Pic Msg screen with the selected picture in the Pic field 7 If you wish to insert a sound into your Picture message use the Down navigation key to highlight the Sound fie...

Страница 78: ...ages When you receive a Picture Message in standby mode the ringer sounds unless turned off and New Message appears in the display along with the closed envelope icon The date and time of the message...

Страница 79: ...is message to another recipient Reply With Copy Compose and send a reply message to the originator of the received message and include a copy of the original message Save Sound Save the sound file inc...

Страница 80: ...the highlighted message Add To Contacts Save the sender s number to your Contacts Message Info Shows message delivery status addressee size and so on Extract Calls the sender of the received message...

Страница 81: ...ar in the display Forward Send the highlighted message to another recipient Save Quick Text Save the message text as Quick Text for insertion into other messages Lock Unlock Block permit erasure of th...

Страница 82: ...e that have been composed but never sent You can return to the Draft Box at any time to view edit or send a draft message Create a Draft Message 1 In standby mode press the Messages Down navigation ke...

Страница 83: ...into your message text Save As Draft Save the message to your Drafts box Priority Level Choose High or Normal Validity Period Enter the Date when this message will cease to be valid then use the Left...

Страница 84: ...acts Save the recipient s number or e mail address to your Contacts 4 Use the Up Down navigation keys to highlight an option Press the key to perform the function for the highlighted option Managing D...

Страница 85: ...listen to your messages Listen Later Returns you to standby mode where you can later choose to call your mailbox and review your messages 1 Use the Up and Down navigation keys to highlight the desired...

Страница 86: ...key You re prompted to confirm the erasure of all messages in the selected box or in all boxes 4 Press the Yes left soft key to delete the messages Press the No right soft key cancel deleting the mess...

Страница 87: ...message and using the Save Quick Text option in the Options menu See Review Messages in the Outbox on page 78 for more information 3 Enter change the text content of your Quick Text using the keypad S...

Страница 88: ...On Off With Auto Receive On Picture messages automatically download and display as they are received With Auto Receive Off you are prompted to download Picture messages Signature Create a signature wh...

Страница 89: ...Each time you launch MetroWEB your phone connects to the Internet and the service indicator icon appears in the display Stored Web Content MetroWEB ends an Internet connection after a certain period o...

Страница 90: ...EB presents on screen items in any of the following ways Text or numeric input Links embedded in content Numbered options some may not be numbered Simple text You can act upon options or links by usin...

Страница 91: ...r symbol entered Press and hold to completely clear the display SHIFT Key Press before entering text to enable uppercase characters Spacebar Press to insert a space when entering text Number 1 thru 0...

Страница 92: ...cess your Contacts list and open Tools To access your phone s voice recognition do the following 1 In standby mode press the MENU left soft key then press for Voice SVC The following options appear in...

Страница 93: ...on your phone You can also dial any telephone number even if it is not stored in your contact list by saying the digits in the number See Voice Dialing on page 24 for more information Send Text Lets y...

Страница 94: ...is only one choice Always Off VoiceSignal never displays a choice list 3 Press the key or the OK left soft key to accept the new setting Press the key to discard the new setting and return to the Voic...

Страница 95: ...s reset digit adaptation to its original state as described below Adapt Digits To adapt digit dialing do the following 1 In standby mode press the MENU left soft key then press for Voice SVC for Voice...

Страница 96: ...u to confirm digit rest 3 Press the OK left soft key to reset your digit adaptation or press the Back right soft key to cancel Sound Sound lets you specify what if any text prompts you want your phone...

Страница 97: ...VoiceSignal 2 Use the Up Down navigation keys to highlight the option you want then press the key or the OK left soft key to save and exit Press the key to discard the new setting and return to the V...

Страница 98: ...pictures display them on your phone s vivid color display and instantly share them with family and friends With Mobile Shop you can download personalized ringtones pictures and more For more informati...

Страница 99: ...standby mode by press the MENU left soft key then press for Multimedia and for Camera 2 Point the camera lens at your subject 3 Using the display as a viewfinder press the key when the image that you...

Страница 100: ...of the image currently appearing on the display Options Pressing the Right soft key opens a pop up menu of camera settings Camera Screen Icons Camera Indicates that your phone is in Camera mode Night...

Страница 101: ...turn to default values Brightness 1 In camera mode change the brightness of your pictures using the Up and Down navigation keys Options are 4 4 2 Press the key to take the picture Zoom in on a Subject...

Страница 102: ...ings 2 Use the Left and Right navigation keys to highlight Self Timer The following options appear in the display Off 2 Seconds 5 Seconds 10 Seconds 3 Use the Up Down navigation keys to highlight the...

Страница 103: ...y setting then press the key The camera applies the selected Quality setting to your next picture Resolution 1 In camera mode press the Options right soft key The options menu bar appears in the displ...

Страница 104: ...ts 3 Use the Up Down navigation keys to highlight one of the White Balances then press the key the camera applies the selected White Balance setting to your next picture Color Effects Color Effects le...

Страница 105: ...the Left and Right navigation keys to highlight Settings 3 Use the Up and Down navigation keys to highlight Shutter Sound then press the key The following options appear in the display Off No Shutter...

Страница 106: ...r and as image IDs for your contacts 1 In standby mode press the MENU left soft key then press for Multimedia and for My Images A multiple page matrix of thumbnail views of saved photos and images app...

Страница 107: ...to show title and file type for the highlighted ringtone 4 Press the key to return to the previous menu or press the key to return to standby mode Using My Sounds Gallery My Sounds lets you record an...

Страница 108: ...l unlocked voice memos Sound Info Shows the title size type and date for the file 5 When you highlight a melody file you have the following options Press the PLAY key to hear the ringtone Press the Op...

Страница 109: ...nts set an alarm perform simple math calculations and more Note Although the procedures in this section are written for the phone keypad you can also perform these procedures using the QWERTY keypad A...

Страница 110: ...ogy headset To turn Bluetooth support on From the Tools menu press for Bluetooth for Blue tooth Settings and for Enable Bluetooth set to on and the black Bluetooth On icon appear in the display To tur...

Страница 111: ...nd connecting to it are complete Registered List This menu provides a list of Bluetooth wireless technology devices discovered by your handset 1 From the Tools menu press for Bluetooth The following o...

Страница 112: ...on Bluetooth Settings Enable Disable Selecting this option turns Bluetooth on or off For more information see Turn Bluetooth On Off on page 107 Discovery Mode Allows other users to see your accessibil...

Страница 113: ...e VIEW key to display the specifics of the highlighted event The following options are available Press the Edit left soft key to change the event details See Add a New Event on page 110 for more infor...

Страница 114: ...date for the event 5 To set the Start Time Use the keypad to enter the time for the event Use the Left and Right navigation keys to select AM or PM 6 Repeat Steps 4 and 5 for the End Date and End Time...

Страница 115: ...ated in the lower right corner of the display 4 Use the Up Down navigation keys to highlight the entry mode that you wish to use or press to exit the pop up menu Note See Entering Text on page 44 for...

Страница 116: ...to change or turn off completely Note The alarm doesn t function when the phone is turned off If the time for an alarm that was set for Once has elapsed while the phone is off the alarm occurs at the...

Страница 117: ...lence the alarm use the Navigation key to highlight Snooze or Dismiss and press If the alarm was set as a Daily alarm the alarm icon remains in the top of the display If the alarm was set as a Once on...

Страница 118: ...e following Press the key to set the selected time zone as the default time zone for your phone EST EDT New York EST EDT Montreal EST EDT Boston Caracas Brasilia Mid Atlantic Cape Verde London Paris R...

Страница 119: ...er the first number in your equation using the keypad Numbers can be up to 9 digits long and can include a decimal point followed by up to 2 more digits Press to enter a decimal point Press to change...

Страница 120: ...ay 2 Press the key to start stop and resume the stopwatch count 3 Press the Record left soft key at the start of each succeeding event lap to record the completion time for the previous event lap You...

Страница 121: ...keys to highlight the conversion feature you wish to use then press the key 3 Use the Navigation key to highlight and select the units to be converted From and To 4 Enter the quantity you want conver...

Страница 122: ...adding exchange rates for these currencies To add a currency and its exchange rate to the Currency Converter do the following 1 From the Tools menu press for Converter and for Currency 2 Press the Ra...

Страница 123: ...own navigation keys to highlight the user added currency exchange rate to be erased 4 Press the Erase right soft key You are prompted to confirm the erasure Note The Erase right soft key is undefined...

Страница 124: ...hlight the Tip field 4 Use the keypad to enter a tip percentage 5 If needed press the Down navigation key to highlight the Paying field 6 Use the keypad to enter the number of persons paying 7 The amo...

Страница 125: ...this section are written for the phone keypad you can also perform these procedures using the QWERTY keypad Accessing Your Phone s Settings To launch the Settings menu In standby mode press the MENU...

Страница 126: ...le in standby mode Clock Format Choose whether the time and date appear in the Main and Front displays on your phone in optional digital or analog clock face style or in the default digital style Them...

Страница 127: ...ock face style or in the default digital style 1 From the Settings menu press for Display Settings and for Clock Format The following clock format options appear in the display Digital Time date and d...

Страница 128: ...Size the following Size options appear in the display Enable Zoom out Disable Zoom out Use the Up and Down navigation keys to highlight the desired setting and press the key to save the selected sett...

Страница 129: ...e internal display backlight remains on after a period of inactivity Optional settings are 7 seconds 15 seconds 30 seconds Always On and Always Off Keypad Sets the amount of time the keypad backlight...

Страница 130: ...highlight the desired option then press the key 3 Use the Navigation key or the Up and Down volume keys on the right side of your phone to select the volume level Ringer Off Low Low Medium Medium Med...

Страница 131: ...sconnect a call Power On Off Play power on and power off melodies 2 Use the Up Down navigation keys to highlight a sub menu then press the key The following options appear in the display On Off 3 Use...

Страница 132: ...Retry The following options appear in the display Off Every 10 Seconds Every 30 Seconds Every 60 Seconds 2 Use the Up Down navigation keys to highlight the desired setting then press TTY Mode Your ph...

Страница 133: ...of voice security Standard or Enhanced your phone will use Tip You can change your Voice Privacy setting during a call by using the In Use Menu options See In Use Menu on page 29 for more information...

Страница 134: ...e Settings and for Airplane Mode The following options appear in the display On Disables the radio transmitter and receiver and the Bluetooth interface in your phone Tip If you need to make an emergen...

Страница 135: ...s except to emergency and secret numbers Important If you change the NAM1 setting after setting the phone to lock upon power up and did not program a number into NAM2 you won t be able to access your...

Страница 136: ...ne does not allow you to view the lock code for obvious security reasons If you change the lock code be sure to write down or memorize the new code Emergency You have the option of storing up to three...

Страница 137: ...Security menu appears in the display 3 Press for Emergency 4 Press or to select one of the three emergency numbers 5 Enter the emergency number up to 32 digits in length 6 Press to save the number th...

Страница 138: ...splay 2 Enter the four digit lock code using the keypad Note The default lock code is the last four digits of your mobile phone number The Enter Code prompt disappears and the Security menu appears in...

Страница 139: ...all Off 6 Use the Up Down navigation keys to highlight the Restriction you want then press the key NAM Selection NAM Selection allows you to set your preferred system Contact your wireless carrier fo...

Страница 140: ...the Clock Set feature is disabled The network adjusts time and date automatically 1 From the Settings menu press for Phone Settings and for Clock Set The following options appear in the display Set T...

Страница 141: ...dby mode press the first few numeric keys that correspond to the letters of the contact s name For example to search for Sally you would enter 2 Press the Up navigation key The contact name is highlig...

Страница 142: ...ess for Memory Info The following options appear in the display Memory Usage Shows Total phone memory total memory Available and memory quantities used to store Photos Ringtones Sounds and Application...

Страница 143: ...Info menu Icon Glossary This option causes the ICON GLOSSARY list to appear in the display and show the icons that can appear in the display and the names of the icons 1 From the Settings menu press f...

Страница 144: ...on Product Performance Availability of Various Features Ring Tones Battery Standby and Talk Time Battery Precautions Care and Maintenance This section outlines the safety precautions associated with u...

Страница 145: ...he phone transmitting at its highest certified power level in all tested frequency bands Although the SAR is determined at the highest certified power level the actual SAR level of the phone while ope...

Страница 146: ...nsumer type type do group mobilephones type mobilephones for more information UL Certified Travel Adapter The Travel Adapter for this phone has met applicable UL safety requirements Please adhere to t...

Страница 147: ...ss phones There is no proof however that wireless phones are absolutely safe Wireless phones emit low levels of radio frequency energy RF in the microwave range while being used They also emit very lo...

Страница 148: ...l Safety and Health Environmental Protection Agency Federal Communications Commission Occupational Safety and Health Administration National Telecommunications and Information Administration The Natio...

Страница 149: ...nd primary brain cancer glioma meningioma or acoustic neuroma tumors of the brain or salivary gland leukemia or other cancers None of the studies demonstrated the existence of any harmful health effec...

Страница 150: ...The initial research will include both laboratory studies and studies of wireless phone users The CRADA will also include a broad assessment of additional research needs in the context of the latest r...

Страница 151: ...nes there is no reason to believe that hands free kits reduce risks Hands free kits can be used with wireless phones for convenience and comfort These systems reduce the absorption of RF energy in the...

Страница 152: ...phone EMI FDA has tested wireless phones and helped develop a voluntary standard sponsored by the Institute of Electrical and Electronic Engineers IEEE This standard specifies test methods and perform...

Страница 153: ...hands free device If possible add an additional layer of convenience and safety to your wireless phone with one of the many hands free accessories available today 3 Position your wireless phone within...

Страница 154: ...gency number The wireless industry reminds you to use your phone safely when driving For more information please call 1 888 901 SAFE or visit our web site www wow com com Important If you are using a...

Страница 155: ...to listen to your portable device in a noisy environment you noise cancelling headphones to block out background environmental noise By blocking background environment noise noise cancelling headphone...

Страница 156: ...en it may cause interference or danger When connecting the phone or any accessory to another device read its user s guide for detailed safety instructions Do not connect incompatible products As with...

Страница 157: ...tp www fcc gov oet rfsafety rf faqs html Hearing Aid Compatibility with Mobile Phones When some mobile phones are used near some hearing devices hearing aids and cochlear implants users may detect a b...

Страница 158: ...en any regulations posted in these areas instruct you to do so Hospitals or health care facilities may be using equipment that could be sensitive to external RF energy Vehicles RF signals may affect i...

Страница 159: ...al strength Emergency calls may not be possible on all wireless phone networks or when certain network services and or phone features are in use Check with local service providers To make an emergency...

Страница 160: ...uipment and can be broken Avoid dropping hitting bending or sitting on it Other Important Safety Information Only qualified personnel should service the phone or install the phone in a vehicle Faulty...

Страница 161: ...ansmitter and receiver When it s turned on it receives and transmits radio frequency RF signals When you use your phone the system handling your call controls the power level This power can range from...

Страница 162: ...us safety hazards If you use the phone near the network s base station it uses less power talk and standby time are greatly affected by the signal strength on the cellular network and the parameters s...

Страница 163: ...a cooking surface cooking appliance iron or radiator Do not get your phone or battery wet Even though they will dry and appear to operate normally the circuitry could slowly corrode and pose a safety...

Страница 164: ...rms up to its normal operating temperature moisture can form inside the phone which may damage the phone s electronic circuit boards Do not drop knock or shake the phone Rough handling can break inter...

Страница 165: ...This Limited Warranty is conditioned upon proper use of Product by Purchaser This Limited Warranty does not cover a defects or damage resulting from accident misuse abuse neglect unusual physical ele...

Страница 166: ...will promptly repair or replace the defective Product SAMSUNG may at SAMSUNG s sole option use rebuilt reconditioned or new parts or components when repairing any Product or replace Product with a reb...

Страница 167: ...S ARISING FROM ANY TORT INCLUDING NEGLIGENCE OR GROSS NEGLIGENCE OR FAULT COMMITTED BY SAMSUNG ITS AGENTS OR EMPLOYEES OR FOR ANY BREACH OF CONTRACT OR FOR ANY CLAIM BROUGHT AGAINST PURCHASER BY ANY O...

Страница 168: ...such as dealer advertising or presentation whether oral or written do not constitute warranties by SAMSUNG and should not be relied upon Precautions for Transfer and Disposal If data stored on this de...

Страница 169: ...MSUNG 726 7864 Important If you are using a handset other than a standard numeric keypad dial the numbers listed in brackets Phone 1 888 987 HELP 4357 2007 Samsung Telecommunications America All right...

Страница 170: ...25 Battery 5 charging 6 Low battery indicator 7 removal 5 Travel adapter 6 Brightness pictures 98 Buying new apps 68 C Calculator 116 Calendar view an event 109 Call Answer 128 Call answer 28 Call Ans...

Страница 171: ...124 Backlight 126 Banner 125 Dialing Font 125 Wallpaper 123 Draft folder 79 Draft messages 79 E Edit contacts name and numbers 53 Emergency 133 Emergency s in lock mode 134 Emergency numbers 133 End k...

Страница 172: ...g Links 87 Using metroWeb 87 Missed calls menu 31 Mobile Shop 66 Shopping and downloading 66 Mode call answer 18 camera 21 input 18 lock 18 silent 20 standby 19 talk 19 vibrate 20 Msg setting sub menu...

Страница 173: ...nswer 129 Auto Retry 129 Backlight 126 Banner 125 Data Settings 130 Dialing Font 125 Language 131 Location Setting 122 Ringer Type 127 Theme 124 TTY Mode 129 Voice Privacy 130 Volume 127 Wallpaper 123...

Страница 174: ...try 53 Finding a Contacts entry 50 Understanding Your Phone 9 Closed View of Your Phone 10 Command Keys 15 Display Screen 16 Features of Your Phone 9 Open View of Your Phone 12 Using Abc Mode 47 V Ver...

Отзывы: