Quick Setup Guide
(For India Only)
This product is RoHS compliant.
For more information on safe disposal and recycling visit our
website www.samsung.com/in or contact our Helpline numbers -
18002668282, 180030008282.
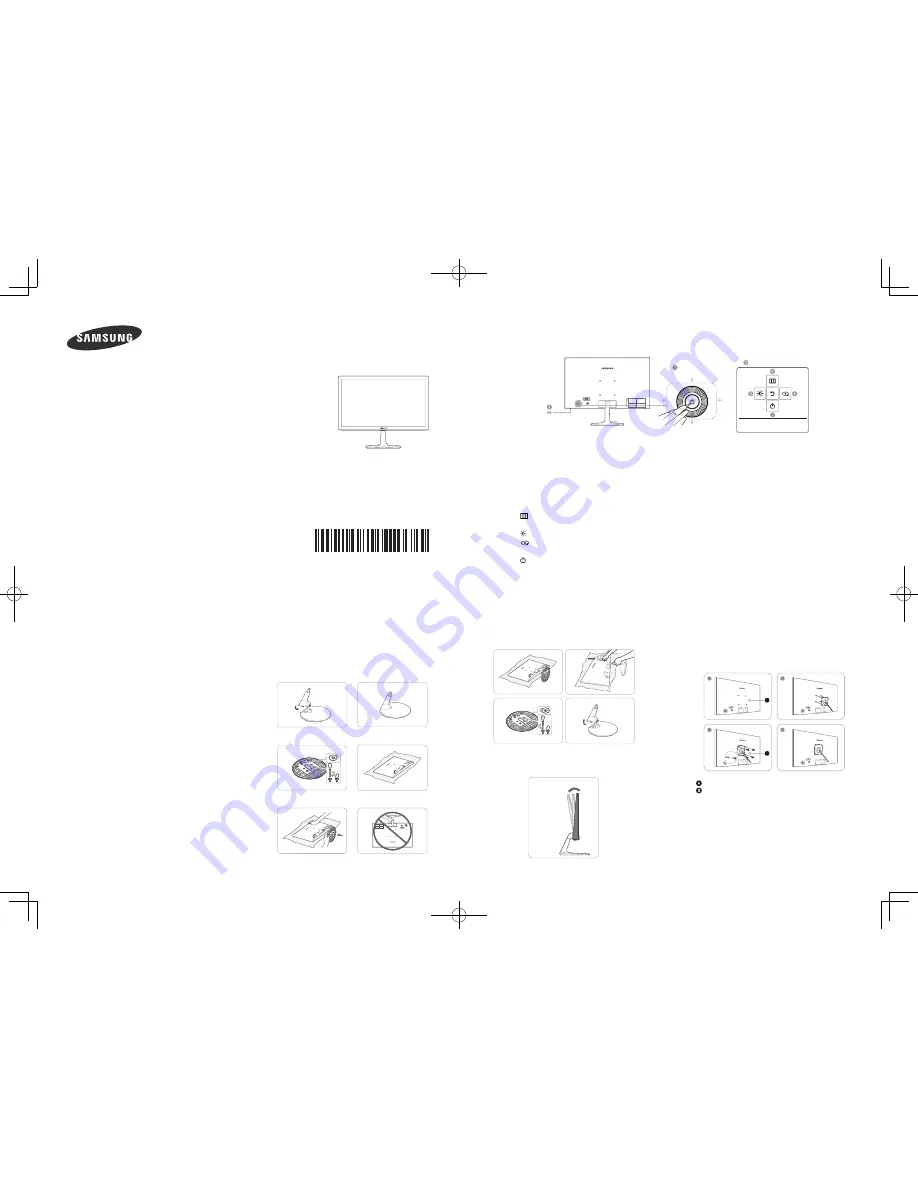
| Control Panel
The functions available may vary depending on the product model.
The color and shape of parts may differ from what is shown.
Specifications are subject to change without notice to improve quality.
1
JOG Button
Multi directional button that helps navigate.
The JOG button is located on the rear left side of the product. The button can be used to move up, down, left or right, or as Enter.
2
This LED is power status indicator and works as
- Power on (Power button): Off / Power saving mode: Blinking / Power Off (Power button): On
3
Function Key
Guide Press the JOG button when the screen is turned on. The Function Key Guide will appear.
To access the onscreen menu when the guide is displayed, press the corresponding direction button again.
4
Select [
] by moving the JOG button in the function key guide screen.
The OSD (On Screen Display) of your Monitor’s feature appears.
4
Select [
] to adjust the brightness by moving the JOG button in the Function Key Guide screen.
6
Select [
] by moving the JOG button in the function key guide screen.
Press to enable or disable
Eye Saver Mode
which is also Low Blue Light Mode.
7
Select [ ] to turn the Monitor off by moving the JOG button in the function key guide screen.
RGB IN
DC14V
LEFT
UP
RIGHT
PRESS(ENTER)
DOWN
Return
Power LED
JOG Button
Function Key Guide
| Checking the Components
•
Contact the dealer from whom you purchased the
product if any item is missing.
•
The appearance of the components may differ from
the images shown.
Quick Setup Guide
Warranty card
(Not available in some
locations)
Regulatory guide
User manual (optional)
Power adapter
(Integrated) (optional)
Power adapter
(Detachable) (optional)
Power cable
(Only provided with
the detachable power
adapter.)
D-SUB cable (optional)
Stand base
Stand neck
| Attaching the Stand
•
Before assembling the product, place the product
down on a flat and stable surface so that the screen is
facing downwards.
•
The exterior may differ depending on the product.
| Removing the Stand
•
The exterior may differ depending on the product.
| Adjusting the Product Tilt
•
The exterior may differ depending on the product.
| Installing a Wall-mount
Kit or Desktop Stand
•
Power the product off and remove the power cable
from the power socket.
Attach the wall-mount kit or desktop stand here
Bracket (sold separately)
Align the grooves and tightly fasten the screws on the
bracket on the product with the corresponding parts on
the wall-mount kit or desktop stand you want to attach.
1
2
3
4
-2.0° (±2.0°) ~ 22.0° (±2.0°)
RGB I
N
DC14
V
1
2
3
4
5
RGB IN
DC14V
A
B
RGB IN
DC14V
2
4
1
3
2002460454T
QSG_India_20150127.indd 1
2016/1/28 21:21:41


