background image

Español  19

Horno de g

as

Funciones de no cocción

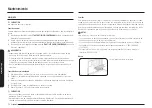
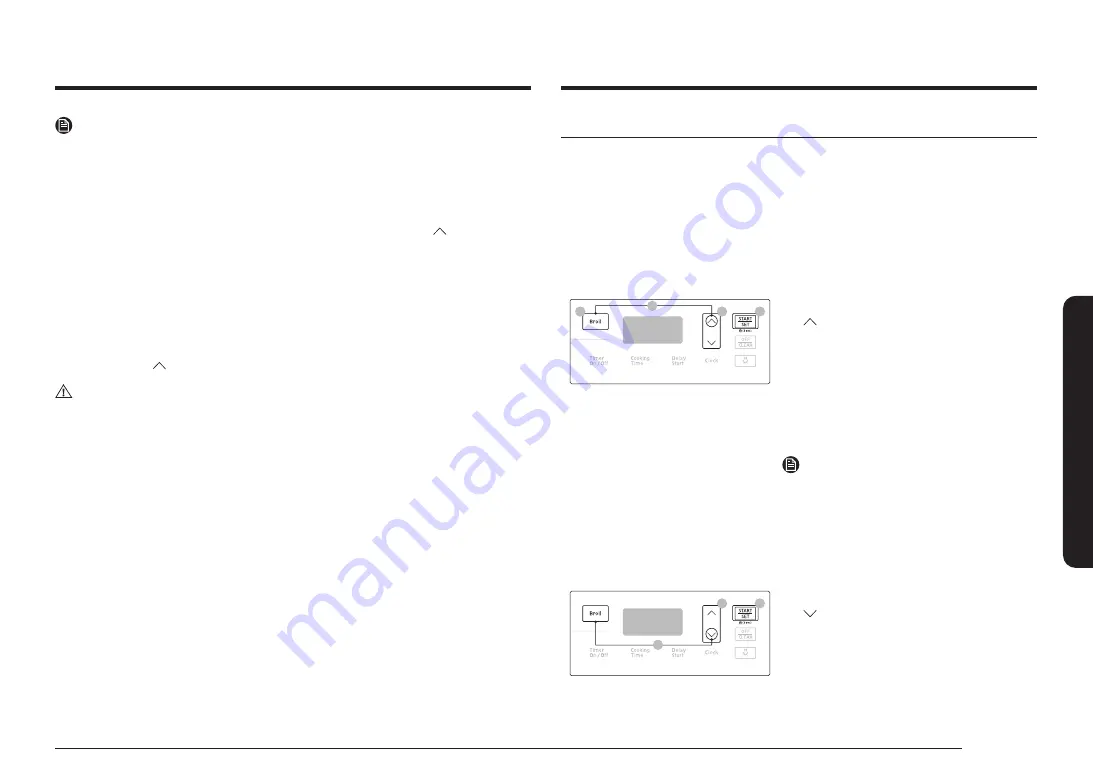
Ajuste de temperatura

La temperatura del horno ya ha sido calibrada en la fábrica. Al principio, cuando utilice 
el horno, siga las indicaciones de tiempo y temperatura recomendadas para las recetas. 
Si considera que el horno está demasiado caliente o demasiado frío, puede recalibrar la 
temperatura. Antes de recalibrarla, pruebe una receta utilizando un ajuste de temperatura 
más alto o más bajo que el recomendado. Los resultados de horneado de esa manera 
probablemente le sirvan de guía para decidir la magnitud del ajuste requerido. La temperatura 
del horno puede ajustarse en ±35 °F (±19 °C ).

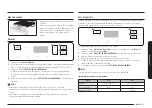
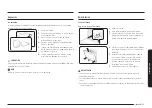
02

03

04

01

1. 

Presione el botón 

Broil (Asar a la parrilla)

 y  

 (Arriba)

 simultáneamente por 3 segundos.

2. 

Presione el botón 

Broil (Asar a la parrilla)

 para 

seleccionar una temperatura más alta (+) o 
más baja (-).

3. 

Ingrese un valor de temperatura de ajuste  
(0-35) usando los botones de flecha.

4. 

Presione el botón 

START/SET  

(INICIO/CONFIGURAR)

 para guardar los cambios.

NOTA

Este ajuste no afecta a la temperatura de asar a la 
parrilla y se conserva en la memoria después de 
un corte de energía eléctrica.

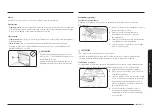
Sonido

Desactivar/activar el sonido.

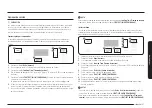
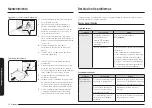
02

03

01

1. 

Presione el botón 

Broil (Asar a la parrilla)

 y  

 (Abajo)

 simultáneamente por 3 segundos.

2. 

Presione los botones de flecha para 
seleccionar la activación o desactivación del 
sonido.

3. 

Presione el botón 

START/SET  

(INICIO/CONFIGURAR)

 para guardar los cambios.

NOTAS

• 

Puede cambiar la temperatura del horno una vez comenzado el horneado, pero la pantalla no 
cambiará ni emitirá sonidos. Luego de cambiar la temperatura, el horno tarda 15 segundos 
en reconocer el cambio.

• 

Puede apagar el horno en cualquier momento presionando 

OFF/CLEAR (APAGAR/BORRAR)

Sin embargo, esto no desactiva la opción Shabat.

• 

Para desactivar la opción Shabat, mantenga presionado 

Bake (Hornear)

 y 

 (Arriba)


simultáneamente por 3 segundos.

• 

Puede programar el tiempo de cocción antes de activar la opción Shabat.

• 

Después de un corte de energía, el horno no reanudará el funcionamiento automáticamente. 
"SAb" aparecerá en el panel de control, pero el horno no se encenderá nuevamente. Los 
alimentos se pueden retirar con seguridad del horno, pero no se debe desactivar la opción 
Shabat y encender el horno de nuevo hasta que finalice el Shabat/las fiestas.

• 

Después de la celebración del Shabat, apague la opción Shabat manteniendo presionado 

Bake (Hornear)

 y 

 (Arriba)

 simultáneamente por al menos 3 segundos.

PRECAUCIÓN

• 

No intente activar ninguna otra función excepto la de Hornear cuando la opción Shabat está activa. 
Solo los siguientes botones funcionarán correctamente: los botones de flecha, 

Bake (Hornear)

Oven 

START/SET (INICIO/CONFIGURAR Horno)

 y Oven 

OFF/CLEAR (APAGAR/BORRAR Horno)

.

• 

No abra la puerta del horno ni cambie la temperatura del horno durante alrededor de 30 minutos 
después de haber iniciado la opción Shabat. Deje que el horno alcance la temperatura fijada.  
El ventilador del horno funciona solamente cuando aumenta la temperatura del horno.

Содержание NX58M3310S Series

Страница 1: ...Gas Range User manual NX58K3310S NX58M3310S ...

Страница 2: ...an tip the range and be killed b Verify the anti tip device has been properly installed and engaged at rear right or rear left of the range bottom c If you move the range and then move it back into place ensure the anti tip device is re engaged at the right or left rear of the range bottom d Do not operate the range without the anti tip device in place and engaged e Failure to do so can result in ...

Страница 3: ...afety 7 Oven safety 9 Storage drawer safety 9 Overview 10 Layout 10 What s included 10 Control panel 11 Clock 11 Kitchen timer 11 Gas range 12 General cooktop instructions 12 Oven vent cooling vent 12 Cookware 12 Gas burners 13 Ignition 14 Gas oven 14 General oven instructions 14 Cooking mode 15 Baking 15 Broiling 15 Using the oven racks 16 Cooking options 17 Non Cooking functions 19 Maintenance 2...

Страница 4: ...nge including but not limited to oven burners surface burners or interior surfaces during or immediately after cooking Know the location of the gas shut off valve and how to shut it off Make sure the anti tip device is properly installed on the range See the installation instructions for more information Do not let children near the range Do not let children go into the range or onto the range Do ...

Страница 5: ...eighbor s phone Follow the gas supplier s instructions If you cannot reach your gas supplier call the fire department When disposing of the range cut off the power cord and remove the door to prevent children and animals from getting trapped Unplug or disconnect power before servicing Make sure all meat and poultry is cooked thoroughly Meat should always be cooked to an internal temperature of 160...

Страница 6: ...ng of the appliance must be conducted according to the manufacturer s instructions Do not use a flame to check for gas leaks Use a brush to spread a soapy water mixture around the area you are checking If there is a gas leak you will see small bubbles in the soapy water mixture at the leak point Electrical and grounding safety WARNING To reduce the risk of fire electric shock personal injuries and...

Страница 7: ...ur range is correctly installed and adjusted by a qualified service technician or installer for the type of gas natural or LP you will use For your range to utilize LP gas the installer must replace the 5 surface burner orifices and 2 oven orifices with the provided LP orifice set and reverse the GPR adapter These adjustments must be made by a qualified service technician in accordance with the ma...

Страница 8: ... the burners when they are on Turn off the burners when you change a pan or pot To warm liquid such as sauces stir it while warming When you set a burner to simmer do not turn the knob quickly Make sure the flame stays on Do not place any objects other than cookware on the cooktop This cooktop is designed for use with a wok or wok ring attachment To flame food you must have a ventilation hood When...

Страница 9: ...ot damage move or clean the door gasket Do not spray water on the oven glass while the oven is on or just after you have turned it off Do not use aluminium foil or foil liners anywhere in the oven Do not use aluminium foil or similar material to cover any holes or passages in the oven bottom or to cover an oven rack This can cause carbon monoxide poisoning Aluminum foil linings may also trap heat ...

Страница 10: ...800 726 7864 or visit our on line parts web site at www samsungparts com Overview Layout 10 08 09 02 06 05 03 04 01 07 01 Display 02 Surface burner knobs 5 pcs 03 Surface burners 04 Oven Vent 05 Removable oven door 06 Storage drawer 07 Oven light 08 Oven rack system 09 Broil oven burner 10 Bake oven burner NOTE If you need a part marked with a you can buy it from the Samsung Contact Center 1 800 7...

Страница 11: ...ount of time you want in minutes or hours and minutes 3 Press the Timer On Off button to start the timer Control panel 08 09 11 10 12 13 02 03 01 04 06 05 07 01 Display Shows the time of day oven temperature whether the oven is in the bake or broil mode and displays the time set for the timer or for automatic oven operations 02 Bake Bake food using the oven burner 03 Broil Broil food using the upp...

Страница 12: ...ists staining Cast Iron A poor conductor but retains heat very well Enamelware Heating characteristics depend on the base material Glass A slow heat conductor Use only glass cookware that is specified for range top cooking or oven use Gas range General cooktop instructions STEP 1 Put all ingredients into a cooking container pan pot etc STEP 2 Place the container on a surface burner STEP 3 Ignite t...

Страница 13: ...l purpose cooking Left Rear LR 9 500 BTU General heating Low simmering General food casseroles tomato sauce General purpose cooking Tomato sauce needs to be stirred while it is simmering Size limitations CAUTION Do not place a small pan or pot with a bottom diameter of about 6 inches or less on the center grate This cookware may tip over Use the rear burners for this small sized cookware 6 inches ...

Страница 14: ...e burner you want to light 2 Push in the control knob for that burner and then turn it to the LITE position Turn on the grill lighter to ignite the burner 3 After the burner is lit turn the control knob to adjust the flame level Flame level The flames on the burners should always stay under the cookware and should not extend beyond the cookware bottom at any time WARNING Flames larger than the coo...

Страница 15: ...ture Min Max Bake 175 F 80 C 550 F 285 C Broil LO HI Keep Warm 3 hours Cooking mode Make sure to close the door before you start cooking If you leave the door open for 20 30 seconds while the oven is in the baking or broiling modes the oven burner shuts off To restart the burner close the door Baking 01 02 03 04 1 Press the Bake button 2 If necessary use the arrow buttons to change the default tem...

Страница 16: ...ack positions The rack positions are delineated by rack guides which support the racks Each rack guide has a stop that prevents racks from loosening during the oven s operation Each rack has stoppers that need to be placed correctly on the rack guides The stoppers prevent the racks from accidently coming out of the oven completely when you pull the racks out 07 06 05 04 03 02 01 Type of food Rack ...

Страница 17: ...en press the START SET button Cooking options CAUTION Food that can easily spoil such as milk eggs fish poultry and meat should be chilled in a refrigerator before they are placed in the oven Even when chilled they should not stand for more than 1 hour before cooking begins and should be removed promptly when cooking is completed Timed Cook Timed cooking sets the oven to cook foods at a set temper...

Страница 18: ...th option 01 02 03 04 1 Press the Bake button 2 Enter a desired temperature using the arrow buttons The default temperature is 350 F 3 Press the START SET pad The display temperature changes after the oven temperature reaches 175 F 4 Press the Bake and Up buttons simultaneously for 3 seconds to display SAb Once SAb appears the oven control no longer beeps or displays any further changes Keep Warm ...

Страница 19: ...s NOTES You can change the oven temperature once baking starts but the display will not change or beep After changing the temperature it takes 15 seconds before the oven recognizes the change You can turn off the oven at any time by pressing OFF CLEAR However this doesn t deactivate the Sabbath option To deactivate the Sabbath option hold down Bake and Up simultaneously for 3 seconds You can set t...

Страница 20: ... 2 Clean the control panel using a soft cloth dampened with plain water warm soapy water or glass cleaner Do not spray cleansers directly onto the control panel 3 When done press and hold the START SET button again for 3 seconds WARNING Make sure the control panel turns off and all surfaces of the gas oven are cool before cleaning Otherwise you can get burned If the gas oven has been moved away fr...

Страница 21: ...n the cooktop surface using a soft cloth If food spills run into gaps of the burner components remove the burner cap and the head and then wipe up the spills 4 When you are done cleaning reinsert the burner components and then put the burner grates back into position Door Do not remove the inner gasket of the oven door for cleaning Inner side Inner surface Clean the inner side of the door manually...

Страница 22: ...an it The gas lines leading to the burner manifolds can be damaged resulting in a fire or system failure Burner grates and components Turn off all surface burners and make sure they have all cooled down 1 3 2 1 Remove the burner grates 2 Remove the burner caps from the burner heads 3 Remove the burner heads from the valve manifolds to reveal the starter electrodes 4 Clean all removable grates and ...

Страница 23: ... the oven door Improper handling could result in physical injury To prevent electric shock make sure the oven is turned off before removing the oven door Replacement Oven light The oven light is a standard 40 watt appliance bulb It comes on when you open the oven door 1 Turn off the oven 2 Make sure the oven and oven light are cool 3 Open the door and remove the glass cover by turning it countercl...

Страница 24: ...oor at the top 2 With the door set at the same angle as the removal position about 5 degrees from vertical slide the hinge arms into the hinge slots at the bottom of the door 3 Open the door fully If you cannot open the door fully the hinge arms are not properly in the hinge slots 4 Lock the hinge arms by pushing them up against the front frame of the oven 5 Close the door and make sure it opens a...

Страница 25: ...d to be adjusted Call for a qualified service technician The gas supply is not properly connected or turned on See the Installation Instructions that came with your range Surface burner Problem Possible cause Action All burners do not light The power cord is not plugged into the electrical outlet Make sure the electrical plug is plugged into a live properly grounded outlet A fuse in your home may ...

Страница 26: ...ormal Apply a small amount of vegetable oil to a paper towel and wipe the edges of the oven racks with the paper towel Problem Possible cause Action The oven temperature is too hot or cold The oven thermostat needs adjustment See page 19 The oven burner will not shut off The oven door lock is turned on The display will show the Lock icon Hold the oven door open and press the START SET button for 3...

Страница 27: ...has been installed improperly The leveling leg s is are damaged or uneven Make sure the floor is level strong and stable If the floor sags or slopes contact a carpenter Check and level the range See the Installation Instructions The kitchen cabinets are not properly aligned and make the range appear to be not level Ensure that cabinets are square and provide sufficient room for installation The di...

Страница 28: ...rding to the directions in the use and care guide are not covered by this limited warranty The cost of repair or replacement under these excluded circumstances shall be the customer s responsibility Visits by an authorized servicer to explain product functions maintenance or installation are not covered by this limited warranty Please contact SAMSUNG at the number below for assistance with any of ...

Страница 29: ... THE CLAIM IS BASED AND EVEN IF SAMSUNG HAS BEEN ADVISED OF THE POSSIBILITY OF SUCH DAMAGES Some states do not allow exclusion or limitation of incidental or consequential damages so the above limitations or exclusions may not apply to you This warranty gives you specific rights and you may also have other rights which vary from state to state SAMSUNG does not warrant uninterrupted or error free o...

Страница 30: ...ISUSE OR INABILITY TO USE THIS PRODUCT THIS LIMITED WARRANTY SHALL NOT EXTEND TO ANYONE OTHER THAN THE ORIGINAL PURCHASER OF THIS PRODUCT IS NONTRANSFERABLE AND STATES YOUR EXCLUSIVE REMEDY Warranty CANADA PLEASE DO NOT DISCARD SAMSUNG GAS RANGE LIMITED WARRANTY TO ORIGINAL PURCHASER This SAMSUNG brand product as supplied and distributed by SAMSUNG ELECTRONICS CANADA INC SAMSUNG and delivered new ...

Страница 31: ...Samsung Electronics Canada Inc 2050 Derry Road West Mississauga Ontario L5N 0B9 Canada 1 800 SAMSUNG 726 7864 and www samsung com ca support English www samsung com ca_fr support French Registration Please register your product online at www samsung com register Questions For questions about features operation performance parts accessories or service call 1 800 SAMSUNG 726 7864 or visit our Web si...

Страница 32: ...R COMMENTS COUNTRY CALL OR VISIT US ONLINE AT U S A Consumer Electronics 1 800 SAMSUNG 726 7864 www samsung com us support CANADA 1 800 SAMSUNG 726 7864 www samsung com ca support English www samsung com ca_fr support French DG68 00773A 08 Scan the QR code or visit www samsung com spsn to view our helpful How to Videos and Live Shows Requires reader to be installed on your smartphone ...

Страница 33: ...Estufa de gas Manual del usuario NX58K3310S NX58M3310S ...

Страница 34: ...ue que el dispositivo anti inclinación haya sido instalado y conectado correctamente en la parte posterior derecha o posterior izquierda de la base de la estufa c Si mueve la estufa y luego la vuelve a colocar en su lugar asegúrese de volver a conectar el dispositivo anti inclinación en la parte posterior derecha o izquierda de la base de la estufa d No opere la estufa sin el dispositivo anti incl...

Страница 35: ...cajón de almacenamiento 9 Descripción general 10 Esquema 10 Elementos incluidos 10 Panel de control 11 Reloj 11 Temporizador de cocina 11 Estufa de gas 12 Instrucciones generales para la cubierta 12 Ventilación del horno orificios de refrigeración 12 Utensilio de cocina 12 Quemadores de gas 13 Ignición 14 Horno de gas 14 Instrucciones generales para el horno 14 Modo de cocción 15 Hornear 15 Asar a...

Страница 36: ...cción o inmediatamente después de cocinar Debe conocer la ubicación de la válvula de cierre del gas y cómo cerrarla si es necesario Asegúrese de que el dispositivo anti inclinación esté correctamente instalado en la estufa Consulte las instrucciones de instalación para obtener más información No permita que los niños se acerquen a la estufa No permita que los niños se metan en la estufa ni trepen ...

Страница 37: ...ufa corte el cable de alimentación y quite la puerta para evitar que niños y animales puedan quedar atrapados Desenchufe o desconecte la alimentación antes de realizar tareas de mantenimiento o reparación Asegúrese de que todas las carnes de res y de ave se cocinen bien La carne de res debe cocinarse siempre a una temperatura interna de 160 F 71 C La carne de ave debe cocinarse siempre a una tempe...

Страница 38: ...el fabricante No utilice una llama para verificar si hay pérdidas de gas Utilice un cepillo para esparcir una mezcla de agua jabonosa alrededor del área que está verificando Si hay una pérdida de gas verá pequeñas burbujas en la mezcla de agua jabonosa en el punto de la pérdida Seguridad de la electricidad y la conexión a tierra ADVERTENCIA Para reducir el riesgo de incendio descarga eléctrica les...

Страница 39: ...dan Si falla el encendido gire la perilla en OFF Apagado y espere hasta que se disipe el gas Asegúrese de que un técnico de servicio o instalador calificado instale y ajuste correctamente la estufa según el tipo de gas natural o LP que utilizará Para utilizar gas LP en su estufa el instalador debe reemplazar los 5 orificios de los quemadores superiores y los 2 orificios del horno con el juego de o...

Страница 40: ... o una olla Cuando caliente líquidos como salsas remueva todo el tiempo Cuando coloque un quemador a fuego lento no gire la perilla rápidamente Asegúrese de que la llama permanezca encendida No coloque objetos sobre la cubierta excepto cuando se trate de recipientes y utensilios de cocina Esta cubierta está diseñada para usar con un wok o con el accesorio del aro para wok Para flambear alimentos d...

Страница 41: ...ie la junta selladora de la puerta No rocíe agua en el vidrio del horno mientras el horno esté encendido o apenas después de haberlo apagado No utilice papel o cubiertas de aluminio en ninguna parte del horno No utilice papel de aluminio ni materiales similares para cubrir orificios o pasajes de la parte inferior del horno ni para cubrir una parrilla del horno Esto puede causar un envenenamiento p...

Страница 42: ...n línea de repuestos www samsungparts com Descripción general Esquema 10 08 09 02 06 05 03 04 01 07 01 Visor 02 Perillas para los quemadores superiores 5 piezas 03 Quemadores superiores 04 Abertura de ventilación del horno 05 Puerta del horno desmontable 06 Cajón de almacenamiento 07 Luz del horno 08 Sistema de parrillas del horno 09 Quemador del horno para asar a la parrilla 10 Quemador del horno...

Страница 43: ...l botón Timer On Off Activar Desactivar temporizador para iniciar el temporizador Panel de control 08 09 11 10 12 13 02 03 01 04 06 05 07 01 Pantalla Muestra la hora del día la temperatura del horno si el horno está en el modo de hornear o de asar a la parrilla y las horas fijadas para el temporizador o para las operaciones automáticas del horno 02 Bake Hornear Hornear los alimentos con el quemado...

Страница 44: ...en el calor Utensilios esmaltados Las características de conducción de calor dependen del material base Vidrio Conductor de calor lento Utilice solo recipientes de vidrio con la especificación de que son aptos para usar sobre quemadores superiores de estufas o en el horno Estufa de gas Instrucciones generales para la cubierta PASO 1 Ponga todos los ingredientes en un recipiente de cocción sartén o...

Страница 45: ...U Calentamiento general Cocción a fuego lento baja Alimentos en general guisos salsa de tomate Cocción de uso general La salsa de tomate debe revolverse durante la cocción a fuego lento Limitaciones de tamaño PRECAUCIÓN No coloque una olla o sartén pequeña con un diámetro de fondo de alrededor de 6 pulgadas o menos en la rejilla central Este utensilio podría volcarse Utilice los quemadores trasero...

Страница 46: ...cender 2 Empuje la perilla de control del quemador y gírela a la posición LITE Encender Encienda el quemador con el encendedor de la parrilla 3 Una vez encendido el quemador gire la perilla de control para ajustar el nivel de la llama Nivel de la llama Las llamas de los quemadores siempre deben permanecer debajo de los recipientes de cocción y no deben extenderse más allá del fondo del utensilio e...

Страница 47: ... Mín Máx Hornear 175 F 80 C 550 F 285 C Asar a la parrilla Baja Alta Mantener caliente 3 horas Modo de cocción Asegúrese de cerrar la puerta antes de empezar a cocinar Si deja la puerta abierta durante 20 30 segundos mientras el horno está en los modos de hornear o asar a la parrilla el quemador del horno se apaga Para reiniciar el quemador cierre la puerta Hornear 01 02 03 04 1 Presione el botón ...

Страница 48: ...iones de las parrillas están delineadas por las guías sobre las que se apoyan Cada una de las guías de las parrillas tienen un tope que evita que se aflojen durante el funcionamiento del horno Cada parrilla tiene topes que requieren colocación correcta sobre las guías Los topes evitan que las parrillas se salgan accidentalmente del horno por completo al retirarlas 07 06 05 04 03 02 01 Tipo de alim...

Страница 49: ...SET INICIO CONFIGURAR Para cambiar el tiempo de cocción programada presione el botón Cooking Time Tiempo de cocción ingrese el nuevo tiempo y luego presione el botón START SET INICIO CONFIGURAR Opciones de cocción PRECAUCIÓN Los alimentos que pueden echarse a perder fácilmente como la leche los huevos el pescado las aves y las carnes deben enfriarse en un refrigerador antes de colocarse en el horn...

Страница 50: ...ura deseada usando los botones de flecha La temperatura predeterminada es de 350 F 3 Presione la tecla START SET INICIO CONFIGURAR La temperatura en la pantalla cambia luego de que la temperatura del horno alcanza los 175 F 4 Presione los botones Bake Hornear y Arriba simultáneamente durante 3 segundos para mostrar SAb Una vez que SAb aparece el control del horno ya no emite sonidos ni muestra nin...

Страница 51: ... CONFIGURAR para guardar los cambios NOTAS Puede cambiar la temperatura del horno una vez comenzado el horneado pero la pantalla no cambiará ni emitirá sonidos Luego de cambiar la temperatura el horno tarda 15 segundos en reconocer el cambio Puede apagar el horno en cualquier momento presionando OFF CLEAR APAGAR BORRAR Sin embargo esto no desactiva la opción Shabat Para desactivar la opción Shabat...

Страница 52: ...l panel de control 2 Limpie el panel de control con un paño suave humedecido con agua corriente agua jabonosa tibia o limpiavidrios No rocíe limpiadores directamente sobre el panel de control 3 Cuando finalice mantenga presionado el botón START SET INICIO CONFIGURAR de nuevo durante 3 segundos ADVERTENCIA Asegúrese de que el panel de control se apague y todas las superficies del horno de gas estén...

Страница 53: ...y retírelas 3 Limpie la superficie de la cubierta con un paño suave Si se derraman alimentos en los huecos de los componentes del quemador retire la tapa del quemador y el cabezal y limpie por completo los derrames 4 Una vez finalizada la limpieza vuelva a insertar los componentes del quemador y luego coloque las rejillas de los quemadores en su posición Puerta No retire la junta interna de la pue...

Страница 54: ...electrodos de encendido no son desmontables No intente retirarlos por la fuerza Asegúrese de que todos los componentes de los quemadores cabezales y tapas se vuelvan a instalar correctamente Si están bien instalados son estables y quedan planos Para evitar el astillado no golpee las rejillas y tapas entre sí o contra superficies duras tales como utensilios de hierro fundido No intente retirar la t...

Страница 55: ...r la puerta del horno El manejo inadecuado podría causar lesiones físicas Para evitar las descargas eléctricas asegúrese de que el horno esté apagado antes de retirar la puerta del horno Repuestos Luz del horno La luz del horno es una bombilla para electrodomésticos estándar de 40 watts Se enciende cuando se abre la puerta del horno 1 Apague el horno 2 Asegúrese de que el horno y la luz del horno ...

Страница 56: ...reinicie el disyuntor El suministro de gas no está correctamente conectado o encendido Consulte las Instrucciones de instalación que vinieron con su estufa Para volver a instalar la puerta del horno 1 Sujete firmemente ambos lados de la puerta en su extremo superior 2 Con la puerta en el mismo ángulo que la posición de remoción aproximadamente 5 grados de la posición vertical deslice los brazos de...

Страница 57: ...s y señales mantenga presionado Bake Hornear y Arriba simultáneamente durante 3 segundos Problema Causa posible Acción Un quemador superior no se enciende La perilla de control no se reguló correctamente Empuje la perilla de control y gírela a la posición LITE Encender Las tapas de los quemadores no están en su lugar La base del quemador está mal alineada Limpie los electrodos Coloque la tapa del ...

Страница 58: ...y hacen que la estufa parezca desnivelada Asegúrese de que los gabinetes se encuentren en escuadra y dejan suficiente lugar para la instalación Problema Causa posible Acción La luz del horno lámpara no se enciende El bloqueo de la puerta del horno está activado La pantalla mostrará el icono de Bloqueo Mantenga la puerta del horno abierta y presione el botón START SET INICIO CONFIGURAR durante 3 se...

Страница 59: ...iciarse Su control digital se ha dañado Reemplace el fusible o reinicie el disyuntor Los alimentos no se hornean o asan como es debido en el horno Se seleccionó un modo de cocción incorrecto Consulte la página 15 Las parrillas del horno no se han ubicado correctamente para los alimentos que se están cocinando Consulte la página 16 Se están utilizando recipientes de cocción no adecuados o de tamaño...

Страница 60: ... de reparación o reemplazo bajo estas circunstancias excluidas será responsabilidad del cliente Las visitas de un proveedor de servicio técnico autorizado para explicar funciones mantenimiento o instalación del producto no se cubren bajo esta garantía limitada Comuníquese con Samsung al número que figura abajo para obtener ayuda con cualquiera de estos problemas Garantía limitada Estados Unidos NO...

Страница 61: ...LA TEORÍA LEGAL EN LA QUE SE BASE EL RECLAMO E INCLUSO SI SAMSUNG HA SIDO ADVERTIDA DE LA POSIBILIDAD DE DICHOS DAÑOS Algunos estados no permiten la exclusión o la limitación de daños imprevistos o derivados por lo que las limitaciones o exclusiones mencionadas tal vez no se apliquen a usted en particular Esta garantía le otorga derechos específicos e incluso usted también puede tener otros derech...

Страница 62: ...ENTE GARANTÍA LIMITADA NO SE EXTENDERÁ A NINGUNA PERSONA DISTINTA DEL COMPRADOR ORIGINAL DEL PRESENTE PRODUCTO ES INTRANSFERIBLE Y ESTABLECE SU EXCLUSIVA REPARACIÓN Garantía CANADÁ NO DESECHE ESTUFA DE GAS SAMSUNG GARANTÍA LIMITADA PARA EL COMPRADOR ORIGINAL El presente producto de la marca SAMSUNG tal como lo provee y distribuye SAMSUNG ELECTRONICS CANADA INC SAMSUNG y lo entrega como nuevo en su...

Страница 63: ... comuníquese con SAMSUNG a Samsung Electronics Canada Inc 2050 Derry Road West Mississauga Ontario L5N 0B9 Canada 1 800 SAMSUNG 726 7864 y www samsung com ca support English www samsung com ca_fr support French Registro Registre su producto en línea en www samsung com register Preguntas Si tiene preguntas sobre funciones operación desempeño piezas accesorios o servicio llame al 1 800 SAMSUNG 726 7...

Страница 64: ...S O COMENTARIOS PAÍS LLAME AL O VISÍTENOS EN LÍNEA EN U S A Consumer Electronics 1 800 SAMSUNG 726 7864 www samsung com us support CANADA 1 800 SAMSUNG 726 7864 www samsung com ca support English www samsung com ca_fr support French DG68 00773A 08 Escanee el código QR o visite www samsung com spsn para ver nuestros útiles videos instructivos y programas en vivo Requiere un lector instalado en su t...

Страница 65: ...Cuisinière à gaz Manuel d utilisation NX58K3310S NX58M3310S ...

Страница 66: ...e dispositif anti basculement ait été correctement installé et fixé sur l arrière droit ou arrière gauche du dessous de la cuisinière c Si vous déplacez la cuisinière puis la remettez en place assurez vous que le dispositif anti basculement est refixé à l arrière droit ou gauche du dessous de l appareil d N utilisez pas la cuisinière si le dispositif anti basculement n est pas en place et bien fix...

Страница 67: ...rité liée au four 9 Sécurité du tiroir de rangement 9 Présentation 10 Disposition 10 Accessoires fournis 10 Tableau de commande 11 Horloge 11 Minuterie 11 Cuisinière à gaz 12 Consignes générales concernant la table de cuisson 12 Ventilation du four orifice de refroidissement 12 Récipient 12 Brûleurs à gaz 13 Allumage 14 Four à gaz 14 Consignes générales concernant le four 14 Mode de cuisson 15 Cui...

Страница 68: ...sans se limiter aux brûleurs du four aux brûleurs de surface ou aux surfaces internes pendant ou immédiatement après la cuisson Repérez la vanne de coupure de gaz et la façon de la fermer Assurez vous que le dispositif anti basculement est correctement installé sur la cuisinière Reportez vous aux consignes d installation pour plus d informations Gardez les enfants éloignés de la cuisinière Ne lais...

Страница 69: ... de votre fournisseur de gaz Si vous ne parvenez pas à joindre votre fournisseur de gaz appelez les pompiers Évitez tout choc sur le verre du four Lors de la mise au rebut de la cuisinière coupez le cordon d alimentation et retirez la porte afin d éviter que des enfants ou des animaux ne se fassent piéger à l intérieur Débranchez la cuisinière ou mettez la hors tension avant de procéder à la répar...

Страница 70: ...eures Vérification des fuites de gaz Un test de fuite de l appareil doit être effectué selon les instructions du fabricant N utilisez pas de flamme pour vérifier s il y a des fuites de gaz Utilisez plutôt un pinceau pour étaler de l eau savonneuse autour de l endroit à vérifier En cas de fuite de gaz vous verrez au niveau de la fuite de petites bulles dans l eau savonneuse Sécurité électrique et m...

Страница 71: ...lace et que tous les brûleurs sont de niveau Assurez vous que votre cuisinière est correctement installée et réglée pour le type de gaz que vous allez utiliser naturel ou GPL par un installateur qualifié ou un technicien qualifié Pour que votre cuisinière puisse fonctionner au GPL l installateur doit remplacer les 5 orifices des brûleurs de surface et les 2 orifices des brûleurs du four par le kit...

Страница 72: ...uide tel qu une sauce remuez le tout en le réchauffant Utilisez toujours la position LITE ALLUMAGE pour allumer les brûleurs et assurez vous qu ils sont allumés Si l allumage échoue tournez le bouton sur OFF ARRÊT et attendez que le gaz se dissipe Lorsque vous réglez un brûleur sur mijotage ne tournez pas le bouton rapidement Assurez vous que la flamme reste allumée Ne placez aucun objet autre qu ...

Страница 73: ...Ne vaporisez pas d eau sur le verre du four lorsque le four est allumé ou juste après l avoir éteint N utilisez pas de papier aluminium ou de barquettes en aluminium dans le four N utilisez pas de feuille d aluminium ou de matériau semblable pour couvrir des orifices ou des passages au bas du four ou pour couvrir une grille du four Cela peut causer une intoxication au monoxyde de carbone Les habil...

Страница 74: ...ter notre site Web de pièces en ligne à l adresse www samsungparts com Présentation Disposition 10 08 09 02 06 05 03 04 01 07 01 Affichage 02 Boutons des brûleurs de surface 5 pièces 03 Brûleurs de surface 04 Ventilation du four 05 Porte du four amovible 06 Tiroir de rangement 07 Éclairage du four 08 Système de grille du four 09 Brûleur de four pour gril 10 Brûleur de four pour cuisson REMARQUE Si...

Страница 75: ...ivation Désactivation de la minuterie pour démarrer la minuterie Tableau de commande 08 09 11 10 12 13 02 03 01 04 06 05 07 01 Écran Indique l heure la température du four si le four est en mode Cuisson traditionnelle Cuisson au gril ou Nettoyage vapeur et le temps réglé pour la minuterie ou le fonctionnement automatique 02 Bake Cuisson traditionnelle Pour faire cuire des aliments en utilisant le ...

Страница 76: ...ctéristiques de chauffage varient en fonction du matériau de base Verre un conducteur thermique lent Utilisez uniquement des ustensiles en verre qui sont spécifiés pour une utilisation sur la table de cuisson et dans le four Cuisinière à gaz Consignes générales concernant la table de cuisson ÉTAPE 1 Placez tous les ingrédients dans un récipient de cuisson casserole poêle etc ÉTAPE 2 Placez le réci...

Страница 77: ...rière gauche ArG 9500 BTU Chauffage général Mijotage lent Aliments normaux plats mijotés sauce tomate Cuisson en général Vous devez mélanger la sauce tomate pendant qu elle mijote Limitations de taille ATTENTION Ne placez pas de petite casserole ou plat avec un fond d un diamètre d environ 6 pouces ou moins sur la grille centrale Cet ustensile peut basculer Utilisez les brûleurs arrière pour les u...

Страница 78: ... Enfoncez et tournez le bouton de commande correspondant à ce brûleur sur la position LITE ALLUMAGE Approchez un allume gaz du brûleur pour l allumer 3 Lorsque le brûleur est allumé tournez le bouton de commande pour ajuster le niveau de la flamme Niveau de flamme Les flammes des brûleurs doivent toujours rester sous l ustensile et ne doivent jamais s étendre en dehors du fond de l ustensile AVERT...

Страница 79: ...5 F 80 C 550 F 285 C Cuisson au gril LO FAIBLE ÉLEVÉE Maintien au chaud 3 heures Mode de cuisson Assurez vous que la porte est fermée avant de démarrer la cuisson Si vous laissez la porte ouverte pendant 20 à 30 secondes alors que le four est en mode de cuisson traditionnelle ou de cuisson au gril le brûleur du four s éteint Pour redémarrer le brûleur fermez la porte Cuisson traditionnelle 01 02 0...

Страница 80: ...illes sont délimitées par les guides de grille prévus pour soutenir les grilles Chaque guide de grille comporte une butée pour éviter que les grilles ne se desserrent pendant le fonctionnement du four Chacune comporte des butées qui doivent être correctement installées sur les guides de grille Les butées permettent d éviter que les grilles de sortent complètement du four par accident lorsque vous ...

Страница 81: ...on START SET DÉPART RÉGLAGE Options de cuisson ATTENTION Les aliments qui se périment facilement comme le lait les œufs et les viandes doivent être conservés au réfrigérateur avant d être placés dans le four Même réfrigérés ces aliments ne doivent pas rester à l air ambiant pendant plus d une heure avant le démarrage de la cuisson De plus ils doivent être retirés rapidement du four une fois la cui...

Страница 82: ...r défaut est de 350 F 3 Appuyez sur la touche START SET DÉPART RÉGLAGE La température affichée change lorsque le four atteint la température de 175 F 4 Appuyez simultanément sur les boutons Bake Cuisson traditionnelle et Haut pendant 3 secondes pour afficher SAb Lorsque SAb s affiche la commande du four n émet plus de signaux sonores ni n affiche plus les modifications ultérieures Maintien au chau...

Страница 83: ... la température du four lorsque la cuisson démarre mais l affichage ne changera pas ni la sonnerie Après avoir modifié la température 15 secondes sont nécessaires avant que le four ne reconnaisse la modification Vous pouvez éteindre le four à tout moment en appuyant sur OFF CLEAR ARRÊT EFFACER Cependant l option Shabbat n est pas désactivée Pour désactiver l option Sabbath Shabbat maintenez les bo...

Страница 84: ...ENTION Portez des gants pendant le nettoyage Tableau de commande Verrouillez d abord le tableau de commande pour éviter un fonctionnement accidentel et ou le basculement de l appareil 1 Maintenez le bouton START SET DÉPART RÉGLAGE enfoncé pendant 3 secondes pour verrouiller le tableau de commande 2 Nettoyez le tableau de commande à l aide d un chiffon doux humidifié avec de l eau pure de l eau tiè...

Страница 85: ...e la table de cuisson à l aide d un chiffon doux Si des aliments renversés s écoulent dans les fentes des composants d un brûleur retirez le chapeau et la tête du brûleur puis essuyez les salissures 4 Lorsque le nettoyage est terminé réinsérez les composants des brûleurs puis repositionnez les grilles des brûleurs Porte Ne retirez pas le joint intérieur de la porte du four pour le nettoyage Côté i...

Страница 86: ... vous que tous les composants des brûleurs têtes et chapeaux sont correctement réinstallés Ils sont stables et reposent à plat lorsqu ils sont positionnés correctement Afin d éviter tout écaillage ne cognez pas les grilles ou les caches les un e s contre les autres ou contre des surfaces dures comme des casseroles en fonte émaillée N essayez pas d enlever le chapeau du brûleur oval central de la t...

Страница 87: ... Une manipulation inappropriée peut engendrer des blessures physiques Afin d éviter un choc électrique assurez vous que le four est éteint avant de retirer sa porte Remplacement Éclairage du four L éclairage du four nécessite une ampoule standard de 40 watts Elle s allume lorsque vous ouvrez la porte du four 1 Éteignez le four 2 Assurez vous que le four et la lampe sont froids 3 Ouvrez la porte et...

Страница 88: ...voir été déclenché Remplacez le fusible concerné ou réenclenchez le disjoncteur Le tuyau d arrivée de gaz n est pas correctement branché ou ouvert Reportez vous aux consignes d installation fournies avec votre cuisinière Pour réinstaller la porte du four 1 Saisissez fermement les deux côtés de la porte par le haut 2 En maintenant la porte dans le même angle que lors de son retrait environ 5 degrés...

Страница 89: ...ant 3 secondes Problème Cause possible Action Les brûleurs de surface ne s allument pas Le bouton de commande n est pas correctement réglé Enfoncez et tournez le bouton de commande sur la position LITE ALLUMER Les chapeaux des brûleurs ne sont pas correctement positionnés La base des brûleurs n est pas correctement alignée Nettoyez les électrodes Placez le chapeau de brûleur sur la tête du brûleur...

Страница 90: ...sinière n est pas de niveau Assurez vous que les éléments de cuisine sont droits et que l espace est suffisant pour l installation Problème Cause possible Action L éclairage du four lampe ne s allume pas Le verrouillage de la porte du four est activé L icône de verrouillage s affiche Maintenez la porte du four ouverte et appuyez sur le bouton START SET DÉPART RÉGLAGE pendant 3 secondes Un signal s...

Страница 91: ...mmagée Remplacez le fusible concerné ou réenclenchez le disjoncteur Les aliments ne cuisent pas ou ne sont pas rôtis correctement au four Le mode de cuisson sélectionné est incorrect Reportez vous à la page 15 Les grilles du four n ont pas été positionnées correctement pour les aliments à cuire Reportez vous à la page 16 Un récipient inadapté ou de taille inappropriée est utilisé Reportez vous à l...

Страница 92: ...ussures durcies de sucre ou de plastique fondu qui n auraient pas été nettoyées selon les instructions fournies dans le manuel d entretien et d utilisation Le coût des réparations ou du remplacement dans de telles circonstances exclues sera à la charge au client Les interventions par un réparateur agréé visant à expliquer les fonctions de l appareil ou les procédures de maintenance ou d installati...

Страница 93: ...LE QUE SOIT LA BASE JURIDIQUE INVOQUÉE POUR JUSTIFIER L ASSERTION ET MÊME SI SAMSUNG A ÉTÉ AVISÉ DE LA POSSIBILITÉ DE TELS DOMMAGES Certains États et certaines juridictions n autorisent pas l exclusion ou les limitations pour dommages accessoires ou indirects Il est donc possible que les limitations ou exclusions ci dessus ne s appliquent pas à votre cas Cette garantie vous confère des droits spéc...

Страница 94: ...USIF OU DE L INCAPACITÉ D UTILISER CE PRODUIT CETTE GARANTIE LIMITÉE N EST VALABLE POUR PERSONNE D AUTRE QUE L ACHETEUR INITIAL DU PRODUIT N EST PAS TRANSFÉRABLE ET ÉNONCE VOTRE RECOURS EXCLUSIF Garantie CANADA VEUILLEZ NE PAS JETER CUISINIÈRE À GAZ SAMSUNG GARANTIE LIMITÉE À L ACHETEUR INITIAL Ce produit de la marque SAMSUNG fourni distribué par SAMSUNG ELECTRONICS CANADA INC SAMSUNG et livré neu...

Страница 95: ...MSUNG à l adresse suivante Samsung Electronics Canada Inc 2050 Derry Road West Mississauga Ontario L5N 0B9 Canada 1 800 SAMSUNG 726 7864 et www samsung com ca support English www samsung com ca_fr support French Enregistrement Veuillez enregistrer votre produit sur www samsung com register Questions Pour les questions sur les fonctions le fonctionnement les performances les pièces les accessoires ...

Страница 96: ...NE QUESTION UN COMMENTAIRE PAYS N DE TÉLÉPHONE SITE INTERNET U S A Consumer Electronics 1 800 SAMSUNG 726 7864 www samsung com us support CANADA 1 800 SAMSUNG 726 7864 www samsung com ca support English www samsung com ca_fr support French DG68 00773A 08 Scannez le code QR ou rendez vous sur le site www samsung com spsn pour voir nos vidéos et démonstrations en direct d utilisation Requiert l inst...

Отзывы: