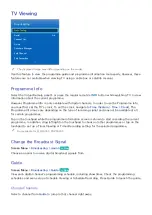
66
Schedule Recording
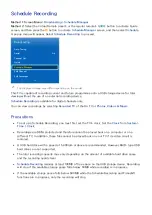
Method 1: Screen Menu
>
Broadcasting
>
Schedule Manager
Method 2:
Select the Virtual Remote panel's or the regular remote's
GUIDE
button to activate Guide
screen, and then press the
{
button to activate
Schedule Manager
screen. and then select
Schedule
.
A popup menu will appear. Select
Schedule Recording
to proceed.
Broadcasting
Auto Tuning
Aerial
Air
Channel List
Guide
Schedule Manager
Edit Channel
Edit Favourites
"
The displayed image may differ depending on the model.
This TV is capable of recording current and future programmes onto a USB storage device for later
viewing without the use of an external recording device.
Schedule Recording
is available for digital channels only.
You can view recordings by selecting
Recorded TV
of the
On TV
or
Photos, Videos & Music
.
Precautions
●
To set up a Schedule Recording, you must first set the TV's clock. Set the
Clock
from
System
>
Time
>
Clock
.
●
Recordings are DRM-protected and therefore cannot be played back on a computer or on a
different TV. In addition, these files cannot be played back on your TV if its video circuit is
replaced.
●
A USB hard drive with a speed of 5,400rpm or above is recommended. However, RAID-type USB
hard drives are not supported.
●
The total recording capacity may vary depending on the amount of available hard drive space
and the recording quality level.
●
Schedule Recording
requires at least 100MB of free space on the USB storage device. Recording
will stop if the available storage space falls below 50MB while recording is in progress.
●
If the available storage space falls below 500MB while the Schedule Recording and Timeshift
functions are in progress, only the recording will stop.

