Playback/Editing
70
Transferring files to your Windows computer
Transferring files using Intelli-studio
You can download Intelli-studio from the linked webpage and
install it on your computer. When you connect the camera to
a computer with Intelli-studio installed, the program will launch
automatically.
1
In Shooting or Playback mode, press [
].
2
Select
Settings
→
PC Software
→
On
.
3
Turn off the camera.
4
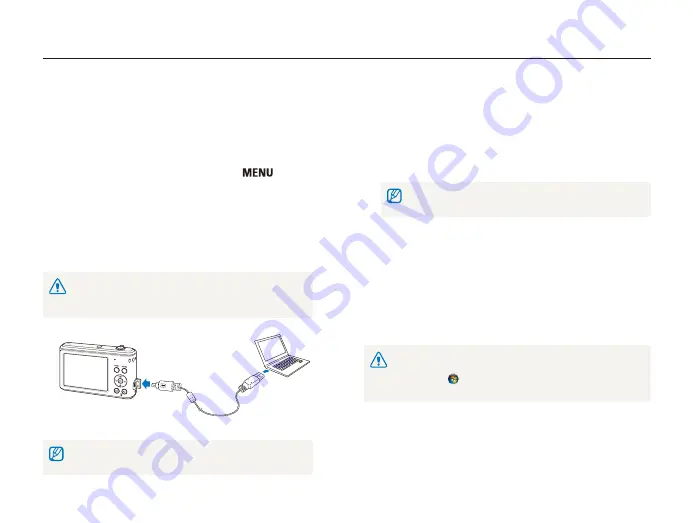
Connect your camera to your computer with the USB
cable.
You must plug the small end of the USB cable into your camera. If the
cable is reversed, it may damage your files. The manufacturer is not
responsible for any loss of data.
The battery will be charged while the camera is connected to a
computer with the USB cable.
5
Turn on the camera.
•
When the Intelli-studio installation pop-up appears on the
computer screen, follow the on-screen instructions to
complete the installation.
•
Once the Intelli-studio is installed on your computer, the
computer recognizes the camera and launches the Intelli-
studio automatically.
If you set the USB option to
Select Mode
, select
Computer
in the
pop-up window.
6
Select a folder on your computer to save new files to.
•
New files stored on the camera will automatically transfer to
the selected folder.
•
If your camera has no new files, the pop-up window for saving
new files will not appear.
7
Select
Yes
.
•
New files are transferred to the computer.
For Windows Vista and Windows 7, select
Run iLinker.exe
from the Auto
Play window to start Intelli-studio. If
Run iLinker.exe
does not appear on the
computer, click
→
Computer
→
Intelli-studio
, and then follow the on-
screen instructions to complete the Intelli-studio installation.


