background image

imagine

 the possibilities

Thank you for purchasing a Samsung product.
To receive a more complete service,  
please register your product at

www.samsung.com/register

Robotic Vacuum Cleaner

User Manual


Before operating this unit, please read the instructions carefully.


For indoor use only.

English

SR8830

DJ68-00518A (EN-1)-0.1.indd   1

2009.11.5   11:32:18 AM

Содержание DJ68-00518A

Страница 1: ...ing a Samsung product To receive a more complete service please register your product at www samsung com register Robotic Vacuum Cleaner User Manual Before operating this unit please read the instructions carefully For indoor use only English SR8830 ...

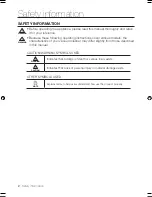
Страница 2: ...ge exists OTHER SYMBOLS USED NOTE Explains terms to help users understand how use the product properly SAFETY INFORMATION Before operating the appliance please read this manual thoroughly and retain it for your reference Because these following operating instructions cover various models the characteristics of your vacuum cleaner may differ slightly from those described in this manual WARNING WARN...

Страница 3: ...less they have been given supervision or instruction concerning use of the appliance by a person responsible for their safety Children should be supervised to ensure that they do not play with the appliance BATTERY CHARGER Do not modify the polarized plug to fit a non polarized outlet or extension cord Do not use outdoors or on wet surfaces Unplug the charger from the outlet when not in use and be...

Страница 4: ...y may be present Do not use robotic vacuum cleaner in an enclosed space filled with vapours given off by oil based paint paint thinner moth proofing substances flammable dust or other explosive or toxic vapours Leaks from battery cells can occur under extreme usage or temperature conditions If the liquid gets on skin wash quickly with water If the liquid gets into the eyes flush them immediately w...

Страница 5: ...out the battery 24 Installing the Smart gate 26 Using robotic vacuum cleaner 26 Starting stopping cleaning 27 Recharging 28 Auto cleaning 29 Spot cleaning 30 Max cleaning 31 Manual cleaning 32 Setting a scheduled cleaning time 33 Selecting audio announcements maintain tools and filter 34 34 Cleaning robotic vacuum cleaner 34 Please keep the cleaning and maintenance methods in mind 34 Cleaning the ...

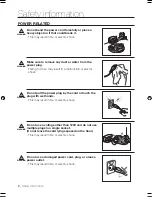
Страница 6: ... or electric shock Do not use a voltage other than 120V and do not use multiple plugs in a single socket Do not leave the cord lying exposed on the floor This may result in fire or electric shock Do not pull the power plug by the cord or touch the plug with wet hands This may result in fire or electric shock Make sure to remove any dust or water from the power plug Failing to do so may result in a...

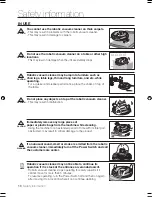
Страница 7: ...rooms and narrow and highly situated locations such as tables or shelves Critical damage abnormal operation and breakage may occur when used in these locations Open all doors to clean all rooms When a door is closed the robotic vacuum cleaner will not be able to enter that room However make sure to close the doors to the main entrance the veranda and the bathroom and any other rooms where the robo...

Страница 8: ...not step or sit on the robotic vacuum Children may fall and injure themselves or critical damage may occur to the product When a child or pet is left alone make sure to turn off the Power Switch of the robotic vacuum cleaner Robotic vacuum cleaner may attract their attention When the rotating wheel or brush catches fingers feet clothing or hair this may result in injury If a child or a pet is in t...

Страница 9: ...over liquids such as water oil or pet litter This may result in critical damage to the product Liquids may spread through the wheels resulting in contamination WARNING Objects in front of the charger will prevent the robotic vacuum cleaner from auto charging itself Clear the area CAUTION There should be no obstacles 0 5m from the side and 1m from the side of the charging station WARNING Make sure ...

Страница 10: ...rom the robotic vacuum cleaner immediately turn off the Power Switch and call the customer care center WARNING Do not use the robotic vacuum cleaner on a table or other high locations This may result in damage when the unit accidentally drops CAUTION Robotic vacuum cleaner may bump into furniture such as chair legs table legs thin and long furniture and etc while operating For a quicker and cleane...

Страница 11: ...ritical damage to the product CAUTION The unit must not be disassembled or reconstructed by anyone other than a qualified service engineer This may result in damage to the product CAUTION Do not forcefully press the bumper on the robotic vacuum cleaner If the bumper sensor gets damaged the robotic vacuum cleaner may bump into walls or furniture CAUTION Remove any foreign substances accumulated on ...

Страница 12: ...aning the charger make sure to disconnect the power cord for safety WARNING When removing foreign substances always use the cleaning brush after turning the Power Switch off Failing to do so may result in sudden operation of the unit and cause an injury or critical damage to the product WARNING 측면 회전솔 측면 회전솔 측면 회전솔 측면 회전솔 측면 회전솔 측면 회전솔 측면 회전솔 측면 회전솔 측면 회전솔 측면 회전솔 측면 회전솔 Edge cleaning side brush 파워...

Страница 13: ... Delicate Cleaning of Every Corner Since the robotic vacuum cleaner cleans the floor in a sequential way along the map determined by the ceiling shape recognition function it cleans every corner of the floor 1 Auto Mode Cleans all rooms automatically 2 Spot Mode Cleans a localized area intensely It can be used to clean bread or cookie crumbs 3 Max Mode Runs until the battery is nearly depleted 4 M...

Страница 14: ...cuum cleaner does crash into an obstacle the 2 bumper sensors absorb the impact Edge Cleaning Side ROTATING Brush The edge cleaning side rotating brush cleans dust from the edges Auto Charging When the battery is low the robotic vacuum cleaner is automatically guided to the charger to enable it to perform a quick auto charge Anti Falling safety device The 3 Cliff sensors detect downward steps such...

Страница 15: ...aner _15 Assembling the cleaner 02 Assembling the cleaner Components Charger Station Main Body Others Components Remote Control User Manual 2 Batteries 2 Smart gates Cleaning Brush Remote Control Holder Spare HEPA Filter ...

Страница 16: ...te Sensor Obstacle Sensor Display Panel Camera Obstacle Sensor Bumper Sensor Smart gate Sensor Remote Control Sensor Remote Control Sensor Dust Bin Dust Bin Eject Button Dust Outlet Driving Wheel Battery Cover Power Brush Power Brush Cover Power Switch Driving Wheel Cliff Sensor Cliff Sensor Charge Pin Cliff Sensor Charge Pin Roller ...

Страница 17: ... the alkaline batteries type D before use Installing the batteries Lift the cover of the Smart gate while pressing the locking tab Install the batteries into the Smart gate as shown by the figure below If the batteries are installed with the incorrect polarity the Smart gate will not work After inserting the tip of the cover into the slot push the other end to close it until it clicks into place 1...

Страница 18: ...b Install the batteries into the remote control as shown by the figure below If the batteries are installed with the wrong polarity the remote control will not work After inserting the tip of the cover into the slot push the other end to close it until it clicks into place 1 2 3 Specification Alkaline type AAA batteries Batteries are not installed in the remote control when purchasing the product ...

Страница 19: ...he robotic vacuum cleaner returns to the charger station to charge its battery 6 Cleaning Mode Display Each time the cleaning mode button is pressed the corresponding cleaning mode is displayed a Auto Mode This icon turns on when Auto cleaning mode is selected b Spot Mode This icon turns on when Spot cleaning mode is selected c Max Mode This icon turns on when Max cleaning mode is selected d Manua...

Страница 20: ... cleaner to a particular section by using Fence virtual wall mode or clean several sections one by one using Guard virtual door mode Installing the robotic vacuum cleaner Turning the Power Switch on or off CAUTION If the Power Switch is turned off the robotic vacuum cleaner will not be charged even if it is docked with the charger station To use the robotic vacuum cleaner you must turn the Power S...

Страница 21: ...le to charge automatically If the robotic vacuum cleaner is separated from the charger the battery is automatically discharged 2 There should be no obstacles 0 5 m to the left and right and within 1 m of the front 1 Install the charger on a flat surface 3 Install the charger in a location where it can be easily accessed by the robotic vacuum cleaner 4 Arrange the power cord along the wall 5 When t...

Страница 22: ...n the Power Switch at the bottom of the robotic vacuum cleaner off and on Reset Re plug the power of the charger Reset Check whether there are any foreign substances on the charge connector and wipe the charge connector on the main unit and the charger with a dry cloth Check whether there are objects near the charger that are strong reflectors When separating the robotic vacuum cleaner from the ch...

Страница 23: ...he customer care center for the genuine part symbol and model number before purchasing it Battery information AA Size Ni MH UNION SUPPO Model HPY 12 EA If the battery is out of order do not disassemble it Contact your nearest customer care center An increased charging time and a shorter battery life indicates the near end of the battery life Please contact an authorized customer care center to rep...

Страница 24: ... virtual door Mode The green lamp flashes Off The lamp is turned off 2 Setting the mode Whenever you press the Mode Power button Fence virtual wall mode Guard virtual door mode Power off is selected in this sequence 3 Setting the Fence length Set the distance to restrict the access of robotic vacuum cleaner from the Smart gate using the distance control switch Forming a Fence virtual wall Smart ga...

Страница 25: ...ue using the distance control switch If more than one robotic vacuum is used simultaneously they may malfunction due to interference of the infrared signals Turn the Smart gate in another direction or set the fence length to an appropriate value if the distance detection sensor of the Smart gate faces the charger as it may interrupt auto charging Using Guard virtual door mode The Smart gate forms ...

Страница 26: ...l button Main unit Select Auto Spot Max Manual mode by using the button and then pressing the button When cleaning begins the robotic vacuum cleaner starts to move Pressing the button without selecting cleaning mode starts to perform a Auto mode cleaning Stopping To stop press the remote control or main unit button When cleaning is stopped the robotic vacuum cleaner stops You can run or stop all r...

Страница 27: ...nd press the Recharging button Troubleshooting when the robotic vacuum cleaner does not return to the charger Check the installation of the charger When the charger is in a location where the charger cannot guide the robotic vacuum cleaner to the charger When the charger is more than 5m away from robotic vacuum cleaner It may require a longer time for the robotic vacuum cleaner to return to the ch...

Страница 28: ... cleaning after charging its battery Number of cleaning operations resumed Once While cleaning When cleaning is complete Cancel the mode 2 1 Set the mode Main unit button Remote control button Configuration Sequence About the Resume Cleaning function If the robotic vacuum cleaner has evaluated that cleaning is complete the resume cleaning function is not performed If you move the robotic vacuum cl...

Страница 29: ... perform a spot clean About 1 5m About 1 5m While cleaning When cleaning is complete In Spot cleaning mode the robotic vacuum cleaner cleans an area with a length of 1 5m and a width of 1 5m When cleaning is completed the robotic vacuum cleaner will display End Stop and Stand by Cancel the mode 2 1 Set the mode Main unit button Remote control button Configuration Sequence When the robotic vacuum c...

Страница 30: ... to the charger station and resumes cleaning after charging the battery Number of resumed cleaning operations Once CAUTION Do not move the robotic vacuum cleaner while it is cleaning or press a button while cleaning Otherwise the robotic vacuum cleaner judges cleaning to be complete and starts cleaning again from the beginning While cleaning Cancel the mode 2 1 Set the mode Main unit button Remote...

Страница 31: ...eaning You can manually clean using the remote control only CAUTION In manual cleaning mode you can navigate to locations such as areas with a fence tape or areas with a risk of falling stairs etc using the remote control While cleaning Directional Buttons Forwards Left Right A backwards function is not supported Cancel the mode 2 1 Set the mode Main unit button Remote control button Configuration...

Страница 32: ...con is turned on Whenever the button is pressed the time is increased or decreased 2 1 Enter the Scheduled Cleaning mode Finish the setting 3 Cancel the setting 4 Main unit button Remote control button Configuration Sequence Example To clean 5 hours Later from now NOTE When setting is complete and you press the button instead of the Delay Start button the scheduled cleaning time is canceled After ...

Страница 33: ...ncements in English Sound effects You can hear a melody instead of voice announcements Voice announcement in French You can hear voice announcements in French When an error occurs while cleaning the audio announcement for the error code is played If the Sound Off button is pressed no sound will be heard Pressing the button again will be sounded on Press the Demo button If you press the button voic...

Страница 34: ...leaner Cleaning the Sensor Window and the Camera You must turn off the Power Switch at the bottom of the main unit before cleaning the robotic vacuum Never spray water thinner benzene etc directly onto the main unit of robotic vacuum cleaner Always turn off the power switch at the bottom of the main unit before cleaning the robotic vacuum The robotic vacuum cleaner could operate suddenly and cause...

Страница 35: ...Dust Bin and the HEPA Filter 2 Separate the dust bin cover by pulling it in the direction of the arrow in the figure 1 Press the Dust Bin Eject PUSH button and pull the dust bin to separate the dust bin First empty the dust bin before cleaning it When separating the dust bin take care not to spill the dust out of the dust bin Empty the dust bin in the following cases 1 When dust has accumulated in...

Страница 36: ...id pattern of the HEPA filter is facing downwards It cannot be installed in the wrong direction 4 Wipe the dust from the HEPA filter and the dust bin You can wash them with water 6 Close the dust bin cover and install it into the main unit Structure of the Dust Bin Dust Bin Eject PUSH Button Dust Outlet Dust Bin HEPA filter Dust Bin Cover Dust Outlet Cover ...

Страница 37: ...u must turn off the Power Switch at the bottom of the main unit before cleaning the robotic vacuum 3 Lift the power brush up from the main unit 4 Remove any foreign substances such as long hairs or strings wrapped around the power brush using a cleaning brush or a vacuum cleaner OFF ON CAUTION Because the dust in the dust bin may come out separate the dust bin first before cleaning the power brush...

Страница 38: ...it clicks into place CAUTION To prevent the robotic vacuum cleaner from becoming clogged be careful not to vacuum tooth picks or cotton swabs When removing foreign substances become difficult contact a customer care center Because the power brush vacuums the dust on the floor long strings or hair can become wrapped around the brush Check and clean the power brush regularly ...

Страница 39: ...the bottom of the main unit before cleaning the robotic vacuum 3 Turning the side rotating brush repeat the procedures in Step 2 4 If hair or string is wrapped between the main unit and the side rotating brush undo the screw of the side rotating brush using a driver to remove it When reassembling the brush check the L mark on the edge cleaning side rotating brush and the L mark on the main unit an...

Страница 40: ...ir of nippers that are not sharp at the ends if necessary 1 When cleaning the driving wheel place a soft cloth on the floor and flip the main unit placing it down carefully You must turn off the Power Switch at the bottom of the main unit before cleaning the robotic If the robotic vacuum cleaner suddenly starts to zigzag there may be foreign substances stuck on the driving wheel OFF ON ...

Страница 41: ...nd is LO displayed in the display panel Lift up the robotic vacuum cleaner manually dock the robotic onto the charger to charge it Has the robotic vacuum cleaner become hooked on wires on the floor Turn off the Power Switch and remove the wires Is the robotic vacuum cleaner stuck to the floor where there is a height difference The driving wheel is lifted Turn off the Power Switch and move the clea...

Страница 42: ... of the Smart gate or set the distance to an appropriate value Robotic vacuum cleaner passes through the Smart gate Are the batteries of the Smart gate worn out Replace the batteries 2 type D LR20 alkaline batteries Is the Smart gate set to Guard virtual door mode Set the Smart gate to Fence virtual wall mode Is the Mode lamp turned off Check if the Smart gate is turned off and then set the Smart ...

Страница 43: ...he bottom and remove the foreign substance from the right driving wheel Check bumper sensor Slightly pull the stuck bumper outward A foreign substance dust stain etc is on the Obstacle sensor window Turn off the Power Switch at the bottom and wipe the foreign substance from the front and rear sensor windows using a soft cloth A foreign substance Dust stain etc is on the Cliff sensor window Turn of...

Страница 44: ...44_ Product specification Product specification Charger Station Main Body 93 mm Height 355 mm Length 355 mm Width 275 mm Width 161 mm Length 122 mm Height ...

Страница 45: ... power consumption 50 W Main unit power consumption 25 W Battery specifications 14 4V 2 000 mA Cleaning Specifications Dust bin capacity About 0 6 ℓ Charging type Auto Charging Manual Charging Cleaning mode Auto Spot Max Manual Scheduled Cleaning Charging time About 120 minutes Cleaning time on the basis of hard floor About 90 minutes Voice announcement function Cleaning method Ceiling shape recog...

Страница 46: ...If you have any connects or questions regarding a Samsung Products Contact the SAMSUNG Customer Care Center Country Customer Care Center Web Site Canada 1 800 SAMSUNG 726 7864 www samsung ca ...

Страница 47: ...e bénéficier d un service plus complet veuillez enregistrer votre produit à l adresse www samsung com register Robot aspirateur Manuel d utilisation Avant d utiliser cet appareil veuillez lire attentivement les instructions Utilisation intérieure uniquement Français SR8830 ...

Страница 48: ... termes pour aider l utilisateur à comprendre comment utiliser l appareil de manière adéquate CONSIGNES DE SÉCURITÉ Avant d utiliser cet appareil veuillez lire attentivement ce manuel et le conserver pour toute référence ultérieure Les instructions d utilisation suivantes concernent plusieurs modèles il est donc possible que les caractéristiques de votre aspirateur soient légèrement différentes de...

Страница 49: ...u elles aient reçu les instructions nécessaires concernant l utilisation de cet appareil de la part d une personne responsable et ce pour leur propre sécurité Les enfants doivent être surveillés afin de garantir qu ils ne jouent pas avec l appareil CHARGEUR DE BATTERIE N utilisez pas la prise polarisée avec une prise murale ou une rallonge non polarisée N utilisez pas l appareil à l extérieur ni s...

Страница 50: ... si de tels liquides risquent d être présents N utilisez pas le robot aspirateur dans un espace clos rempli de vapeurs de peinture à l huile de diluant de substances antimites de poussières inflammables et autres vapeurs explosives ou toxiques Des fuites de batterie peuvent se produire suite à un usage intensif ou à des températures extrêmes En cas de contact du liquide avec la peau rincez abondam...

Страница 51: ...u module Smart gate 26 Utilisation du robot aspirateur 26 Démarrage Arrêt du nettoyage 27 Recharge 28 Nettoyage automatique 29 Nettoyage localisé 30 Nettoyage intensif 31 Nettoyage manuel 32 Programmation de l heure de nettoyage 33 Sélection des annonces sonores ENTRETIEN DES OUTILS ET DU FILTRE 34 34 Nettoyage du robot aspirateur 34 Veuillez suivre les méthodes de nettoyage et d entretien spécifi...

Страница 52: ...n incendie N utilisez pas de courant d une tension autre que 120 V et n utilisez pas de prises multiples Ne laissez pas le cordon traîner sur le sol Cela pourrait entraîner une électrocution ou un incendie Ne tirez pas la prise d alimentation par le cordon et ne touchez jamais la prise avec les mains mouillées Cela pourrait entraîner une électrocution ou un incendie Veillez à éliminer toute trace ...

Страница 53: ...lles de bain salle d eau ou surfaces étroites et en hauteur tables étagères En cas d utilisation dans ces lieux l appareil risque d être gravement endommagé dysfonctionnements pannes Ouvrez toutes les portes pour nettoyer toutes les pièces Si une porte est fermée le robot aspirateur ne pourra pas entrer dans la pièce Toutefois veillez à fermer la porte d entrée principale de la véranda et de la sa...

Страница 54: ...t de tomber Veillez à ce que les enfants ne montent pas et ne s assoient pas dessus Les enfants risqueraient de tomber et de se blesser ou d endommager gravement l appareil Si un enfant ou un animal domestique doit rester seul veillez à mettre le robot aspirateur hors tension Le robot aspirateur risquerait d attirer leur attention Si la roue d entraînement venait à entraîner des doigts des pattes ...

Страница 55: ...de eau huile ou litière d animaux Cela risquerait d endommager gravement l appareil Le liquide risquerait de se répandre sur les roues et de salir l intérieur de l appareil DANGER Les objets situés devant le chargeur empêchent le robot aspirateur de venir se recharger automatiquement Libérez la zone ATTENTION Il ne doit y avoir aucun obstacle à 50 cm de chaque côté du chargeur et à 1 m devant DANG...

Страница 56: ...ssion d un son d une odeur anormal e ou de fumée mettez immédiatement l appareil hors tension et contactez le centre d assistance clientèle DANGER N utilisez pas le robot aspirateur sur une table ou autre surface en hauteur Cela risquerait de l endommager en cas de chute ATTENTION Pendant son fonctionnement le robot aspirateur risque de percuter des meubles tels que les pieds de chaises de tables ...

Страница 57: ...e vaporiser de l eau directement sur la surface extérieure ou d appliquer une substance volatile telle que du benzène du diluant ou de l alcool Cela risquerait d endommager gravement l appareil ATTENTION L appareil ne doit en aucun cas être démonté ou réparé par une personne autre qu un technicien de maintenance qualifié Cela risquerait d endommager l appareil ATTENTION N appuyez pas excessivement...

Страница 58: ... Le non respect de cette consigne risquerait de provoquer un incendie ou une électrocution DANGER Avant de nettoyer le chargeur veillez à débrancher le cordon d alimentation pour des raisons de sécurité DANGER Pour retirer les substances étrangères utilisez toujours la brosse de nettoyage après avoir mis l appareil hors tension Le non respect de cette consigne risque d entraîner la mise en marche ...

Страница 59: ...bot aspirateur nettoie le sol de manière séquentielle selon la carte déterminée par la fonction de reconnaissance du plafond Il peut ainsi nettoyer chaque recoin de la pièce 1 Mode Auto Permet de nettoyer les pièces automatiquement 2 Mode Spot Permet de nettoyer une zone localisée en profondeur Il peut être utilisé pour aspirer des miettes de pain ou de biscuits 3 Mode Max Fonctionne jusqu à épuis...

Страница 60: ...e les 2 capteurs antichocs absorbent l impact BROSSE ROTATIVE LATÉRALE La brosse rotative latérale permet de nettoyer la poussière sur les côtés CHARGEMENT AUTOMATIQUE Lorsque la batterie est faible le robot aspirateur se dirige automatiquement vers le chargeur où il sera rapidement rechargé ANTI CHUTE SYSTÈME DE SÉCURITÉ Les 3 capteurs d escarpement détectent les marches descendantes escaliers ou...

Страница 61: ...pirateur 02 Montage de l aspirateur COMPOSANTS Chargeur Station de recharge Unité principale Autres composants Télécommande Manuel d utilisation 2 piles 2 modules Smart gate Brosse de nettoyage Support pour télécommande Filtre HEPA de rechange ...

Страница 62: ...de la télécommande Capteur de la télécommande Collecteur de poussière Bouton d éjection du collecteur de poussière Ouverture du collecteur de poussière Roue d entraînement Cache de la batterie Brosse principale Cache de la brosse principale Bouton de mise sous hors tension Roue d entraînement Capteur d escarpement Capteur d escarpement Broche de chargement Capteur d escarpement Broche de chargemen...

Страница 63: ...piles ne sont pas fournies avec l appareil Elles doivent être achetées séparément Insérez les piles alcalines type D avant d utiliser l appareil Mise en place des piles Soulevez le couvercle du module Smart gate tout en appuyant sur la languette de verrouillage Insérez les piles dans le module Smart gate comme indiqué sur la figure ci dessous Si les piles sont insérées à l envers le module Smart g...

Страница 64: ...r la figure ci dessous Si les piles sont insérées à l envers la télécommande ne fonctionnera pas Après avoir inséré la languette du couvercle dans l encoche appuyez sur l autre côté pour le fermer jusqu à ce qu un petit clic se fasse entendre 1 2 3 Spécification piles alcalines de type AAA Les piles ne sont pas insérées dans la télécommande au moment de l achat de l appareil Insérez les piles alca...

Страница 65: ...spirateur retourne sur la station de recharge pour recharger sa batterie 6 Affichage du mode de nettoyage Chaque fois que le bouton de mode de nettoyage est actionné le mode de nettoyage correspondant s affiche a Mode automatique ce symbole s allume lorsque le mode de nettoyage Auto est sélectionné b Mode localisé ce symbole s allume lorsque le mode de nettoyage Spot est sélectionné c Mode intensi...

Страница 66: ...e particulière en utilisant le mode Fence mur virtuel ou nettoyer plusieurs zones une par une à l aide du mode Guard porte virtuelle INSTALLATION DU ROBOT ASPIRATEUR MISE SOUS HORS TENSION Si le bouton de mise sous tension est désactivé le robot aspirateur ne se rechargera pas même s il est installé sur la station de recharge Pour utiliser le robot aspirateur vous devez actionner le bouton de mise...

Страница 67: ...ger automatiquement Si le robot aspirateur est séparé du chargeur la batterie se décharge automatiquement 2 Il ne doit y avoir aucun obstacle à 50 cm sur les côtés et à 1 m devant 1 Installez le chargeur sur une surface plane 3 Installez le charger à un endroit facilement accessible pour le robot aspirateur 4 Disposez le cordon d alimentation le long du mur 5 Si le sol est recouvert de parquet ins...

Страница 68: ... appareil Lorsque l indicateur du niveau de la batterie se met à clignoter en cours de fonctionnement le robot aspirateur s arrête et retourne automatiquement se recharger sur le chargeur Lorsque l indicateur du niveau de la batterie clignote et que le message LO s affiche en cours de fonctionnement le robot aspirateur ne peut pas être contrôlé par la télécommande ni par les boutons de l unité pri...

Страница 69: ...du centre d assistance clientèle le symbole authentique ainsi que le numéro de modèle avant de l acheter Référence de la batterie type AA Ni MH UNION SUPPO modèle HPY x12 Si la batterie ne fonctionne plus ne la démontez pas et contactez le centre d assistance clientèle le plus proche Un temps de charge plus long et un temps de fonctionnement de la batterie plus court indiquent que celle ci est en ...

Страница 70: ...é le témoin est éteint 2 Réglage du mode L actionnement du bouton Mode Mise en marche sélectionne tour à tour un mode dans l ordre suivant_ mode Fence mur virtuel mode Guard porte virtuelle désactivé 3 Réglage de la longueur de la barrière Réglez la distance de restriction d accès délimitée par le module Smart gate pour le robot aspirateur à l aide du bouton de la télécommande Création d une barri...

Страница 71: ...te suffisamment loin du chargeur car le chargement automatique risque d être interrompu si le module est trop près du chargeur Si la barrière est réglée sur une distance plus grande que nécessaire le robot aspirateur risque de ne pas nettoyer correctement Réglez la longueur de la barrière sur une valeur appropriée à l aide du bouton de contrôle de la distance Si plusieurs robots aspirateurs sont u...

Страница 72: ...nez le mode Auto Spot Max Manual à l aide des boutons puis Lorsque le nettoyage démarre le robot aspirateur commence à se déplacer Si vous appuyez sur le bouton sans sélectionner de mode de nettoyage le nettoyage démarre en mode Auto Arrêt Pour arrêter appuyez sur le bouton de la télécommande ou de l unité principale Lorsque le nettoyage s interrompt le robot aspirateur s arrête Vous pouvez lancer...

Страница 73: ...ler l opération puis sur le bouton Recharging Dépannage au cas où le robot aspirateur ne retourne pas sur le chargeur Vérifiez l installation du chargeur Si le chargeur de là où il est installé ne parvient pas à guider le robot aspirateur jusqu à lui Si le chargeur se situe à plus de 5 m du robot aspirateur Le robot aspirateur peut avoir besoin de plus de temps pour revenir au chargeur Vous devez ...

Страница 74: ...ar il garde en mémoire sa position initiale lorsqu il se déplace Si le niveau de la batterie devient faible en cours de nettoyage le robot aspirateur revient automatiquement sur la station de recharge et reprend le nettoyage une fois sa batterie chargée Nombre de fois où il reprendra le nettoyage une fois En cours de nettoyage Lorsque le nettoyage est terminé Permet d annuler le mode 2 1 Permet de...

Страница 75: ...ut 1 5m About 1 5m En cours de nettoyage Lorsque le nettoyage est terminé En mode de nettoyage localisé Spot le robot aspirateur nettoie une zone de 1 5 m x 1 5 m Une fois le nettoyage terminé le robot aspirateur affiche les messages End Stop et Stand by Permet d annuler le mode 2 1 Permet de régler le mode Bouton de l unité principale Bouton de la télécommande Action correspondante Lorsque le rob...

Страница 76: ...tomatiquement sur la station de recharge et reprend le nettoyage une fois sa batterie chargée Nombre de fois où il reprendra le nettoyage une fois ATTENTION Ne déplacez pas le robot aspirateur et n appuyez sur aucun bouton lorsqu il est en cours de nettoyage Sinon il va considérer que le nettoyage est terminé et va recommencer à nettoyer depuis le début En cours de nettoyage Permet d annuler le mo...

Страница 77: ...à l aide de la télécommande uniquement ATTENTION En mode de nettoyage manuel vous pouvez déplacer l appareil dans des zones comportant des barrières ou présentant un risque de chute escaliers etc à l aide de la télécommande En cours de nettoyage Boutons directionnels haut gauche droite La direction bas n est pas disponible Permet d annuler le mode 2 1 Permet de régler le mode Bouton de l unité pri...

Страница 78: ... DE L HEURE DE NETTOYAGE Vous pouvez programmer le robot aspirateur pour qu il commence le nettoyage à une heure précise Départ différé jusqu à 23 heures Le nettoyage programmé n est possible que si le robot aspirateur est installé sur la station de recharge Le symbole est éteint Le symbole est allumé Ces boutons permettent de faire défiler l heure vers le haut ou vers le bas 2 1 Permet d activer ...

Страница 79: ...es en anglais Effets sonores une mélodie retentit au lieu de l annonce vocale Annonces vocales en français les annonces vocales sont faites en français Si une erreur survient lors du nettoyage une annonce sonore est émise En revanche si le bouton Sound Off est actionné aucun son n est émis Si vous appuyez à nouveau sur le bouton le son est réactivé Appuyez sur le bouton Demo Si vous actionnez ce b...

Страница 80: ... CAMÉRA Vous devez éteindre le bouton de mise sous tension situé sous l unité principale avant de la nettoyer Ne vaporisez jamais d eau de diluant de benzène etc directement sur l unité principale du robot aspirateur Éteignez toujours le bouton de mise sous tension situé sous l unité principale avant de la nettoyer Le robot aspirateur pourrait se mettre en marche accidentellement et entraîner des ...

Страница 81: ...DU FILTRE HEPA 2 Retirez le capot du réservoir de poussière en tirant dans la direction de la flèche indiquée sur l illustration 1 Appuyez sur bouton d éjection du réservoir de poussière PUSH et tirez sur le réservoir pour l enlever Videz le réservoir de poussière avant de le nettoyer Au moment de retirer le réservoir de poussière prenez garde de ne pas renverser la poussière qui s y trouve Videz ...

Страница 82: ...ans le mauvais sens 4 Éliminez la poussière accumulée sur le filtre HEPA et sur le réservoir de poussière Vous pouvez les laver à l eau 6 Refermez le capot du réservoir de poussière et replacez ce dernier dans l unité principale Structure du réservoir de poussière Bouton d éjection PUSH du réservoir de poussière Ouverture du réservoir de poussière Réservoir de poussière Filtre HEPA Capot du réserv...

Страница 83: ...bouton de mise sous tension situé sous l unité principale avant de la nettoyer 3 Séparez la brosse principale de l unité 4 Retirez tout corps étranger tel que des cheveux ou des bouts de ficelle enroulés autour de la brosse principale à l aide de la brosse de nettoyage ou de votre aspirateur traditionnel OFF ON Retirez le réservoir de poussière avant de nettoyer la brosse principale sinon la pouss...

Страница 84: ...usqu à entendre un petit clic Afin d éviter que le robot aspirateur ne se bouche veillez à ne pas aspirer de cure dents cotons tiges etc Si vous ne parvenez pas à retirer les corps étrangers contactez le centre d assistance clientèle La brosse principale nettoie la poussière sur le sol il est donc fréquent que des bouts de ficelle ou des cheveux s enroulent autour Vérifiez et nettoyez la régulière...

Страница 85: ...cipale avant de la nettoyer Vous devez éteindre le bouton de mise sous tension situé sous l unité principale avant de la nettoyer 3 Tournez la brosse rotative latérale puis répétez les actions spécifiés à l étape 2 4 Si des cheveux ou des bouts de ficelle sont coincés entre l unité principale et la brosse rotative latérale dévissez la brosse à l aide d un tournevis cruciforme et retirez la Avant d...

Страница 86: ...ton ou d une paire de pinces aux bouts arrondis si nécessaire 1 Pour nettoyer la roue d entraînement placez un chiffon doux sur le sol et retournez doucement l unité principale Vous devez éteindre le bouton de mise sous tension situé sous l unité principale avant de la nettoyer Si le robot aspirateur se met soudainement à zigzaguer cela peut être dû à un corps étranger qui bloque la roue d entraîn...

Страница 87: ...fiché sur le panneau d affichage Soulevez le robot aspirateur et placez le sur le chargeur pour le recharger Le robot aspirateur est il coincé dans des câbles traînant sur le sol Éteignez du bouton de mise sous tension et enlevez les câbles Le robot aspirateur est il coincé au niveau d un trou La roue d entraînement ne touche plus le sol Éteignez du bouton de mise sous tension et déplacez le robot...

Страница 88: ...ou placez le à une distance appropriée Le robot aspirateur franchit le module Smart gate Les piles du module Smart gate sont elles vides Changez les piles piles alcalines type D LR20 Le module Smart gate est il réglé en mode Guard porte virtuelle Réglez le module Smart gate sur le mode Fence mur virtuel Le témoin de mode est il éteint Vérifiez que le module Smart gate n est pas éteint puis réglez ...

Страница 89: ...dans la roue d entraînement droite Vérifiez le capteur antichoc Tirez légèrement sur le pare choc vers l extérieur Un corps étranger poussière saleté etc se trouve sur la fenêtre du capteur d obstacles Éteignez du bouton de mise sous tension situé sous le robot et essuyez les fenêtres avant et arrière du capteur à l aide d un chiffon doux Un corps étranger poussière saleté etc se trouve sur la fen...

Страница 90: ...ctéristiques techniques du produit Caractéristiques techniques du produit Chargeur Station de recharge Unité principale 93 mm hauteur 355 mm longueur 355 mm largeur 275 mm largeur 161 mm longueur 122 mm hauteur ...

Страница 91: ... Consommation électrique de l unité principale 25 W Caractéristiques de la batterie 14 4 V 2000 mA Caractéristiques de nettoyage Capacité du réservoir de poussière Environ 0 6 ℓ Type de recharge Recharge automatique manuelle Mode de nettoyage Auto automatique Spot localisé Max intensif Manual manuel nettoyage programmé Temps de charge Environ 120 minutes Temps de nettoyage sur sol dur Environ 90 m...

Страница 92: ... 1 Si vous avez des suggestions ou des questions concernant les produits Samsung veuillez contacter le Service Consommateurs Samsung Pays Centre de service á la clientéle Site internet Canada 1 800 SAMSUNG 726 7864 www samsung ca ...

Отзывы: