background image

Code No.: DE68-02473A

FOUR À MICRO-ONDES

Mode d’emploi et conseils de cuisson

CE2974N / CE2974NT
CE2914N / CE2914NT

Aide-mémoire.................................................................................................2
Four ................................................................................................................3
Panneau de commande.................................................................................4
Accessoires....................................................................................................5
Utilisez ce mode d’emploi ..............................................................................5
Précautions d’emploi......................................................................................6
Installez votre four à micro-ondes..................................................................7
Réglez l’horloge (CE2974N/CE2974NT) .......................................................8
Comment fonctionne un four à micro-ondes..................................................8
Vérifiez que votre four fonctionne correctement ............................................9
Problèmes et solutions...................................................................................9
Cuisez et réchauffez un plat par micro-ondes .............................................10
Niveaux de puissance ..................................................................................11
Arrêtez la cuisson.........................................................................................11
Ajustez le temps de cuisson ........................................................................12
Réchauffez ou cuisez un plat en mode automatique 
(CE2974N/CE2974NT) ................................................................................12
Temps pour le réchauffage en mode automatique 
(CE2974N/CE2974NT) ................................................................................13
Réchauffez ou cuisez un plat en mode instantané 
(CE2914N/CE2914NT) ................................................................................14
Temps pour le réchauffage ou la cuisson en mode instantané 
(CE2914N/CE2914NT) ................................................................................14
Décongelez un plat automatiquement (CE2974N/CE2974NT) ...................14
Temps pour la décongélation automatique (CE2974N/CE2974NT)............15
Décongelez un plat manuellement (CE2914N/CE2914NT) ........................15
Réchauffez deux plats en même temps (CE2974N/CE2974NT) ................16
Utilisez un plat croustilleur (CE2974NT/CE2914NT) ...................................16
Conseils de cuisson pour le plat croustilleur (CE2974NT/CE2914NT) .......17
Choisissez la position de l’élément chauffant ..............................................18
Choisissez les accessoires ..........................................................................18
Cuisez un plat au gril....................................................................................19
Combinez la cuisson aux micro-ondes et le gril ..........................................20
Supprimez le signal sonore (CE2974N/CE2974NT)....................................21
Verrouillez votre four à micro-ondes (CE2974N/CE2974NT) ......................21
Utilisez la fonction de mémorisation de cuisson (CE2974N/CE2974NT) ....22
Désactivez la rotation du plateau.................................................................22
Guide des récipients ....................................................................................23
Conseils de cuisson .....................................................................................24
Nettoyez votre four à micro-ondes...............................................................31
Rangez ou réparez votre four à micro-ondes ..............................................31
Spécifications techniques ............................................................................32

jlY`^[TmU”GGwˆŽŒGXGG{œŒš‹ˆ SGvŠ›–‰Œ™G_SGYWWYGGYaW\Gwt

Содержание CE2974N

Страница 1: ...fage ou la cuisson en mode instantané CE2914N CE2914NT 14 Décongelez un plat automatiquement CE2974N CE2974NT 14 Temps pour la décongélation automatique CE2974N CE2974NT 15 Décongelez un plat manuellement CE2914N CE2914NT 15 Réchauffez deux plats en même temps CE2974N CE2974NT 16 Utilisez un plat croustilleur CE2974NT CE2914NT 16 Conseils de cuisson pour le plat croustilleur CE2974NT CE2914NT 17 C...

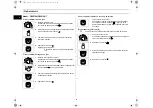
Страница 2: ...retentit quatre fois 1 Mettez le plat congelé dans le four Positionnez le bouton de sélection du mode de cuisson sur l icône de cuisson manuelle 2 Sélectionnez le type d aliments à décongeler en appuyant sur le bouton Auto une ou plusieurs fois 3 Choisissez le temps de décongélation en tournant le bouton de sélection multiusage 4 Appuyez sur le bouton Laissez le plat dans le four Positionnez le bo...

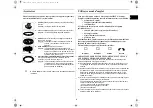
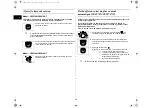
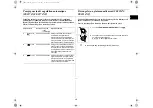
Страница 3: ...ation en tournant le bouton de sélection du temps Laissez le plat dans le four Ajustez le temps de cuisson en tournant le bouton de sélection du temps 1 Positionnez le bouton de sélection du niveau de puissance sur l icône de gril 2 Réglez le temps de cuisson en tournant le bouton de sélection du temps ORIFICES DE VENTILATION CROCHETS DEVERROUILL AGEDE LA PORTE PORTE PLATEAU COUPLEUR ANNEAU DE GUI...

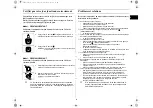
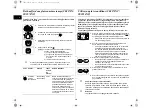
Страница 4: ...LECTION DU MODE COMBINÉ MICRO ONDES GRIL 9 SÉLECTION DU MODE GRIL 10 RÉGLAGE DE L HEURE 11 ACTIVATION DÉSACTIVATION DE LA ROTATION DU PLATEAU 12 BOUTON D ARRÊT ET D ANNULATION 13 BOUTON DE DÉMARRAGE BOUTON DE SÉLECTION MULTIUSAGE temps poids et quantités 2 9 8 3 6 10 11 7 12 4 1 5 1 SÉLECTION DU MODE DE DÉCONGÉLATION 2 SÉLECTION DU MODE GRIL 3 SÉLECTION DU MODE COMBINÉ MICRO ONDES GRIL 4 SÉLECTION...

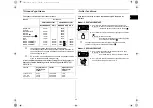
Страница 5: ... étanchéité propres en les essuyant après usage d abord avec un chiffon humide et ensuite avec un chiffon sec et doux c Si le four est endommagé ne l utilisez pas tant qu il n a pas été réparé par un spécialiste micro ondes formé par le fabricant Il est impératif que la porte du four ferme correctement et que les éléments suivants ne soient pas endommagés 1 porte joints de porte et joints d étanch...

Страница 6: ...n utilisez pas votre four à micro ondes pour sécher des journaux en cas d apparition de fumée laissez la porte du four fermée et arrêtez le four ou débranchez le de la prise électrique 9 Faites TOUJOURS très attention lorsque vous chauffez des liquides ou des aliments pour bébé Attendez au moins 20 secondes après avoir arrêté le four pour bien répartir la chaleur Remuez pendant la cuisson si néces...

Страница 7: ... de s arrêter automatiquement Vous devrez alors attendre qu il ait suffisamment refroidi pour le réutiliser Pour votre sécurité personnelle cet appareil doit être branché sur une prise murale à 3 broches délivrant une tension de 230 volts CA 50 Hz avec mise à la terre Si le cordon d alimentation de l appareil est endommagé contactez votre revendeur ou le service après vente SAMSUNG le plus proche ...

Страница 8: ...ecettes et dans ce mode d emploi doivent donc être respectés pour assurer la cuisson homogène des aliments jusqu au centre une température uniforme 1 Pour afficher l heure appuyez sur le bouton en mode 24 heures une fois 12 heures deux fois 2 Sélectionnez l heure en tournant le bouton de sélection multiusage 3 Appuyez sur le bouton 4 Sélectionnez les minutes en tournant le bouton de sélection mult...

Страница 9: ...T La porte est elle bien fermée L alimentation secteur a t elle disjoncté ou le fusible a t il fondu à la suite d une surcharge de votre prise électrique Les aliments sont trop ou pas assez cuits Avez vous indiqué un temps de cuisson correct en fonction du type d aliments Avez vous choisi le niveau de puissance approprié Des étincelles et craquements se produisent à l intérieur du four arcs électr...

Страница 10: ...isson manuelle 2 Appuyez sur le bouton Rèsultat la puissance de cuisson maximale 900 W s affiche par défaut Réglez le niveau de puissance approprié en appuyant de nouveau sur le bouton jusqu à ce que la puissance souhaitée s affiche Pour plus de renseignements reportez vous au tableau de la page suivante 3 Choisissez le temps de cuisson en tournant le bouton de sélection multiusage 4 Appuyez sur l...

Страница 11: ...LEVÉ MOYEN ÉLEVÉ MOYEN MOYEN BAS DÉCONGÉLATION BAS GRIL MODE COMBINÉ III MODE COMBINÉ II MODE COMBINÉ I 900 W 600 W 450 W 300 W 180 W 100 W 600 W 450 W 300 W 1300 W 1300 W 1300 W 1300 W 900 W 700 W 600 W 450 W 300 W 180 W 100 W 300 W 450 W 600 W 1300 W 1300 W 1300 W 1300 W Tranche Augmentation ou diminution par unité de Tranche Augmentation ou diminution par unité de Jusqu à 1 min 1 à 3 min 3 à 10...

Страница 12: ...au puis fermez la porte N utilisez que des récipients garantis micro ondes Appuyez sur le bouton 30s chaque fois que vous souhaitez ajouter 30 secondes Pour augmenter ou diminuer le temps de cuisson de vos aliments en cours de cuisson tournez le bouton de sélection multiusage vers la droite ou la gauche Ajustez le temps de cuisson restant en tournant le bouton de sélection du temps 1 Sélectionnez ...

Страница 13: ...e 200 à 250 ml 300 à 350 ml 400 à 450 ml 500 à 550 ml 600 à 650 ml 1 à 2 mins Versez la soupe ou la sauce dans une assiette creuse ou dans un bol en céramique et recouvrez pendant la cuisson et le temps de repos Remuez avant et après le temps de repos A 1 Légumes frais 200 à 250 g 300 à 350 g 400 à 450 g 500 à 550 g 600 à 650 g 700 à 750 g 3 mins Lavez épluchez et découpez les légumes en morceaux ...

Страница 14: ...our plus de renseignements reportez vous à la section intitulée Cuisez et réchauffez un plat par micro ondes page 10 1 Sélectionnez la puissance de cuisson maximale en tournant le bouton de sélection du niveau de puissance 2 Sélectionnez l icône de cuisson instantanée appropriée boissons soupe sauce ou assiette garnie en tournant le bouton de sélection du temps de cuisson Icône Aliment Puissance Q...

Страница 15: ...0 2 à 2kg 20 à 60mins Protégez les bords avec du papier d aluminium Au signal sonore retournez la viande Ce programme convient très bien pour décongeler du bœuf du mouton du porc des steaks des côtelettes ou de la viande hachée 2 Volaille 0 2 à 2kg 20 à 60mins Protégez les extrémités des pattes et des ailes avec du papier d aluminium Au signal sonore retournez la volaille Ce programme convient trè...

Страница 16: ...s toutes les minutes pendant trois minutes 3 l heure s affiche de nouveau Code Aliment Quantité Temps de repos en minutes Recommandations d 1 Assiettes garnies Réfrigérées 2x300 à 350g 2x400 à 450g 2 mins Mettez les aliments dans deux assiettes en céramique et recouvrez ces dernières d un film plastique garanti micro ondes Ce programme concerne des plats composés de trois aliments différents tels ...

Страница 17: ...côte pour deux baguettes Mettez le plat sur la grille Pizza congelée 300 à 350g 400 à 450g 600W Grill 5min 7 à 8min 9 à 10min Préchauffez le plat croustilleur Mettez la pizza congelée dans le plat puis placez ce dernier sur la grille Mini pizzas réfrigérées 100 à 150g 200 à 250g 600W Grill 5min 3 à 3 min 4 à 4 min Préchauffez le plat croustilleur Mettez la pizza congelée dans le plat puis placez c...

Страница 18: ...c Pour plus de renseignements sur les récipients et ustensiles garantis micro ondes reportez vous à la section Guide des récipients page 23 Pour mettre l élément chauffant alors en position horizontale mode gril ou mode combiné micro ondes gril tirez l élément chauffant vers vous poussez le vers le haut jusqu à ce qu il soit parallèle à la voûte du four en position oblique pour faciliter le nettoy...

Страница 19: ...n de sélection multiusage 3 Appuyez sur le bouton 4 Ouvrez la porte et placez la nourriture sur la grille 5 Appuyez sur le bouton Rèsultat l indication suivante s affiche 6 Réglez le temps de cuisson en tournant le bouton de sélection multiusage Le temps de cuisson maximal est de 60 minutes en mode gril 7 Appuyez sur le bouton Rèsultat la cuisson en mode gril démarre Lorsqu elle est terminée 1 un ...

Страница 20: ... icône de cuisson manuelle 4 Appuyez sur le bouton du mode combiné micro ondes gril Rèsultat Trois modes combinés sont possibles 600 W gril 450 W gril et 300 W gril Pour sélectionner le mode approprié appuyez sur le bouton jusqu à ce que le mode souhaité s affiche La température du gril est réglée automatiquement 5 Réglez le temps de cuisson en tournant le bouton de sélection multiusage Le temps d...

Страница 21: ...ivante apparaît sur l afficheur le signal sonore est désactivé et ne retentit plus chaque fois que vous appuyez sur un bouton 2 Pour rétablir le signal sonore appuyez simultanément sur les deux mêmes boutons Rèsultat l indication suivante apparaît sur l afficheur le four fonctionne avec le signal sonore actif 1 Appuyez simultanément sur les boutons et Rèsultat le four est verrouillé aucune fonctio...

Страница 22: ...des aliments étant moins homogène Nous vous conseillons de tourner le plat manuellement à mi parcours N utilisez jamais l appareil s il y a rien au four ou l appareil peut etrê endommagé et l incendie peut etrê provoqué Model CE2974N CE2974NT N appuyez pas sur le bouton de désactivation de la rotation du plateau en cours de cuisson La turntable ne tourme pas quand le boutton allume Model CE2914N C...

Страница 23: ...mais risquent de se déformer en cas de surchauffe Risquent de brûler Risquent de provoquer des arcs électriques étincelles Verre Résistant à la chaleur Verres de table Bocaux Utilisable à condition de ne pas présenter de décorations métalliques Utilisables pour réchauffer des aliments ou des liquides Du verre fin peut cependant être fêlé ou brisé par un changement soudain de température Retirez le...

Страница 24: ...à la section sur les astuces micro ondes Nécessité de recouvrir les aliments pendant la cuisson En recouvrant les aliments pendant la cuisson l eau qu ils contiennent se transforme en vapeur et contribue alors au processus de cuisson Vous pouvez recouvrir les aliments de différentes façons à l aide d une assiette en céramique d un couvercle ou d un film en plastique garanti micro ondes Temps de re...

Страница 25: ...ant que son centre ne soit bien chaud Pour obtenir un résultat optimal découpez les aliments en plusieurs morceaux ou tranches Régler le niveau de puissance et mélanger Certains aliments peuvent être réchauffés à 900 W tandis que d autres nécessitent une puissance de 600 W 450 W ou 300 W Pour plus de renseignements reportez vous aux tableaux des pages suivantes Il est préférable de réchauffer un a...

Страница 26: ...puis vérifiez la température avant de servir La température recommandée pour ce type d aliments se situe entre 30 C et 40 C Lait pour bébé versez le lait dans un biberon stérilisé Réchauffez sans recouvrir Ne chauffez jamais un biberon avec la tétine car il pourrait exploser en cas de surchauffe Agitez avant de laisser reposer et avant de servir Vérifiez toujours la température du lait ou des alim...

Страница 27: ...ments Reportez vous au tableau ci dessous pour décongeler des aliments dont la température est située entre 18 C et 20 C Aliment Quantité Puiss ance Cuisson en minutes Repos en minutes Recommandations Soupe réfrigérée 2 x 250g 2 x 350g 900 W 3 à 4 5 à 6 2 à 3 Versez la soupe dans deux assiettes creuses en céramique et recouvrez Posez une assiette sur le plateau et l autre sur la grille Remuez aprè...

Страница 28: ... par exemple ainsi qu aux aliments nécessitant un temps de cuisson très court pour les faire dorer sur le dessus Ce mode peut également servir pour des aliments plus gros généralement appréciés lorqu ils sont dorés et croustillants sur le dessus des morceaux de poulet par exemple Dans ce cas retournez les morceaux de poulet à mi cuisson Pour plus de renseignements reportez vous aux tableaux des de...

Страница 29: ... la grille Laissez reposer 2 à 3 minutes après la cuisson Morceaux de poulet 450 g 2 morce aux 650 g 2 à 3mor ceaux 850 g 4 morce aux 300W Grill 7 à 8 9 à 10 11 à 12 7 à 8 8 à 9 9 à 10 Badigeonnez les morceaux de poulet d huile puis ajoutez des épices Disposez les morceaux en cercle les ailes et les pattes au centre Laissez reposer 2 à 3 minutes Poulet rôti 900g 1100g 450W Grill 10 à 12 12 à 14 9 ...

Страница 30: ...fiture et remuez Faites cuire 10 à 12 minutes à 900 W en recouvrant Remuez souvent pendant la cuisson Versez directement dans des pots en verre avec couvercles qui se vissent Mettez les couvercles puis laissez les pots retournés pendant cinq minutes FAIRE DORER DES AMANDES EFFILÉES Étalez 30 g d amandes éffilées dans une assiette en céramique de taille moyenne Faites dorer pendant 3 à 4 minutes à ...

Страница 31: ...tout particulier les joints de la porte afin qu aucune particule ne s accumule ne nuise à l étanchéité de la porte Nettoyez la cavité du four après chaque utilisation à l aide d une solution savonneuse douce Pour éviter tout risque de brûlures laissez le four refroidir avant de procéder à son nettoyage Rangez ou réparez votre four à micro ondes Pour le rangement ou le dépannage de votre four à mic...

Страница 32: ...ource d alimentation 230V 50 Hz Consommation Micro ondes Gril Mode combiné 1400 W 1300 W 2700 W Puissance restituée en micro ondes 100 W 900 W 6 niveaux IEC 705 CE2974N CE2974NT 100 W 900 W 7 niveaux IEC 705 CE2914N CE2914NT Fréquence de fonctionnement 2450 MHz Type de magnétron OM75P 31 Méthode de refroidissement Moteur de ventilation Dimensions Long x Haut x Prof Extérieures Cavité du four 517 x...

Страница 33: ...33 F Remarque jlY TmU GGw GZZGG SGv G_SGYWWYGGYaW Gwt ...

Страница 34: ...34 F Remarque jlY TmU GGw GZ GG SGv G_SGYWWYGGYaW Gwt ...

Страница 35: ...35 F Remarque jlY TmU GGw GZ GG SGv G_SGYWWYGGYaW Gwt ...

Страница 36: ...jlY TmU GGw GZ GG SGv G_SGYWWYGGYaW Gwt ...

Страница 37: ... Feature CE2914N CE2914NT 14 Instant Reheat Cook Setting CE2914N CE2914NT 14 Using the Auto Defrost Feature CE2974N CE2974NT 14 Auto Defrost Settings CE2974N CE2974NT 15 Manual Defrosting Food CE2914N CE2914NT 15 Using the Dual Cook Feature CE2974N CE2974NT 16 Using the Crusty Plate CE2974NT CE2914NT 16 Crusty Plate Setting CE2974NT CE2914NT 17 Choosing the Heating Element Position 18 Choosing the...

Страница 38: ...esult Cooking starts The oven beeps four times when cooking is over 1 Place the frozen food in the oven Turn the Cooking Control knob to Manual Cook symbol 2 Select the type of food by press the Auto button once or more times 3 Select the cooking time by turning the dial knob as required 4 Press the button Leave the food in the oven Turn the Cooking Control knob to Manual Cook symbol Press 30s onc...

Страница 39: ...the COOKING POWER CONTROL knob to defrost symbol 2 Turn the TIMER knob to select the appropriate time Leave the food in the oven Turn the TIMER knob to desired time 1 Turn the COOKING POWER CONTROL knob to Grill symbol 2 Turn the TIMER knob to select the appropriate time VENTILATION HOLES DOOR LATCHES DOOR TURNTABLE COUPLER ROLLER RING SAFETY INTERLOCK LIGHT DOOR HANDLE DISPLAY CONTROL PANEL HOLES...

Страница 40: ... 6 POWER LEVEL SETTING 7 COMBI MODE SELECTION 8 GRILL MODE SELECTION 9 CLOCK SETTING 10 TURNTABLE ON OFF 11 STOP CANCEL BUTTON 12 START BUTTON DIAL KNOB cook time weight and serving size 13 COOKING CONTROL KNOB ROTATIVO 2 7 8 3 12 5 9 11 6 10 4 1 13 1 DEFROST 2 GRILL MODE SELECTION 3 COMBI MODE SELECTION 4 INSTANT REHEAT 5 TURNTABLE ON OFF 4 1 5 2 3 jlY TniU GGw G GGt SGv G SGYWWYGG a Ght ...

Страница 41: ...ealing surfaces Ensure that the door and door sealing surfaces are kept clean by wiping after use first with a damp cloth and then with a soft dry cloth c Do not operate the oven if it is damaged until it has been repaired by a qualified microwave service technician trained by the manufacturer It is particularly important that the oven door closes properly and that there is no damage to the 1 Door...

Страница 42: ...me of at least 20 seconds after the oven has been switched off so that the temperature can equalize Stir during heating if necessary and ALWAYS stir after heating Take care when handling the container after heating You may burn yourself if the container is too hot A risk of delayed eruptive boiling exists To prevent delayed boiling and possible scalding you should put a plastic spoon or glass stic...

Страница 43: ...his appliance is damaged it must be replaced by the manufacturer or its service agent or a similarly qualified person in order to avoid a hazard Do not install the microwave oven in hot or damp surroundings like next to a traditional oven or radiator The power supply specifications of the oven must be respected and any extension cable used must be of the same standard as the power cable supplied w...

Страница 44: ...must therefore be respected to ensure Even cooking of the food right to the centre The same temperature throughout the food 1 To display the time in the Then press the button 24 hour notation Once 12 hour notation Twice 2 Turn the dial knob to set hour 3 Press the Clock button 4 Turn the dial knob to set minute 5 When the right time is displayed press the button again to start the clock and press ...

Страница 45: ...et the timer correctly CE2914N CE2914NT Is the door closed Have you overloaded the electric circuit and caused a fuse to blow or a breaker to be triggered The food is either overcooked or undercooked Was the appropriate cooking length set for the type of food Was an appropriate power level chosen Sparking and cracking occur inside the oven arcing Have you used a dish with metal trimmings Have you ...

Страница 46: ...OL knob 1 Turn the Cooking Control knob to Manual Cook symbol 2 Press the button Result The 900W maximum cooking power indications are displayed Select the appropriate power level by pressing the button again until the corresponding wattage is displayed Refer to the power level table 3 Set the cooking time by turning the dial knob as required 4 Press the button Result The oven light comes on and t...

Страница 47: ...GRILL COMBI III COMBI II COMBI I 900 W 600 W 450 W 300 W 180 W 100 W 600 W 450 W 300 W 1300 W 1300 W 1300 W 1300 W 900 W 700 W 600 W 450 W 300 W 180 W 100 W 300 W 450 W 600 W 1300 W 1300 W 1300 W 1300 W Time Increasing Time Time Increasing Time up to 1 min 1 3 min 3 10 min 5 sec unit 10 sec unit 30 sec unit 10 20 min 20 40 min 40 99 min 1 min unit 2 min unit 5 min unit 1 To stop Timerarily Open th...

Страница 48: ...b First place the food in the centre of the turntable and close the door Use only recipients that are microwave safe Press the 30s button once for each 30 seconds to be added During the cooking to increase or decrease the cooking time of your food turn the dial knob right or left Adjust the remaining cooking time by rotating the TIMER knob 1 Turn the Cooking Control Knob to Drinks symbol Drink is ...

Страница 49: ...ml 1 2 mins Pour into a deep ceramic soup plate or bowl and cover during heating and standing Stir carefully before and after standing time A 1 Fresh Vegetab les 200 250 g 300 350 g 400 450 g 500 550 g 600 650 g 700 750 g 3 mins Weigh the vegetables after washing cleaning and cutting into a similar size Put them into a glass bowl with lid Add 45 ml 3 tablespoons water when cooking 200 450 g add 60...

Страница 50: ...e cooking reheating function with a power level of 180W Refer to the section entitled Cooking Reheating on page 10 for further details 1 Turn the COOKING POWER CONTROL knob to Max Power 2 Turn the TIMER knob to select Instant Reheat drinks soup sauce or ready meal Symbol Serving Type Portion Cooking Time Standing Time Cooking Power Drinks 150 ml 1 min 10 sec 1 2 mins 900 W Soup Sauce 200 250 ml 2 ...

Страница 51: ...commendation 1 Meat 0 2 2kg 20 60mins Shield the edges with aluminium foil Turn the meat over when the oven beeps This programme is suitable for beef lamb pork steaks chops minced meat 2 Poultry 0 2 2kg 20 60mins Shield the leg and wing tips with aluminium foil Turn the poultry over when the oven beeps This programme is suitable for whole chicken as well as for chicken portions 3 Fish 0 2 2kg 20 5...

Страница 52: ...times 2 The end reminder signal will beep 3 times once every minute 3 The current time is displayed again Code Symbol Serving Type Portion Standing Time Recommendations d 1 Ready meal Chilled 2x300 350g 2x400 450g 2 mins Put each meal on a ceramic plate and cover it with microwave cling film This programme is suitable for the meals consisting of 3 components e g meat with sauce vegetables and side...

Страница 53: ...rusty plate on rack Pizza frozen 300 350g 400 450g 600W Grill 5min 7 8min 9 10min Preheat crusty plate Put the frozen pizza on the crusty plate Put crusty plate on the rack Mini Pizza chilled 100 150g 200 250g 600W Grill 5min 3 3 min 4 4 min Preheat crusty plate Put the chilled pizza pieces in a circle on the plate Set crusty plate on the rack Oven Chips frozen 200g 300g 400g 450W Grill 4min 9min ...

Страница 54: ...per cups towels etc For further details on suitable cookware and utensils refer to the Cookware Guide on page 23 To set the heating element to the Then Horizontal position grill or combined microwave grill Pull the heating element towards you Push it upwards until it is parallel with the oof of the oven When cleaning the upper part inside the cavity it will be convenient to turn heater downward by...

Страница 55: ...ature by pressing the button and set the preheat time by turning the dial knob 3 Press the button 4 Open the door and place the food on the rack 5 Press the button Result The follwing indications are displayed 6 Set the cooking time by turning the dial knob The maximum grilling time is 60 minute 7 Press the button Result Grill cooking starts When it has finished 1 The oven beeps four times 2 The e...

Страница 56: ...the door 3 Turn the Cooking Control knob to Manual Cook symbol 4 Press the Combi button Result Select the appropriate power level by pressing the Combi button again until the corresponding power level is displayed 600W 450 W 300 W You cannot set the temperature of the grill 5 Set the cooking time by turning the dial knob The maximum grilling time is 60 minute 6 Press the button Result Combination ...

Страница 57: ...me Result The following indication is displayed The oven does not beep each time you press a button or cooking ends 2 To switch the beeper back on press the and buttons again at the same time Result The following indication is displayed The oven operates with the beeper on again 1 Press the and buttons at the same time Result The following indication is displayed The oven is locked no funtions can...

Страница 58: ...d that you turn the dish by hand halfway through the cooking process Warning Never operate the oven without local when turntable button is off Result This condition may cath fire and extre damage the oven Model CE2974N CE2974NT Don t press Turntable on off button during cooking process The turntable doesn t rotate when the lamp is ON Model CE2914N CE2914NT Don t press Turntable on off button durin...

Страница 59: ...ng Polystyrene cups containers Paper bags or newspaper Recycled paper or metal trims Can be used to warm food Overheating may cause the polystyrene to melt May catch fire May cause arcing Glassware Oven to table ware Fine glassware Glass jars Can be used unless decorated with a metal trim Can be used to warm foods or liquids Delicate glass may break or crack if heated suddenly Must remove the lid ...

Страница 60: ...chocolate for example see the chapter with tips techniques and hints Covering during cooking To cover the food during cooking is very important as the evaporated water rises as steam and contributes to cooking process Food can be covered in different ways e g with a ceramic plate plastic cover or microwave suitable cling film Standing times After cooking is over food the standing time is important...

Страница 61: ...be reheated using 600 W 450 W or even 300 W Check the tables for guidance In general it is better to reheat food using a lower power level if the food is delicate in large quantities or if it is likely to heat up very quickly mince pies for example Stir well or turn food over during reheating for best results When possible stir again before serving Food Portion Time min Standing Time min Instructi...

Страница 62: ...y s bottle with teat on as the bottle may explode if overheated Shake well before standing time and again before serving Always carefully check the temperature of baby milk or food before giving it to the baby Recommended serving temperature ca 37 C REMARK Baby food particularly needs to be checked carefully before serving to prevent burns Use the power levels and times in the next table as a guid...

Страница 63: ...zing and defrosting food For defrosting of frozen food with a temperature of about 18 to 20 C use the following table as a guide Food Portion Power Time Standing Time min Instructions Soup chilled 2 x 250g 2 x 350g 900 W 3 4 5 6 2 3 Pour into two deep ceramic plates and cover Put one plate directly on the turntable other on the rack Stir well after reheating Stir again before serving Chicken Curry...

Страница 64: ...equire a short cooking time to brown the top of the food Also this mode can be used for thick food portions that benefit from a browned and crispy top e g chicken pieces turning them over half way through cooking Please refer to the grill table for further details IMPORTANT REMARK Whenever the combination mode microwave grill is used make sure that the grill heating element is under the ceiling in...

Страница 65: ...ut the fresh gratin into a small glass Grill pyrex dish Put the dish on the rack After cooking stand for 2 3 minutes Chicken Pieces 450g 2pcs 650g 2 3pcs 850g 4pcs 300W Grill 7 8 9 10 11 12 7 8 8 9 9 10 Brush chicken pieces with oil and spices Put them in a circle with the bones to the middle Put one chicken piece not into the centre of the rack Stand for 2 3 minutes Roast Chicken 900g 1100g 450W ...

Страница 66: ...ING PUDDING Mix pudding powder with sugar and milk 500 ml by following the manufacturers instructions and stir well Use a suitable sized glass pyrex bowl with lid Cook covered for 6 to 7 minutes using 900 W Stir several times well during cooking BROWNING ALMOND SLICES Spread 30 g sliced almonds evenly on a medium sized ceramic plate Stir several times during browning for 3 to 4 minutes using 600 W...

Страница 67: ...the door from closing correctly Clean the microwave oven cavity right after each use with a mild detergent solution but let the microwave oven cool down before cleaning in order to avoid injury Storing and Repairing Your Microwave Oven A few simple precautions should be taken when storing or having your microwave oven serviced The oven must not be used if the door or door seals are damaged Broken ...

Страница 68: ...wer source 230V 50 Hz Power consumption Microwave Grill Combined mode 1400 W 1300 W 2700 W Output power 100 W 900 W 6 Level IEC 705 CE2974N CE2974NT 100 W 900 W 7 Level IEC 705 CE2914N CE2914NT Operating frequency 2450 MHz Magnetron OM75P 31 Cooling method Cooling fan motor Dimensions W x H x D Outside Oven cavity 517 x 297 x 424 mm 336 x 241 x 349 mm Volume 28 liter Weight Net 18 kg approx jlY Tn...

Страница 69: ...33 GB Note jlY TniU GGw GZZGGt SGv G SGYWWYGG a Ght ...

Страница 70: ...34 GB Note jlY TniU GGw GZ GGt SGv G SGYWWYGG a Ght ...

Страница 71: ...35 GB Note jlY TniU GGw GZ GGt SGv G SGYWWYGG a Ght ...

Страница 72: ...jlY TniU GGw GZ GGt SGv G SGYWWYGG a Ght ...

Отзывы: