1. Read these instructions.
2. Keep these instructions.
3. Heed all warnings.
4. Follow all instructions.
5. This apparatus shall not be exposed to
dripping or splashing liquid and no object
filled with liquid, such as a vase, should
be placed on the apparatus.
6. Clean only with a dry cloth.
7. Do not block any of the ventilation
openings. Install in accordance with the
manufacturer's instructions.
8. Do not install near any heat sources such
as radiators, heat registers, stoves, or
other apparatuses (including amplifiers)
that produce heat.
9. Only use attachments/accessories
specified by the manufacturer.
10. Unplug this apparatus during lightning
storms or when not in use for long
periods of time.
11. Do not override the intended purpose
of the polarized or grounding-type plug.
A polarized plug has two blades, with
one wider than the other. A grounding-
type plug has two blades and a third
grounding prong. The wide blade, or third
prong, is provided for your safety. If the
provided plug does not fit your outlet,
consult an electrician to replace the
obsolete outlet.
12. Protect the power cord from being walked
on or pinched, particularly at the prongs,
convenience receptacles, the point where
they exit from the apparatus.
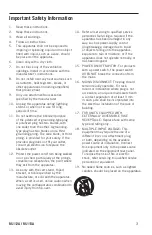
13. Use only with the cart stand, tripod
bracket, or table specified by the
manufacture, or sold with the apparatus.
When a cart is used, utilize caution when
moving the cart/apparatus combination to
avoid injury from tip-over.
14. Refer all servicing to qualified service
personnel. Servicing is required if the
apparatus has been damaged in any
way, such as power-supply cord or
plug breakage, damage due to liquid
or objects falling onto the apparatus,
exposure to rain or moisture, or if the
apparatus does not operate normally, or
has been dropped.
15. POWER ON/OFF SWITCH: For products
with a power switch, the power switch
DOES NOT break the connection from
the mains.
16. MAINS DISCONNECT: The plug should
remain readily operable. For rack-
mount or installation where plug is not
accessible, an all-pole mains switch with
a contact separation of at least 3 mm
in each pole shall be incorporated into
the electrical installation of the rack or
building.
17. FOR UNITS EQUIPPED WITH
EXTERNALLY ACCESSIBLE FUSE
RECEPTACLE: Replace fuse with same
type and rating only.
18.
19. No naked flame sources, such as lighted
candles, should be placed on the apparatus.
MULTIPLE-INPUT VOLTAGE: This
equipment may require the use of a
different line cord, attachment plug,
or both, depending on the available
power source at installation. Connect
this equipment only to the power source
indicated on the equipment rear panel.
To reduce the risk of fire or electric
shock, refer servicing to qualified service
personnel or equivalent.
Important Safety Information
3
RS112A / RS115A

