24
EB 8140 EN
Servicing
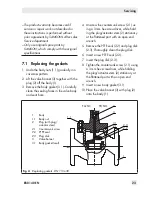
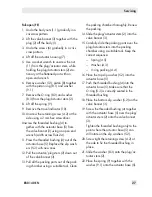
11. Tighten the body nuts (1.1) gradually in
a crisscross pattern. Observe tightening
torques.
7.2 Replacing the packing
7.2.1
DN 15 to 50
Fail-close (FA)
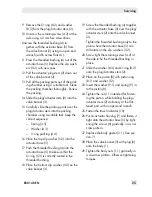
1. Undo the body nuts (1.1) gradually in a
crisscross pattern.
2.
Lift the valve bonnet (3) together with the
plug (2) off the body (1).
3. Undo the screws (6) gradually in a criss-
cross pattern.
4.
Lift off the actuator housing (7).
5.
Lift off the spring (9).
6. Remove the travel indicator (10).
7. Use a socket wrench to unscrew the nut
(11) from the plug/actuator stem, while
holding the plug/actuator stem (2) sta-
tionary at the flattened part with an
open-end wrench.
8. Remove washer (12), piston (8) together
with the piston ring (8.1) and washer
(9.1).
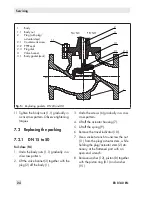
3.1
2.1
2.2
2.3
1
2
3
1.1
FE/NO
FA/NC
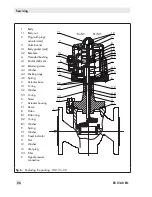
1
Body
1.1
Body nut
2
Plug (with plug/
actuator stem)
2.1 Countersunk screw
2.2 PTFE seal
2.3 Plug disk
3
Valve bonnet
3.1
Body gasket (seal)
Fig. 5:
Replacing gaskets · DN 65 and 80


