Phoenix G2 IDU User Manual
WEB GUI
SAF Tehnika JSC
51
Interconnect PC with USB B port of the IDU using USB/USB mini B cable (USB A
connector – computer side / USB mini B connector – IDU side). USB cable is shown in
Figure 2.6
If the connection is done for the first time, wait while device driver software will be
installed automatically. If it does not happen automatically, contact SAF Technical
support.
If driver is successfully installed, in PC’s Network Connection panel new network
adapter will appear:
Figure 3.2
PC IP USB setup – USB network adapter
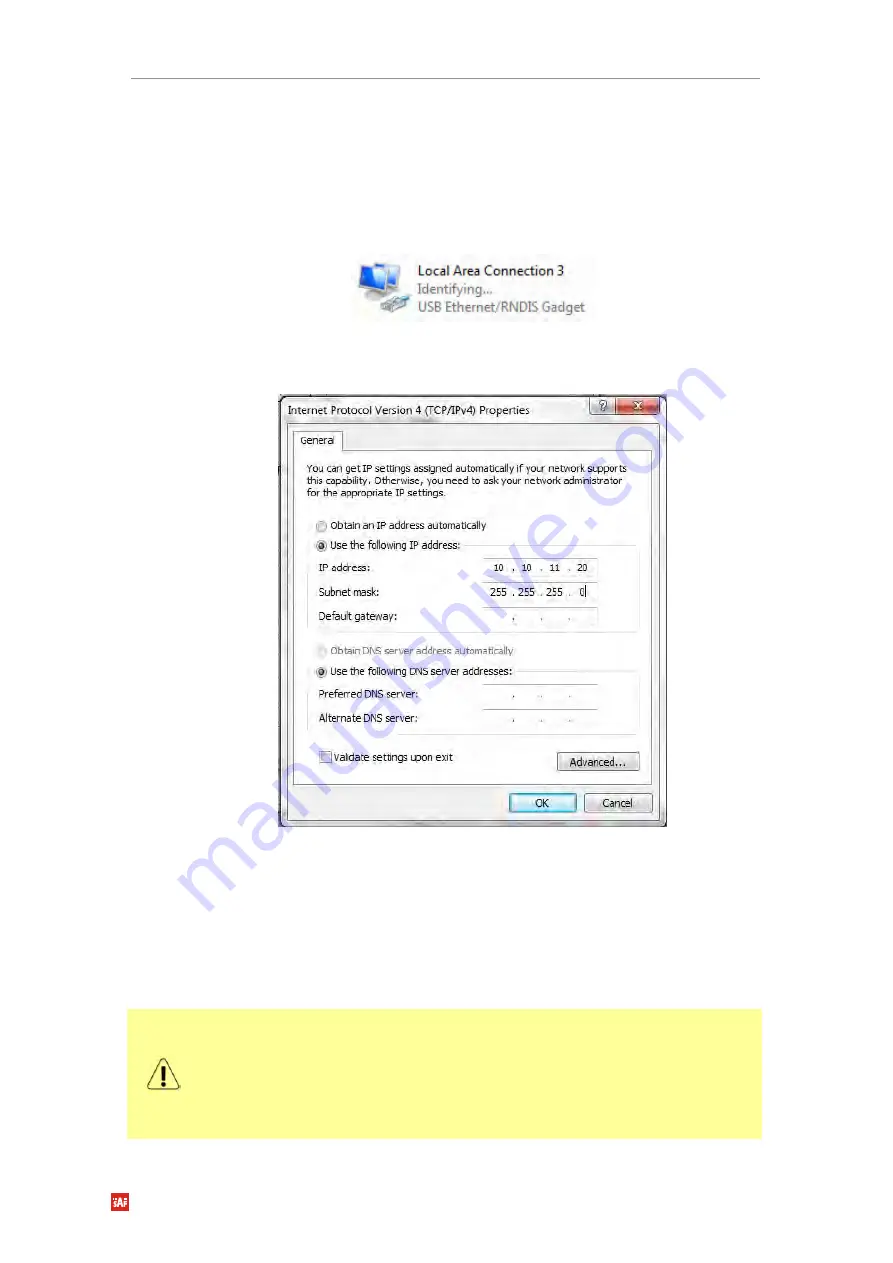
Adjust IPv4 settings of USB Ethernet network adapter to 10.10.11.0 subnet. IP address
should be other than default IP address (10.10.11.10).
Figure 3.3
TCP/IPv4 Properties
After applying these settings you are ready to connect to Web GUI.
Accessing PhoeniX G2 IDU Web GUI
1.
Connect your PC to MNG LAN 3 port on PhoeniX G2 IDU with Ethernet patch cable.
2.
Launch your Web browser and in address field enter PhoeniX G2 IDU IP address. Default IP
address is 10.10.10.10.
Another management access options are following:
LAN 3 port - IP Address 10.10.10.10, Netmask 255.255.255.0 - factory default
LAN 3 port - IP Address 192.168.10.10, Netmask 255.255.255.0 - configurable
alternative
MNG USB port - IP Address 10.10.11.10, Netmask 255.255.255.0 - factory default
MNG USB port - IP Address 192.168.11.10, Netmask 255.255.255.0 - configurable
alternative


