background image

English

   - 68 -

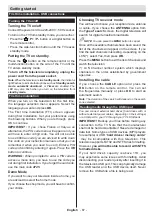
Recording a programme

IMPORTANT

:  When  using  a  new  USB  hard  drive 

reader, it is advisable to first format the disk using the 

“Format disk”

 option of your television.

Note:

To record a programme, you first have to 

connect a 2.0 compatible USB device at least, if not 

an error message will appear, to your television which 

you would have turned off before this. Then turn on the 

TV set in order to enable the record function.
To use the record function, you have to connect a  

USB key or an external hard drive to the television. 

The USB key connected should have a capacity of 1 

GB at least. A 4 Go key is recommended.

Note

:  Programmes  recorded  are  saved  on  your 

USB device. You can ‘‘

copy’’

 these recordings on a 

computer if you want. However, they can be read only 

on your television.

Note

:  You  cannot  record  radio  broadcasts.  The 

maximum duration of a recording is unlimited. During 

simultaneous recording (time shift) an image-sound 

gap may occur.
Programmes recorded are divided into 4 GB partitions. 

If the  write  speed  of  the  USB  device  connected  is 

insufficient, the recording may fail and the time shift 

option may not be available.

As such, it is advisable to use USB devices that are 

HD compatible.
Avoid  disconnecting  your  USB  device  during 

recording. If you do, you may damage the device.
It is possible to have multiple partitions on your 

device (maximum of 2). The television can support a 

maximum of two different partitions. The first partition 

of the USB disk will be used for the recording function 

(PVR). 

Due to some antenna issues, it will not be possible 

to record some signal data. Also, the images may be 

blurry during playback.
The 

Record, Play, Pause, Display

 buttons (for 

PlayListDialog) are not active in Teletext mode. If a 

recording starts from the timer when the teletext is 

active, the latter will be disabled automatically. Teletext 

does not function in multimedia mode. 

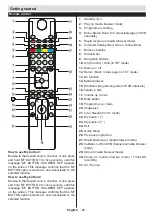
Time shift recording 

Press the 


(PAUSE)  button  while  watching  a 

programme to switch to delayed replay mode. When 

you use this mode, the programme pauses and the 

recording continues. 
Press the 

 (PLAY) button again to watch the paused 

programme. Press the 

STOP

 button to stop recording 

and return to real time broadcast

Note

: This function is not available in radio mode. You may 

use the fast forward /fast rewind buttons to browse.

Note

: You cannot use the  fast rewind and fast forward buttons 

if you are not in play mode.

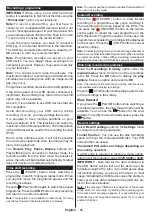
Instant Recording

Press the 

(RECORD)  button  to  start  instant 

recording of a programme while you're watching it. 

The recording will be done based on the EPG. You 

can press the 

 (RECORD) button on the remote 

control again to record the next programme on the 

EPG (Electronic Programme Guide). In this case, the 

programmes scheduled for recording will be displayed 

on the screen. Press the   (STOP) button to cancel 

instant recording. 

Note

: In instant recording mode, you cannot change channels or 

watch a source other than that being recorded. When recording 

a programme during a time shifting, a warning message will 

appear on the screen if your USB device's speed is not sufficient.

Watching recorded programmes 

Select the 

Recordings in library

 option under the 

media browser

 menu. Select one of the recordings 

in the list. Press the 

OK

 button to display the 

play 

options

. Select an option and press the 

OK

Note: The display of the main menu and the submenus are 

not available when playing recordings.

Press the   (STOP) button to stop playing and return 

to the recordings in the Library.

Slow forward

If you press the 

(PAUSE) button while watching a 

recorded programme, the slow forward option will be 

available. You can use the 

 button for the slow 

forward. To modify the slow forward speed, press the 

 button.

Record settings

Select 

Record settings 

option in the 

Settings

 menu 

to configure recording parameters. 

Format the disc 

: You can use the disk formatting 

option to format the connected USB disc. Your PIN 

code will then be asked.

The default PIN code can change depending on 

the country selected.

If a PIN code is required to display a menu option, 

enter one of the following codes: 

4725

0000

 or 

1234

.

IMPORTANT

  :  Note  that  all  the  data  contained  in 

the  USB  device  will  be  lost  and  the  device  will  be 

formatted using FAT32. Also, if your USB device does 

not function properly, you can try to format it. In most 

cases, formatting the USB device solves the problem, 

however, ALL the data contained in the USB disc are 

lost in the same situation. 

Note :


If the message "USB too slow" appears on the screen 

at the start of a recording, try starting the recording again. 

If the same error message appears, it is possible that your 

USB disk does not have the required speed. Try to connect 

another USB disc.

Содержание LD32V167

Страница 1: ......

Страница 2: ......

Страница 3: ...mpatibilit des signaux AV et HDMI 15 Consignes de s curit Le fait de faire fonctionner votre t l viseur TV dans des conditions ambiantes extr mes peut l endommager AVERTISSEMENT RISQUE D ELECTROCUTION...

Страница 4: ...u manquant de connaissances appropri es d utiliser un appareil lectrique sans tre encadr es par une autre personne responsable de leur s curit Pour la ventilation laissez un espace d au moins 10 cm au...

Страница 5: ...s il passe en mode veille Au prochain d marrage le message suivant s affichera Mode veille en cas d absence de signal Appuyez sur OK pour continuer Fonctions T l viseur couleur t l commande Tuner num...

Страница 6: ...de l antenne C ble Branchez l antenne ou le c ble d antenne la prise d ENTR E DE L ANTENNE ANT situ e l arri re de la TV Notification Fabriqu sous licence de Dolby Laboratories FABRIQUE SOUS LICENCE...

Страница 7: ...r 25 Menu principal 26 Programme pr c dent 27 Avance rapide en mode Navigateur m dia 28 Sous titre activ d sactiv dans les cha nes DVB en mode vid o du Navigateur m dia 29 Arr ter en mode vid o du Nav...

Страница 8: ...via la p ritel Lorsque vous utilisez un kit de montage mural est recommand de connecter tout vos c bles avant de fixer votre TV Ins rez ou effacez le module CI uniquement lorsque le t l viseur est ete...

Страница 9: ...fini lors de la premi re installation En cas d oubli de ce dernier utilisez le code principal 4725 Mode Demo Pour un usage domestique de votre t l viseur nous vous recommandons de s lectionner le mode...

Страница 10: ...nt Lecture Pause Affichage pour PlayListDialog ne sont pas actives en mode T l texte Si un enregistrement d marre partir de la minuterie lorsque le t l texte est activ le t l texte est automatiquement...

Страница 11: ...esse requise Essayez de connecter un autre disque USB Menu Navigateur m dia Vous pouvez lire les fichiers photo la musique et les vid os stock s sur un p riph rique USB en connectant ce dernier votre...

Страница 12: ...vous regardez le t l viseur partir de la source HDMI cette option est visible dans le menu Param tres de l image Vous pouvez utiliser cette option pour renforcer la noirceur de l image Mode Film Les...

Страница 13: ...guration des param tres parentaux en page 12 Minuteries Cette fonction sert r gler le mode sommeil et programmer vos enregistrements effectu s sur votre p riph rique USB Configuration Enregistrements...

Страница 14: ...t une cha ne si vous connaissez la fr quence Recherche des cha nes r seau Recherche les cha nes li es dans le syst me de diffusion R glage fin analogique Vous pouvez utiliser ce r glage pour la recher...

Страница 15: ...ource Remarque Il est impossible d enregistrer deux cha nes en m me temps Mise jour du logiciel VotreTV peut gr ce l antenne ou au c ble rechercher et effectuer les mises jour Recherche de mise jour d...

Страница 16: ...pouvez pas effectuer un enregistrement essayez d teindre le t l viseur et d ins rer nouveau le p riph rique USB Le p riph rique USB est trop lent Si le message USB trop lent s affiche l cran au d but...

Страница 17: ...otre t l viseur ne peut pas prendre en charge toutes les r solutions Votre t l viseur prend en charge jusqu 1920x1080 Index Resolution Fr quence 1 640x480 60 Hz 2 800x600 56 Hz 3 800x600 60 Hz 4 1024x...

Страница 18: ...visualizaci n de entrada de PC 30 Formatos de ficheros admitidos en modo USB 30 Compatibilidad con Se ales AV y HDMI 30 Instrucciones de seguridad Si hace funcionar el televisor en condiciones ambien...

Страница 19: ...ueda utilizar ning n aparato el ctrico sin vigilancia Para ventilar el equipo deje un espacio libre de al menos 10 cm a su alrededor No cubra las ranuras de ventilaci n con peri dicos manteles cortina...

Страница 20: ...e inactivo durante 4 horas entrar en el modo de espera La pr xima vez que se encienda aparecer el siguiente mensaje Modo en espera por falta de se al Pulse OK para continuar Funciones Televisi n en co...

Страница 21: ...le de alimentaci n a la toma de corriente Conexi n del cable antena Conecte la antena o el cable de antena SDSq a la ENTRADA DE ANTENA ANT que se encuentra en la parte posterior del televisor Notifica...

Страница 22: ...4 Salir 25 Men R pido 26 Programa anterior 27 Avance R pido en el modo del Explorador Multimedia 28 Activar Desactivar Subt tulos en los canales DVB en el modo del Explorador Multimedia 29 Parar en el...

Страница 23: ...e audio y v deo a trav s del enchufe del conector Si utiliza un kit de montaje en pared un es recomendable conectar todos los cables antes de fijar su televisor al kit Inserte o elimine el m dulo CI s...

Страница 24: ...tilizar el televisor dentro de una casa se recomienda seleccionar el modo de casa Si elige el modo de tienda tendr que confirmar su elecci n Elegir el modo de receptor de TV Usted tendr que elegir el...

Страница 25: ...n el modo multimedia Grabaci n de cambio de hora Pulse el bot n PAUSA mientras ve un programa para intercambiar al modo de reproducci n retardada Cuando se utiliza este modo el programa se detiene y l...

Страница 26: ...sitivo USB mediante la conexi n de este dispositivo a su televisor Conecte un disco USB a la entrada ubicada en los puertos laterales del televisor Para los archivos de v deo fotos y m sica se puede a...

Страница 27: ...ional Cuando usted mira la televisi n desde la fuente HDMI esta opci n est visible en el men de ajuste de imagen Puede usar esta opci n para aumentar imagen oscurecida Modo Filme Las pel culas se grab...

Страница 28: ...rental desde este men Tambi n puede introducir un nuevo c digo PIN Consulte el cap tulo sobre la configuraci n de los par metros de los padres en la p gina12 Temporizador Esta funci n se utiliza para...

Страница 29: ...un canal directamente si se conoce la frecuencia B squeda autom tica de red B squedas canales relacionados con el sistema de transmisi n Ajuste fino anal gico Puede utilizar esta opci n para la sinton...

Страница 30: ...s al mismo tiempo Actualizaci n de Software Sutelevisorpuede atravesdelaantenao cable buscar y proporcionar actualizaciones Actualizaci n de software mediante la interfaz de usuario Simplemente despl...

Страница 31: ...uebe a apagar la televisi n y la inserci n del dispositivo USB El dispositivo USB est muy lento Si el mensaje USB demasiado lento aparece en la pantalla al comienzo de la grabaci n intente iniciar de...

Страница 32: ...ci n de imagen Es posible que el televisor no admita todas las resoluciones El televisor admite hasta 1920x1080 ndice Resoluci n Frecuencia 1 640x480 60 Hz 2 800x600 56 Hz 3 800x600 60 Hz 4 1024x768 6...

Страница 33: ...Modalit tipica monitor ingresso PC 45 Formati di file supportati in modalit USB 45 Compatibilit segnale AV e HDMI 45 Istruzioni di sicurezza L utilizzo del proprio dispositivo TV in condizioni climat...

Страница 34: ...la dovuta esperienza e o conoscenza di usare il dispositivo elettrico senza essere sorvegliati Per la ventilazione lasciare uno spazio di almeno 10 cm tutto attorno all apparecchio La ventilazione non...

Страница 35: ...o in cui la televisione rimanga inattiva per 4 ore acceder alla modalit standby Alla prossima accensione comparir il seguente messaggio Standby mode if no signal Premere OK per continuare Funzioni Tel...

Страница 36: ...la presa Collegamento dell antenna cavo Collegare l antenna o il cavo dell antenna SDSq alla presa INGRESSO ANTENNA ANT che si trova sulla parte posteriore della TV Notifica Prodotto sotto licenza dai...

Страница 37: ...in modalit Browser Multimediale 28 Sottotitoli On Of in canali DVB Modalit Browser Multimediale 29 Arresto in modalit Browser Multimediale 30 Pausa in modalit Browser Multimediale Registrazione times...

Страница 38: ...alla presa jack Nel caso in cui venga utilizzato un kit montato a parete consigliamo di collegare tutti i cavi prima di fissare la TV al kit Inserire o eliminare il modulo CI solo quando la television...

Страница 39: ...liamo di selezionare la modalit home Se viene scelta la modalit negozio sar necessario confermare la propria scelta Scelta della modalit ricevitore TV Sar necessario scegliere la modalit di ricezione...

Страница 40: ...isattivata Il televideo non funziona in modalit multimediale Registrazione Time shift Premere il pulsante PAUSA mentre si sta guardando un programma per passare alla modalit di riproduzione ritardata...

Страница 41: ...hiesta Provare a connettere un altro disco USB Menu Browser Multimediale Sar possibile visualizzare file immagine musica e video salvati in un dispositivo USB collegando il dispositivo alla propria TV...

Страница 42: ...alta tensione switch bassa tensione HDMI True Black opzionale Quando si guarda la TV dalla sorgente HDMI questa opzione visibile nel menu Impostazioni Immagine Sar possibile usare questa opzione per...

Страница 43: ...lare il blocco menu e il controllo genitori da questo menu Sar inoltre possibile inserire un nuovo codice PIN vedere il capitolo sull impostazione dei parametri genitori a pagina 12 Timer Questa funzi...

Страница 44: ...cercare o salvare direttamente un canale se la frequenza nota Ricerca canale di rete Cerca i canali legati al sistema di trasmissione Sintonia fine analogico Sar possibile utilizzare questa impostazi...

Страница 45: ...ue funzioni non possono essere usate contemporaneamente Aggiornamento software La televisione pu tramite antenna o cavo Ricerca cercare o fornire aggiornamenti Ricerca aggiornamento software tramite i...

Страница 46: ...eseguire una registrazione provare a spegnere la TV e inserire nuovamente il dispositivo Il dispositivo USB troppo lento Nel caso in cui a video compaia il messaggio USB troppo lento all inizio della...

Страница 47: ...sualizzazione tipiche del video La TV potrebbe non supportare tutte le risoluzioni La TV supporta una risoluzione massima di 1920x1080 Indice Risoluzione Frequenza 1 640x480 60 Hz 2 800x600 56 Hz 3 80...

Страница 48: ...ibilidade do sinal AV e HDMI 60 Instru es de seguran a Utilizar a TV LED em condi es ambientais adversas pode danific la CUIDADO RISCO DE CHOQUE EL CTRICO N O ABRIR CUIDADO PARA REDUZIR O RISCO DE CHO...

Страница 49: ...Para ventila o deixe um espa o livre de pelo menos 10 cm volta do aparelho A ventila o n o pode ser obstru da cobrindo as aberturas de ventila o com itens tais como jornais toalhas cortinas etc N o c...

Страница 50: ...z em que for ligada aparecer a seguinte mensagem Em Espera se nenhum sinal Premir em OK para continuar Fun es Televis o a cores com controlo remoto Cabo do sintonizador digital e Alta Defini o TNT DVB...

Страница 51: ...ar a antena ou o cabo da antena SDSq ENTRADA ANTENA ANT na parte de tr s do aparelho de televis o Declara o Fabricado sob a licen a da Dolby Laboratories FABRICADO SOB LICEN A Dolby e o s mbolo double...

Страница 52: ...pido 26 Programa anterior 27 Avan o r pido no modo Navega o de Media 28 Igar desligar os subt tulos nos canais DVB no modo Navega o de Media 29 Parar no modo Navega o de Media 30 Pausa no modo de Nav...

Страница 53: ...io v deo atrav s da tomada Se usar um kit de montagem na parede aconselh vel ligar os seus cabos antes de fixar a TV ao kit Inserir ou remover o m dulo CI s quando a televis o estiver desligada Consul...

Страница 54: ...conselhado seleccionar o modo casa Se escolher o modo loja tem de confirmar esta escolha Escolher o modo de receptor de TV Tem de escolher o seu modo de recep o antena ou cabo Se escolher a op o ANTEN...

Страница 55: ...bot o REPRODUZIR de novo para ver o programa pausado Premir o bot o PARAR para parar a grava o e voltar transmiss o em tempo real Nota Esta fun o n o est dispon vel no modo DVD Pode usar os bot es av...

Страница 56: ...o MENU Esta fun o n o funciona com grava es feitas no aparelho de televis o Ao premir o bot o MENU de novo o visor desaparece Pode definir as prefer ncias do seu navegador de multim dia atrav s do seu...

Страница 57: ...HDMI opcional Quando v a televis o a partir da fonte HDMI esta op o est vis vel no menu defini o de Imagem Pode usar esta op o para aumentar a parte escura na imagem Modo de Filme Os filmes est o grav...

Страница 58: ...rir um novo c digo pin Ver o cap tulo sobre defini o dos par metros parentais na p gina 12 Temporizador Esta fun o usada para configurar o modo dormir e para agendar grava es feitas no seu dispositivo...

Страница 59: ...ra canais relacionados com o sistema de transmiss o Sintonia fina anal gica Pode utilizar esta defini o para a sintonia fina dos canais anal gicos Est apenas dispon vel se forem memorizados canais ana...

Страница 60: ...a A sua televis o pode atrav s de antena ou cabo procurar e fornecer actualiza es Procura de actualiza o do software atrav s da interface do utilizador Navegue simplesmente para o menu principal Escol...

Страница 61: ...ar desligar a televis o e inserir de novo o dispositivo USB O dispositivo USB est demasiado lento Se aparecer no ecr a mensagem USB demasiado lento no in cio de uma grava o tente iniciar a grava o de...

Страница 62: ...ua TV pode n o suportar todas as resolu es Pode suportar at 1920x1080 ndice Resolu o Frequ ncia 1 640x480 60 Hz 2 800x600 56 Hz 3 800x600 60 Hz 4 1024x768 60 Hz 5 1024x768 66 Hz 6 1280x768 60 Hz 7 128...

Страница 63: ...upported in USB mode 75 AV and HDMI Signal Compatibility 75 Security instructions To operate your TV in extreme ambient conditions may cause the damage of the device CAUTION RISK OF ELECTRIC SHOCK DO...

Страница 64: ...ory or mental capabilities or lack of experience and or knowledge use electrical devices unsupervised For ventilation purposes leave a free space of at least 10 cm all around the set The ventilation s...

Страница 65: ...appear Standby mode if no signal Press OK to continue Functions Colour television with remote control Digital tuner cable and High definition TNT DVB T C The HDMI ports are meant for devices with HDMI...

Страница 66: ...f the TV set Notification Manufactured under licence from Dolby Laboratories MANUFACTURED UNDER LICENCE Dolby and the double D symbol are trademarks of Dolby Laboratories HDMI the HDMI logo and the hi...

Страница 67: ...Previous programme 27 Rapid advance in media browser mode 28 Subtitle on off in DVB channels media browser mode 29 Stop in media browser mode 30 Pause in media browser mode Timeshift recording 31 AV...

Страница 68: ...o signal output through the jack socket If you use a wall mounted kit un it is advisable to connect all your cables before fixing your TV to the kit Insert or delete the CI module CI only when the tel...

Страница 69: ...to select the home mode If you choose the shop mode you will have to confirm your choice Choosing TV receiver mode You will have to choose your reception mode antenna or cable If you choose the ANTENN...

Страница 70: ...radio mode You may use the fast forward fast rewind buttons to browse Note You cannot use the fast rewind and fast forward buttons if you are not in play mode Instant Recording Press the RECORD button...

Страница 71: ...n set the preferences of your media browser through your settings menu Functioning of the Random Repeat mode Launch playback with and enable The TV set reads the next file and closes the list Launch p...

Страница 72: ...True Black optional When you watch the television from the HDMI source this option is visible in the Image setting menu You can use this option to increase image darkness Film Mode Films are recorded...

Страница 73: ...s made on your USB device Record settings Displays the record settings menu accessible if your USB device is connected Date Time Selects the date and time Sources Enables or disables selected Source o...

Страница 74: ...etting of parental control settings To prevent certain programs from being watched channels and menus can be locked through the parental control system To display lock menu option enter the PIN code B...

Страница 75: ...n automatically turns on at 3 00 a m and launches the search for broadcasting channels in order to update the new software If new software is found and downloaded successfully the television begins to...

Страница 76: ...s it is possible that your USB device does not have the required speed Try to connect another USB device Teletext Press the button to enter teletext mode Press again to enable the Mix mode Press one m...

Страница 77: ...ideo display modes Your TV cannot support all resolutions It can support up to 1920x1080 Index Resolution Frequency 1 640x480 60 Hz 2 800x600 56 Hz 3 800x600 60 Hz 4 1024x768 60 Hz 5 1024x768 66 Hz 6...

Страница 78: ...E ENERGETIQUE A DIAGONALE VISIBLE ECRAN 81 CM 32 POUCES CONSOMMATION ELECTRIQUE EN MODE MARCHE 41 Watt CONSOMMATION D ENERGIE ANNUELLE 59 kWh an CONSOMMATION ELECTRIQUE EN MODE VEILLE 0 5 Watt CONSOMM...

Страница 79: ......

Отзывы: