
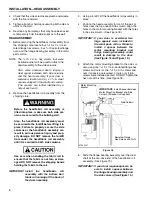


17
INSTALLATION—INSTALL HOOD
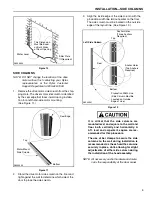
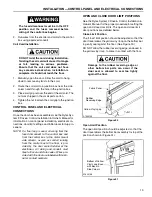
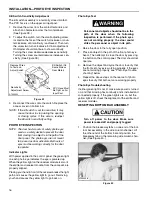
2.
Check to make sure that the fabric is inside each
channel. (See Figure 41.)
Figure 41
3.
Turn power ON.
NOTE: It should not be possible to restart the door
until the door has been reassembled and
the control system reset.
4.
Check operation of door.
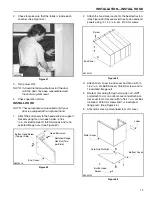
INSTALL HOOD
NOTE: These procedures are required only if your
door is equipped with an optional hood.
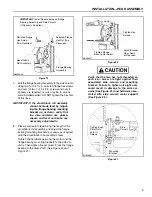
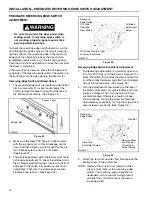
1.
Attach the end covers to the head extrusion support
brackets using four (two each side)
³₈
-16 x
³₄
-in. LG Button Head, 18-8 SS screws and
³₈
-16
serrated-flange nuts. (See Figure 42.)
Figure 42
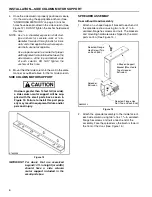
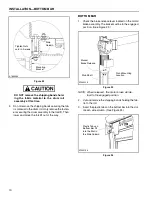
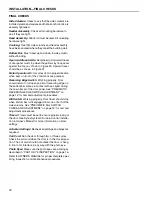
2.
Attach the hood cover section to the head extrusion.
(See Figure 43.) Secure cover to extrusion and end
panels using
¹₄
-
14
x
³₄
-in. LG, 410 SS screws.
Figure 43
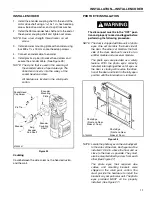
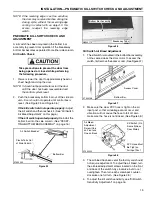
3.
Attach motor cover to end cover and hood with
³₈
-
16 x
³₄
-in. LG Button Head, 18-8 SS screws and
³₈
-
16 serrated-flange nuts.
4.
Route motor wiring through cord grip nut
³₈
NPT
and attach to slot on bottom cover and attach bot-
tom cover to motor cover with
³₈
-16 x
³₄
-in. LG But-
ton Head, 18-8 SS screws and
³₈
-16 serrated-
flange nuts. (See Figure 44.)
5.
Affix motor cover removal label to motor cover.
Figure 44
A3000087
A8500016
Head Extrusion
Button Head Screw
(Two per Side)
End Cover
Serrated-Flange
Hex Nut (Two
per Side)
A3000101
Screw
End Cover
A3000102
Motor Cover
Bottom Cover
Cord Grip Nut Slot
Button Head
Screw
Label
Содержание Pharma-Roll
Страница 1: ...Pharma Roll Installation Manual Revision January 15 2009 0715009 Rytec Corporation 2007...
Страница 2: ......
Страница 23: ...NOTES 19...
Страница 24: ......