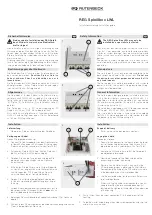
REG Spleißbox LWL
Installationsanleitung/Installation guide
Sicherheitshinweise
Einbau und die Installation der REG Spleiß-
box LWL darf nur durch eine Elektrofach-
kraft erfolgen!
Diese Anleitung enthält wichtige Anmerkungen und
Warnungen, deren Nichtbeachtung zu ernsthaften Per-
sonen- oder Anlageschäden führen kann. Bitte lesen
Sie die Anleitung vor Inbetriebnahme der Geräte auf-
merksam durch.
Ordnungsgemäßer Transport, korrekte Lagerung und
Installation sowie sorgfältige Bedienung und Instandhal-
tung sind entscheidend für den sicheren Betrieb.
Bestimmungsgemäßer Gebrauch
Die Spleißbox (A) darf nur wie in der Anleitung beschrie-
ben verwendet werden.
Benutzen Sie das Gerät zu
keinem anderen Zweck und betreiben es nur in
Innenräumen.
Die Spleissbox darf nicht über den normalen Hausmüll
entsorgt werden – halten Sie die nationalen und region-
laen Vorschriften zur Entsorgung ein.
Allgemeines
Die Spleißbox ist für den Einbau in Elektroinstallations-
verteilern nach DIN 43880 ausgelegt. Sie wird spleiß-
fertig inklusive Kupplungen (B), Kabelverschraubung
(E), Pigtails (E), Spleißkamm (F) und Spleißkassette (G)
geliefert.
Die Spleißbox ist mit 3 SC Duplexkupplungen (SC
Duplex, 50/125 µm, OM2, Multimode) bestückt.
Das stabile Kunststoffgehäuse ist flammhemmend nach
UL94 V-0 und verfügt über einen Clip zur Befestigung
auf 35 mm DIN-Tragschienen.
Installation
Lieferumfang
1 Überprüfen Sie den Lieferumfang der Spleißbox.
Verlegung der Kabel
Gehen Sie folgendermaßen vor:
2 Trennen Sie Gehäuseoberteil von dem Gehäuseunter-
teil durch Entfernen der 3 Schrauben (D). Verwenden
Sie dazu einen Drehschrauber mit einem Torx T6 Bit.
3 Entnehmen Sie die LWL-Kabel. Achten Sie darauf,
die Faser-Pigtails nicht zu beschädigen.
4 Spleißen Sie nun die Faserenden und legen Sie
die überschüssigen Längen in dem Gehäuse-
Innenraum ab.
5 Bitte führen Sie die Fasern so, dass der Biegeradi-
us von 30 mm eingehalten wird. Weitere Hinweise
zum Verlegen der POF-Kabel finden Sie unter
www.rutenbeck.de im Download-Bereich.
6 Sorgen Sie mittels der beigefügten Kabelbinder
für eine ausreichende Zugentlastung bzw. Kabel-
führung.
7 Für den Einbau der Kabelverschraubung müssen Sie
die vorgestanzten Öffnungen (H) rechts
oder
links an
der Geräteoberseite herausbrechen.
8 Befestigen Sie anschließend die Kabelverschraubung (C) im Gehäuse-
oberteil.
9 Führen Sie das Stammkabel durch die Kabelverschraubung und manteln
Sie es in der gewohnten Weise ab.
Safety Information
The REG Splice Box LWL may only be
installed by a specialist electrician.
These instructions contain important remarks and warn-
ings that, if not observed, can lead to serious personal
injuries or system damage. Please ensure that you read
these instructions carefully before commissioning the
devices.
The correct transport, storage and installation as well as
careful operation and maintenance is decisive for safe
operation.
Intended use
The splice box (A) may only be used according to the
descriptions contained in the instructions.
Do not use
the device for any other purpose and ensure that it is
only used indoors
.
The splice box may not be disposed of with standard
domestic waste. The national and regional disposal reg-
ulations must be observed.
General Information
The splice box is designed to be installed in electrical
installation distributors according to DIN 43880. It is
supplied in a ready to splice condition incl. connectors
(B), cable screw connection (E), pigtails (E), splice comb
(F) and splice cassette (G).
The splice box is equipped with 3 SC duplex connectors
(SC Duplex, 50/125 μm, OM2, Multimode).
The stable plastic housing is flame-retardant according
to UL94 V-0 and is equipped with a clip in order to fasten
the device to 35 mm DIN mounting rails.
Installation
Scope of delivery
1 Examine the splice box delivery contents.
Laying the cable
Proceed as follows:
2 Separate the upper part of the housing from the lower
part of the housing by removing the 3 screws (D). In
order to do so, use a screwdriver with a Torx T6 bit.
3 Remove the LWL cable. Ensure that the fibre pigtails
do not become damaged.
4 Now splice the ends of the fibres and place the
excess lengths inside the housing.
5 Please insert the fibres in such a manner that the
30 mm bending radius is observed. Further informa-
tion regarding the laying of the POF cable is available
in the download area at www.rutenbeck.de
6 Use the enclosed cable ties to ensure sufficient strain
relief / cable guidance.
7 When installing the cable screw connection, you will
need to break out the pre-punched openings (H)
located on the right
or
left hand side of the upper side
of the housing.
8 Finally, fasten the cable screw connection (C) in the upper part of the
housing.
9 Guide the master cable through the cable screw connection and strip the
cable in the usual manner.
A
1
D
2
B
C
E
3
F
G
H
4


