136
User settings
User settings
Editing the user button
The user buttons are a function for assigning desired functions to
the [1] through [8] buttons on the USER section (p. 27). You can
make settings for 16 user buttons. You can operate user buttons
1 through 8 using the [1] through [8] buttons, and you can
operate user buttons 9 through 16 by holding down [SHIFT] and
pressing the [1] through [8] buttons.
1.
Access the USER screen.
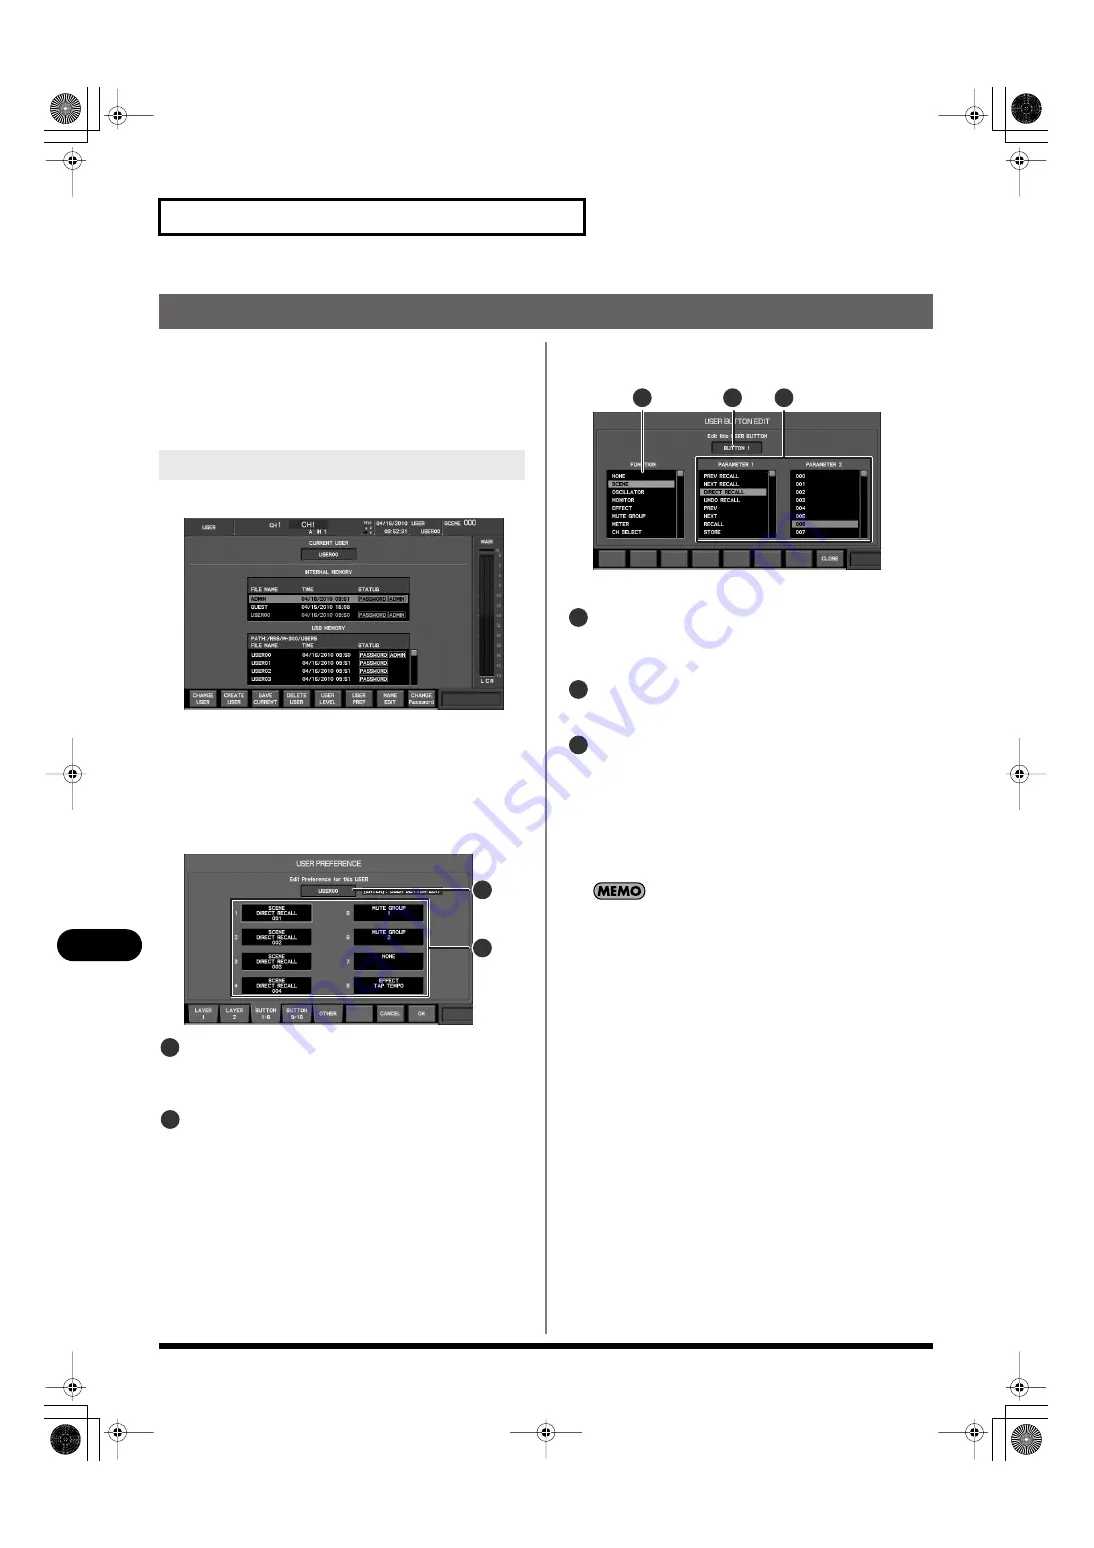
fig.ScrUser.eps
2.
From the user list, select the desired user.
3.
Press [F6 (USER PREF)].
The USER PREFERENCE popup will appear.
4.
Press [F
3
(BUTTON 1–8)] (or [F
4
(BUTTON 9–16)]) to
access the BUTTON 1–8 tab (or the BUTTON 9–16 tab.)
fig.ScrUserBtnGuide.eps
Applicable user indication
This indicates the user settings to which the USER
PREFERENCE popup applies.
User button assign 1–8 (9–16)
This area indicates the functions that are assigned to user
buttons 1–8. (or user buttons 9–16)
5.
Move the cursor to the desired user button assignment,
and press [ENTER].
fig.ScrUserBtnAsgn.eps
The USER BUTTON EDIT popup will appear.
Applicable user button
This indicates the user button to which the USER BUTTON
ASSIGN popup applies.
FUNCTION list
You can select a function from this list.
PARAMETER 1 and 2 list
Here you can select the parameters of the function you’ve
selected in the FUNCTION list.
6.
In the FUNCTION list, select the desired function.
7.
Next, use the PARAMETER 1 list and PARAMETER 2 list to
select the parameters.
For a list of the functions that can be assigned, refer to “User
button functions” (p. 190).
8.
Press [F8 (CLOSE)] to finalize the changes and close the
USER BUTTON ASSIGN popup.
9.
Press [F8 (OK)] to finalize the USER PREFERENCE changes
and close the popup.
If you press [F7 (CANCEL)], the changes will be cancelled and
the USER PREFERENCE popup will close.
Editing the user button assignments
2
1
1
2
4
3
5
3
4
5
M-300_e.book 136 ページ 2010年4月22日 木曜日 午前8時17分


