Issued / Herausgegeben / Publication / Publicatto
09/00
V9580
237-072
Introduction
This standard 3.5 Inch Floppy Disk Drive for IBM compatible Personal
Computers, will read and write to both high density (2.0MB
unformatted, 1.44MB formatted) diskettes and low density (1.0MB
unformatted, 720kB formatted) diskettes.
Important Notices
1. To avoid electric shock ensure that your computer is turned off and
the AC power cord is removed from the mains socket. You should
also switch of and disconnect any peripheral equipment such as
Monitor and Printer before removing the cover of the computer.
2. To avoid the possibility of damaging internal components of your PC
or disk drive from static electricity, make sure to discharge yourself
by touching a metal part of the PC case before disconnecting It from
the mains socket and before removing the top cover.
Installation Instructions
Remove the cover from your computer following the manufacturers
instructions.
1. Replacing an existing Floppy Disk Drive
a) Remove the old disk drive by first disconnecting the 34-pin
ribbon cable and 4-pin power cable from the rear of the drive.
b) Remove the old drive by removing any securing screws and
sliding out the drive.
c) If the drive is fitted with any mounting brackets, rails or other
hardware specifically required by your computer, remove these
parts and fit them to your new drive.
d) Fit the new drive in place of the old drive.
e) Reconnect the 34-pin ribbon cable and 4-pin power cable to the
rear of the drive, if the ribbon cable connector has a polarising
key (a raised piece on one side of the connector), the connector
will only fit one way on the drive connector. If the connector is not
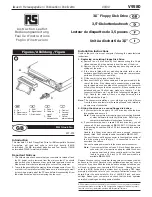
polarised and can fit either way, make sure that pin 1 of the
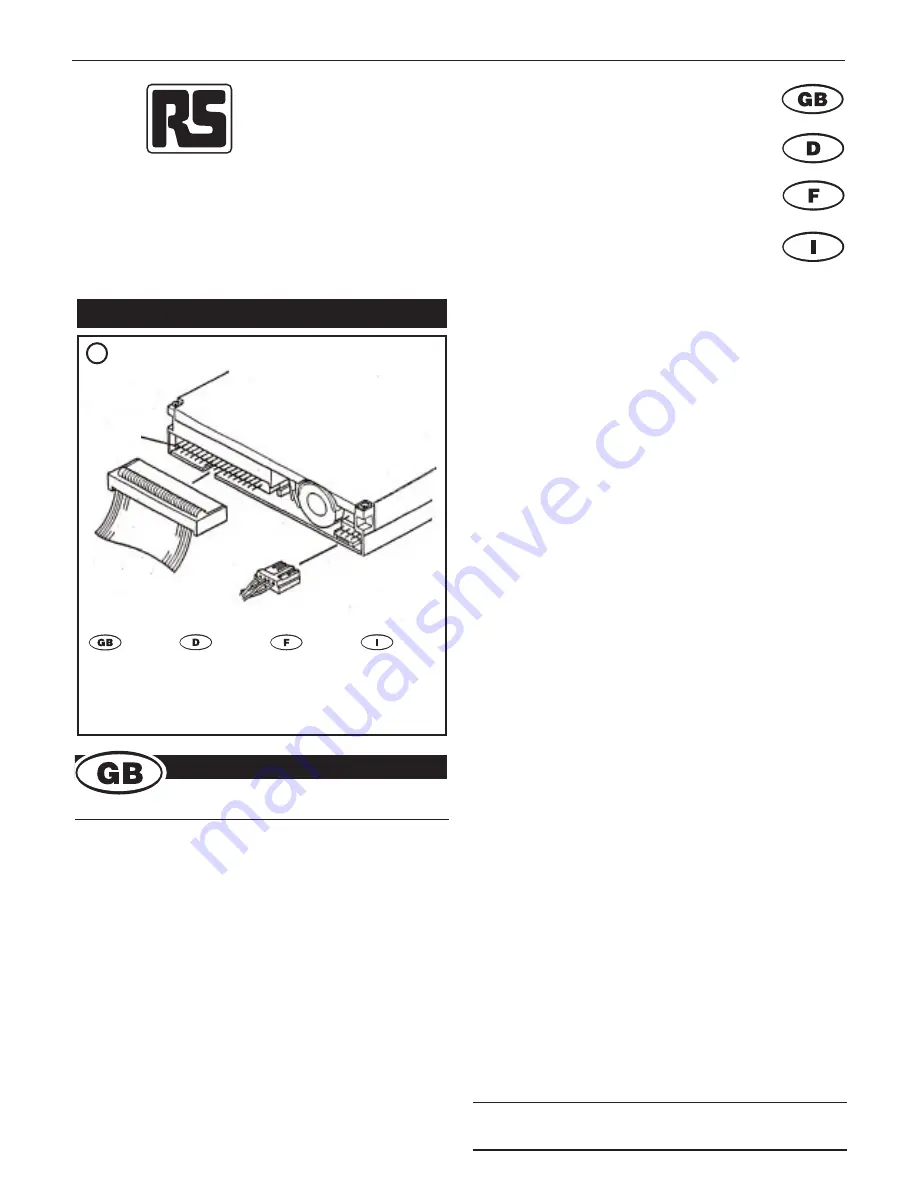
connector is fitted to pin 1 on the drive following the diagram in
Fig.1. Usually, the cable will have one edge coloured red to
identify which side is pin 1.
Note: The connector orientation of your old drive might be different
from this drive, and therefore the cable will need to be twisted to
ensure correct connection.
2. Fitting the drive as a second floppy disk drive.
a) If your computer has a spare 3.5 Inch drive bay slide the drive
into position and secure it.
Note: Some computers may require special mounting brackets
or other hardware to correctly fit this drive, Refer to your
computer manufacturers instructions for details.
b) If your computer has only a spare 5.25 Inch drive bay, you will
require a 5.25 Inch conversion kit RS 325-9817. Fit the drive into
the mounting kit and then fit the 5.25 Inch assembly into a spare
drive bay.
Usually, the floppy drive cable will have a second connector
already fitted. If not a suitable cable is available RS 243-0431
Connect the second floppy connector to the signal connector of
the drive making sure that pin 1 is connected to pin 1 as
described In e) above.
Connect a spare power cable to the drives power connector.
Note: If your computer has only one 3.5 Inch floppy type power
connector, you may require an adapter cable to connect
a spare power lead to the second floppy drive. A suitable
lead to convert a 5.25 inch to 3.5 inch power cable is
available RS 294-9430.
Replace the cover on your computer, taking care not to trap any cables,
and secure the cover. Reconnect any peripherals and power on your
computer. If you have fitted the drive as a second floppy disk drive you
will need to change your computers BIOS set-up. Usually you can
enter the BIOS set-up during system boot by pressing DEL when
prompted, otherwise, refer to your computer Instruction manual for
details, Enter the drive details for B: as 1.44MB 3.5 Inch, and save
settings. Reboot your computer and check that the drive operates
normally by reading and writing some diskettes
RS Components shall not be liable for any liability or loss of any nature (howsoever
caused and whether or not due to RS Components’ negligence) which may result
from the use of any information provided in RS technical literature.
RS
Stock No.
Figures / Abbildung / Figura
3.5˝ Floppy Disk Drive
3,5"-Diskettenlaufwerk
Lecteur de disquettes de 3,5 pouces
Unità a dischetti da 3,5"
Instruction Leaflet
Bedienungsanleitung
Feuille d’instructions
Foglio d’instruzioni
1
A. Pin 1
B. Signal cable
C. Power cable
A. Stift 1
B. Signalkabel
C.Stromkabel
A. Fiche 1
B. Câble de
signal
C. Câble
d’alimentation
A. Piedino 1
B. Cavo del
segnale
C. Cavo di
alimentazione
A
B
C

