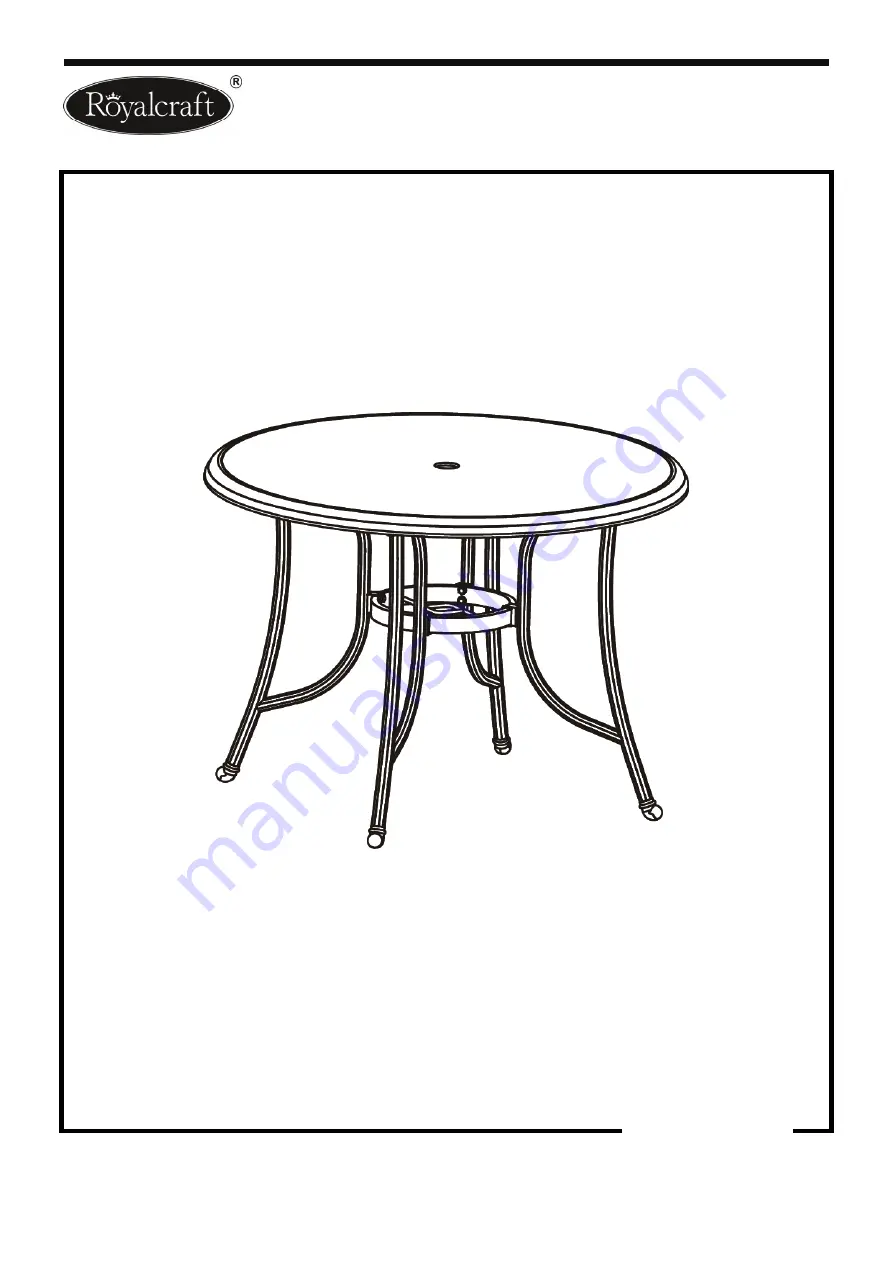
Versailles 124cm Table
Assembly Instructions
Produced
in
China
for
A
Mir
&
Co.,
Ltd.
© A Mir & Co., Ltd. 2015
1 / 6
www.a-mir.co.uk
Product size:
D124* H71.5cm
IMPORTANT, RETAIN FOR FUTURE REFERENCE
READ CAREFULLY
Страница 1: ...Versailles 124cm Table Assembly Instructions Produced in China for A Mir Co Ltd A Mir Co Ltd 2015 1 6 www a mir co uk Product size D124 H71 5cm IMPORTANT RETAIN FOR FUTURE REFERENCE READ CAREFULLY ...
Страница 2: ...eady to start make sure that you have the right tools plenty of space and a clean dry area for assembly Unwrap all packaging materials and place the components on suitable surface to prevent scratching your product Check the pack and make sure you have all of the parts listed Check if all screws and bolts are tightened and inspect regularly We recommend the use of furniture covers to protect your ...
Страница 3: ...ea of the frame before applying to ensure it doesn t discolor the finish If your cast aluminum furniture has a shiny or glossy non textured finish you may also use a fine automotive wax to maintain it This will help in reducing the amount of dirt and debris that accumulates on the frame finish On furniture textured surfaces or finishes you can periodically apply mineral oil or baby oil to prevent ...
Страница 4: ...ents fixtures fittings not actual size Parts List Part No Diagram Qty Part No Diagram Qty A 1 PC B 4 PCS C 1 PC D M6 25mm 8 PCS E M6 40mm 4 PCS F 12 PCS G 12 PCS H 1 PC 30 40 50 60 70 80 90 100 110 120 130 140 150 160 170 180 190 200 210 220 mm 10 20 30 40 50 60 70 80 90 100 110 120 130 140 150 160 170 180 190 200 210 220 0 ...
Страница 5: ... the help of another person place Table Top A upside down on a flat non abrasive surface to avoid scratching the table surface or rim Step Two Locate the assembly position on the bottom side of the Table Top A Attach the Table Legs B onto the assembly position aligning holes in each part Loosely attach the Table Legs to the Table Top using Flat Washers F and Bolts E ...
Страница 6: ...en all bolts and washers are in place and turn freely Once you are satisfied with the alignment of the components carefully tighten all bolts using Socket Wrench H Do not over tighten Cover each bolt with Bolt End Cap G Step Four With the help of another person carefully turn over the table and place it in the upright position Your table is now ready for use Note This table is not designed to hold...