3
x
Operation
FA ROTEX RoCon mb • 09/2017
9
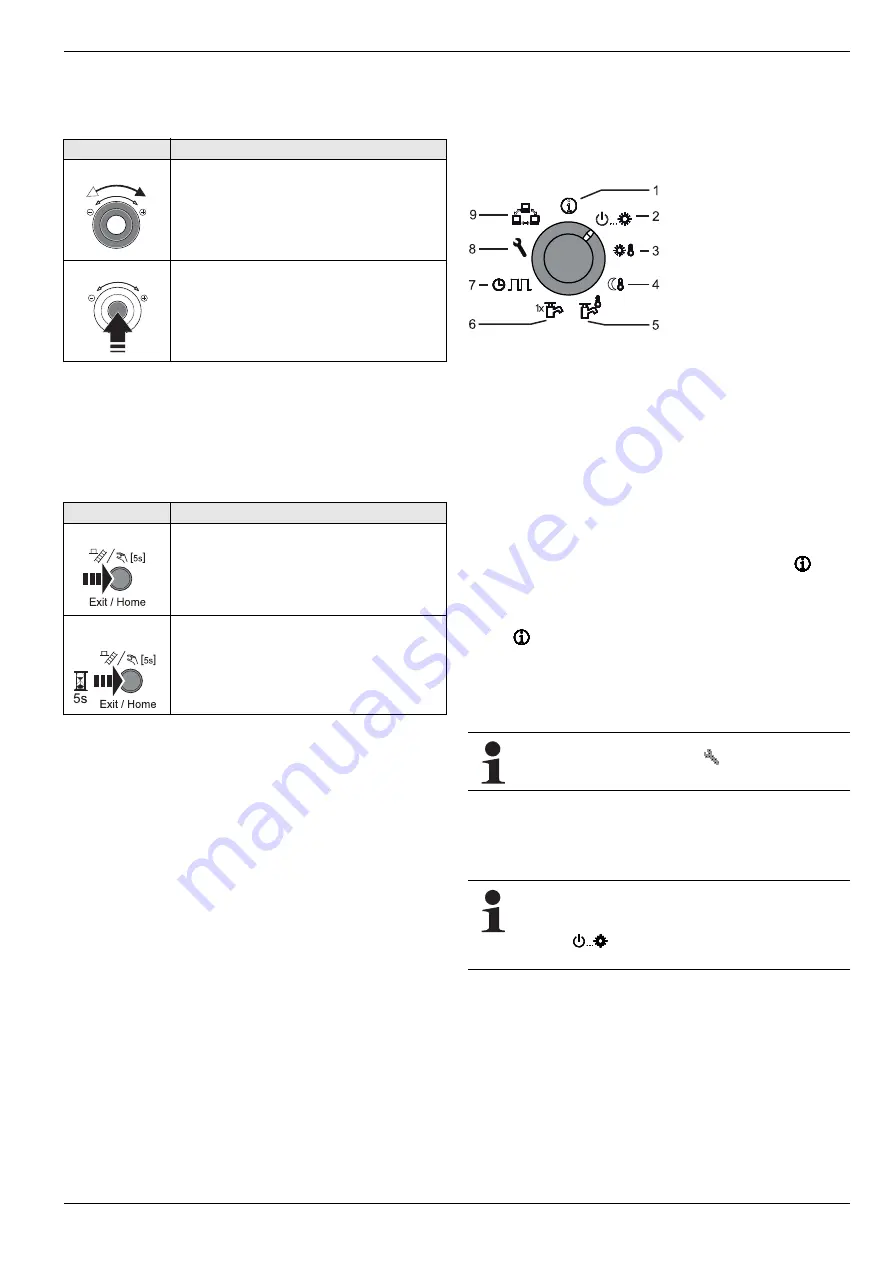
Rotary button
The rotary button can be used to navigate in the respective level,
to select or change the setting value and to accept this change
with a short key press.
Tab. 3-3 Functions of the rotary button
Exit key
This key can be used to jump back to the previous display within
a menu item or to cancel a function/input.
The special level can also be called up using this key (see
chap. 3.5).
Tab. 3-4 Functions of the Exit key
3.3
Operating concept
The operating concept of the RoCon mb control unit is designed
so that frequently required setting options can be accessed
quickly and directly at the
main function level
(selection by
means of
rotary switch
) and less frequently required setting op-
tions are arranged on a lower lying parameter level.
Certain functions and parameters are restricted by access rights
and can only be configured by a heating expert (see chap. 3.6.1).
In normal operation, the rotary switch should be in the
po-
sition.
After switching on and successful initialisation, the standard
display automatically shows the display for the rotary switch
setting
.
During initial start-up, the setting for the language selection is first
displayed.
●
Select the language with the rotary button.
●
Confirm the selection with a brief push of the rotary button.
If the system is switched on, the defaults set in the RoCon mb
control unit fully automatically control the operation of the
– room heating, room cooling and
– hot water generation plumbing.
If the user sets a value manually, this setting remains active until
the user changes it or until the timer program forces a different
mode of operation.
Action
Result
Turning
To the right (+): increasing adjustment
To the left (–): decreasing adjustment
Touching
Confirm selection, accept setting, execute
function.
Action
Result
Touch briefly.
– Return to the previous display or the pre-
vious level or
– cancel a special function or an active,
temporary time program.
Press for longer
than 5 seconds.
– A special level is called up.
1
Info (chap. 3.4.1)
2
Operating Mode (chap. 3.4.2)
3
Set Temp Day (chap. 3.4.3)
4
Set Temp Night (chap. 3.4.4)
5
DHW Set Temp (chap. 3.4.5)
6
DHW Install (chap. 3.4.6)
7
Time Program (Chap. 3.4.7)
8
Configuration (Chap. 3.4.8)
9
Remote Param (Chap. 3.4.9)
Fig. 3-3
Illustration of the main function level (rotary switch position)
Adaptations to the special system configuration are
made in the
"Configuration"
rotary switch setting
(see chap. 3.4.8).
Irrespective of the rotary switch position, the ROTEX
HPSU monobloc compact operates according to the
operating mode which has been set in the
"Operating
Mode"
switch position or activated by a special
program.


