


2.
Use the
Input
knob to select the input source that
is your key alpha.
3.
In the
Type
area, select
Alpha
.
4.
Use the
Video Format
knob to select the video
format of the input video signal on the selected input
source.
5.
Press
Auto Key Setup
.
6.
Use the
Source
knob to select the input source that
has the fill of the auto key you want to set up.
7.
Use the
Alpha
knob to select the input source that
has the alpha of the auto key you want to set up.
8.
Use the
Mode
knob to assign the alpha as
Shaped
or
Unshaped
.
•
Unshaped
— switcher performs a
multiplicative key. The key alpha cuts a hole
based on the gradient values of the alpha. Shades
of gray are translated into transparency levels,
giving the key a soft edge. Unshaped key alphas
can also be considered true linear alphas.
•
Shaped
— switcher perform an additive key.
With shaped keys, the key alpha cuts a hole
based on the monochrome value of the alpha.
Shades of gray are translated into either white
or black, giving the key a hard edge. Shaped Key
alphas are sometimes used with Character
Generators to cut very precise holes for the fill.
9.
Press
HOME
>
Confirm
.
Source Names
Each video source on the switcher can be given a unique
name that is used on the mnemonics for that source, as
well as internal menus. These names can be customized
for how they appears on the mnemonics by adjusting the
size or the font and the background color.
Internally generated video sources, such as MEs, matte
generators, and Global-Store channels can also be given
unique names.
You can assign an video source to an under monitor
display (UMD) input address to provide the mnemonic
names. If an video source is assigned to a UMD input
address, any source name you enter is replaced with the
UMD input name for all the mnemonics and menus.
To Name a Video Source
1.
Press
HOME
>
Setup
>
Installation
>
Source
Configuration
>
Source Names
.
2.
Use the
Source
knob to select the input source that
you want to change the name for.
3.
Enter the new name in the
New Name
field.
4.
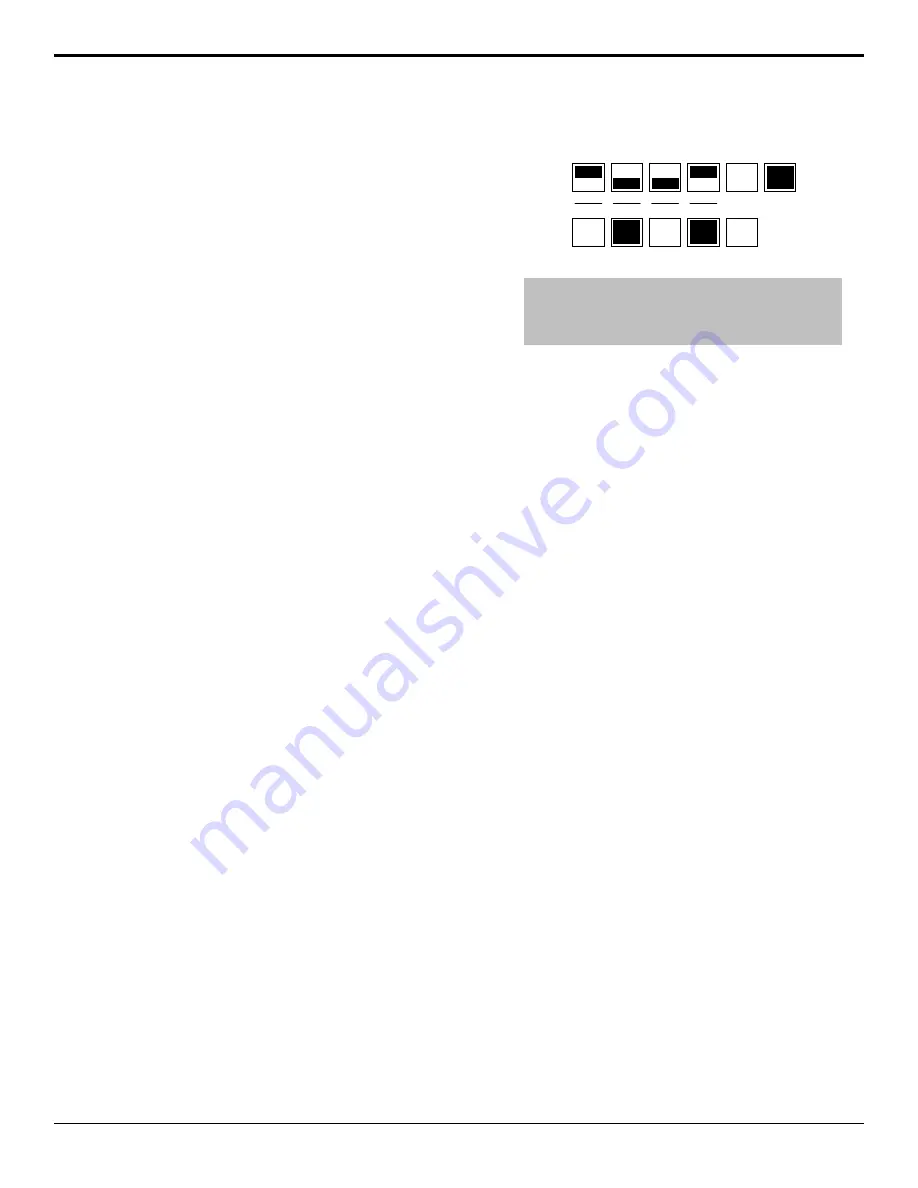
Use the
Font
knob to select the size and layout of
the font you want to use on the mnemonic displays.
In
Large
Invert
In
Large
None
In
001
Medium
Invert
In
001
Medium
In 001
Small
Invert
In 001
Small
[shft]
In 001
Inv Shift
Unshift
[shft]
In 001
Shift
Inv Unshift
In 001
[shft]
Unshift
Inv Shift
In 001
[shft]
Inv Unshift
Shift
Tip:
The Standard font allows you to adjust the default
appearance of all the source mnemonics. Refer to
the Default Mnemonic Appearance
on page 58 for more
information.
5.
Use the
Color
knob to select the color you want to
use for the mnemonics. This can be the background
or text color, depending on whether you have
selected an invert font.
•
Standard
— use the standard mnemonics color.
•
Green
— use a green color.
•
Red
— use a red color.
•
Blue
— use a blue color.
•
Yellow
— use a yellow color.
•
Orange
— use an orange color.
•
Purple
— use a purple color.
•
ME X Glow
— use ME Glow color
X
.
•
Aux Glow
— use the aux glow color.
•
CC Glow
— use the CC glow color.
•
User Color X
— use User Color
X
.
•
None
— don't use a color for the mnemonic.
6.
Press
Accept New Name
.
Control Panel Button Inserts
Insert films can be installed into most buttons on the
control panel. Insert films allow you to label specific
source buttons, control buttons, or replace the default
button names with those of a different language.
Button insert templates can be downloaded from Ross
Video.
To Install a Button Insert
1.
Remove the Cap Assembly from the Switch
Assembly by grasping it firmly and pulling away
from the control panel surface.
26
• Video Input Setup — Acuity Setup Manual (v9.2)
Содержание Acuity 4410AR-020
Страница 1: ...Acuity Setup Manual v9 2...


