


Replay Overview
The Mira server can operate as a replay server with the
addition of the Mira Control Surface that allows quick
interaction with the replay interface.
Required Equipment
To set up and operate your server you will need the
following equipment:
•
Computer monitor with minimum 1280×1024
resolution.
•
HD-SDI video monitor to view the internal quad-split
output (1 or 2 depending on the number of channels
in your server)
A standard USB keyboard (QWERTY) and mouse are
provided with your server.
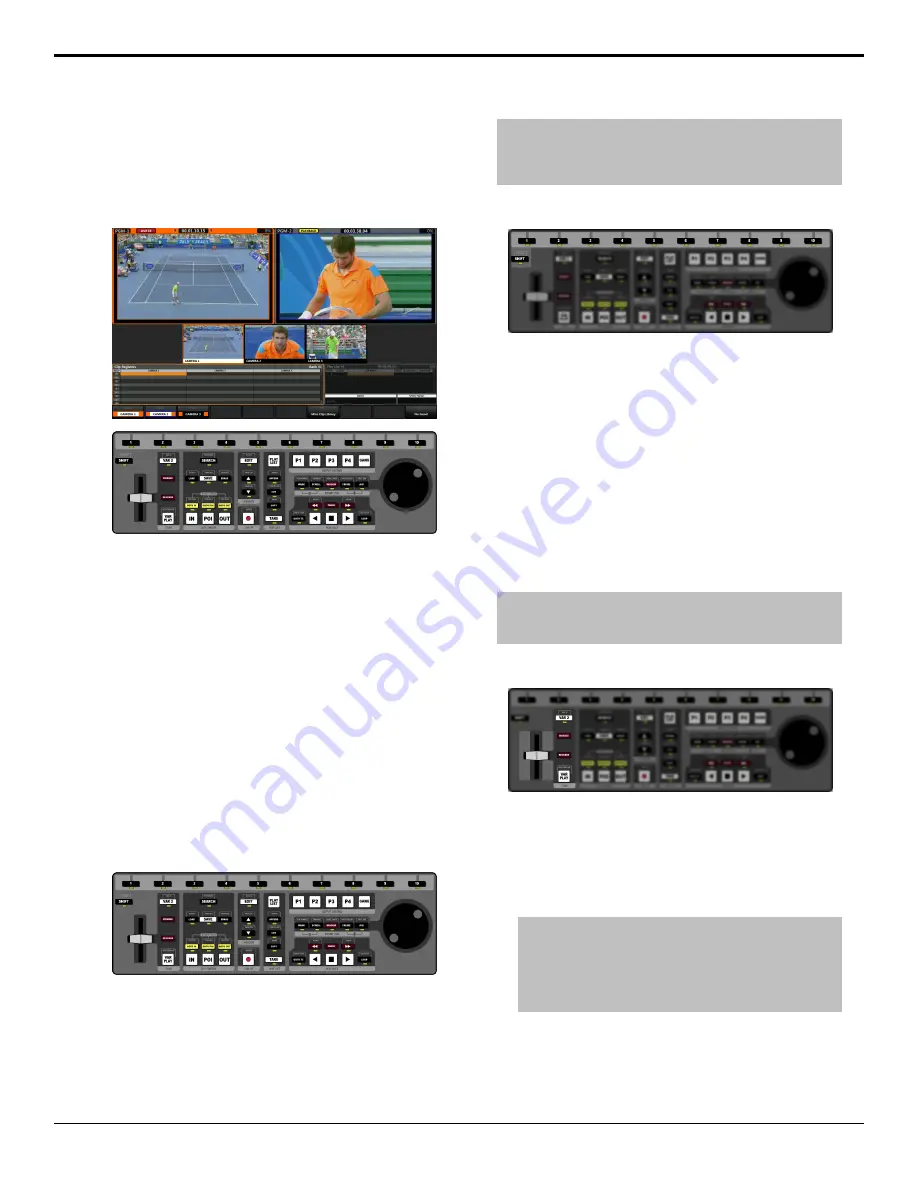
Control Surface
The Control Surface has been designed to give you quick
access to all the functions of the replay operation without
the need for a keyboard or mouse.
There is no power switch on the Control Surface. When
you connect the Control Surface to the
POE
port on the
server the panel boots up. When the unit is up and
running the softkey buttons along the top will illuminate,
in order, from 1 to 10.
Note:
If the softkey buttons do not illuminate, or the sequence
appears frozen, disconnect and reconnect the ethernet cable to
the Control Surface. If the problem persists, please contact
technical support.
Softkey Buttons and Shift
Press the
1
through
10
buttons along the top of the
Control Surface to select cameras, navigate menus, or
make selections. The corresponding assigned function
of each softkey button is shown along the bottom of the
Replay
window. The label on the far left corresponds to
softkey button
1
and the button on the far right
corresponds to softkey button
10
.
Press the
SHIFT
button to access the shifted function for
all the buttons on the Control Surface. The buttons and
indicators will pulse yellow while shift is active. The
shifted function for a button is shown just above the
button. When you press a button, or press the
SHIFT
button again, the Control Surface returns to normal.
Tip:
Press and hold the SHIFT button for 3 seconds to enable
shift-lock. The Control Surface will remain in shift mode until the
SHIFT button is pressed again.
T-Bar Area
•
T-Bar
– allows you to manually set the play speed
of the clip playing out on the program channel
transport. In default mode the range is from 0%
play-speed at the bottom (towards you) and 100%
play-speed at the top (away from you). Video starts
to play as soon as the T-bar is moved.
Tip:
The T-bar can be locked to a specific playout channel
by holding the VAR PLAY button and pressing the P button
for the playout channel you want to assign the T-bar to. Even
if another playout channel has focus, the T-bar will still control
the playout channel it is assigned to. Press the buttons again
to release the lock.
•
VAR 2/VAR 3
– allow you to use different playout
speeds from the
User Setup
menu.
•
DISABLE
– press and hold
DISABLE
to disable to
playout functionality of the T-bar. This can be used
8
• Replay Overview — Mira Manual (v6.1)
Содержание Abekas Mira
Страница 1: ...Mira Manual v6 1 ...


