background image

The AnoScreen™ is a trademark of Rose Displays, Ltd. Neither the
manufacturer nor any sales agent may be held liable for injury, loss or
damage resulting from the use of these products.
Part#02INSAnoScreenBaseRail

Incept-8.15.02

35 Congress Street, Salem, MA 01970

 Tel# 1-800-631-9707  Fax# 1-800-560-2890

e-mail:[email protected]

Instruction Sheet

Step 1

Insert corner brackets into ends of
bottom base rails, using thumb, as
shown in illustration. 2 brackets per
end of each rail.  

Fig. 1

Detail


Fig. 1a

- Corner bracket tension

tabs face toward outside of frame.

Step 2

Lay out parts as they will be configured
on the floor. (2, 3 or 4 panels)

Step 3

Assemble the vertical rail assemblies
onto the upward facing corner brackets
already inserted into the bottom base
rails. All 4 brackets can go into the
vertical rails at one time, or you can do
one side at a time.

Note

: Make sure grommets are on the

top end of the vertical panels.  Use the
two vertical rails without flex spine
connectors on the outside edges of the
outermost panels.

AnoScreen™

Instructions For Assembly

1

1a

Parts

3

(continued on other side)

Base Rails

Corner Brackets

Split Rails

Vertical Rails

with Flex Spine

3

Ano rails

3

2a

2

2 Panel

3 Panel

4 Panel

Содержание ANOSCREEN WITH BASE RAIL

Страница 1: ...er bracket tension tabs face toward outside of frame Step 2 Lay out parts as they will be configured on the floor 2 3 or 4 panels Step 3 Assemble the vertical rail assemblies onto the upward facing corner brackets already inserted into the bottom base rails All 4 brackets can go into the vertical rails at one time or you can do one side at a time Note Make sure grommets are on the top end of the v...

Страница 2: ...1 1a 2 2a 3 2a 3 2 Panel 3 Panel 4 Panel Step 1 Insert corner brackets into ends of bottom rails using thumb as shown in illustration 2 brackets per end of each rail Fig 1 Detail Fig 1a Corner bracket tension tabs face toward outside of frame Step 2 Snap base Ano rail sections into the Vario base section Start at one end and work the Vario base onto the Ano rail Step 3 Lay out parts as they will b...

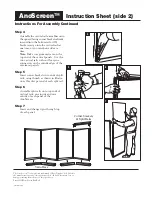
Страница 3: ...970 Tel 1 800 631 9707 Fax 1 800 560 2890 e mail signware rosedisplays com Instruction Sheet side 2 Instructions For Assembly Continued 6 Step 4 Insert corner brackets into ends of split rails using thumb as shown in illustra tion 1bracket per end of each split rail Step 5 Assemble split rails onto top ends of vertical rails one inside and one outside of each panel of the AnoScreen Step 6 Insert a...

Страница 4: ...ng corner brackets already inserted into the bottom rails All 4 brackets can go into the vertical rails at one time or you cando one side at a time Note Make sure grommets are on the top end of the vertical panels Use the two vertical rails without flex spine connectors on the outside edges of the outermost panels Step 5 Insert corner brackets into ends of split rails using thumb as shown in illus...

Отзывы: