FIGURE 2
PATIO HEATER ASSEMBLY
ASSEMBLY INSTRUCTIONS
z
List of Required Tools:
Philip Screwdriver / Adjustable Spanners / Wrenches
z
Leak Detection Solution one part detergent and three parts
water
z
Assemble all nuts and bolts loosely at first. Tighten all
connections after completion of assembly. This eases your
work and increases the stability of your appliance.
z
Before assembly, make sure all packing material and any
transmit protection must be moved.
z
Small deviations in equipment may occur. This is no lack of
quality but subject to improvements.
ASSEMBLY
SETP 1:
Screw rear panel of housing to the base with 5pcs bolts
M5 x 12 and 5pcs washers. (Detail Abb. A)
Note:
Start with two bolts at both ends of rear panel of
housing, then three bolts in the middle, which will ease the
assembly.
SETP 2:
Place the housing lid onto rear panel of housing. Screw
together the housing lid and rear panel of housing with
5pcs bolts M5 x 12 and 5pcs washers. (Detail Abb. B)
SETP 3:
Fix the post onto the housing lid with 4pcs bolts M5 x 12
and 4pcs washers. Then put the plastic cover over the
screws and bolts through the post. (Detail Abb. C)
SETP 4:
Place the reflector to main burner using 3pcs round cap
nuts and 3pcs big washers. (Detail Abb. D)
SETP 5:
Tighten inner gas pipe to main burner (See Figure 2),
Note:
please examine the tightness before use. If
damages are evident, they must be eliminated
immediately. (See Leakage Test)
Then fix main burner to the post with 3 bolts M5 x 12 and
3pcs washers. (Detail Abb. E)
SETP 6:
Fix the door to rear panel of housing. (See Figure 1 and
Detail Abb. F)
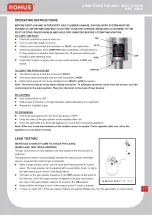
Detail Abb. A
Detail Abb. B
Detail Abb.C
Detail Abb. D
Detail Abb. E
Detail Abb. F
Содержание 93448
Страница 1: ... 8 3 5 62 12 5 ...
Страница 2: ... 8 3 5 62 12 5 ...
Страница 3: ... 8 3 5 62 12 5 ...
Страница 4: ......
Страница 5: ... 8 3 5 62 12 5 ...
Страница 6: ... 8 3 5 62 12 5 ...
Страница 7: ... 8 3 5 62 12 5 ...
Страница 8: ...915mm 915mm 8 3 5 62 12 5 ...
Страница 9: ... 8 3 5 62 12 5 ...
Страница 10: ... 8 3 5 62 12 5 ...
Страница 12: ...13 14 15 17 17 18 18 18 18 19 19 19 20 21 8 3 5 62 12 5 ...
Страница 13: ... 8 3 5 62 12 5 ...
Страница 16: ... 8 3 5 62 12 5 ...
Страница 17: ...Leak Test Point 8 3 5 62 12 5 ...
Страница 18: ... 8 3 5 62 12 5 ...
Страница 19: ... 8 3 5 62 12 5 ...
Страница 20: ... 8 3 5 62 12 5 ...
Страница 21: ...Injector size mm 1 70 1 60 1 60 1 60 HP135 8 3 5 62 12 5 ...


