background image

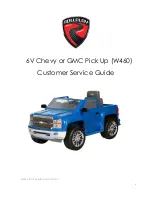
6V Chevy

 or 

GMC Pick Up (W460)

Customer Service Guide 

MMXV © Copyright Aria Child Inc. 

Содержание 6V Chevy W460

Страница 1: ...1 6V Chevy or GMC Pick Up W460 Customer Service Guide MMXV Copyright Aria Child Inc...

Страница 2: ...e Contents I Check Battery 3 II Check Wiring Condition 6 III Check Foot Pedal 13 IV Gearbox Replacement 15 V Warning Stickers 22 VI Schematic diagram 28 VII Exploded View 29 CAUTION Disconnect the bat...

Страница 3: ...ttery Operation Use a Flat head screwdriver to unlock and remove the seat Locate the battery harness unplug the connector then use a volt meter to check battery condition Step 1 Turn and unlock this p...

Страница 4: ...4 Customer Service Guide I Check Battery Unplug the battery connector RED underneath seat Step 3 Step 4...

Страница 5: ...p 5 Reading Judgment 6 0 V 6 6 V Good condition 5 6 V 5 9 V Proceed to Recharge 5 5 V Battery to be recharged If after the stipulated recharging time voltage has not increased the Battery needs replac...

Страница 6: ...Wiring Connection Operation There are two positions of connections should be checked A Motor Gearbox Follow above Point I to remove the seat locate the Gearbox harness underneath Check the white Gear...

Страница 7: ...Connection B Other Connections Access the circuitry inside Dashboard assembly to check other wiring connections Step 1 Use phillips head screwdriver to remove the steering wheel screw Step 2 Slide the...

Страница 8: ...8 Customer Service Guide II Check Wiring Connection Step 3 Unscrew these two screws to loosen the Dashboard Step 4 Unscrew the two screws underneath Dashboard both sides...

Страница 9: ...out together then access the connectors Step 6 There are two connectors for all the electronic functions check for loose or unstable connections If problem is solved reverse above steps to re assembl...

Страница 10: ...mer Service Guide II Check Wiring Connection Step 7 Unscrew these eight screws and remove the Windshield first Step 8 Unscrew these three remaining screws to remove the bottom of the Dashboard 1 2 3 4...

Страница 11: ...11 Customer Service Guide II Check Wiring Connection Step 9 Orange Step 10 Red Black Power switch Speaker connector white wiring...

Страница 12: ...2 Customer Service Guide II Check Wiring Connection Step 11 Check the wiring connections of Forward Reverse lever Reverse above procedures to re assemble the vehicle Blue top Pink middle Yellow bottom...

Страница 13: ...I Check Foot Pedal Operation Follow below procedures to check the Foot Pedal connection Step 1 Turn over the vehicle and loosen the Foot Pedal cover by pressing its right side with a flat head screwdr...

Страница 14: ...14 Customer Service Guide III Check Foot Pedal Step 3 Slide in the Foot Pedal into Chassis from right side 2 Snap back in place 1...

Страница 15: ...nt Operation Follow below steps to take apart the gearbox completely for replacing Step 1 Unplug the gearbox connector white color underneath the seat Step 2 Use flat head screwdriver to loosen each l...

Страница 16: ...16 Customer Service Guide IV Gearbox Replacement Step 3 There are five latches as shown Step 4 Use a flat head screwdriver to remove the snap pin from axle...

Страница 17: ...17 Customer Service Guide IV Gearbox Replacement Step 5 Slide the rear wheel out from axle Keep all loose pieces on hand Step 6...

Страница 18: ...18 Customer Service Guide IV Gearbox Replacement Unscrew the two wire clips as below located at the right bottom side Step 7 Step 8 Unplug the black connector near to the headlight 1 2...

Страница 19: ...19 Customer Service Guide IV Gearbox Replacement Step 9 Slide the gearbox out from axle Step 10 Replace the whole gearbox sub assembly with a good one...

Страница 20: ...rvice Guide IV Gearbox Replacement Step 11 Step 12 To re assemble the unit first put the harness with black connector to the hole at right rear body Keep aligning the harness by putting it through the...

Страница 21: ...de IV Gearbox Replacement Step 13 Step 14 Slide the new gearbox onto the axle Put the gearbox connector through the first hole also Take care not to lose the washers Reverse above other procedures to...

Страница 22: ...22 Customer Service Guide V Warning Stickers Operation Check and re put the damaged warning stickers after repairing 1 Behind the seat...

Страница 23: ...23 Customer Service Guide V Warning Stickers 1 Behind the seat...

Страница 24: ...24 Customer Service Guide V Warning Stickers 2 Below the seat...

Страница 25: ...25 Customer Service Guide V Warning Stickers 2 Below the seat...

Страница 26: ...26 Customer Service Guide V Warning Stickers 2 Below the seat...

Страница 27: ...27 Customer Service Guide V Warning Stickers 3 Battery harness...

Страница 28: ...28 Customer Service Guide VI Wirings Schematic...

Страница 29: ...29 Customer Service Guide VII Exploded View...

Страница 30: ...30 Customer Service Guide Due to the construction and design for both items this Service Guide is commonly used for 6V Chevy Silverado and 6V GMC Sierra Denali...

Отзывы: