


2
Panel Description
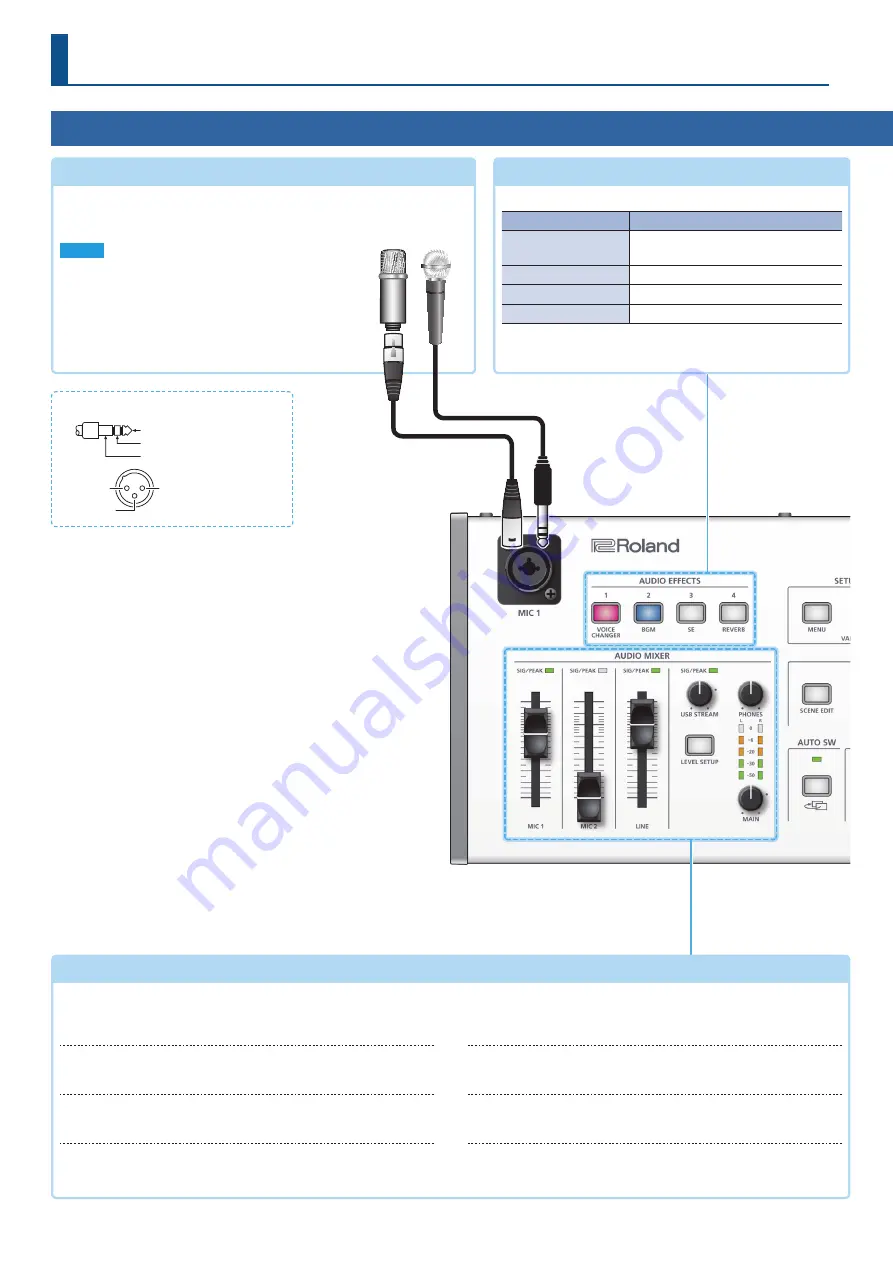
Top Panel
MIC 1 jack
Connect your mic here. If you connect a condenser mic that requires
a phantom power supply, turn the side panel [PHANTOM] switch on.
NOTE
5
If you use a gooseneck mic, operating noise might be
picked up.
5
Do not connect a mic that supports plug-in power,
or the mics that are included with Roland “VP-03” or
“JD-Xi.” Doing so will cause malfunctions
AUDIO EFFECTS [1]–[4] buttons
Turn the audio effects on/off. When on, the button is lit.
Button
Effect
[1] (VOICE CHANGER)
Transforms the pitch or character of
the voice.
[2] (BGM)
Plays background music.
[3] (SE)
Plays a sound effect.
[4] (REVERB)
Adds reverberation to the sound.
* The above are the factory settings. You can also assign other
functions to each of buttons.
AUDIO MIXER area
SIG/PEAK indicators
(MIC 1/MIC 2/ LINE)
These are lit green when audio input is detected. If the input is
excessive, the indicator is lit red.
[MIC 1][MIC 2][LINE] faders
Adjust the volume of the MIC 1, MIC 2, and LINE inputs.
SIG/PEAK indicator
(USB STREAM)
Indicates the volume level of the USB output.
[USB STREAM] knob
Adjusts the volume of the USB output.
[LEVEL SETUP] button
Accesses the menu of settings related to volume, input gain,
solo, and mute.
[PHONES] knob
Adjusts the volume of the headphones.
Level meter
Indicates the volume level of the main output.
[MAIN] knob
Adjusts the volume of the main output.
* Pin assignment of MIC 1 and MIC 2 jacks
1: GND
2: HOT
TIP: HOT
RING: COLD
SLEEVE: GND
3: COLD
2: HOT
1: GND
3: COLD
1: GND
2: HOT
TIP: HOT
RING: COLD
SLEEVE: GND
3: COLD
2: HOT
1: GND
3: COLD
XLR
1/4” TRS phone


