


Correcting the Misalignment of Printing and Cutting
This is a correction method performed when printing followed immediately by cutting yields positioning for print-
ing and cutting that is slightly misaligned.
Print alignment marks, perform detection of the printed marks, and then correct the discrepancy. Subtle misalign-
ment between the printing and cutting positions may occur due to the thickness of the media or the head height.
We recommend that you make corrections to match the media you are using.
1.
Adjust the misalignment of the ink landing position.
Procedure
1.
Press [MENU].
2.
Press [
▼
] several times to display the screen shown below.
MENU
MEDIA GAP ADJ.
3.
Press [
▲
] or [
▶
] to display the screen shown below.
MEDIA GAP ADJ.
TEST PRINT
4.
Press [ENTER].
Printing of the test pattern starts.
5.
When printing is finished, press [
▼
], then [
▶
] to display the screen shown below.
6.
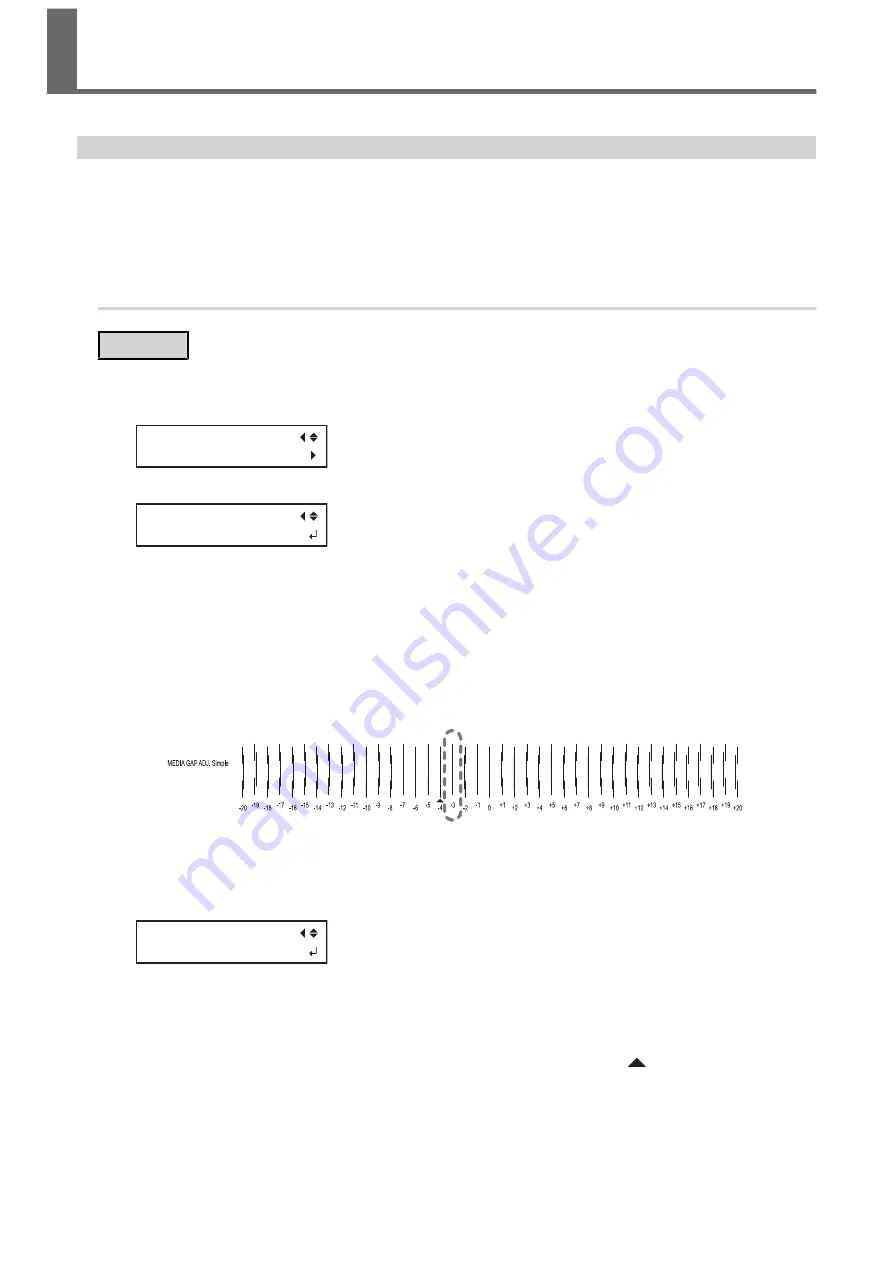
View the printed test pattern, and then determine the correction value.
Select the value that gives the least misalignment between the two lines. In the case of the following figure,
select "-3." When you cannot choose between two sequential numbers, select a value that is between them
(you can set correction values in units of "0.5").
7.
Press [
▲
] or [
▼
] to select the correction value.
8.
Press [ENTER] to confirm your entry.
9.
Press [
◀
] or [
▲
] to display the screen shown below.
MEDIA GAP ADJ.
TEST PRINT
10.
Press [ENTER].
Printing of the test pattern starts.
11.
Check the test pattern to see whether the correction was successful.
Check that the misalignment is minimized for the two vertical lines indicated by "
" (that is, the current
correction value). If the misalignment is smaller for another set of vertical lines, set the correction value
again.
12.
When you have successfully performed the correction, press [MENU] to go back to the original screen.
Accurately Adjusting the Settings for Printing and
Cutting
1. Optimizing the Output Quality
169
Содержание TrueVIS VG2-540
Страница 9: ...Chapter 1 Basic Handling Methods 8 ...
Страница 36: ...Setup of Media 2 Basic Operations 35 ...
Страница 43: ...Setup of Media 42 2 Basic Operations ...
Страница 60: ...Ink Pouch TR2 Cleaning Liquid Pouch Replacement 2 Basic Operations 59 ...
Страница 61: ...Chapter 2 Output Method 60 ...
Страница 70: ...REDO ADJ YES DONE 10 Press ENTER to confirm your entry Printing Output 1 Printing Method 69 ...
Страница 100: ...REDO ADJ YES DONE 10 Press ENTER to confirm your entry Printing and Cutting Output 3 Printing and Cutting Method 99 ...
Страница 122: ...REDO ADJ YES DONE 10 Press ENTER to confirm your entry Cutting with Crop Marks 4 How to Cut with Crop Marks 121 ...
Страница 138: ...Chapter 3 Optimizing Quality and Efficiency 137 ...
Страница 195: ...W1100mm B Adjusting the Output start Location 194 2 Optimizing Work Efficiency ...
Страница 217: ...Chapter 4 Maintenance 216 ...
Страница 272: ...Chapter 5 Troubleshooting Methods 271 ...
Страница 305: ...Chapter 6 Appendix 304 ...
Страница 308: ...8 Detach the blade holder Preparing to Move the Machine 1 Operations When Moving the Unit 307 ...


